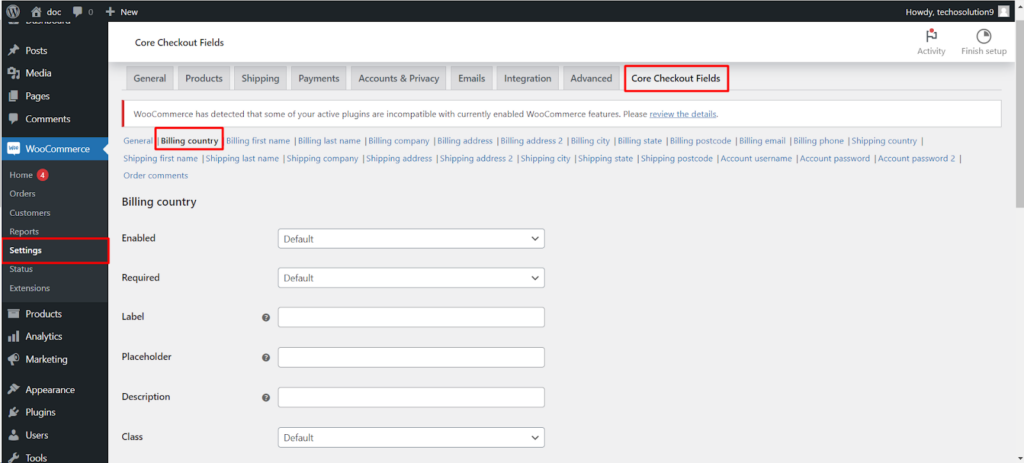
The billing country field on your WooCommerce checkout page plays a crucial role in processing orders and ensuring accurate shipping costs. The Checkout Field Editor and Customizer plugin (Free Version) allows you to customize this field’s behavior and appearance for a smoother customer experience. This article explores the available options for the “Billing Country” field.
Accessing the Settings #
- Navigate to your WordPress dashboard.
- Go to WooCommerce > Settings > Checkout Fields.
- Locate the Billing Country section.
Understanding the Options #
The plugin provides various options to fine-tune the “Billing Country” field.
- Enabled/Disabled: This controls whether the billing country field is displayed on the checkout page.
- Default: Enabled (recommended for accurate order processing).
- Required/Not Required: This determines whether customers must select a billing country to proceed with checkout.
- Default: Required (recommended to ensure accurate tax and shipping calculations).
- Label: This is the text displayed next to the billing country field on the checkout page. You can customize this label for clarity (e.g., “Billing Country”).
- Default: “Billing Country”
- Placeholder: This is the text displayed within the billing country field before a customer selects a country. It provides a hint to guide the user (e.g., “Select your billing country”).
- Default: Empty
- Description: Here, you can add a short explanatory text below the billing country field. This could be used for additional information or specific instructions (e.g., “The country where your billing address is located”).
- Default: Empty
- Class: This allows you to assign a CSS class to the billing country field for further styling customization using CSS code (requires knowledge of CSS).
- Default: Empty
- Align Left/Align Right/Full Row: These options control the alignment of the billing country field label within the checkout form.
- Default: Align left (common layout).
Additional Notes on Pro Features #
The knowledge base article mentions some options requiring the “Core Checkout Fields for WooCommerce Pro” plugin.
- Position (i.e. priority): This feature allows you to define the order in which the billing country field appears relative to other checkout fields (requires Pro version).
- Product Visibility: These options enable you to control which product categories or tags are displayed based on the selected billing country (requires Pro version).
Resetting Settings #
The Reset section settings button allows you to restore all settings within the “Billing Country” section to their default values.
Saving Your Configuration #
Once you’ve made your desired adjustments, click the Save changes button to apply the configuration to your checkout page.
Optimizing Your Billing Country Field #
By customizing these options, you can #
- Improve clarity and user experience on the checkout page.
- Ensure accurate data collection for billing and shipping purposes.
- Maintain a clean and organized checkout form layout.
Remember to test any changes thoroughly to ensure a smooth checkout process for your customers.

