
How to use FluentCRM to Automate your WooCommerce Store
Note: This article was written in collaboration with FluentCRM to help WooCommerce store owners automate and improve their email marketing.
Imagine watching your WooCommerce store automatically send a thank you email, welcome new customers, remind users about their abandoned carts, recommend similar products to what was purchased, or even re-engage with past buyers, just by automating some settings and emails. It seems like a dream for every eCommerce store, right?
What FluentCRM Brings to Your WooCommerce Store?
Setting Up FluentCRM for WooCommerce
Step1:
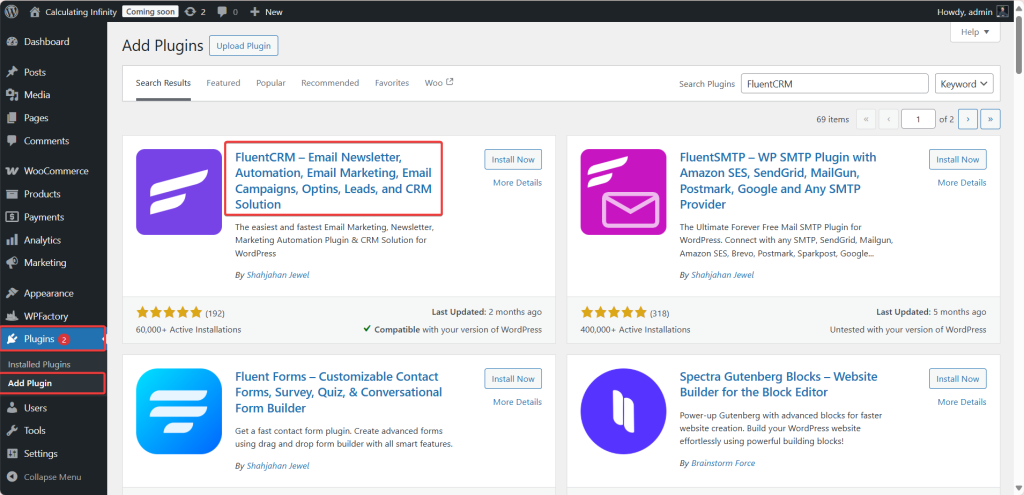
➡ Install and activate FluentCRM
You can install FluentCRM directly from your WordPress dashboard.
Go to your WordPress dashboard > plugins > add new plugin > search for FluentCRM > Install and then activate it.
Step2:
➡ Connect WooCommerce with FluentCRM
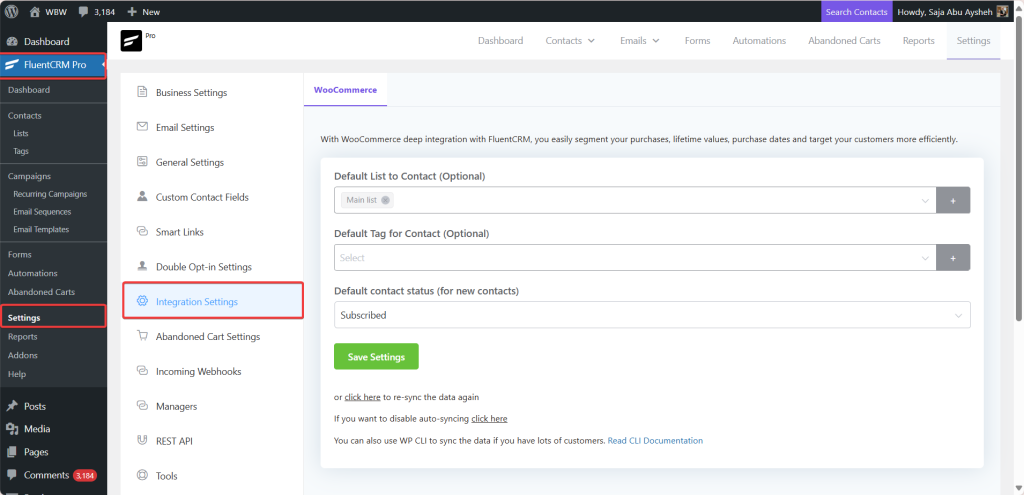
Once activated, go to FluentCRM > Settings> Integrations > enable WooCommerce.
When you enable WooCommerce, FluentCRM will automatically track your WooCommerce store activity, like purchases, order status, and more.
Note: These integrations are only available on the pro version of FluentCRM
From here, you can set the default contact list and contact status:
- Subscribed
- Unsubscribed
- Pending
- Transactional
Step3:
➡ Contact, List, and Tags
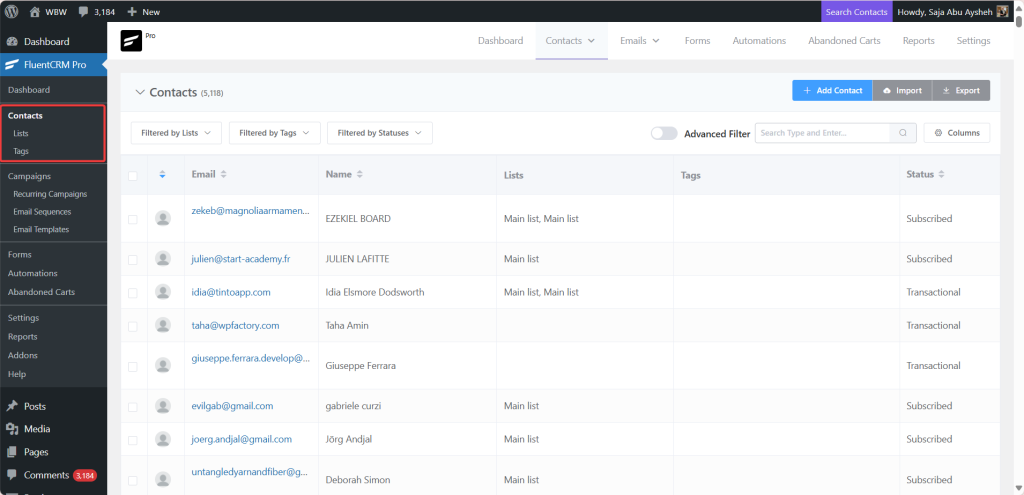
Once WooCommerce is integrated with FluentCRM, your customer list and data are now at your hands. You can segment your contacts into lists and tags.
Lists are typically used for board segmentation. Tags are like Lists, but with more ways to filter your contacts inside a list. You can use tags to track specific actions or behaviors like abandoned carts, VIP customers, or purchased product X, and more.
Also, you can create dynamic segments that allow you to create live, auto-updating groups based on specific conditions like past activity date, purchase history, or total spend, and more.
Key Automations You Can Set After Integration
Once FluentCRM is installed and connected to WooCommerce, it opens the door to powerful automation features. You can now go beyond basic email sending and start setting up smart workflows that follow your customer’s journey from the moment they add a product to their cart to post-purchase engagement.
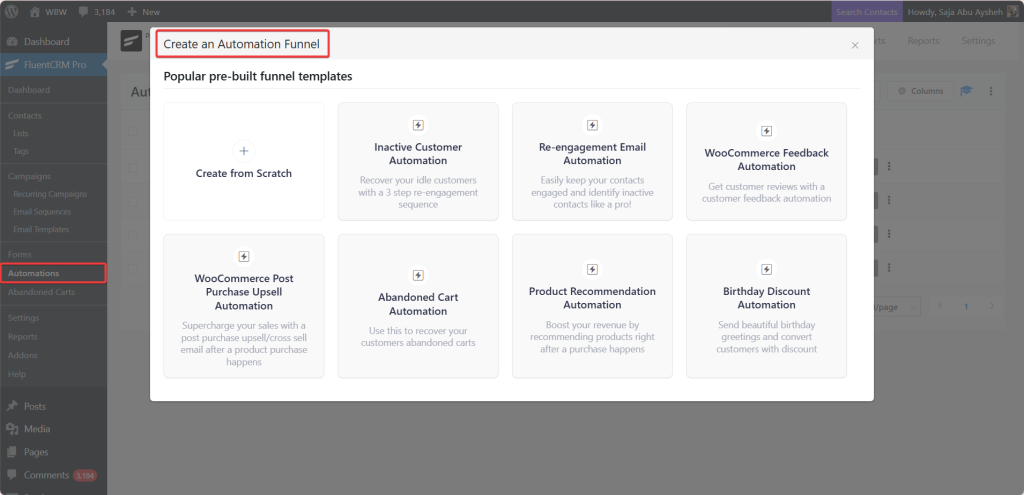
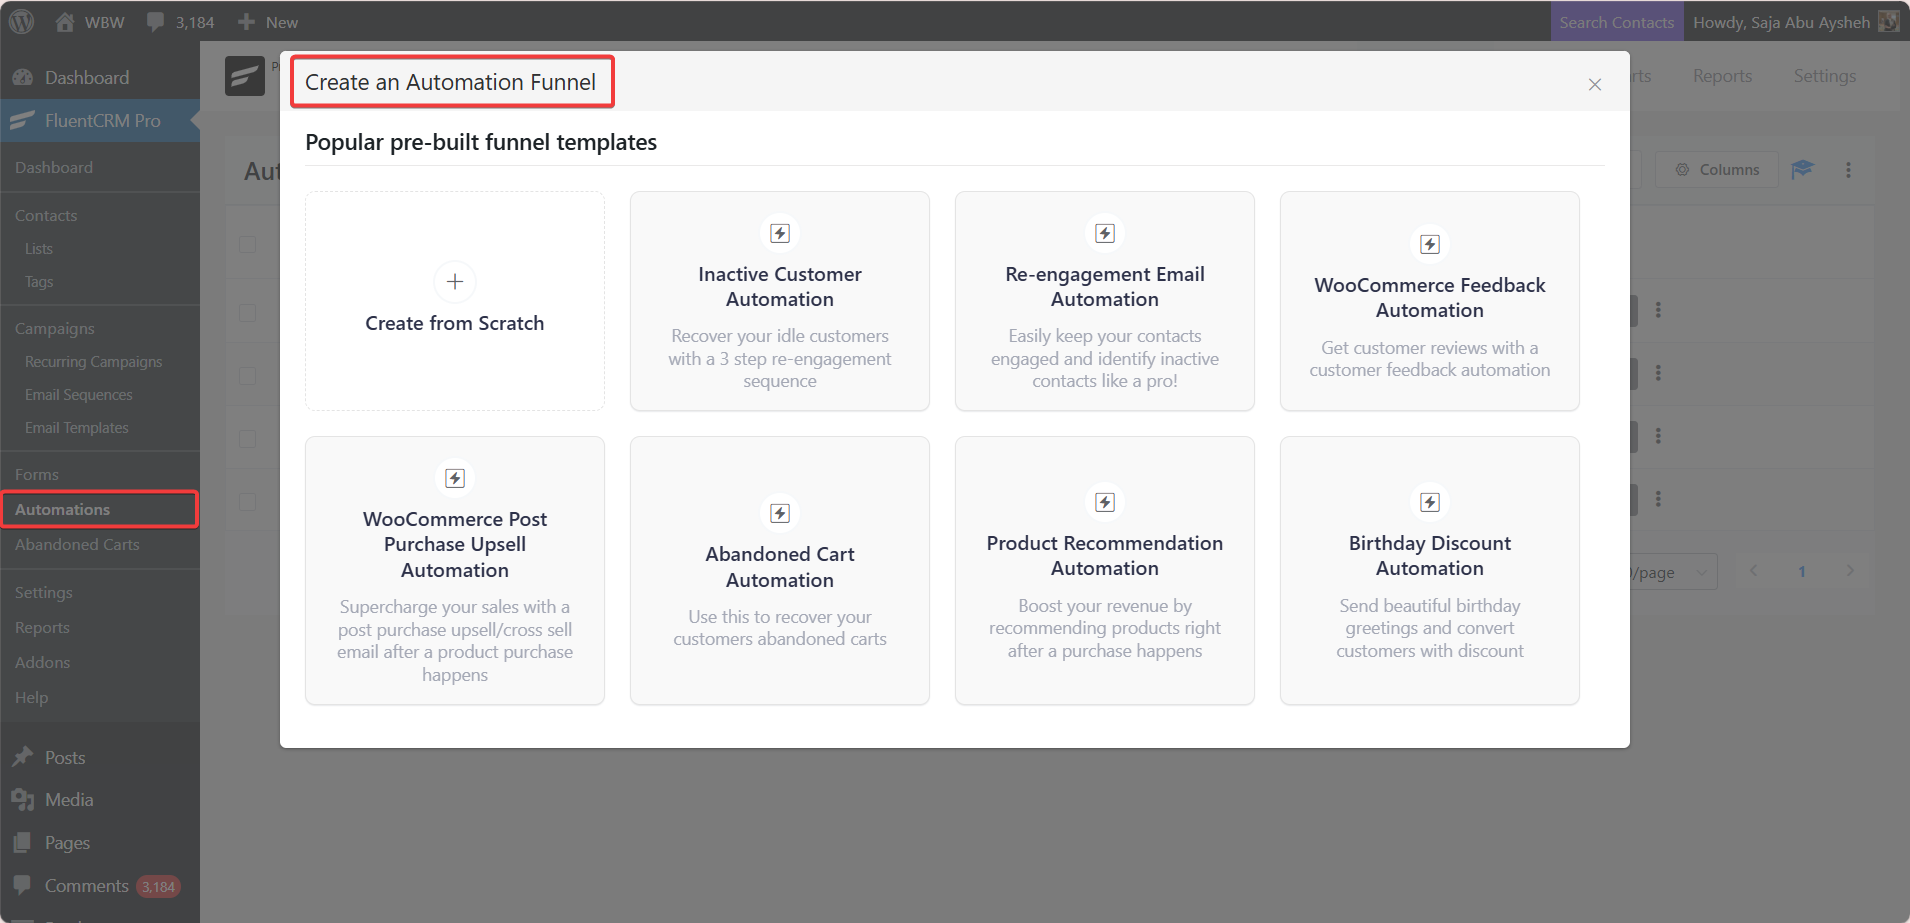
➡Automations
From here, you can create various types of automation like abandoned carts, upsells, product recommendations, inactive customer re-engagement, and more.
Behavior-Based Email Triggers, FluentCRM allows you to activate automation or send follow-up emails if a customer:
- Opening or not opening the email.
- Click on specific link.
- Not making purchase after X days.
This kind of smart targeting helps increase conversions with less effort.
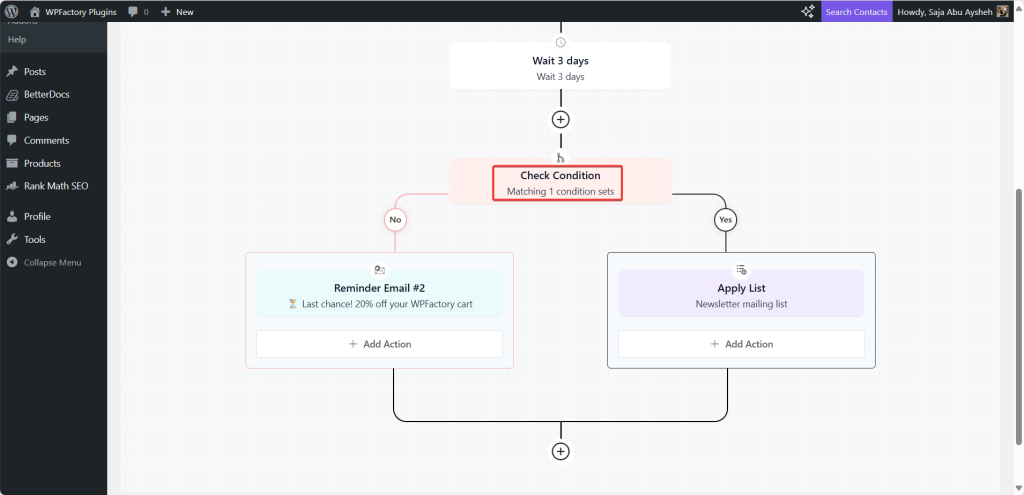
➡Conditional Logic in Automation
FluentCRM allows you to add conditional logic inside the automation using Yes/No, which means that the automation will operate according to the customer’s behavior.
For example, if the customer makes a purchase, you can just add them to a specific list, or you can wait a few days and either send a reminder, offer a discount, or stop the automation.
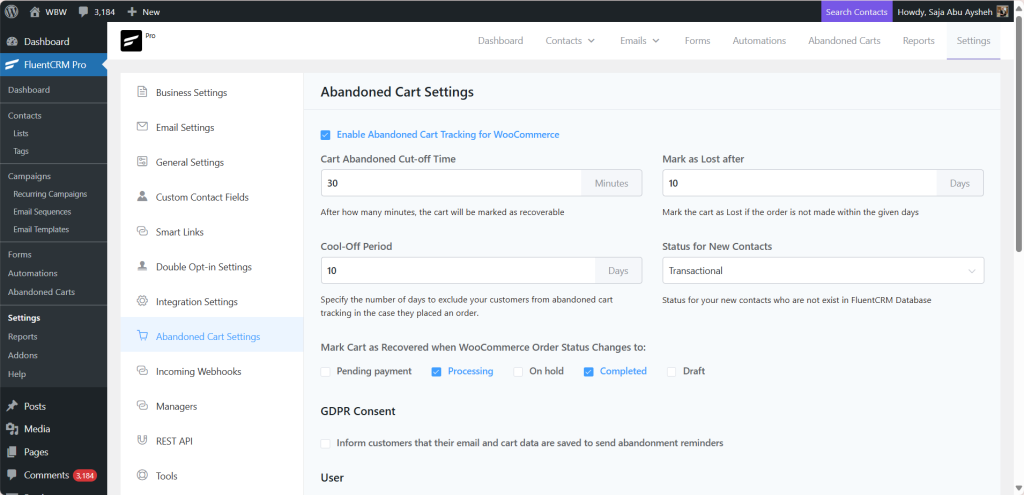
➡ Abandoned Cart
FluentCRM allows you full control over abandoned shopping carts in your WooCommerce store.
The first step to build abandoned cart automation is enabling “Abandoned cart tracking for WooCommerce”. After that, from the settings panel, you can easily define how much time should pass before a cart is marked as abandoned or lost.
After completing the settings, you can move on to creating automation workflows to help recover abandoned carts and boost your conversions.
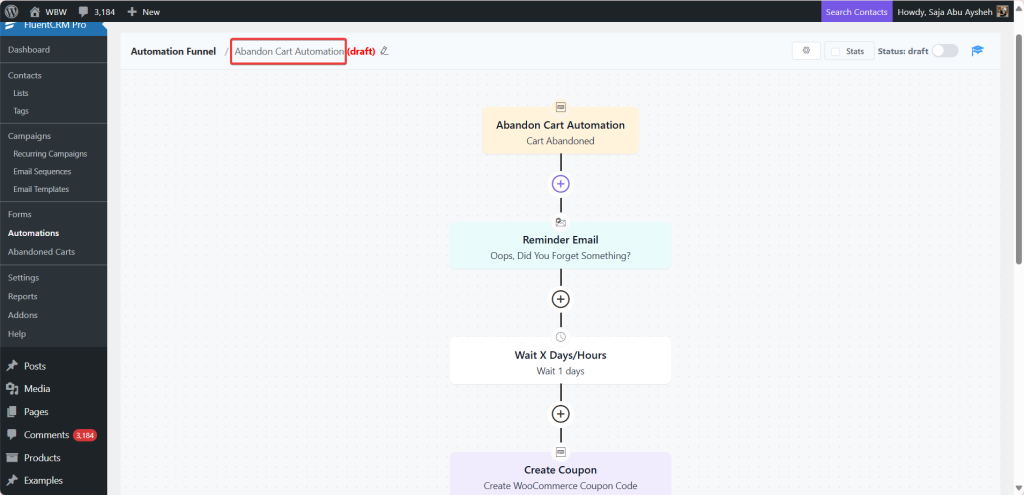
➡ Abandoned Cart Automation
From here, you can create abandoned cart automation and customize it according to your goals.
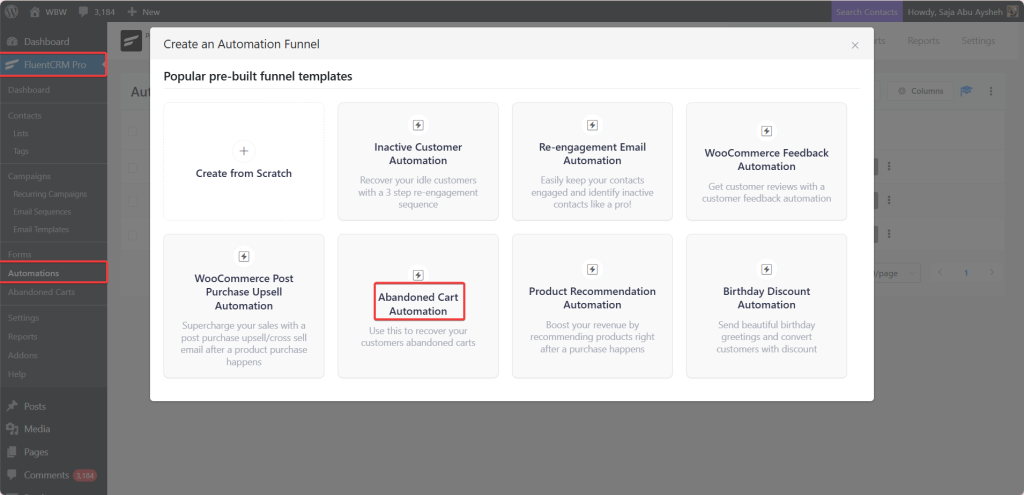
From here you can build the automation, customize the email content, and set the time interval between each email, and define when the automation should start, for example, how long after a customer’s leaves a product in their cart.
This allows you to remind customers about their abandoned carts and encourage them to complete their purchase.
➡Types of Automations
-
Inactive Customer Automation: You can use this trigger to reach out to customers who haven’t engaged in a while to bring them back.
-
Re-engagement Email Automation: By this trigger you can send emails to customers who stopped open your emails.
-
WooCommerce Feedback: You can obtain your customers feedback about your products or services to improve customers’ experience.
-
WooCommerce Post Purchase Upsell Automation: After customers purchased product, you can suggest related or higher related products.
-
Product Recommendation Automation: This trigger allows you send personalized product recommendations-based on customers’ browsing or purchase history.
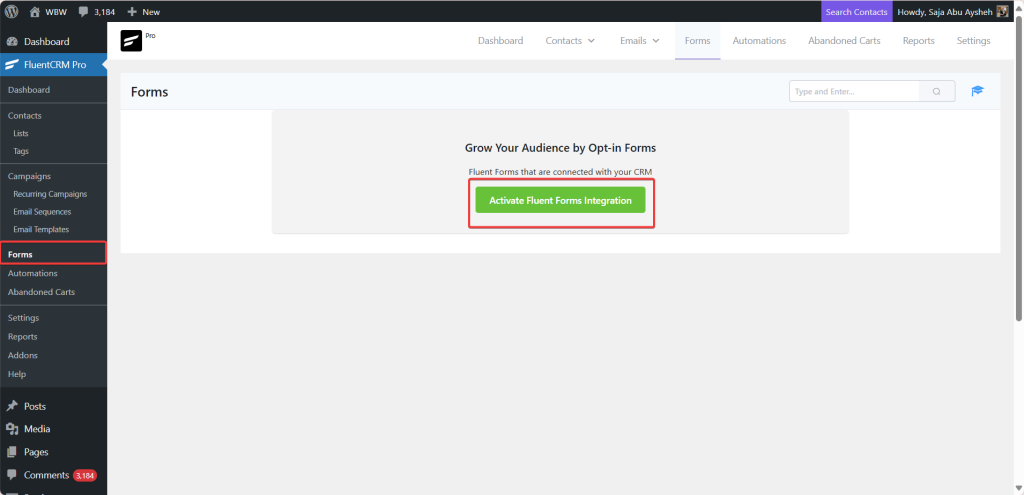
➡ Forms
And the matter doesn’t stop at the emails, FluentCRM works seamlessly with the FluentForms plugin, which helps you use built-in forms to collect leads and grow your contact list directly from your website without needing a third party.
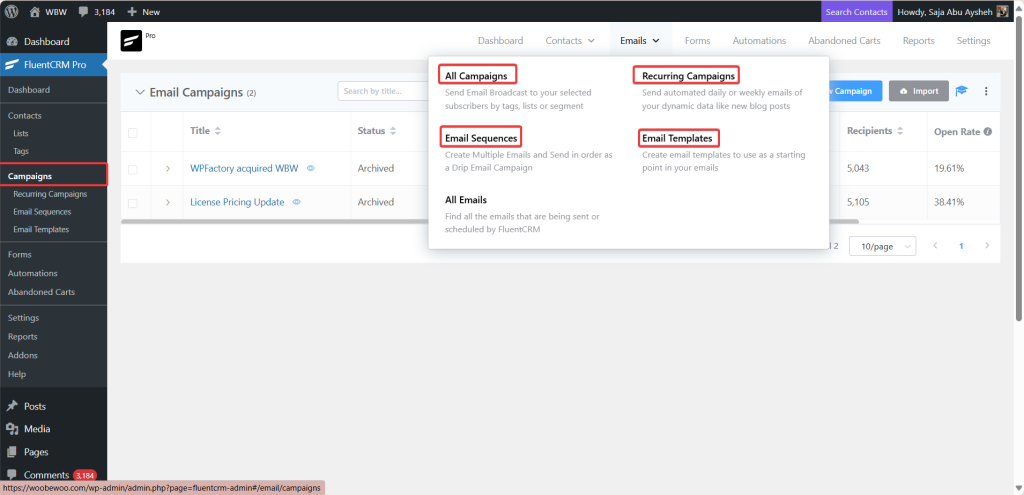
➡ Email Campaigns
FluentCRM doesn’t stop on basic emails, with this tool, you can create any type of email campaign your store needs. Whether it’s one time newsletter, sequence emails, or a promotional blast, you have full control over content, timing, and audience. Also, FluentCRM allows you to build custom email templates that match your brand identity, colors, fonts, and style.
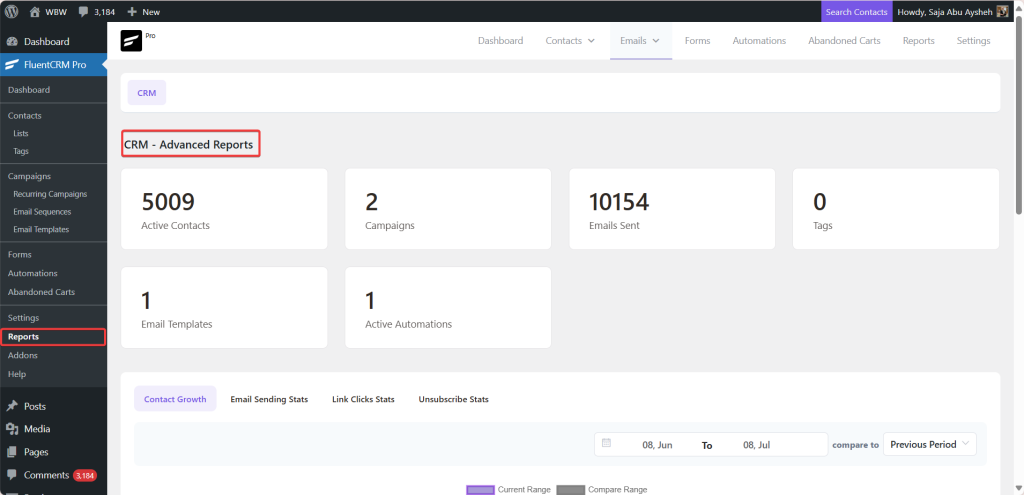
➡ Reports
This dashboard provides you with comprehensive reports that explain to you how your email campaigns and automations are performing, which help you make the best decisions based on these statistics. You can track open rate, clicks, bounce rate, unsubscribes, and overall engagement.
Final Thoughts
In the end, FluentCRM is not just a tool for sending emails, but an amazing plugin that gives every WooCommerce store owner the tools they need to create smart, personalized, and automated emails that save time, effort, and drive more sales.
All types of triggers are in your hands, from abandoned cart recovery, and product recommendation, up-sells to re-engagement with inactive users, the full control is in your hands. All from within your WordPress dashboard.


