How to Automatically Rename Files on Upload in WordPress?
Sometimes, naming or renaming media files can feel like a boring and routine task, that takes more time than you expect, which leads you some time to skip entirely!
You might think, it’s just a media title, but here’s the bad thing you don’t know neglecting to properly name your media files can actually harm your website’s SEO and WordPress image optimization.
Imagine that sometimes your products may not appear in search engine results because the media file names don’t match SEO best practices or WooCommerce products image SEO standards.
The good news? In this article, I will show you an easy way to fix that by “Rename Media Files on Upload: WordPress Image SEO” plugin. This tool is not just what seems from the outside, it’s more than just “renaming media files in WordPress“
This plugin automatically renames WordPress media file names when they’re uploaded, using smart patterns like post title, site URL, or any current data in file name, which improves your website’s SEO and your search engine ranking by generating smart file names.
But that’s not all, this tool also helps you keep your site organized, with the right names for each file, because it makes sure that everyone who uploads files follows the same file naming rules. And from now on, you don’t have to worry about uploading file names, this tool takes care of the task with ease, by automatically renaming all media files in one click, saving time, effort, and keeping everyone consistent.
Now, let’s go to see how easy it is to get started with this amazing tool in just a few simple steps.

Step1:
➡ Download the Plugin
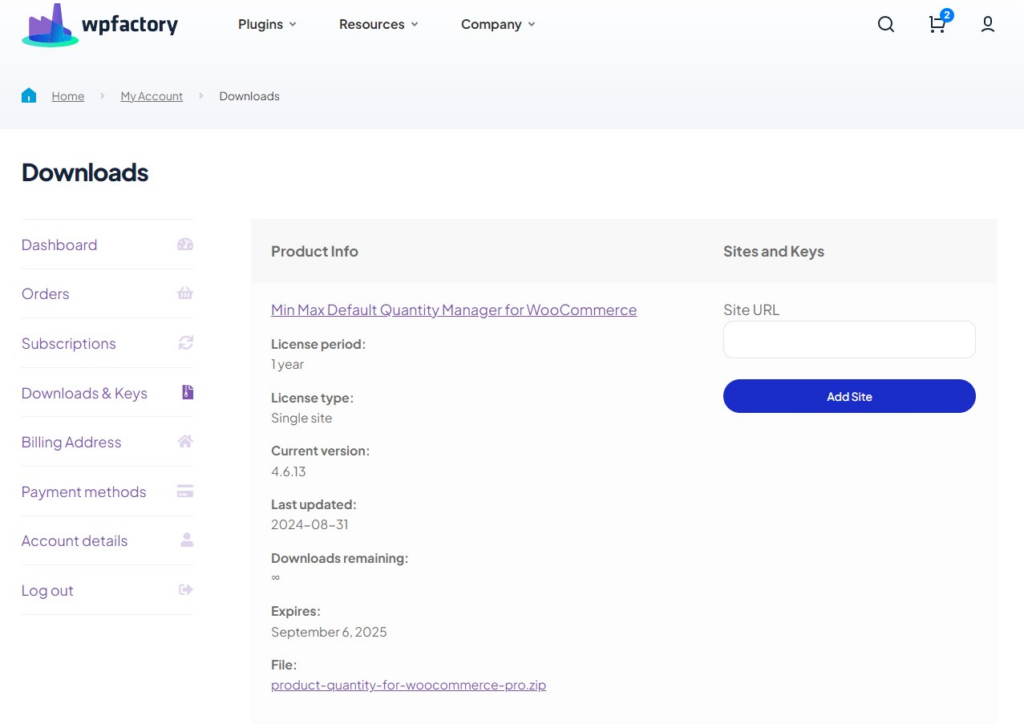
To get started you will need to download the “Rename Media Files on Upload: WordPress Image SEO” plugin that allows you to set maximum quantities based on your store’s needs.
After downloading the plugin, from your WPFactory account, upload it to your WordPress site.
Step2:
➡ Access the Plugin
Once the plugin is installed and activated, you can tailor it to fit your business needs.
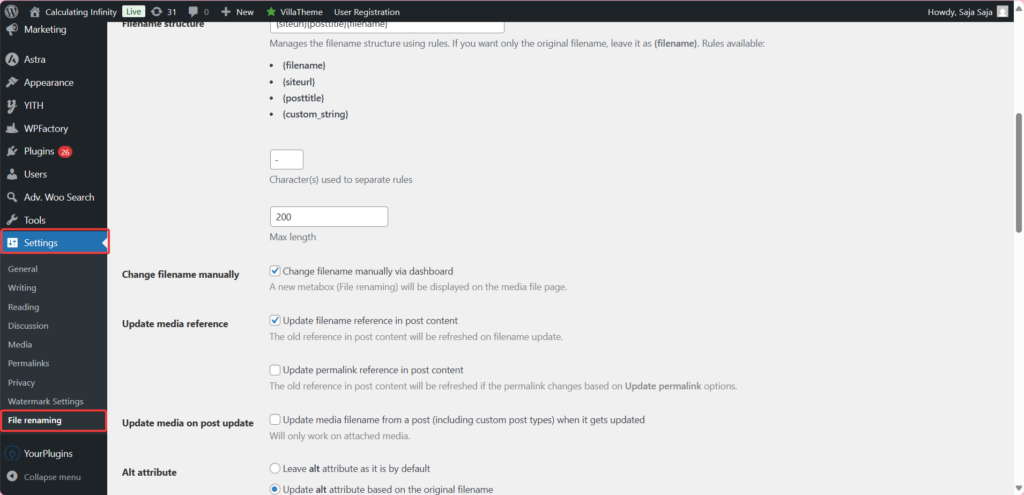
Go to Setting > File renaming > File Renaming on upload
Step3:
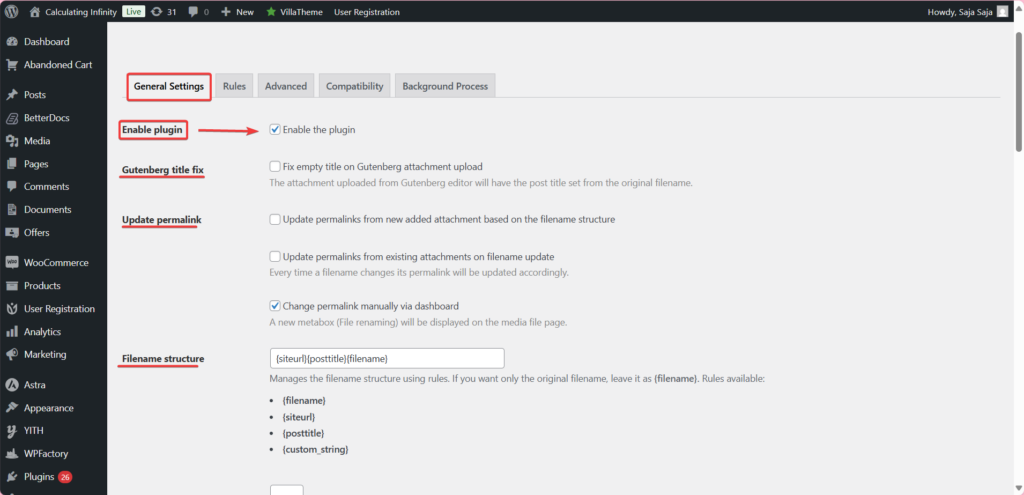
➡ General Settings
- Enable Plugin
First, check the box to enable the plugin, to automatically start renaming files when uploading them.
- Gutenberg Title Fix
When you enable this option, the issue of an empty file title appearing when uploading from the Gutenberg editor will be fixed. The media title is set based on the original file name.
- Update Permalink
This option automatically creates permalinks for new media based on the naming structure you chose.
The second option is that if you modify the name of an existing media file, its permalink will be automatically updated to match the new name.
- Change Permalink Manually via Dashboard Option
Allows you to manually edit the permalink from the media page via metabox.
- Filename Structure
From here you can specify how you want to generate file names. Options include:
1️⃣filename: Original file name
2️⃣siteurl: Your website link
3️⃣posttitle: Title of the associated post
4️⃣custom string: Custom text
You can also specify a maximum file name length, for example 300 characters.
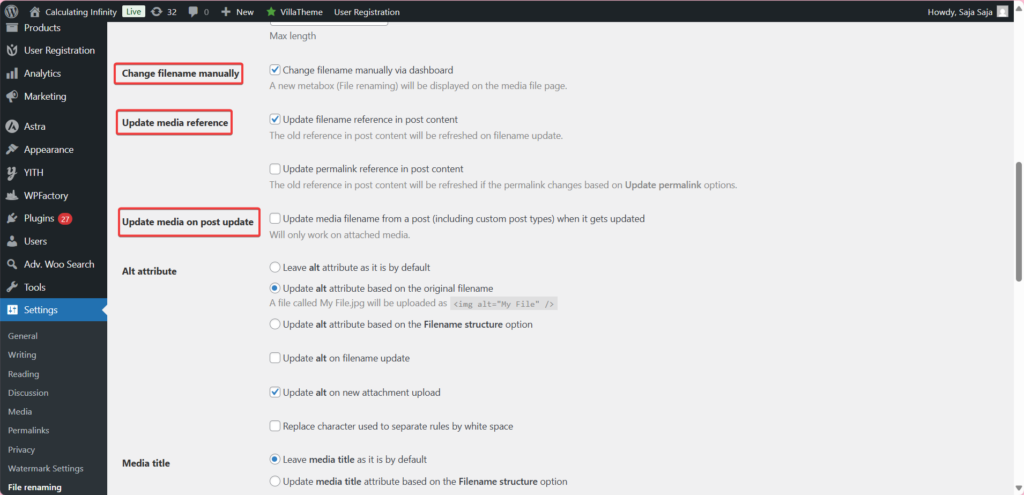
- Change Filename Manually
This option allows you to manually change the file name from within the media control panel.
Update Media Reference:
- Update Filename Reference in Post Content
If the name of the file is changed, all links to it within the content of the posts will be updated.
- Update Permalink Reference in Post Content
The same thing, but to update permalinks if they change.
- Updated Media on Post Update
If a post linked to a media is edited, the file name is automatically updated. Applies only to linked files.
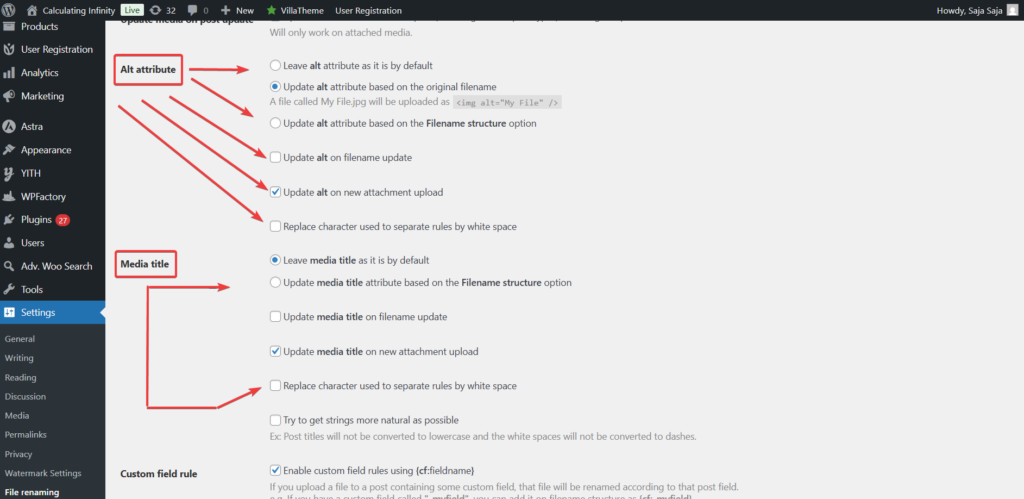
- Alt Attributes
Alt attribute is an alternative description for images; its importance lies in providing context when images fail to load.
Keep Default: Leaves the alt attributes as it was raised without any modification. This option is used most when writing alt text manually.
Update alt attribute based on the original filename: Here, the alt is generated from the file name.
➡For example, if the file name is “My file.JPJ” the alt will be “My file“. This method is useful when using the automatic option for quick SEO optimization.
Update alt attribute based on the Filename structure option: Here, the same rules you set for naming the file are used. The benefit of this option is that the alt text becomes based on the page or product content, which leads to better results in search engines.
Update alt on filename update: With this option, the alt text is automatically updated in two cases:
1️⃣ When uploading the image for the first time.
2️⃣ When renaming the file later.
Update alt on new attachment upload: Here, the alt attribute is automatically updated when a new attachment is uploaded. This means that when this option is enabled, the plugin automatically adds or generate a value for the alt attribute for each image or media file that is newly uploaded to the media library.
Replace character used to separate rules by white space: If you use any commas like (-) or (_) in the file name, they will be replaced with white space.
➡For example, a file name like “My- file” will be converted to “My file“. This option is useful because it improves user experience and SEO effectiveness.
- Media Title
Same as alt settings but applied to the media title.
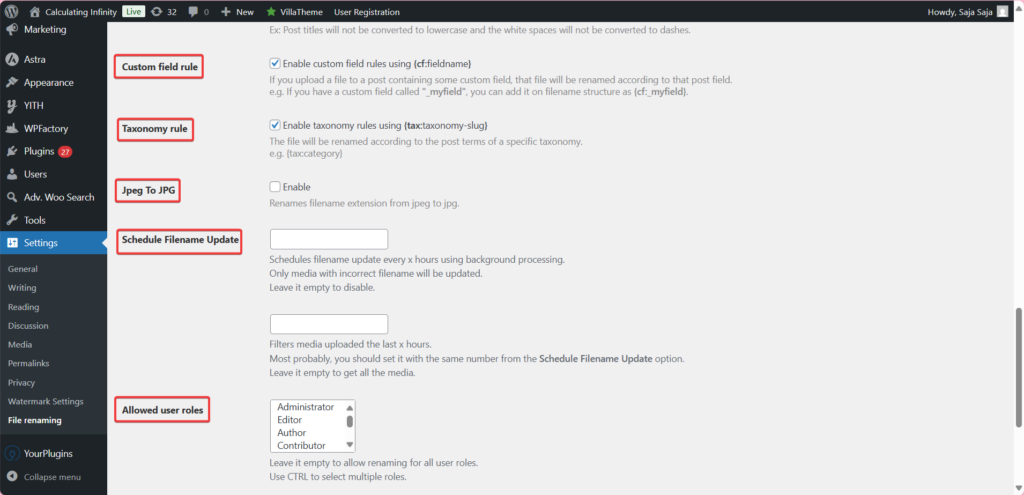
- Custom Field Rule
Here the files are automatically renamed based on the value of specific custom field in the post.
➡For example, {cf:_myfield} ➡ is replaced by the actual value of the field.
- Taxonomy Rule
The same idea of custom field is applied here but using categories.
➡For example, {tax: category} ➡ the article label is used to name the file.
- Schedule Filename Update
With this option, your schedule can automatically check and update file names every X hour. This option is only used for files that don’t follow proper naming conventions.
You can choose the number of hours during which files should be scanned. If you leave it blank, all media will be scanned
- Allowed User Roles
From here you can specify who can use the add-on based on user roles. If you want everyone to use it, leave it blank.
Step4:
➡ Rules
These options are used to build the new file name in a smart and dynamic way when uploading any media.
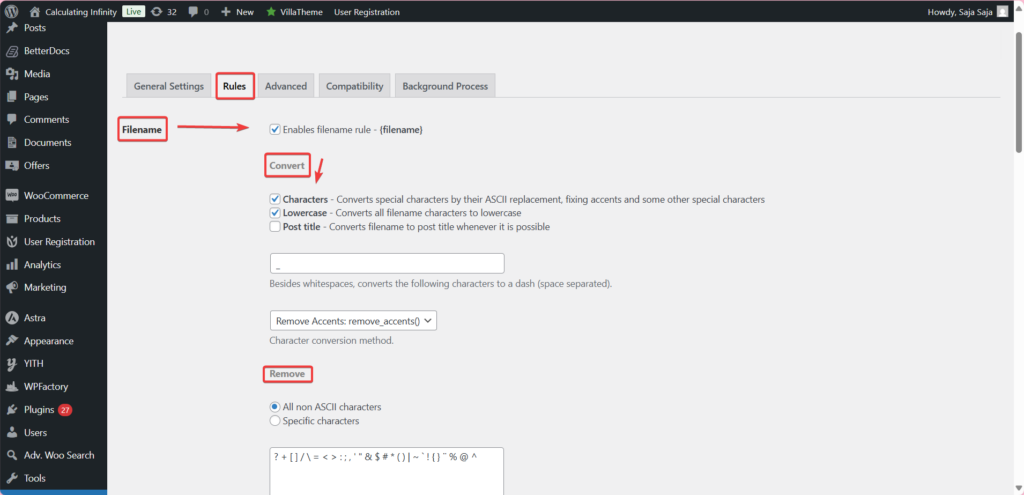
- Filename
If you enable this option, the original file name will be used as is.
➡For example, if you upload a file named “Summer – catalog“, the name will remain the same if you use only filename.
- Convert Options
1️⃣Characters: Replaces special characters (such as capital letters or symbols) with the closest ASCII version. This option is useful for preventing file name problems.
2️⃣Lowercase: Converts all letters in the file name to lowercase.
3️⃣Post Title: Here, replace the file name with the title of the post it’s linked to (If it’s linked to a post). This option is useful for making the file name more descriptive and relevant to the content.
- Remove
Removes characters with accents and converts them to regular characters. You can choose to:
1️⃣Remove all non-English characters
2️⃣Select specific characters to remove.
- Truncate
From here you can specify the maximum length of the file.
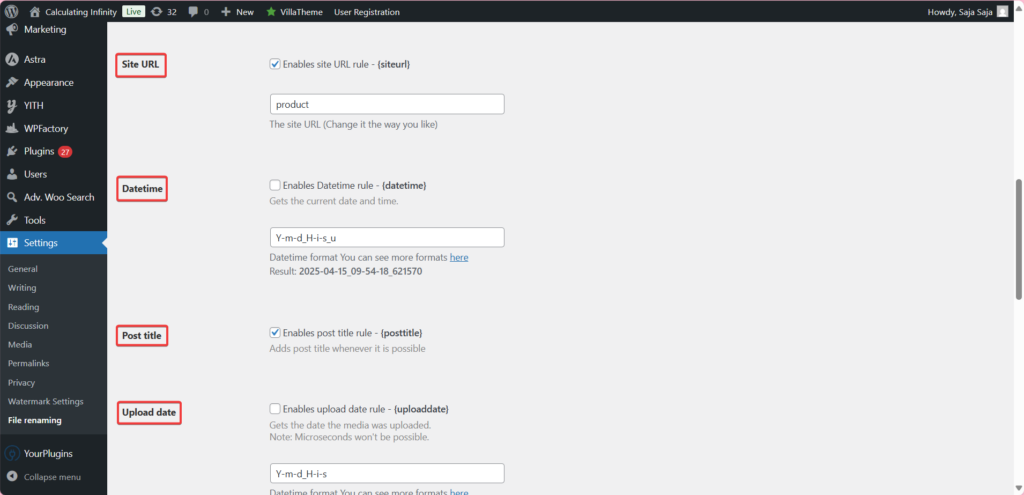
➡Dynamic Filename Components
- Site URL
Adds the domain name of the site to the file name. You can manually modify it to appear as you want.
- Datetime
Adds the current date and time when uploading the file.
- Post Title
Adds a post title associated with the image. This option is excellent for improving SEO and linking the file to the content.
- Upload Date
Adds the date the file was uploaded, in a format you can specify.
It differs from {datetime} because it represents the lifting time, not the time the operation is executed.
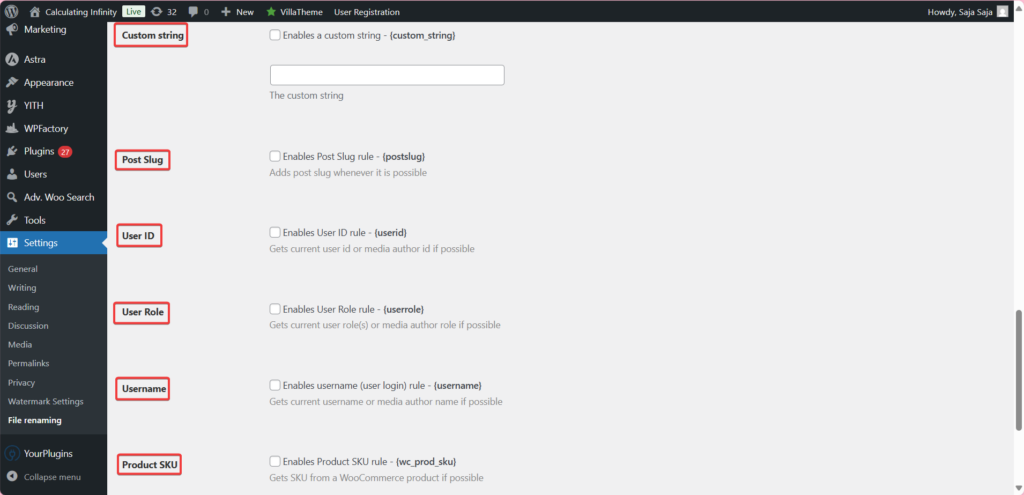
- Custom String
Here you can add fixed or custom text to the file name.
- Post Slug
Adds the post’s slug (the title version used in links)
- User- ID
Adds the user ID of the user who uploaded the file.
- User role & Username
Adds the name and role of the user who added the file.
- Product SKU
If the file is associated with a WooCommerce product, will add the product’s SKU.
Step5:
➡ Advanced
These settings relate to ignoring (not renaming) certain files under certain circumstances.
➡For example, if they are files without an extension or contain special names or certain words in their names.
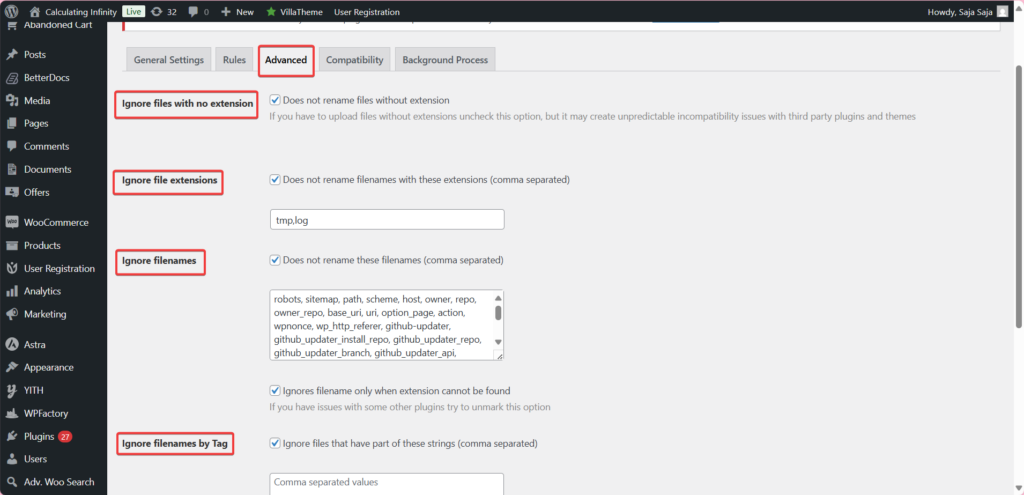
- Ignore Files with Now Extension
If this option is enabled, files that don’t have an extension will not be renamed.
➡For example, a file named “REDME” without a text. or Jpj.
If you disable this option, these files will be renamed, but problems may occur in some plugins or themes because they expect that every fil has an extension.
- Ignore File Extension
Here you can specify a list of extension (separated by commas) that will not be renamed,
➡For example, if you type “tmp or log”, any file with tem or log will not have its name changed.
- Ignore Filenames
Here you specify the names of the files that you want to completely exclude from the renaming process.
- Ignores filename only when extension cannot be found
File named: robots → does not have an extension.
If the option is enabled→ it will be ignored.
If it is not activated→ it will be ignored whether it has an extension or not.
- Ignore Filenames by Tags
If the file name contains part of these words, it will be ignored (its name will not be changed)
➡Example: I wrote here: backup,temp,test
A file named product-backup-2024.jpg → will be excluded because it contains a backup.
Step6:
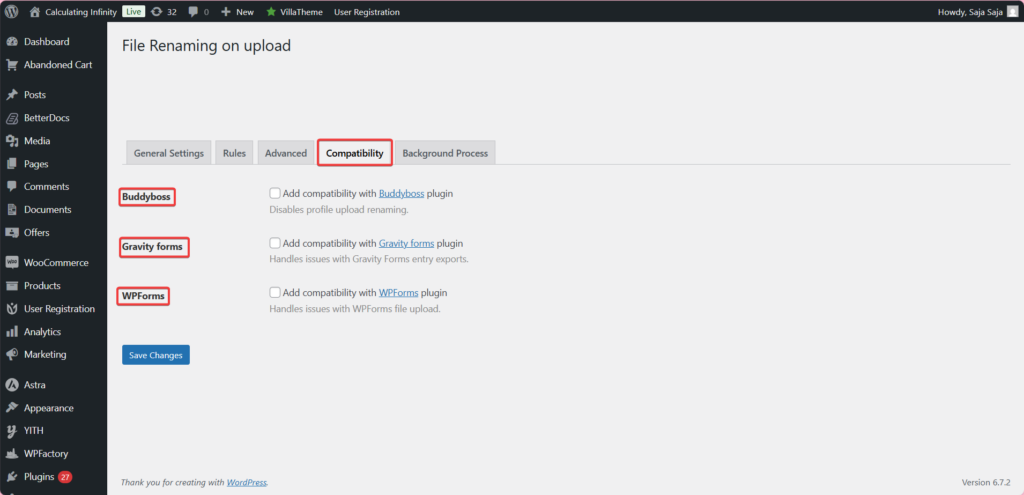
➡ Compatibility
This section shows the plugins and tools compatible with this plugin.
Final Thoughts
With all this ease and simplicity, the process of naming and renaming your site’s files is completed, with the customization of the details and settings you want. Without any additional time or effort, rather “Rename Media Files on Upload: WordPress Image SEO” makes this task smart, fast, and fully automated.
Now you get clear file names, better SEO, bulk uploads with automatically renaming, and a more organized media library. Renaming media files doesn’t have to be boring anymore, and this plugin do the heavy lifting for you.