
- Prerequisites
- 1. Update the plugin
- 2. Prepare the Excel / Google Sheet
- 2.1 Export existing products (recommended)
- 2.2 Create / edit the Google Sheet
- 3. Publish the Google Sheet as a public XLSX URL
- 4. Run the initial manual import
- 5. Configure the scheduled product import (cron)
- 6. Updating data via Google Sheets
- 7. Notes and best practices
This guide explains how to sync WooCommerce products from Google Sheets using the Products Import & Export with Excel plugin and a scheduled cron import.
Prerequisites #
-
WooCommerce installed and active.
-
Products Import & Export with Excel plugin updated to version 12.1.1 or later.
-
A Google Sheet containing product data (existing products or new ones) with columns that match the plugin’s import fields (e.g. ID/SKU, title, prices, stock, etc.).
1. Update the plugin #
-
Go to Plugins → Installed Plugins in WordPress.
-
Locate Product Import Export with Excel for WooCommerce and confirm the version is 12.1.1 or higher.
-
If an update is available, click Update now, then verify the site works correctly after the update.
2. Prepare the Excel / Google Sheet #
You can either start from an export or from an empty sheet.
2.1 Export existing products (recommended) #
Use the Export Products screen to control which products and fields will be used as your Google Sheets template.
-
-
Go to WPFactory → Product Import/Export → Export Products in your WordPress dashboard.
-
(Optional) In the top area, set any filters you need, for example:
-
Filter by SKU, Regular Price, Sale Price, or other fields.
-
Limit the number of results or choose the order (ASC/DESC).
-
-
Scroll down to TAXONOMIES TO SHOW and tick any taxonomies you want in the export (e.g. product categories, tags, attributes).
-
In FIELDS TO SHOW, select the exact product fields you want to work with, such as
_sku,_regular_price,_sale_price,_stock, titles, content, etc., or use Check All to export everything. -
Click Search at the bottom of the page to generate the export and download the Excel file.
-
Open the downloaded file and use it as a template: edit titles, prices, stock, or any other selected fields, then upload the edited file into Google Sheets for the later import and scheduling steps.
-
2.2 Create / edit the Google Sheet #
-
In Google Sheets, ensure the first row contains the column headers you plan to map (for example:
ID,SKU,POST TITLE,regular_price,sale_price, etc.). -
Add or edit product rows under these headers. Existing products should be matched using ID or SKU according to how you plan to map fields in the plugin.
3. Publish the Google Sheet as a public XLSX URL #
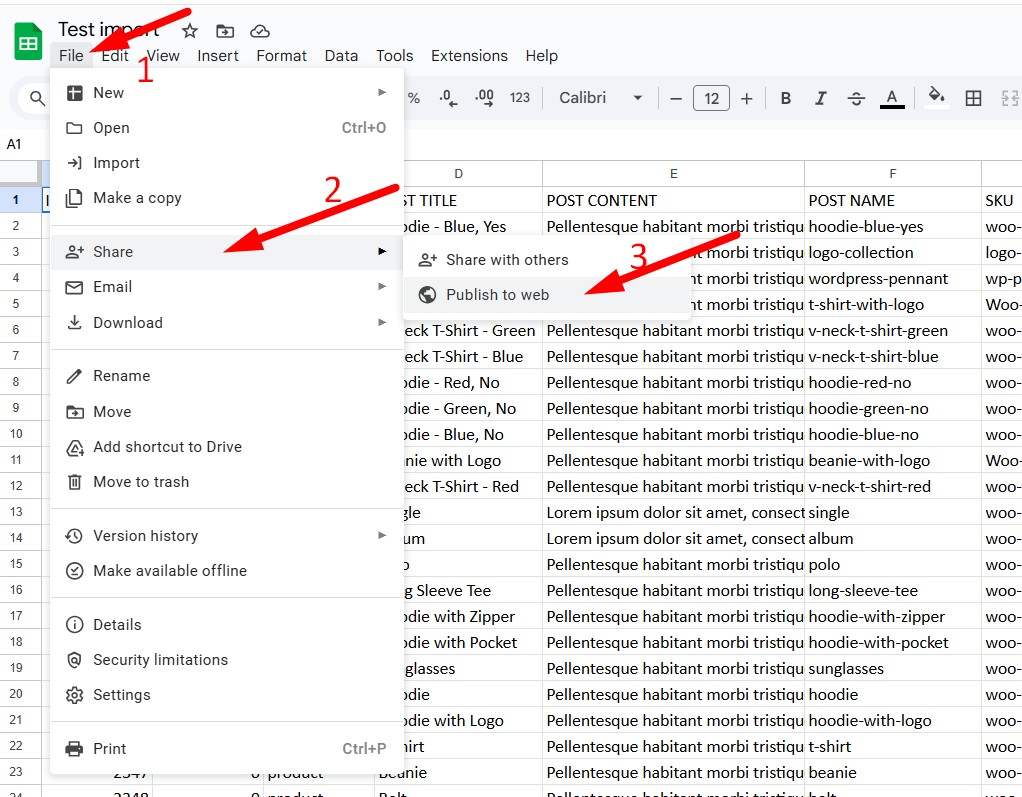
The cron import requires a public, direct XLSX link. Use “Publish to the web” in Google Sheets, as illustrated in the screenshots.
-
In Google Sheets, click File → Share → Publish to web.
-
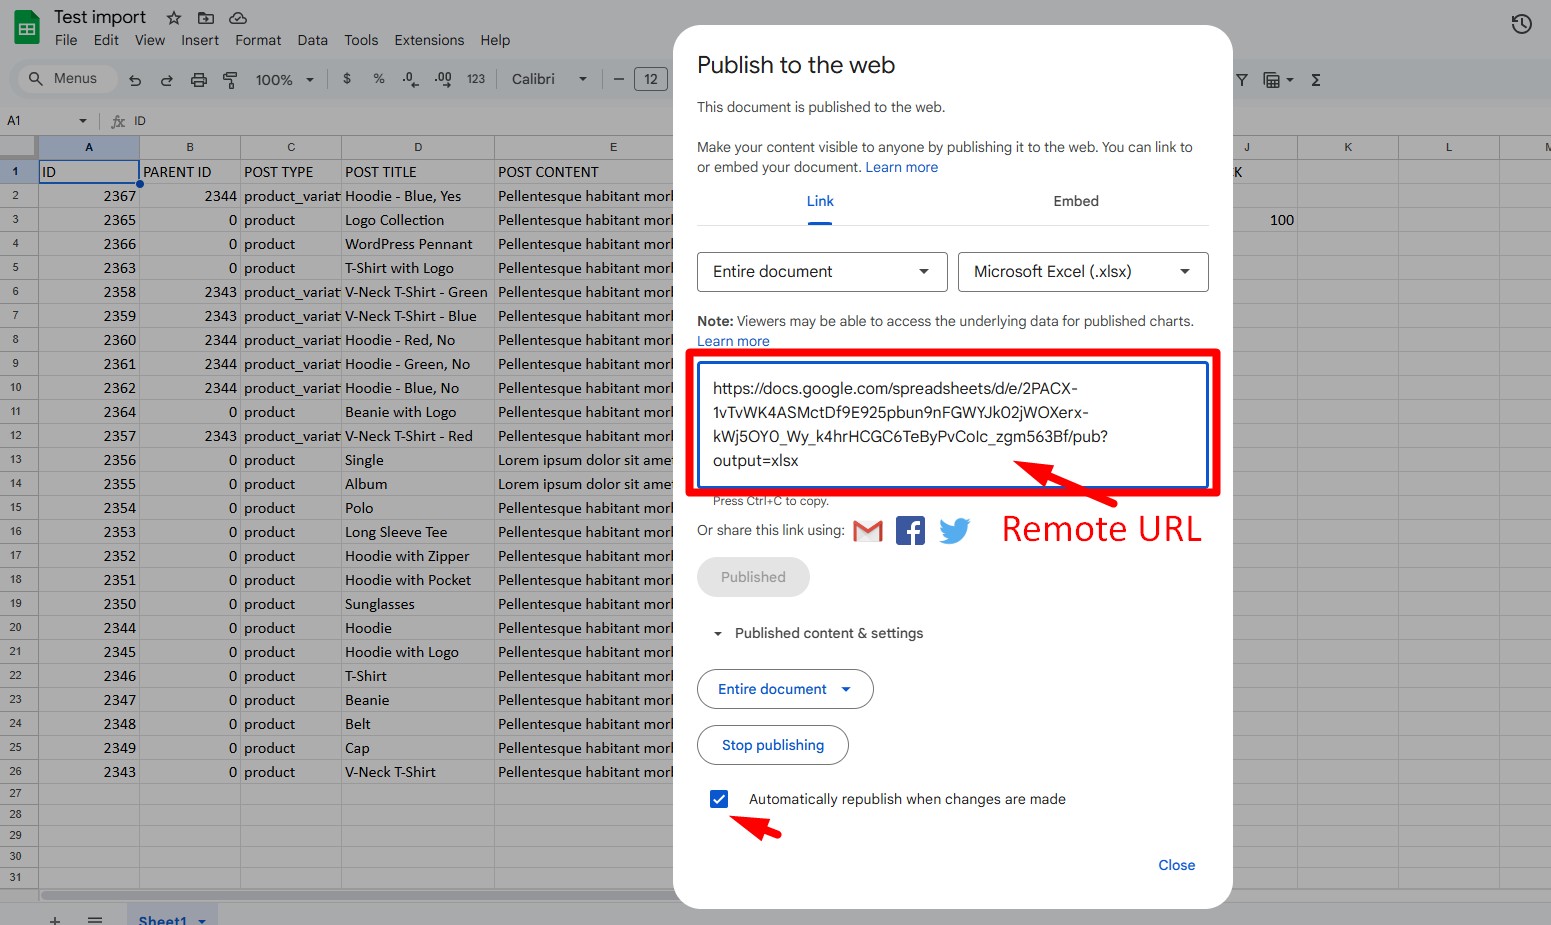
In the dialog:
-
Under Link, choose Entire document.
-
In the format dropdown, select Microsoft Excel (.xlsx).
-
-
Click Publish and confirm.
-
Copy the generated link (ending with
output=xlsx) and keep it for later as the remote URL for the plugin. -
Make sure Automatically republish when changes are made is enabled so any edits in Google Sheets are reflected on the next cron run.
4. Run the initial manual import #
A successful manual import must be completed before enabling the schedule.
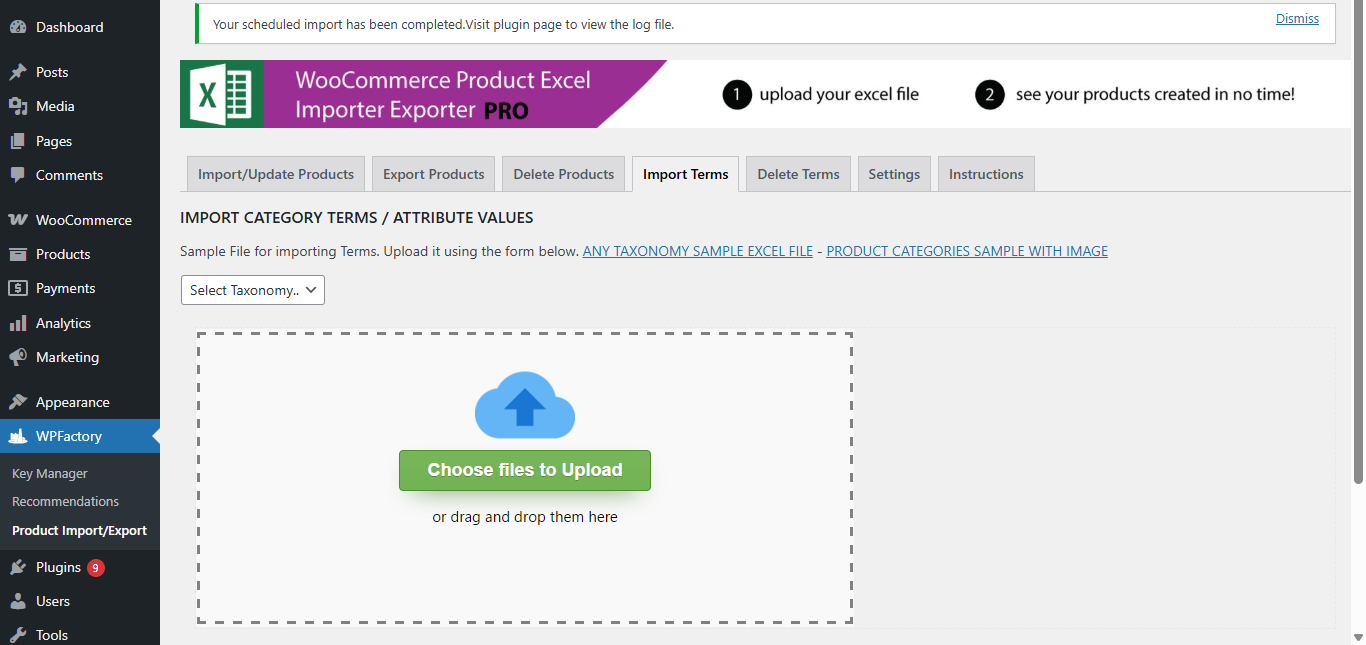
- Go to WPFactory → Product Import/Export → Import Terms in your WordPress dashboard..
- In the import screen, choose file to upload.
5. Configure the scheduled product import (cron) #
Once the manual import and template are ready, configure the cron schedule.
-
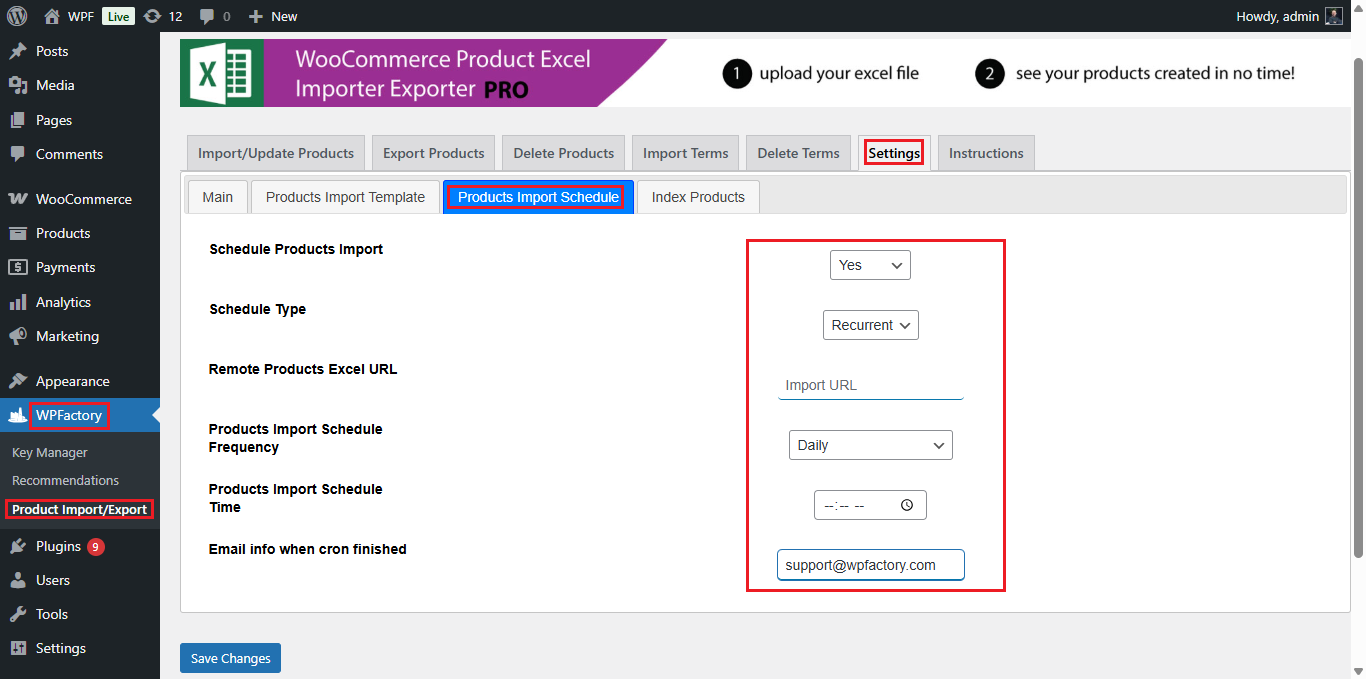
Navigate to WooCommerce → Product Import Export with Excel → Settings → Products Import Schedule.
-
Set Schedule to Yes.
-
Choose the Import type:
-
One-time product import for a single scheduled run.
-
Recurrent product import for regular updates (e.g. every day, every week).
-
- Enter the Products Import Excel URL location using the published Google Sheets XLSX link created in step 3.
-
Define the start date and time and, for recurrent imports, the interval (e.g. every 1 hour, every 12 hours, daily).
-
Configure email notification settings so that an email is sent to the store’s info email address when the cron job finishes.
-
Save changes.
The plugin will now automatically download the XLSX version of your Google Sheet at the configured times, apply the saved mapping, and create or update products accordingly.
6. Updating data via Google Sheets #
After scheduling is in place:
-
Edit any product data directly in the Google Sheet (prices, stock, titles, etc.).
-
Ensure the structure (column names and order) remains the same so the mapping template stays valid.
-
When the cron runs again, changes will be imported automatically, and an email will be sent when the process completes.
7. Notes and best practices #
-
Always test on a staging / test site before enabling recurrent imports on a live store.
-
Keep a recent backup of the database before large imports.
-
Prefer matching products by ID or SKU to avoid creating duplicates.