Table of Contents
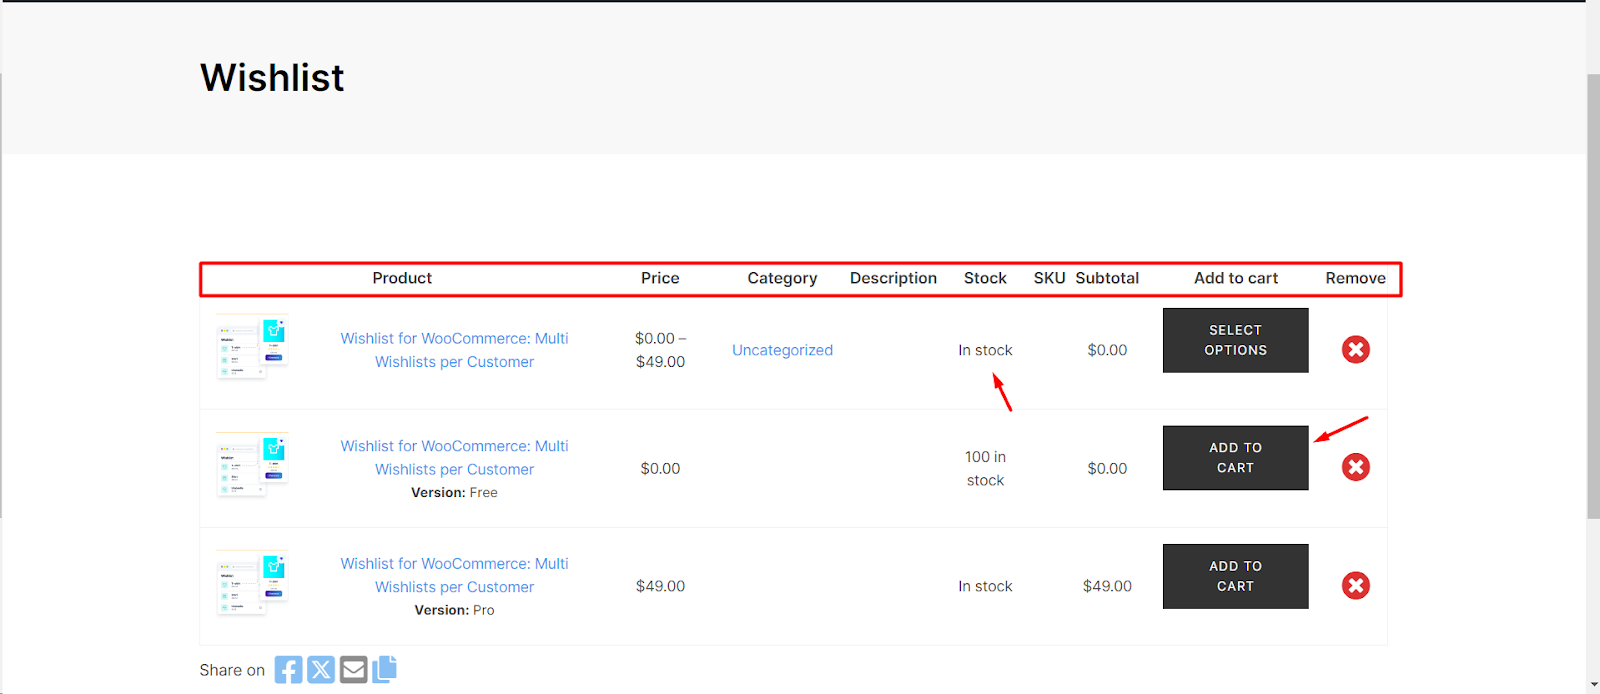
Setting up a new wishlist page with advanced features in WooCommerce is a breeze with our plugin. Follow these steps to create a wishlist page that not only showcases desired products but also includes additional columns like stock, subtotal, and descriptions, along with convenient sorting functionality.
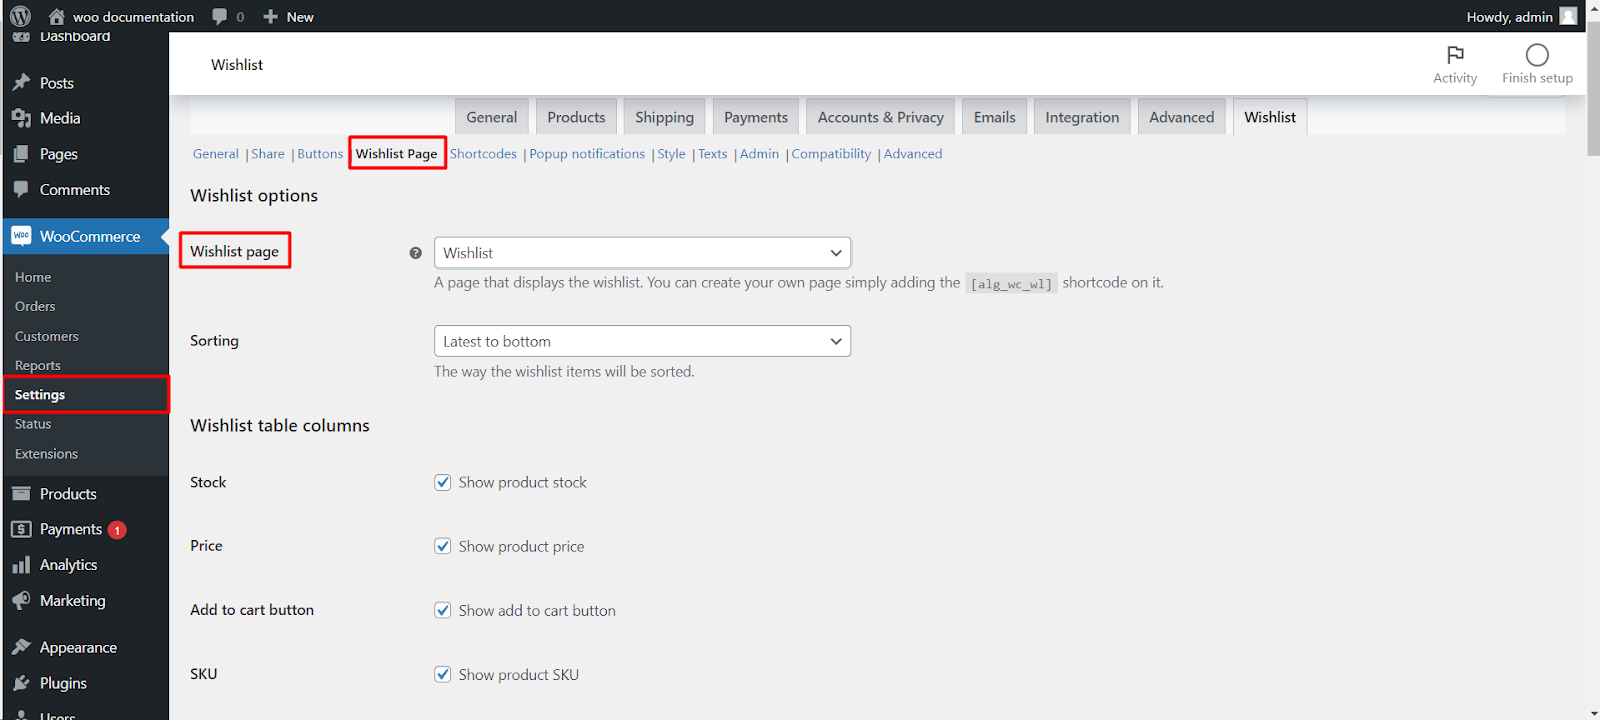
Step 1: Navigate to WooCommerce Wishlist Settings #
- Log in to your WordPress dashboard.
- Find and click on “WooCommerce“ in the left-hand menu.
- Locate the “Wishlist“ tab and click on it.
Step 2: Access Wishlist Page Settings #
- Under the Wishlist tab, look for the “Wishlist Page“ tab.
Step 3: Set Wishlist Page #
- In the “Wishlist Page“ tab, you’ll see an option to set the wishlist page.
- Use the dropdown menu to select or create a new page for your wishlist.
Step 4: Add Sorting Functionality #
- Still within the “Wishlist Page“ tab, find the sorting functionality options.
- Enable sorting to allow users to arrange their wishlist items as they prefer.
Step 5: Customize Additional Columns #
- To add extra columns like stock, subtotal, and description, explore the customization options within the Wishlist settings.
- Look for options such as “Show Stock,” “Show Subtotal,” and “Show Description,” and enable them as needed.
Step 6: Save Changes #
- Don’t forget to save your changes.
Now, your wishlist page is set up with advanced features, including sorting functionality and additional columns to provide more information about each wishlist item.