
Many store owners want to expand their business, selling through various and multiple platforms, reaching new countries, and tapping into global markets. But I know several obstacles often stand in the way.
For example, if you want to sell on platforms like Google shopping, Amazon, Facebook catalog, or even affiliate marketing networks, you will think about how to export all the product’s data and manually enter every product detail, or even how much will it take, right? the process can be quit challenging, which discourages sellers from taking this step.
But with WPFactory’s plugins everything becomes possible!
That’s why “WooCommerce Product XML Feeds Manager” comes in.
From this moment, you can sell on any other platform without manually entering a single piece of product information.
The “WooCommerce Product XML Feeds Manager” allows you to sell on any platform by uploading XML file that includes all your store data, products, prices, images, and more. With one fil,e you can connect your WooCommerce with any platforms like Google shopping, Amazon, Facebook catalog, or even affiliate marketing networks, and others.
Now you can open new horizons for your store.
Let’s go to see how easy it is to get started with this smart tool!
Step1: #
➡ Download the Plugin #
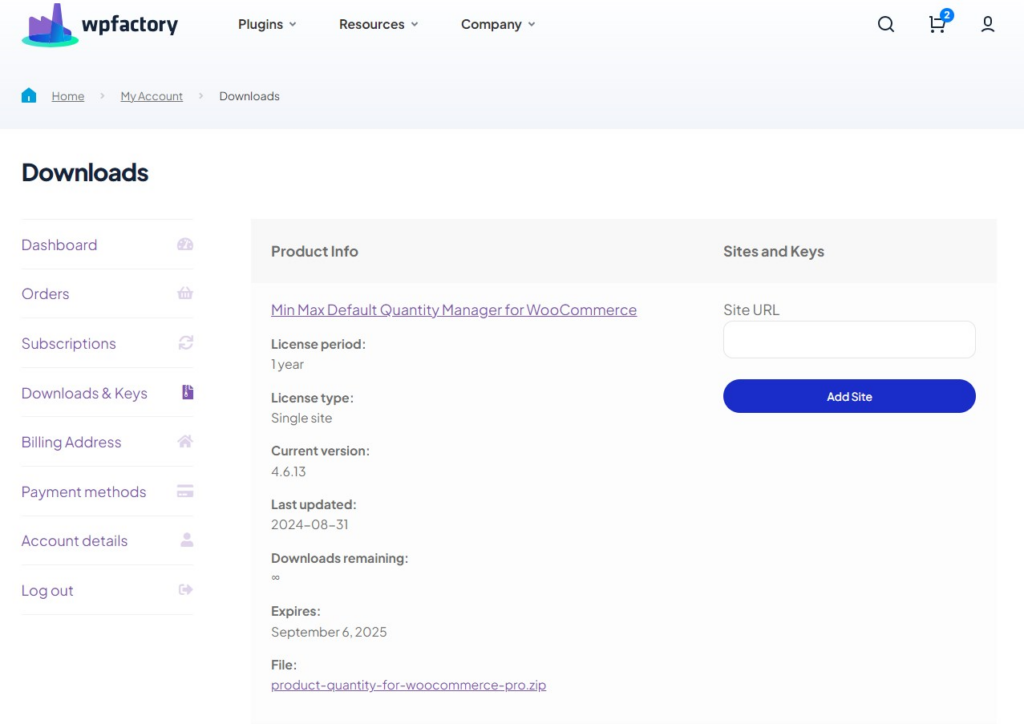
To get started, you will need to download the “WooCommerce Product XML Feeds Manager” plugin, which allows you to set maximum quantities based on your store’s needs.
After downloading the plugin from your WPFactory account, upload it to your WordPress site.
Step2: #
➡ Access the Plugin #
Once the plugin is installed and activated, you can tailor it to fit your business needs.
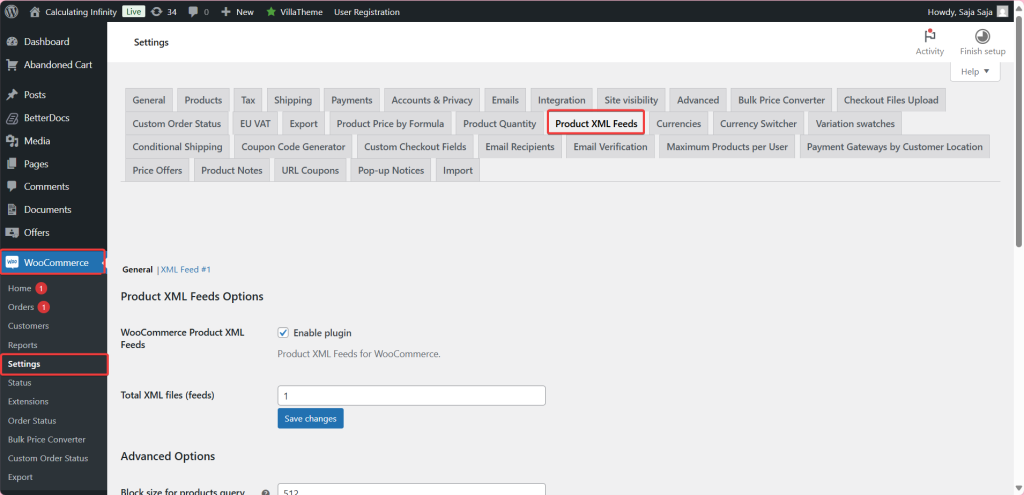
Go to WooCommerce > Settings > “Product XML Feeds”
Step3: #
➡Product XML Feeds Options #
- WooCommerce Product XML Feeds
The first thing you need to do is enable the plugin to start creating XML files for your store products.
- Total XML files (feeds)
Here you can specify the number of XML files you want. For example, the box here shows you one file.
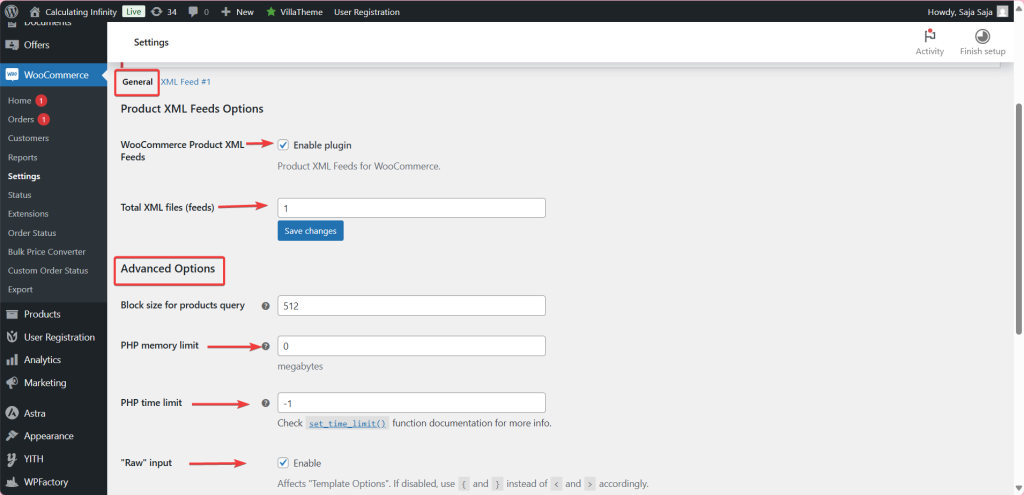
Advanced Options
- Block size for products query
Here, you can specify how many products you want to fetch at once while creating the XML file.
- PHP memory limit
Here, you specify the maximum amount of memory (RAM) that PHP can use while creating the file. “O” means there is no specified limit, and the server’s default limit is used.
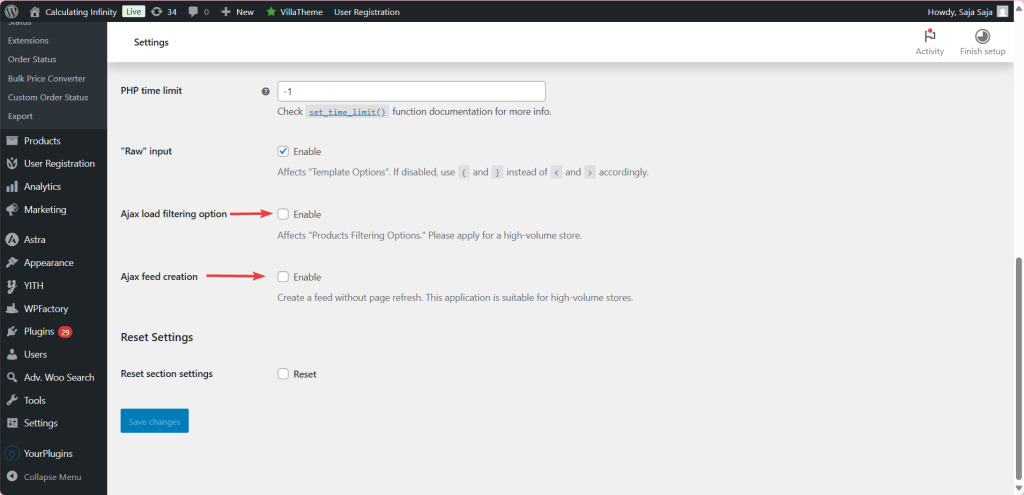
- PHP time limit
Here you specify the maximum time (in seconds) allows for processing before execution stops.
“-1” means no time limit (unspecified).
This is useful for large stores to avoid interruption of the process before completion.
- “Raw” input
If this option is enabled, templates will use native XML formats such as:
-
<product>و</product>.
If it is enabled, {product} و {/product} is used to make writing easier for some people.
- Ajax load filtering option
If you do this, the filters will be applied via Ajax instead of reloading the page. This is very useful for large stores because it makes the filters faster and less resource intensive.
- Ajax feed creation
When this option is enabled, an XML file will be generated without reloading the page. Ideal for stores with a large number of products, it improves performance when generating files.
Step4: #
➡XML Feed #1 #
- Enable/ Disable
From here, you can enable or disable this file (Feed). When enabled, a custom XML file is created based on the template you specify.
- Admin title
An internal title that appears only to you in the control panel so that you can easily identity this feed.
Template Options
- XML header
This is the beginning of an XML file and can be customized as you wish. For example, it includes the creation date and title using shortcodes.
- XML item
This is a template for a single product item within an XML file. It contains information such as name, URL, price, currency, image, category, etc. You can use shortcodes to specify the data displayed.

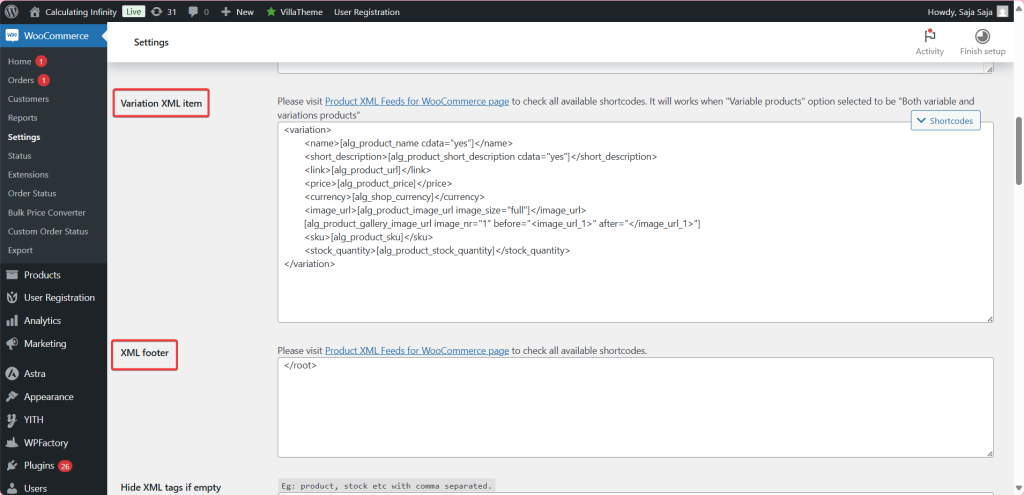
- Variation XML item
Same idea as XML item but for variable products. Used when you choose to display “Both variable and variations products”.
- XML Footer
The end of the XML file, often </root>.
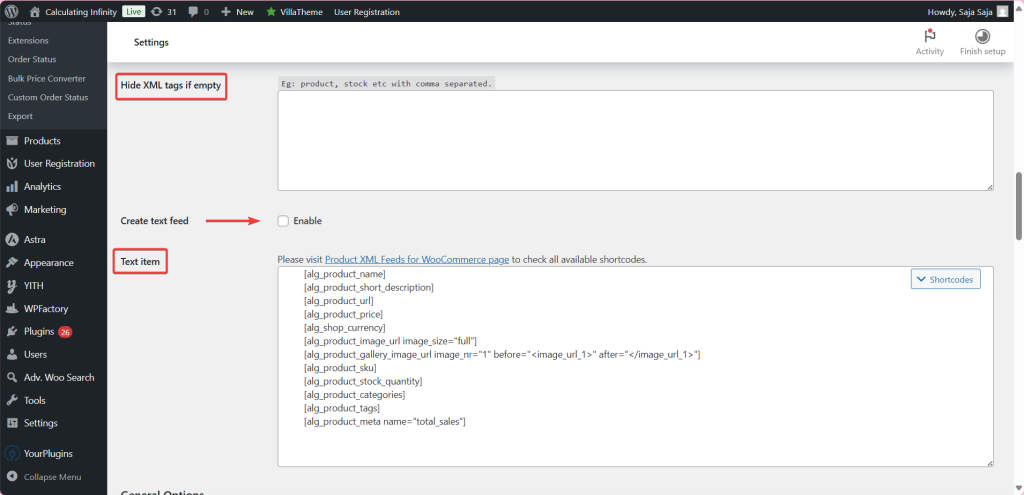
- Hide XML tags if empty
If you enable this, it will hide empty tags like <stock_quantity></stock_quantity>, making the file cleaner.
- Create Text Feed
If you enable this, it will create a text file instead of XML. Useful for some platforms or analytics.
General Options
- XML file path and name
Here, you specify the name and path of the XML file.
- Text file path and name
The same thing, but specific to the Text file if it is activated.
- Use site address (Home URL)
Uses the main sit address instead of the WordPress address if enabled. Useful if your site uses a different address for front-end.
- Update period
Here you specify the period in which you want to update the file, every minute, hour, day, week, or month.
- Manual corn job command
A command you can use on the server to manually generate the file through cron (Cron Job).

- Sorting: order by
From here, you can choose how to arrange the products by date, name, or price.
- Sorting: order
Choose ascending or descending order.
Products Filtering Options
From here you can determine which products are include and which are excluded. You can filter products by categories and filters products by tags.

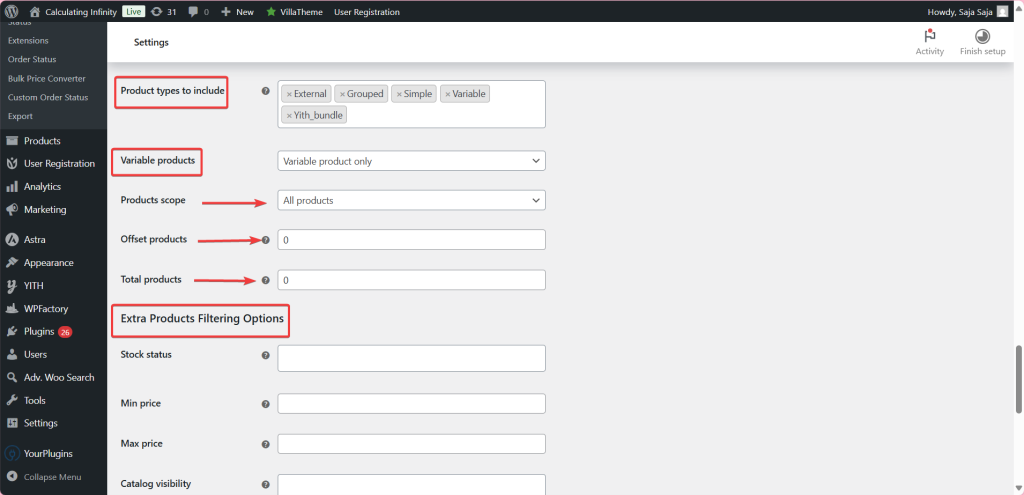
- Product types to include
From here, you can determine the types of products that appear in the file, such as simple, variable, and group.
- Variable products
Choose to show only the variable products, the variations themselves, or both.
- Products scope
From here, the scope of the products is defined: all products or a specific number.
- Offset products
From here, you can specify the number of products you want to ignore.
- Total products
From here you select the products you want to include. if you want to include all of them, set zero.
Extra Products Filtering Options
- Stock status
Who can determine the product status: available, out of stock, pre-order.
- Min price/ Max price
Here, you set the price range for the products that appear.
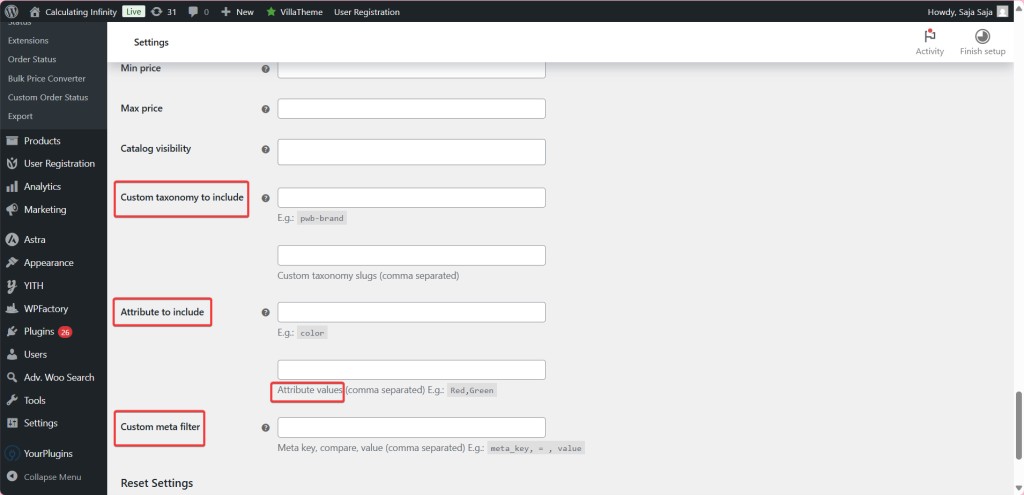
- Catalog visibility
Here you specify whether you want the product to appear in the search results, the store page, both, or hidden.
- Attribute to include – Attribute values
From here, you can include specific attributes such as color and size, and set attribute values such as green, black, etc.
- Custom meta filter
From here, you can filter products according to custom data.
For Example: price, >, 20 or on_sale, =, yes
The conclusion #
You can now say goodbye to any obstacles standing in your way to growing and expanding your eCommerce store. Now with the “WooCommerce Product XML Feeds Manager” plugin, you can easily list your products on any platform and marketplace you want to sell on, all through a single XML file.