
How to Manage WooCommerce Product Stock Easily Using Excel
Are you still managing inventory, updating prices, and editing stock levels one by one for hundreds of products?
Jumping from page to another because your bulk actions are limited. It’s exhausting, a waste of time, and lacks efficiency, right?
But what if I told you that you no longer need to track your inventory manually or adjust each product individually?
What if you could manage your entire inventory in a single Excel file as if you were using a spreadsheet?
Yes, with the “Products Stock Manager with Excel for WooCommerce” you can:
-
Export and import your inventory in bulk.
-
Updated product stock levels for all your products with one click.
-
Generate stock reports in seconds.
-
Get low stock alerts.

Step1:
➡ Download the Plugin
To get started, you will need to download the “Products Stock Manager with Excel for WooCommerce” plugin, which allows you to easily track and support your customers inquiries.
After downloading the plugin from your WPFactory account, upload it to your WordPress site.
Step2:
➡ Access the Plugin
Once the plugin is installed and activated, you can tailor it to fit your business needs.
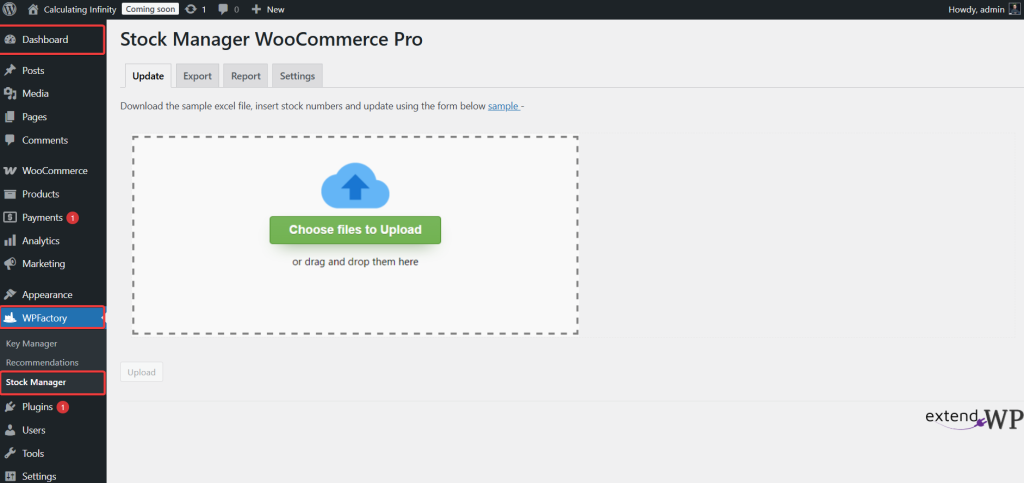
Go to WordPress dashboard > WPFactory > “Stock manager”
Step3:
➡ Dashboard
The first thing you need to do is to adjust and modify the settings according to the inventory information of your products. To adjust the settings, go to the update tab, then download the sample excel file.
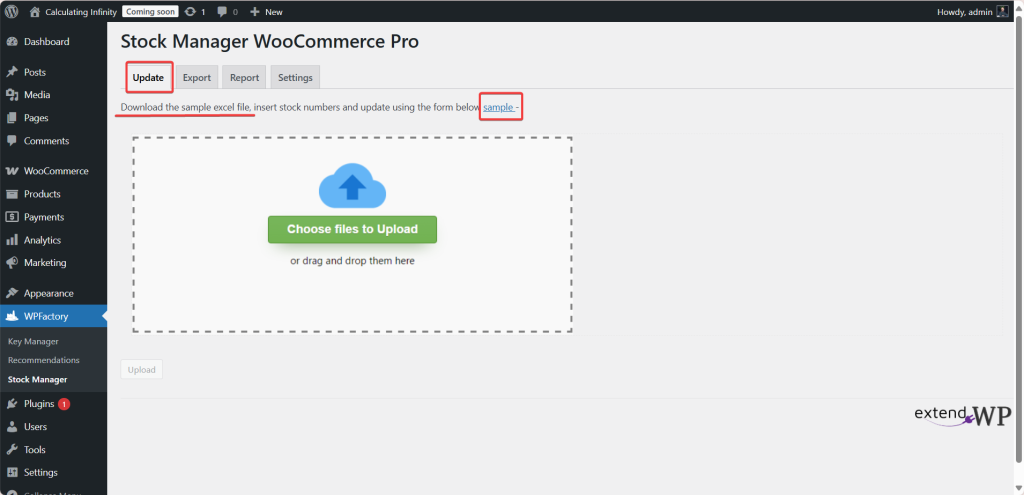
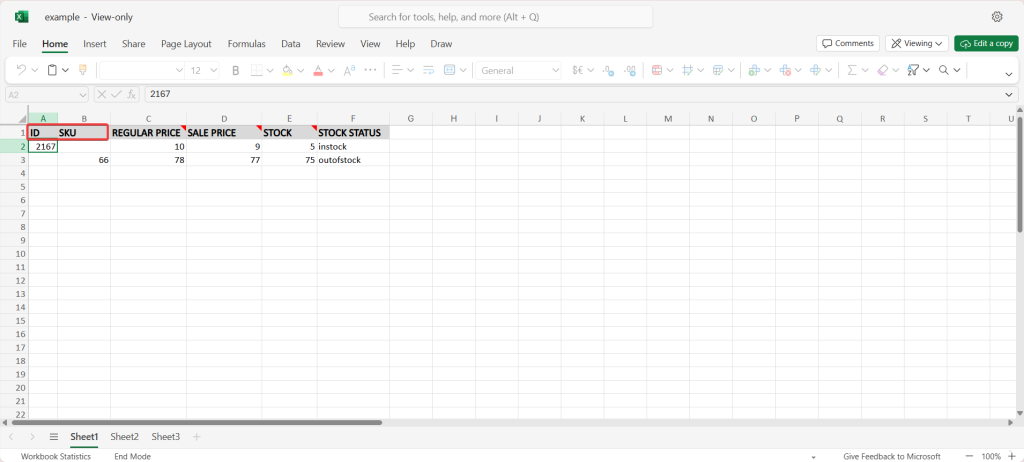
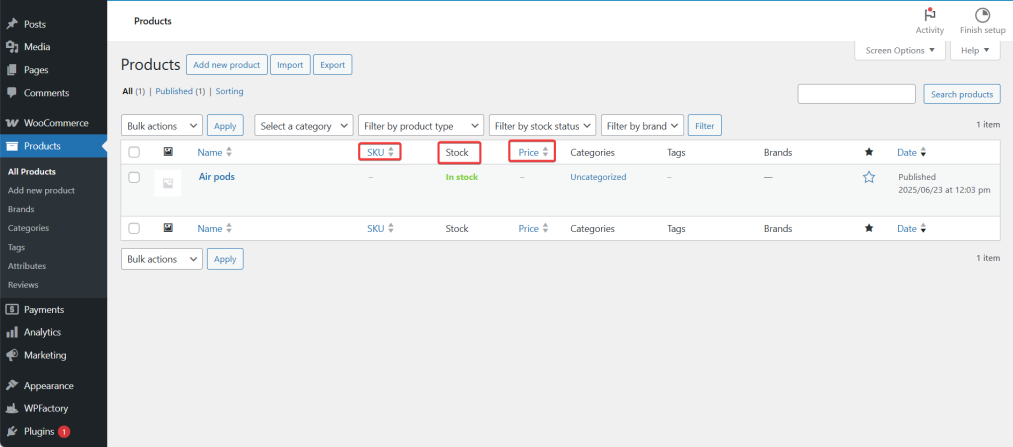
The file includes the main columns such as: Product ID number, SKU, stock quantity, stock statues, and prices. The purpose of it is for you to know the correct format of the file to modify the data on.
Step4:
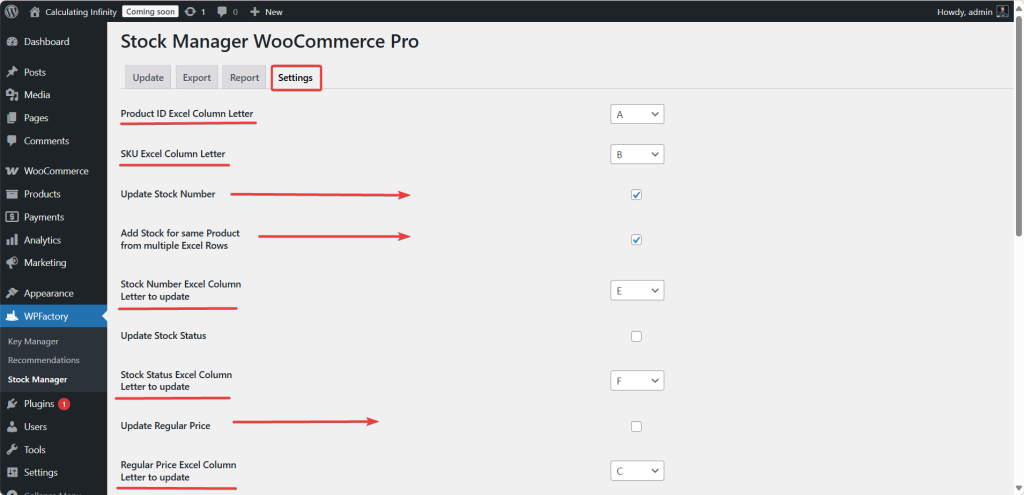
➡ Settings
This section is dedicated to setting the configurations of the Excel file that you have downloaded. You will use it to update products by importing the data.
The list fields will be adjusted according to those in the Excel file. This means that the Product ID will be in column A, and the SKU will be in column B, and so on.
This number (Product ID – SKU) identifies the product you want to update.
- Update Stock Number
Activating this option means that you want to update the quantity in stock through the Excel file.
- Add Stock for same Product from multiple Excel Rows
If you enable this option, the quantity from several rows containing the same product in the file will be combined instead of being replaced. For example:
If the same product appears twice in the file with quantities of 5 and 10, the stock will be set to 15.
- Update Stock Status
Activating this option allows you to update the stock statuses (Available – not available) through the Excel file.
- Update Regular Price
Activating this option allows you to update the regular price of the product.
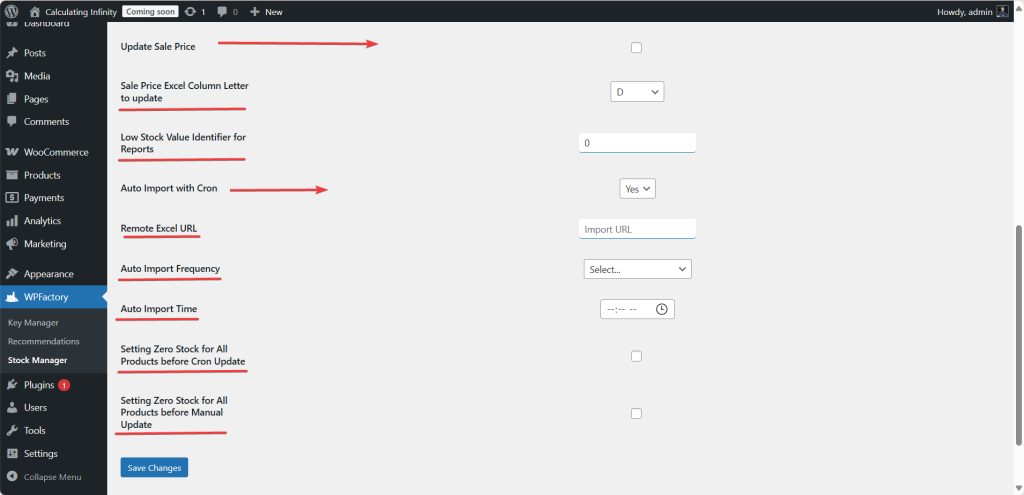
- Update Sale Price
Activating this option means you want to update the discount price.
- Low Stock Value Identifier for Reports
A value used to determine products that are considered to be close to running out. For example:
If you set 3, any product with a quantity less than 3 will appear in the “Almost Out of Stock” report.
- Auto Import with Cron
This means that the system will perform an automatic import of data from a file located at an external URL using the corn job.
- Remote Excel URL
The link to the Excel file that is available on the internet, from which the data will be automatically pulled. For example:
A link on Google Drive or Dropbox.
- Auto Import Frequency
The time when the automatic update is executed. For example:
Every one minutes, every hour, every day…
- Auto Import Time
Here, you specify the exact time when the automatic update is activated.
- Setting Zero Stock for All Products before Cron Update
If you enable this option, the stock of all products will be set to Zero before the automatic update. It helps if you only want to rely on the Excel file to determine the quantities.
- Setting Zero Stock for All Products before Manual Update
The same idea, but when manually uploading the file, it sets the stock to Zero before entering the data from the file.
Step5:
➡ Export
Now that you have modified the Excel file with the information you want to include and adjust your settings, the next step is to upload the products ID numbers because the file does not contain them. To do this, go to the Export tab.
From here, you can specify the information you want to appear in the file alongside the main information. such as category, product description, upsell and cross-sell, titles, etc.
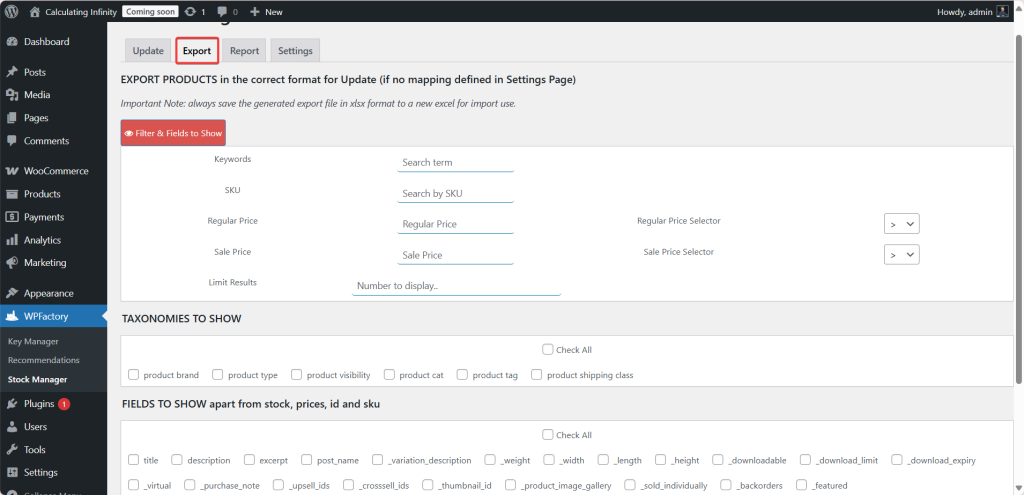
After you have specified it, click on the search to display a list of products.

Here, the products will appear for you. Click on the export option in the format you want.
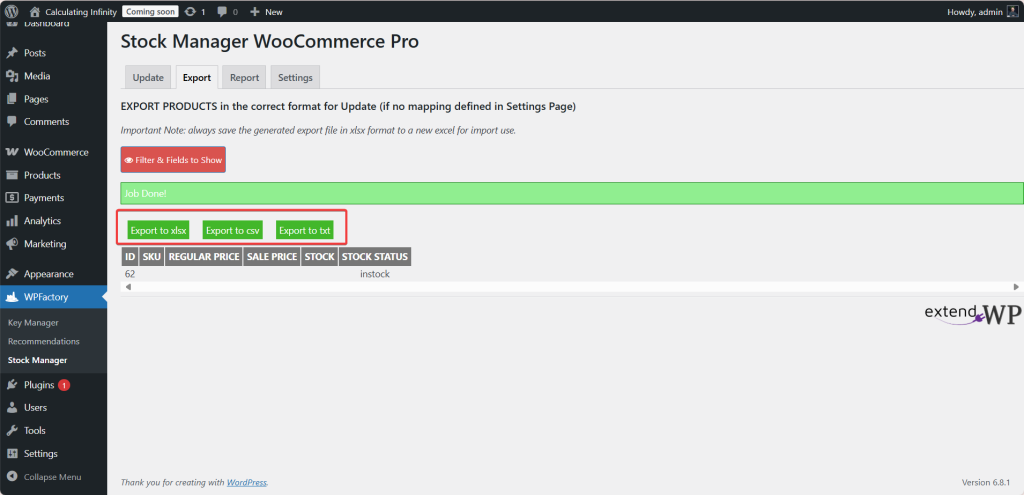
After that, the file will be downloaded for you. Now you will go to the update tab and import your file. At that point, the inventory information and any information you specified on the product page will appear.
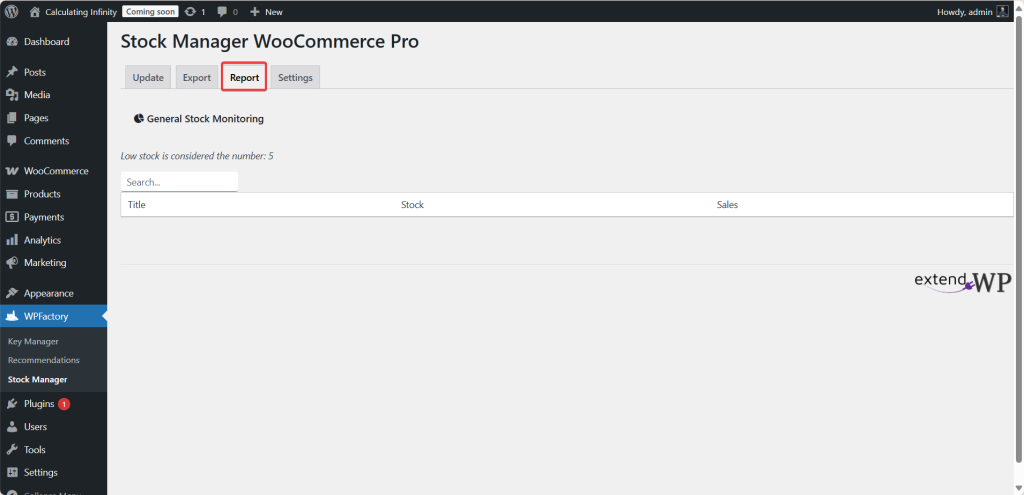
Step6:
➡ Report
From this tab, you can see all the reports related to inventory, sales, and the information you want.
And the reports are not limited to inventory data, you can also obtain product cost reports, that show you the best profit Margin you can achieve, and help you set smart pricing strategies based on these reports using the WooCommerce Cost of Goods: Product Cost & Profit Calculator.
Final Thoughts
Effective inventory management is one of the most important keys to the success of any WooCommerce store. Poor inventory control leads to out-of-stock items, ultimately, missed sales, and lost profits.
That’s exactly where “Products Stock Manager with Excel for WooCommerce” plugin comes in, which makes stock management faster, easier, and more reliable.
Let’s recap what you will get with this amazing tool:
- Bulk update your product stock using a single Excel sheet.
- Easily export your current inventory to Excel.
- Get notifications about low stock before it’s too late.
- Access clear and organized stock reports.
Now you have full control and complete visibility over your inventory, ensuring easier and more efficient management, which means better growth opportunities that lead to increased profit.
Prefer watching? This short video summarizes the article in just a few minutes.