How to Migrate WooCommerce Data with Easy Excel Import & Export
Imagine from today you no longer need CSVs or any manual adjustments!
What if you could manage and migrate all your WooCommerce store data with ease, importing and exporting data via Excel files, transferring orders between stores effortlessly, editing and moving reviews, managing subscriptions, creating backups, and so much more?
Yes, it’s not a dream, you can do all of this and more without any CSV or the need to manual edit just with one tool, All In One WooCommerce Migration: Import & Export to Excel.
So, if you are moving from one store to another, recovering lost data, switching your hosting, or you need to manage and edit bulk data, you can now handle all of this from one place, one tool with less time and effort, using All In One WooCommerce Migration: Import & Export to Excel.

Step1:
➡ Download the Plugin
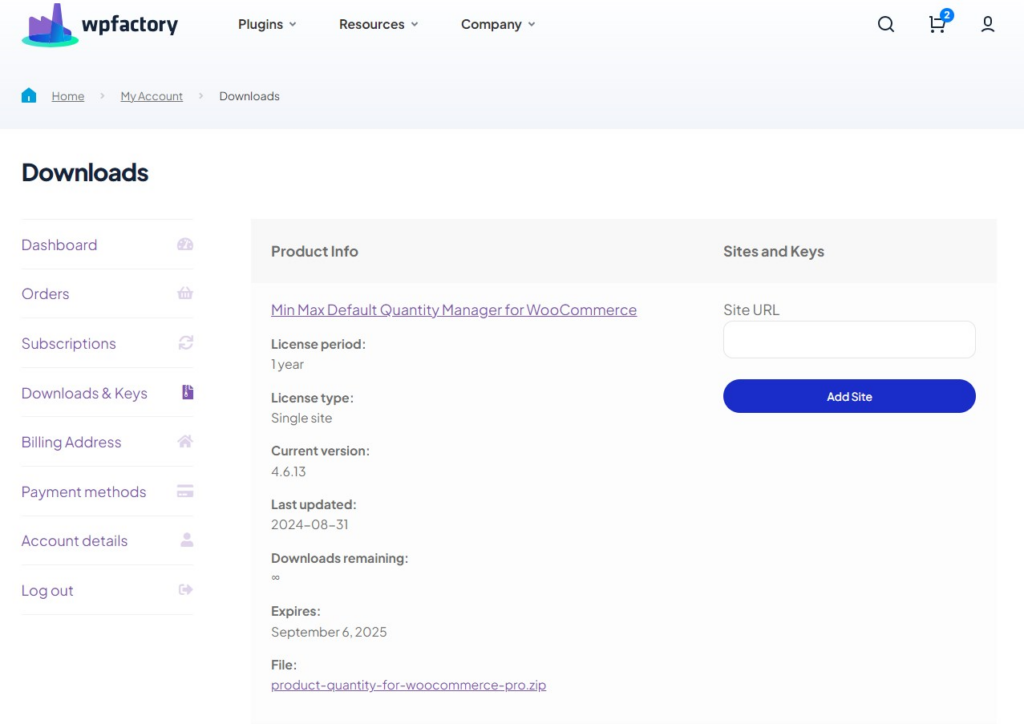
To get started, you will need to download the “All In One WooCommerce Migration: Import & Export to Excel” plugin, which allows you to manage your store data in an easy way.
After downloading the plugin from your WPFactory account, upload it to your WordPress site.
Step2:
➡ Access the Plugin
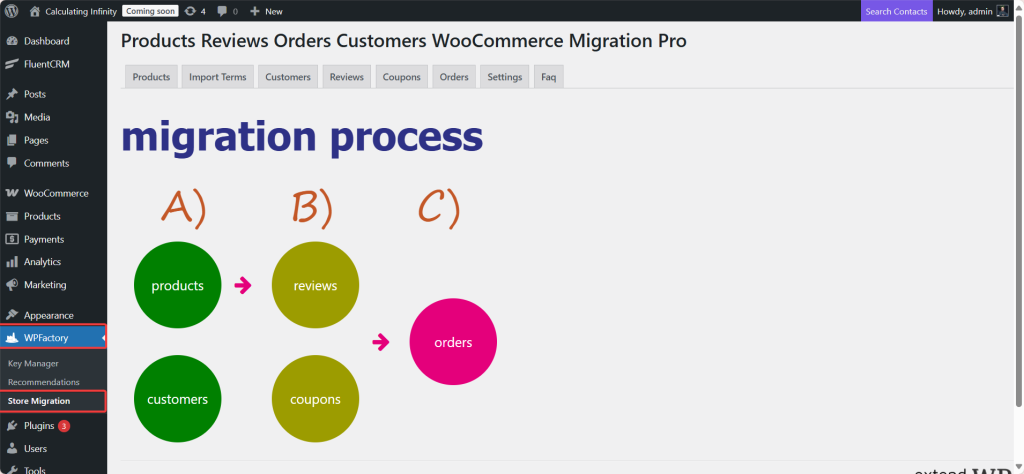
Once the plugin is installed and activated, you can tailor it to fit your business needs.
Go to WordPress dashboard > WPFactory > “Store migration”
Step3:
➡ Import/Export Products
Import Products
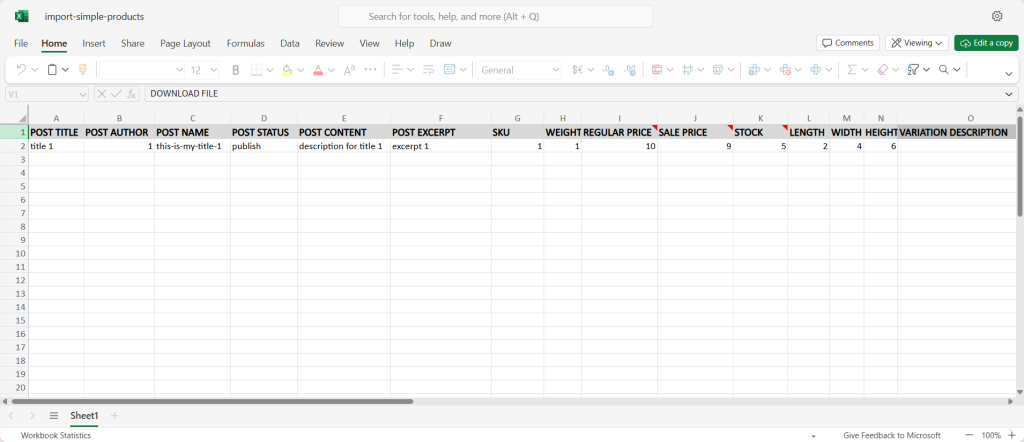
To import products to the site, the first thing you need to do is choose one of the sample files located at the top of the page to place your product information in. Each sample file serves a different purpose from the others.

- Simple Products Sample
For simple products.
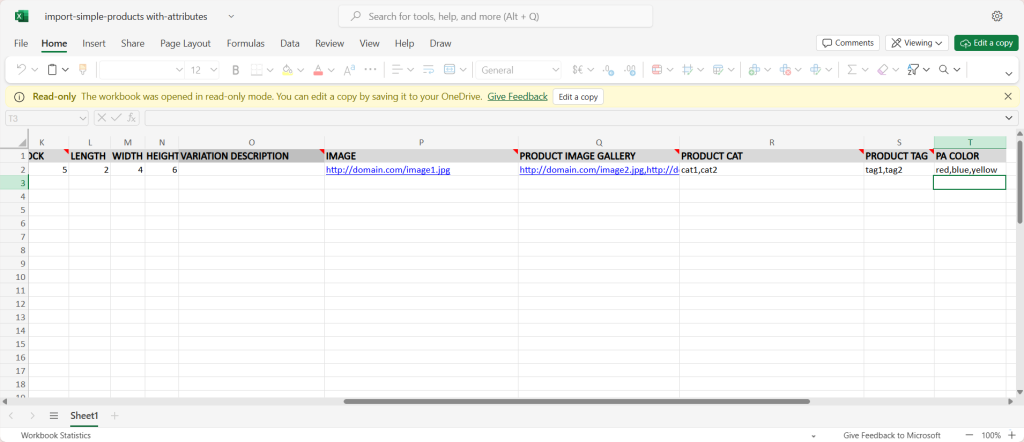
2. Simple Products with Attributes Sample
Simple products with attributes, for example color.
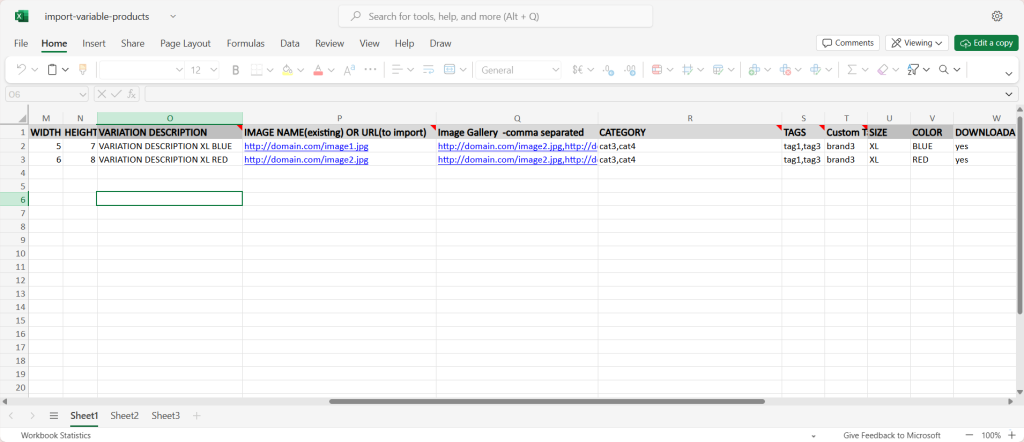
3. Variable Products Sample
Each variable has a separate row (each variation row is an independent row linked to the parent).
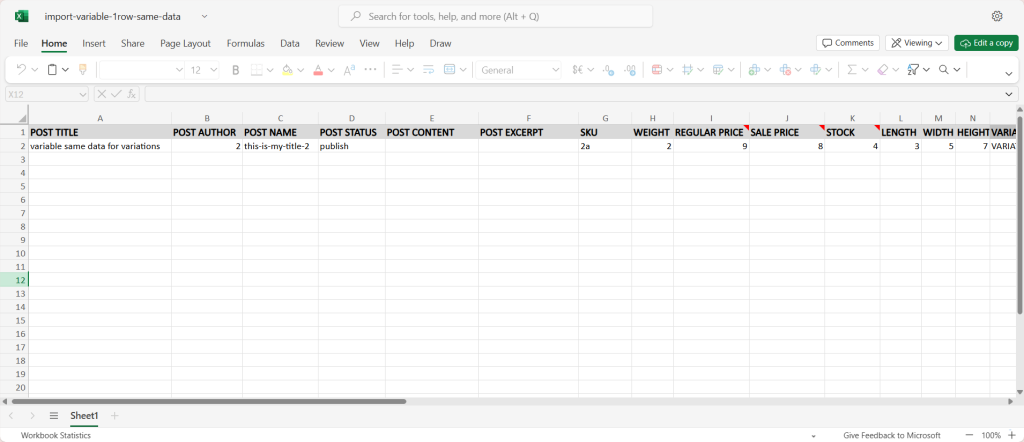
4. Variable Products from 1 excel row
Product data and all variables are in one row.
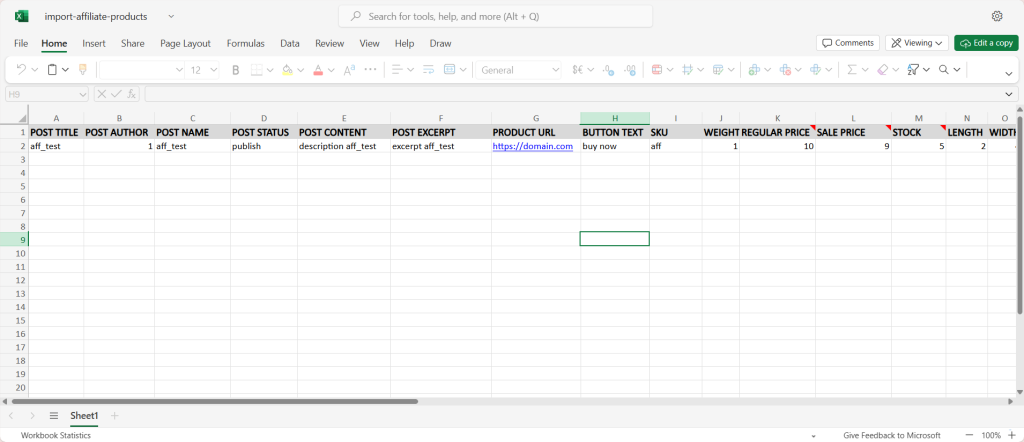
5. Affiliate Products Sample
External products/related to an external link and a buy button.
Steps to Import Your Products
- Download the sample Excel file
After getting to know the types of sample files, download the appropriate file.
2. Save it and add your products
save it on your device and use it to open the products of your store. Make sure to save the file as .xlsx (Excel) and avoid merged formulas/cells.
3. Add your custom columns
And if you have additional data that is not present in the sample (such as a custom field or meta field) you can add new columns with the appropriate name
4. Upload (Import)
Go back to the page and click on Choose files to Upload, then upload the file, and then start the import process.
The Red Buttons
- Image Handling
You have two main methods for adding images:
1️⃣ Upload images via URL while creating the product
➡Add a column in the Excel file.
Inside this column, place the image link directly. When you upload the file, the system will fetch the image from the link and place it in the product.
2️⃣ Manually upload images to the media library before import.
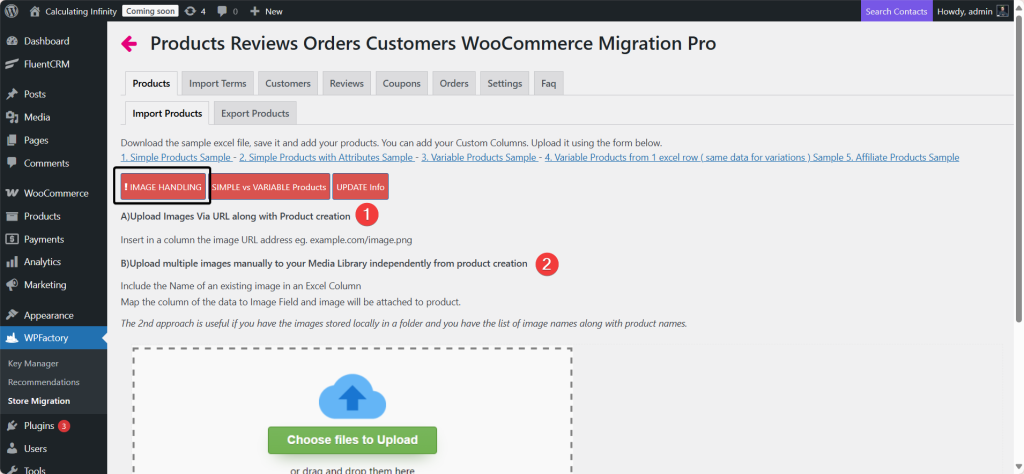
- Simple vs Variable Products
➡Sample Products
-
A product has only one option and doesn’t conation variations.
-
For example: a book, or shirt in one color.
-
Each simple product is written in one row, along with the price, stock, and description.
➡Variable Products
-
A product that includes several options or variations (such as color, sizes, or any other attributes)
-
For example: the shirt is available in several colors: red, green, black, and white.
-
In the Excel file: There is a row for the main product (the Parent) with the type of variable. And other rows for each option/variation linked to the main product via the parent SKU or parent ID.

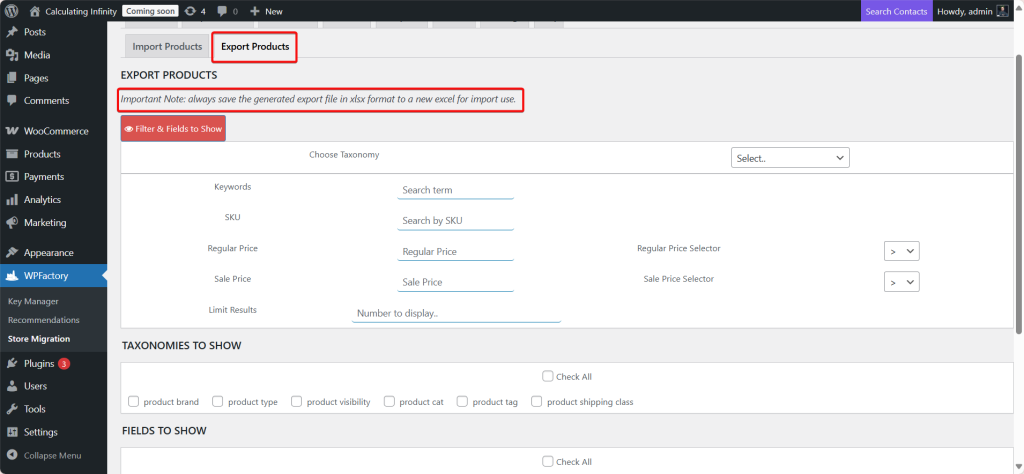
Export Products
- Filter & Fields to Show
Here, you specify which products you want to export based on certain conditions:
- Keywords: You are looking for products that contain a certain word or phrase in the product name or description.
- SKU: You search for products using the product identification number (SKU).
- Regular Price: Filter products by regular price, with the option to choose the condition (greater than >, less than <, equals =).
- Sale Price: Filtering products by discount price, with the same condition options.
- Limit Results: Specify the number of products that will appear in the export (for example, 50 or 100).
- Taxonomies to Show
These options determine which classifications or types of product data you want to include in the export file.
- Fields to Show
The fields that will appear in the export.
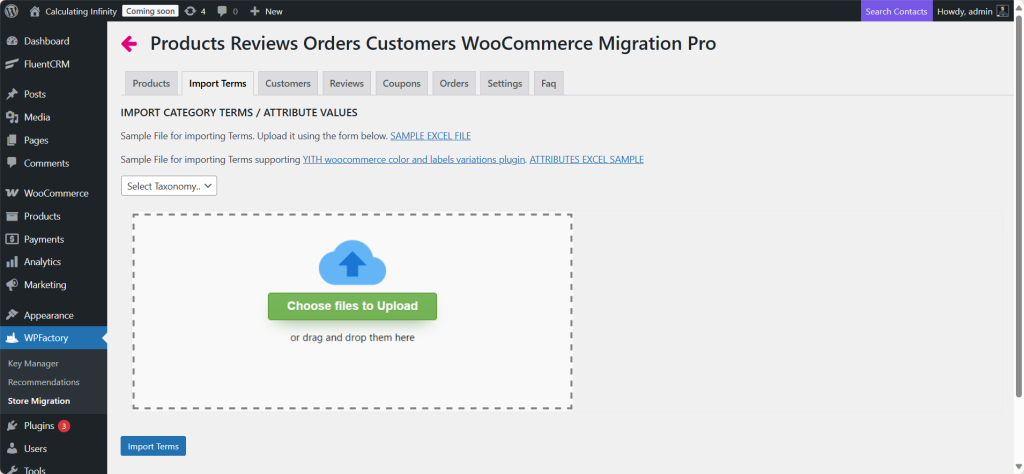
Step4:
➡ Import Terms
This section is for importing values of categories or attributes (For example: product colors, sizes, or classifications).
- Download sample file
The first thing you should do is download the sample file to understand the correct format required for the file that will be imported.
- Data preparation
Here, you can transfer your data (category value or attributes) to the sample file.
- Select Taxonomy
From the list, select the type of category or attribute you want to import, such as:
-
Product_cat
-
Product_brand
-
Product_tag
- Upload the File
Then upload the Excel file to complete the importing process.
Step5:
➡ Import Customers, reviews, coupons, and orders
The same steps apply when importing customers data, reviews, coupons, and orders.
Download the sample file, save it, add your data to it, and then upload it using the box shown in the image.
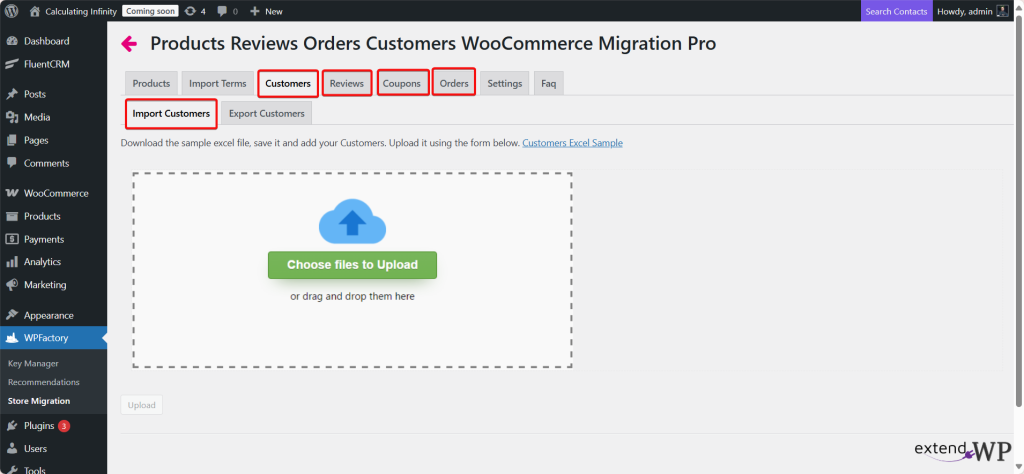
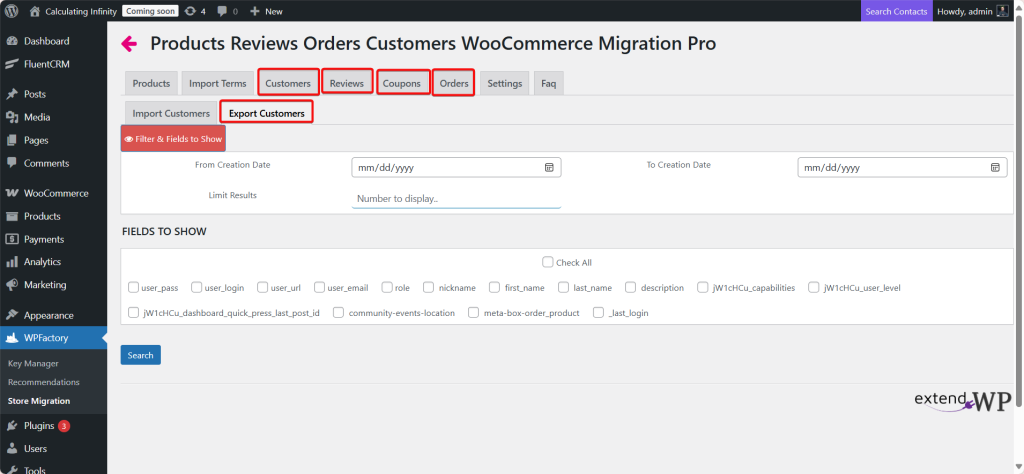
➡ Export Customers, reviews, coupons, and orders
And the same steps apply when exporting customers data, reviews, coupons, and orders.
- Filter & Fields to show
The first thing you need to do is to specify the time period for which you want to obtain data. From Creation Date / To Creation Date
- Limit Results – Number to display
Here, you should enter s specific number of customers, reviews, orders, and coupons you want to export.
- Fields to Show
A list of checkboxes that allows you to select the data you want to include in the export.
The conclusion
From now on, managing, organizing, and migrating your data doesn’t have to be complicated. You can handle everything from one place, one tool. With “All In One WooCommerce Migration: Import & Export to Excel” plugin, you can easily import, export, and manage all your store data, from customers, to reviews and coupons, to orders. All in one place without the need to deal with CSV files or even make any manual edits.
So, instead of dealing with multiple tools to get all this done, All In One WooCommerce Migration: Import & Export to Excel allows you to do everything from the same dashboard. Your one-stop solution for bulk data management.