How to Import Export WooCommerce Products with Excel (Step-by-Step Guide)
Imagine you own a physical store with thousands of products. Every time you want to add a new item, update a price, change or add a new description, you would have to walk around all the store to edit everything by your hand, sounds exhausting, right?
The same thing happens when you try to manage WooCommerce products manually or through CSV files, it’s complicated, takes a lot of time and effort, and results in a lot of errors.
This is why the WooCommerce Products Import & Export with Excel plugin is here! Now you can manage everything with simple Excel sheets, without the need to deal with any CSV files or do any manual editing. Easily import, export, update products prices, descriptions, and schedule automated tasks with just a few clicks.

Step1:
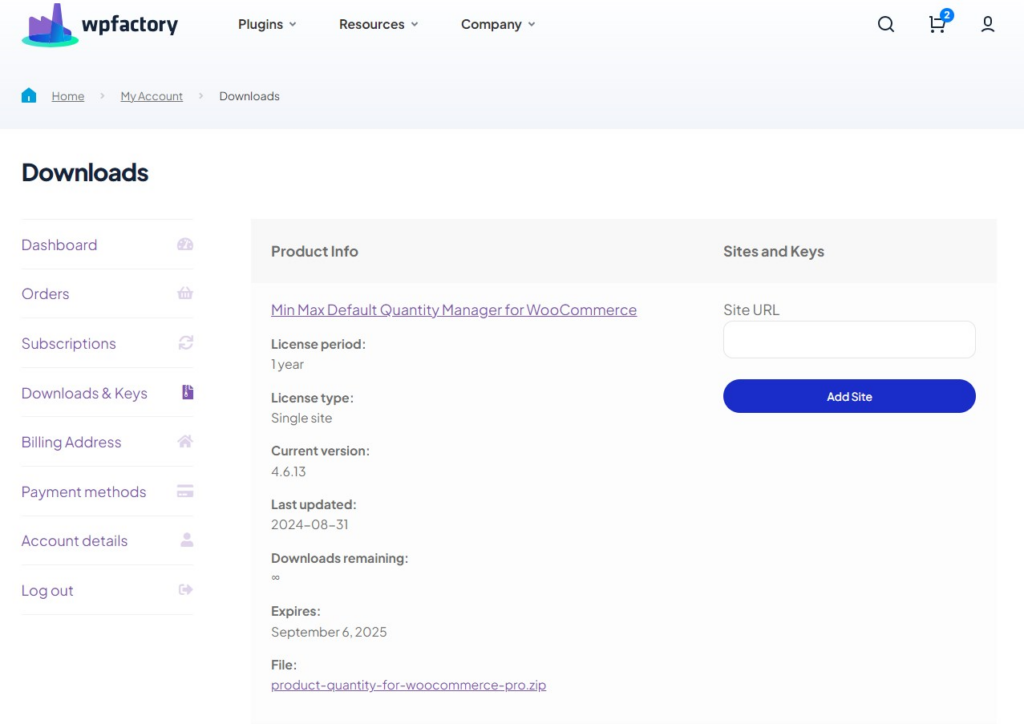
➡ Download the Plugin
To get started, you will need to download the “WooCommerce Products Import & Export with Excel” plugin, which allows you to manage your WooCommerce store through simple steps.
After downloading the plugin from your WPFactory account, upload it to your WordPress site.
Step2:
➡ Access the Plugin
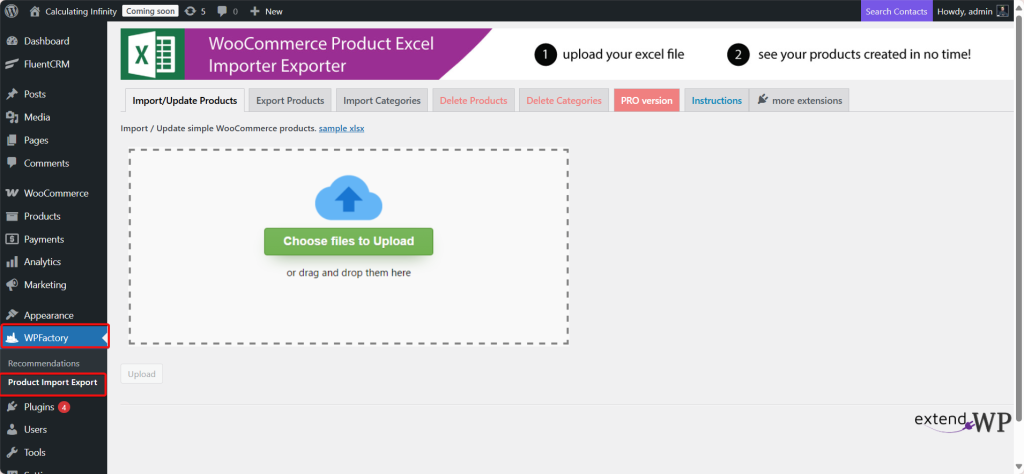
Once the plugin is installed and activated, you can tailor it to fit your business needs.
Go to WordPress dashboard > WPFactory > “Product import export”.
Step3:
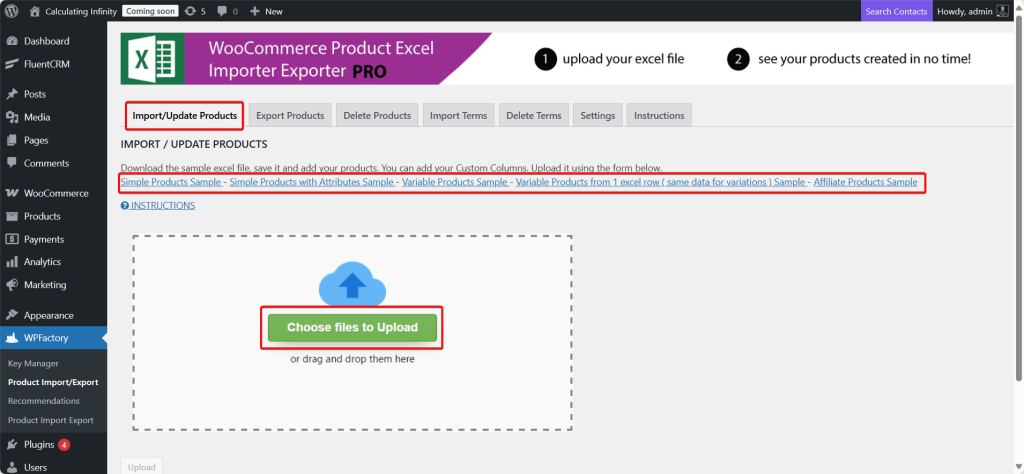
➡ Import/ Update Products
From here, you can import or update your WooCommerce products.
To import products to the site, the first thing you need to do is choose one of the sample files located at the top of the page to place your product information in. Each sample file serves a different purpose from the others. You can refer to the previous article to learn about all types of sample files.
Steps to import or update WooCommerce products:
- Download the sample Excel file
After getting to know the types of sample file, download the appropriate file.
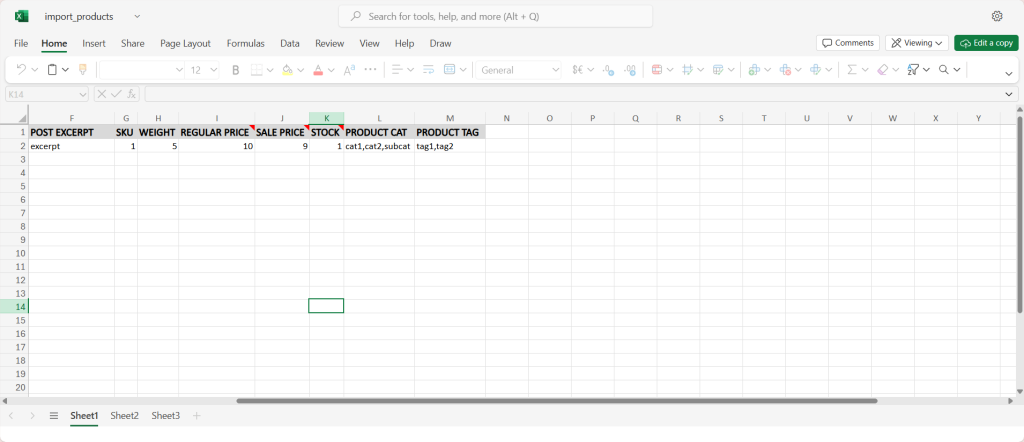
2. Save it and add your products
save it on your device and use it to open the products of your store. Make sure to save the file as .xlsx (Excel) and avoid merged formulas/cells.
3. Add your custom columns
And if you have additional data that is not present in the sample (such as a custom field or meta field) you can add new columns with the appropriate name
4. Upload (Import)
Go back to the page and click on Choose files to Upload, then upload the file, and then start the import process.
Step4:
➡ Export Products
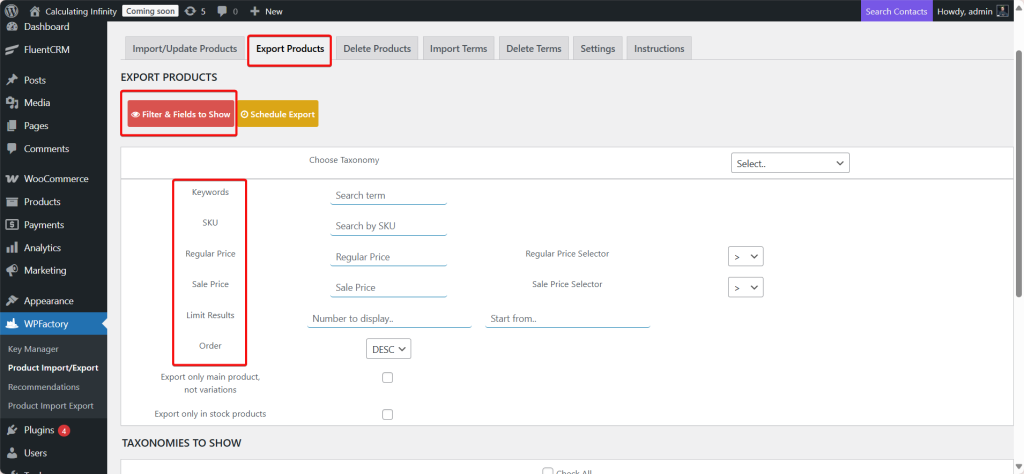
- Filter & Fields to Show
Here, you specify which products you want to export based on certain conditions:
- Keywords: You are looking for products that contain a certain word or phrase in the product name or description.
- SKU: You search for products using the product identification number (SKU).
- Regular Price: Filter products by regular price, with the option to choose the condition (greater than >, less than <, equals =).
- Sale Price: Filtering products by discount price, with the same condition options.
- Limit Results: Specify the number of products that will appear in the export (for example, 50 or 100).
- Taxonomies to Show
These options determine which classifications or types of product data you want to include in the export file.
Important note: The plugin always recommends saving the export file in “xlsx” format before re-importing it.
- Fields to Show
The fields that will appear in the export.
- Export only the main product, not variations
So, when you export, the system will export only the main product (Parent product) without the details of the variations such as color, size, etc.
Example: If you have a t-shirt in two colors (black and white) and in two sizes (M and L), this option will export the “t-shirt” as a single product only, without listing each variation separately.
- Export only in stock products
It means they will only export the products that are in stock. Any product that is not available or it is out of stock will not be include in the export.
Step5:
➡ Delete Products
This option allows the possibility of deleting products in bulk via an Excel file.
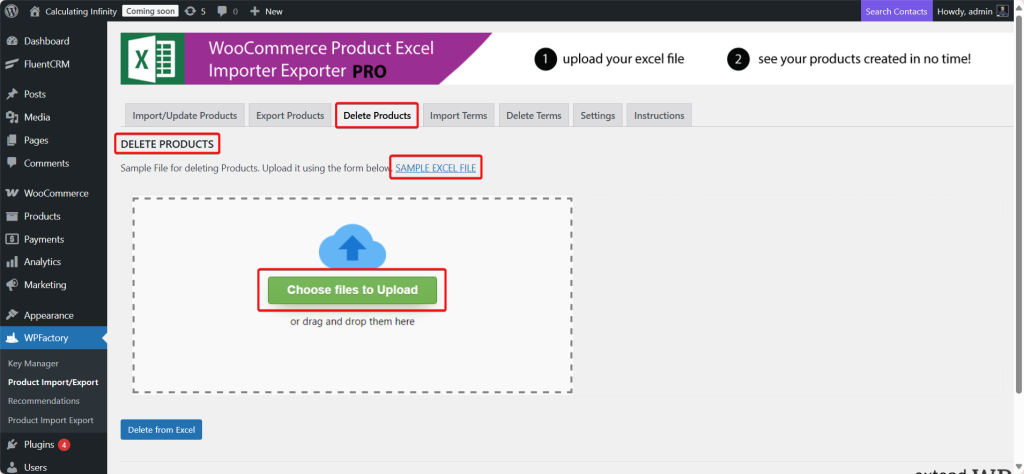
- Download the sample Excel file
First, download the sample file, this file usually contains key columns such as Product ID or SKU
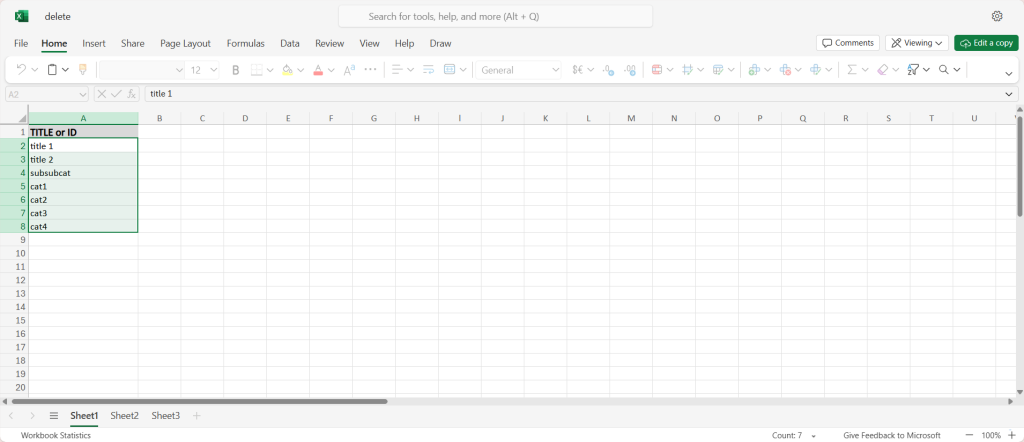
2. Filling out the file
Here, enter the products you want to delete in the file (via product ID or SKU).
3. Upload the file
Then, upload the file using the form under the same option, the system will read the file and delete the specified products.
Step6:
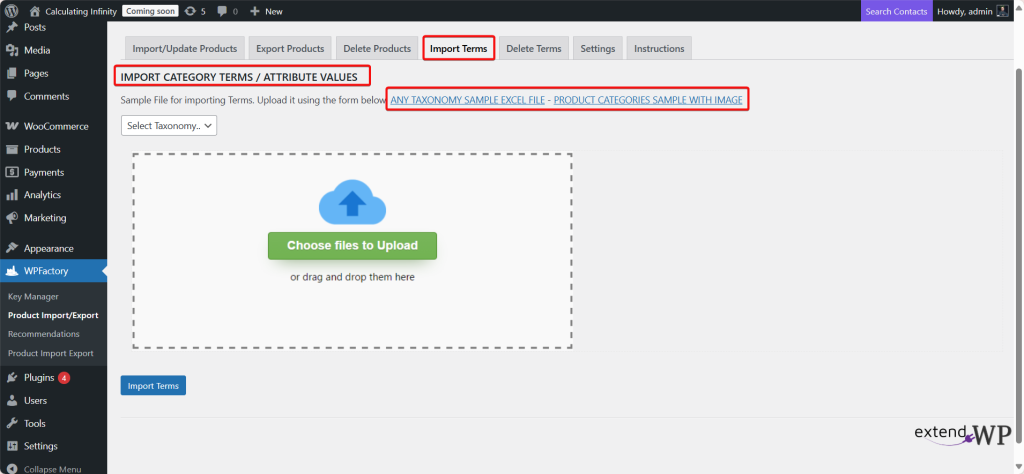
➡Import Terms
This option allows you to import categories or attribute values for products in WooCommerce via an Excel file.
So, you can upload a file containing a list of product categories to be directly added to the store. Instead of entering the categories manually, you upload the file, and all of them will be added at once.
The file can typically contain:
-
Category Name
-
Description
-
Parent Category
-
Category Image
The PRODUCT CATEGORIES SAMPLE WITH IMAGE file is an example of a ready file that shows you how the data should be written.
- Select Taxonomy
This is an option from which you can choose the type of Taxonomy you want to upload the data to:
-
Product Categories
-
Product Tags
-
Attributes
All you have to do is download the sample file, upload the attributes and categories you want for the file, and then re-upload it.
Step7:
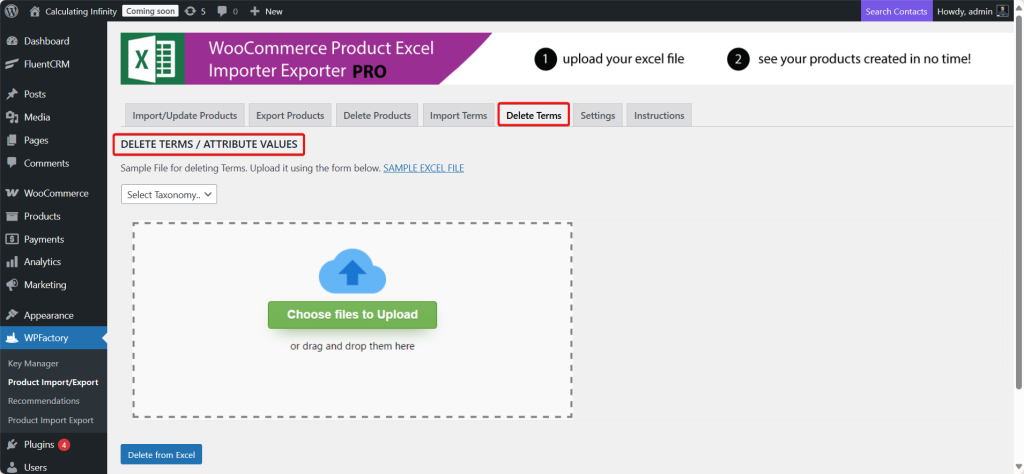
➡Delete Terms
This option allows the possibility of deleting terms in bulk via an Excel file.
First, download the sample file. Enter the terms/ attributes you want to delete in the file, then upload the file using the form under the same option, the system will read the file and delete the specified terms.
Step8:
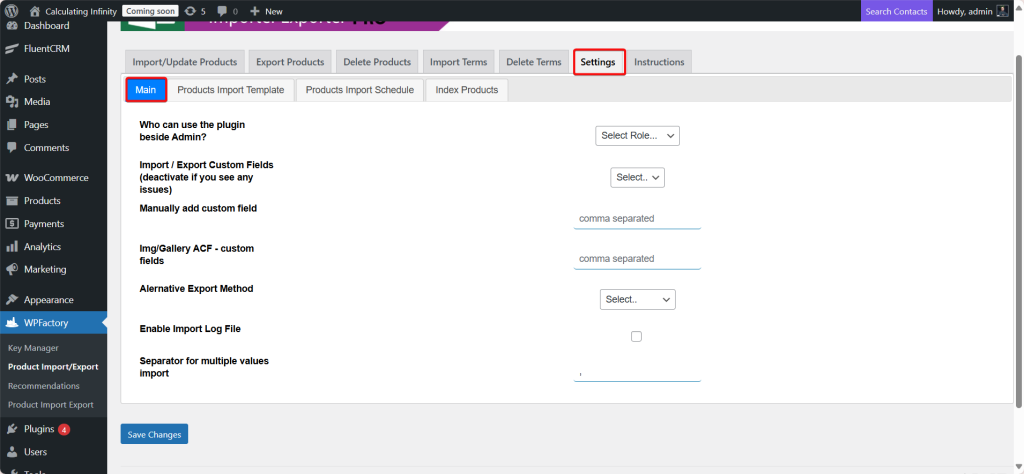
➡System
From here, you can control the general settings of the plugin.
- Main
You can specify who can use the plugin based on their role:
-
Editor
-
Author
-
Customer
-
Subscriber
- Import / Export Custom Fields
This option activates or deactivates the handling of custom fields during import/export. If you encounter an issue (Like slowness or conflicts with other plugins), you can deactivate it.
- Manually add custom field
If you have a specific custom field name (like brand, material, custom_sku), you can manually write them separated by commas.
- Img/Gallery ACF – custom fields
This is intended for using ACF (Advanced Custom Fields) to add images or a gallery. You can write the names of the fields for the images or gallery, separated by commas.
- Alternative Export Method
An additional option is to use an alternative export method if the regular method causes issues (like a timeout or data loss). I usually use different queries or split the data into smaller batches.
- Enable Import Log File
If you enable this option, a record will be generated for each import operation.
- Separator for multiple values import
If you have a dedicated field with multiple values (for example, multiple colors: red, blue, green), you need to specify the separator between the values. It is usually:
-
Comma
-
Slash |
Example: red, blue, green OR red|blue|green
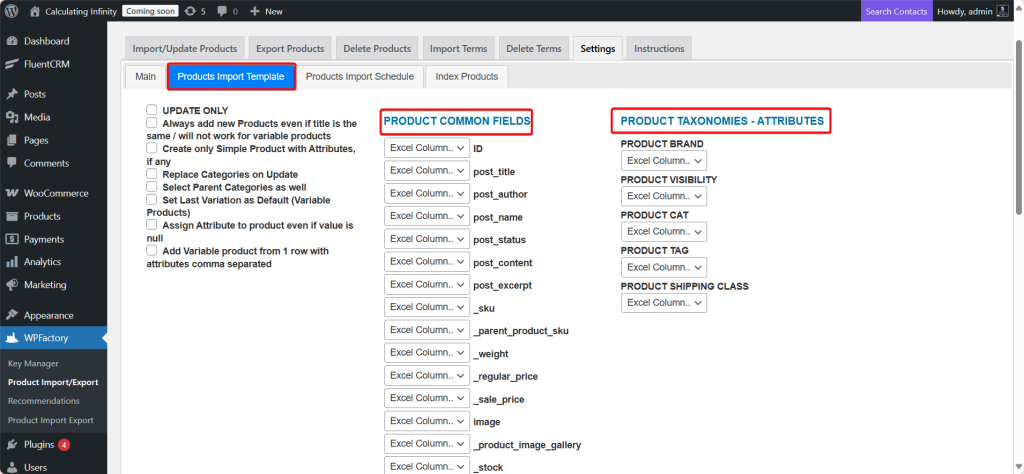
- Products Import Template
The product import template simply means the template/structure that the system will follow when you import products from an Excel file.
You can specify the columns along with the appropriate fields from here.
The Products Import Template saves time and prevents errors. Instead of redefining the columns every time, you use the pre-made template.
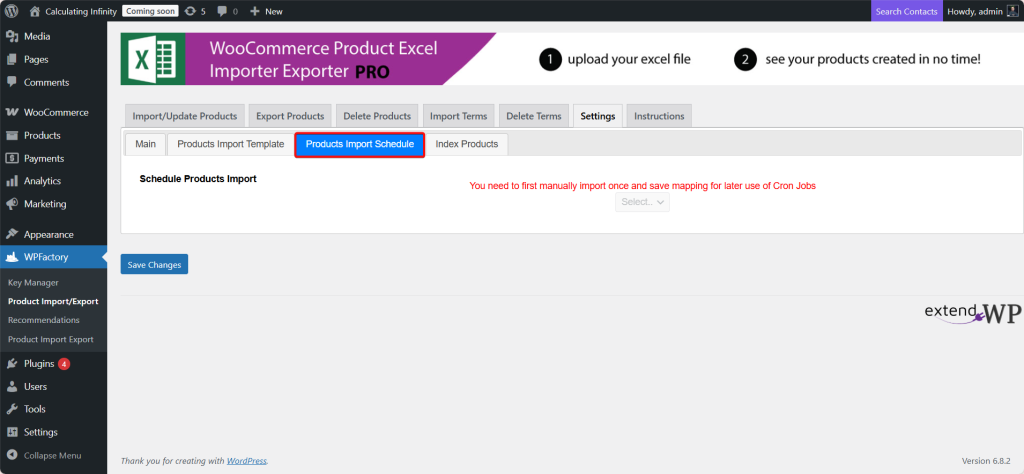
- Product Import Schedule
From here, you can schedule the products you want to import, which means they will be imported automatically at the scheduled time.
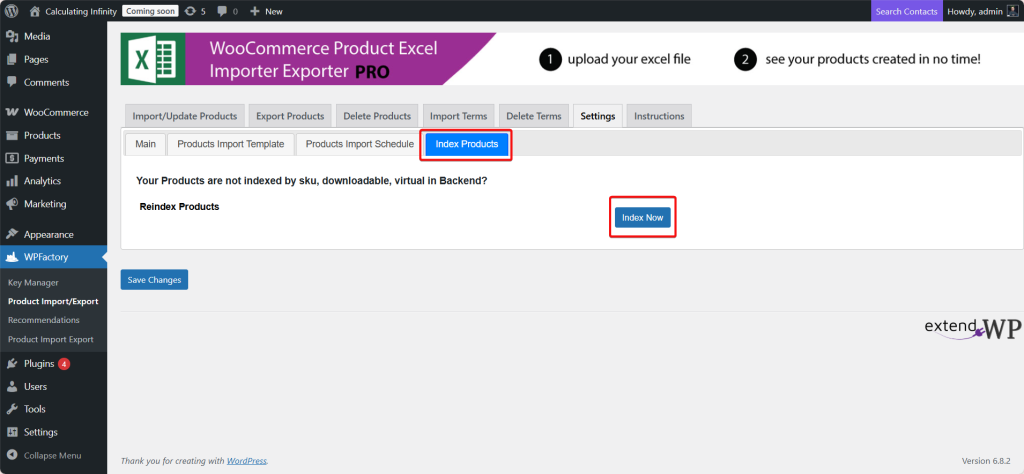
- Index Products
From here, you can choose the option to index your products, meaning to re-read the product data from the database.
Update the index to include all products along with their details (SKU, downloadable, virtual…).
Result:
-
Faster search
-
Import/export becomes more accurate
-
Fewer errors.
Final Thoughts
Managing and editing every single product, its price, and description manually is exhausting, and imagine doing this for thousands of products. I think it’s pure madness.
This is why the “WooCommerce Products Import & Export with Excel” plugin is an amazing tool. With this tool, you have the ability to manage your store efficiently, which saves your time, effort and helps you to reduce errors.
This tool allows you to import, export, update products, manage attributes & categories, and schedule importing tasks in just a few clicks!
Whether you are managing two products or thousands, this tool makes managing your store much easier.