Introduction #
The ‘Order Minimum/Maximum Limits for WooCommerce’ plugin allows you to set minimum and maximum purchase limits on your WooCommerce store. This guide will walk you through the installation and basic setup process to start utilizing these features.
Installation #
1. Download Plugin: Navigate to the WordPress plugin directory and search for ‘Order Minimum/Maximum Limits for WooCommerce’.
- Install Plugin: Click ‘Install Now’ to install the plugin on your WordPress site.
- Activate Plugin: After installation, click ‘Activate’ to enable the plugin on your site.
Setup #
Access Plugin Settings #
- Go to your WordPress dashboard and click on ‘WooCommerce’.
- Under the ‘WooCommerce’ settings, locate and click on the ‘Settings’ tab.
- Find and select the ‘Order Min/Max Amount’ tab to access the plugin settings.
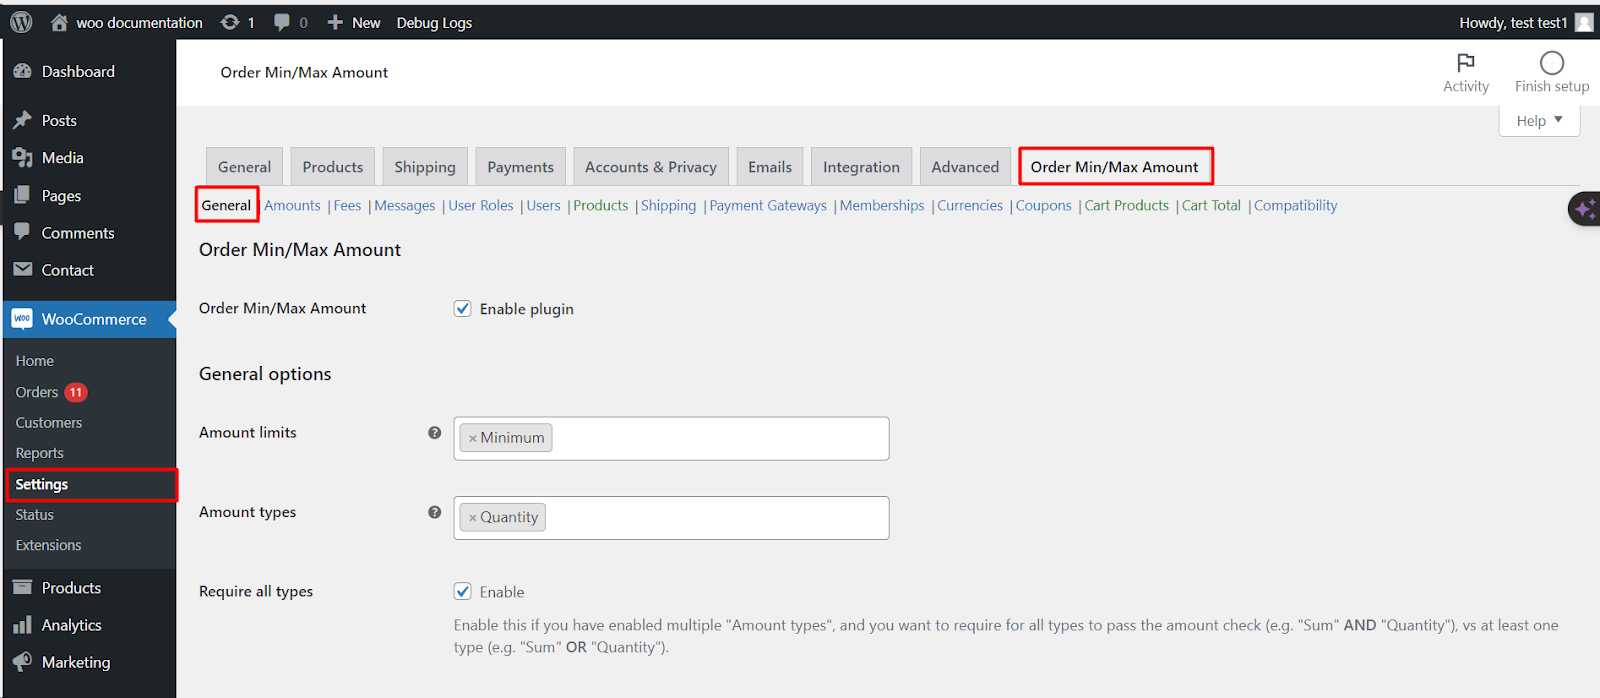
General Tab #
- Enable Plugin: Check the ‘Enable plugin’ box to turn on the plugin’s functionality.
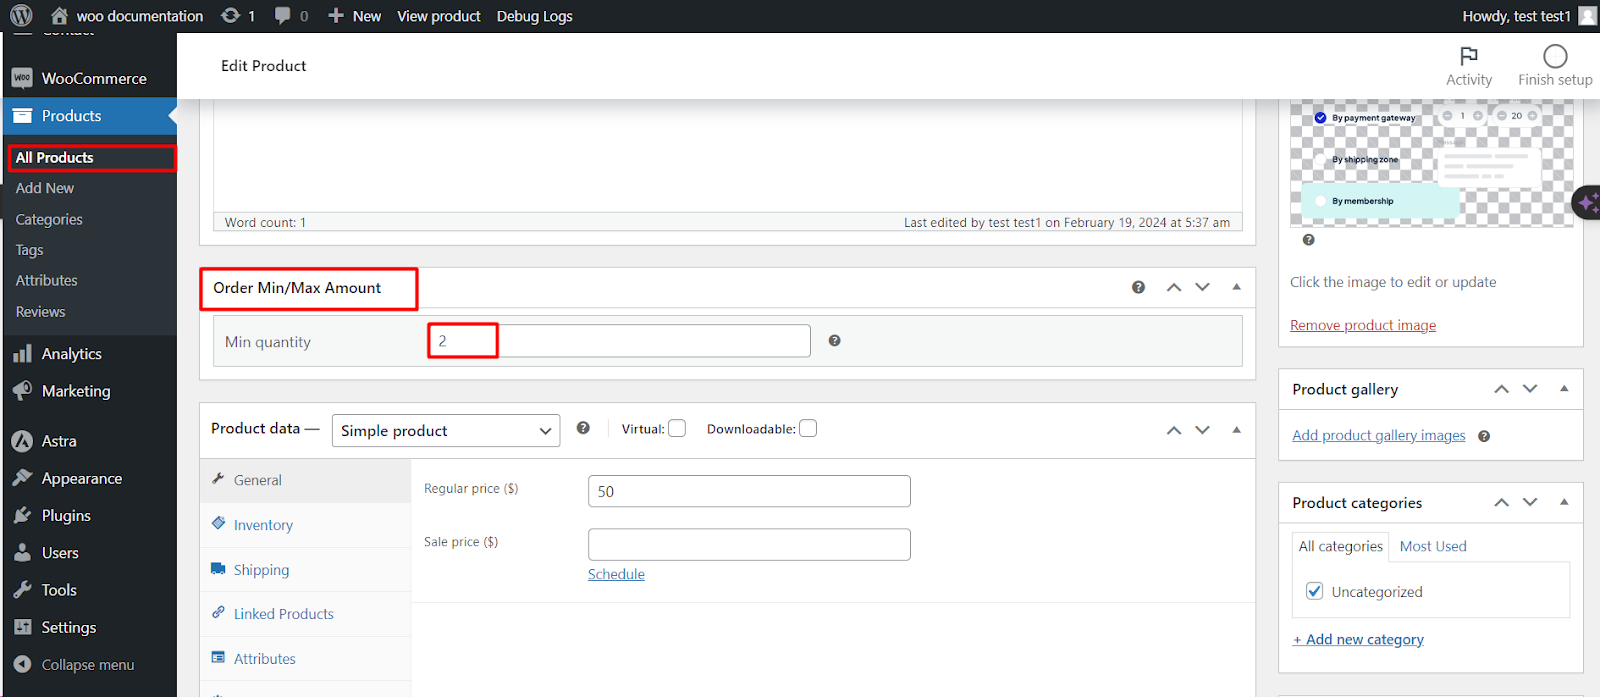
- General Options: Here, you can set the ‘Minimum’ and ‘Maximum’ amount limits for purchases.
Amount Types #
- Choose the criteria for the minimum/maximum limits.
Options include #
- Quantity
- Product Tags
- Products
- Area
- Height
- Sum
- Weight
- Volume
- Length
Require All Types #
If you enable multiple ‘Amount types’, you have the option to require customers to meet all conditions by checking the ‘Require all types’ box. This means all conditions such as “Sum” AND “Quantity” must be met.
If you prefer to allow orders to meet any one of the selected conditions, leave this box unchecked. This way, orders need to meet a condition like “Sum” OR “Quantity”.
Save Changes #
After configuring your settings, click the ‘Save changes’ button to apply your configurations.