
WooCommerce attributes are a powerful tool for adding extra details to your products, helping customers filter and find exactly what they’re looking for. This guide will walk you through setting up attribute options, making your store more organized and user-friendly.
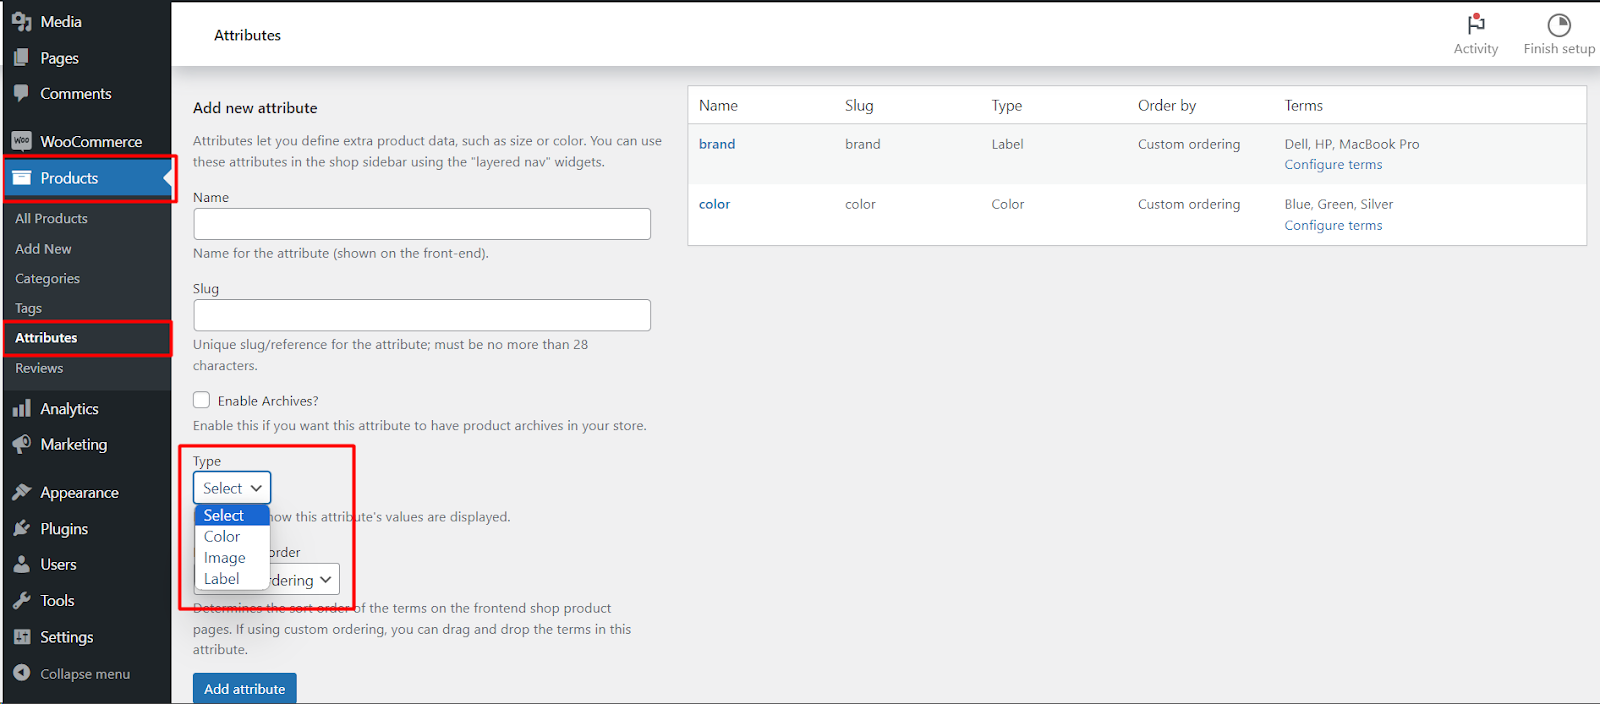
Accessing the Attributes Section
- Log in to your WordPress dashboard.
- Navigate to Products on the left-hand menu.
- Under the WooCommerce menu, click on Attributes.
Adding a New Attribute
Here’s where you define the additional product information you want to include.
- Click the Add new attribute button.
- Enter a clear and descriptive Name for the attribute that will be displayed to your customers (e.g., Color, Size).
- Set a unique Slug, a short reference used internally (e.g., color, size). Keep it under 28 characters.
Optional Settings
- Enable archives: This allows the creation of dedicated archive pages for products with specific attribute values (e.g., a “Red Shirts” archive page).
Choosing the Attribute Type
Now, it’s time to define how your attribute values will be displayed:
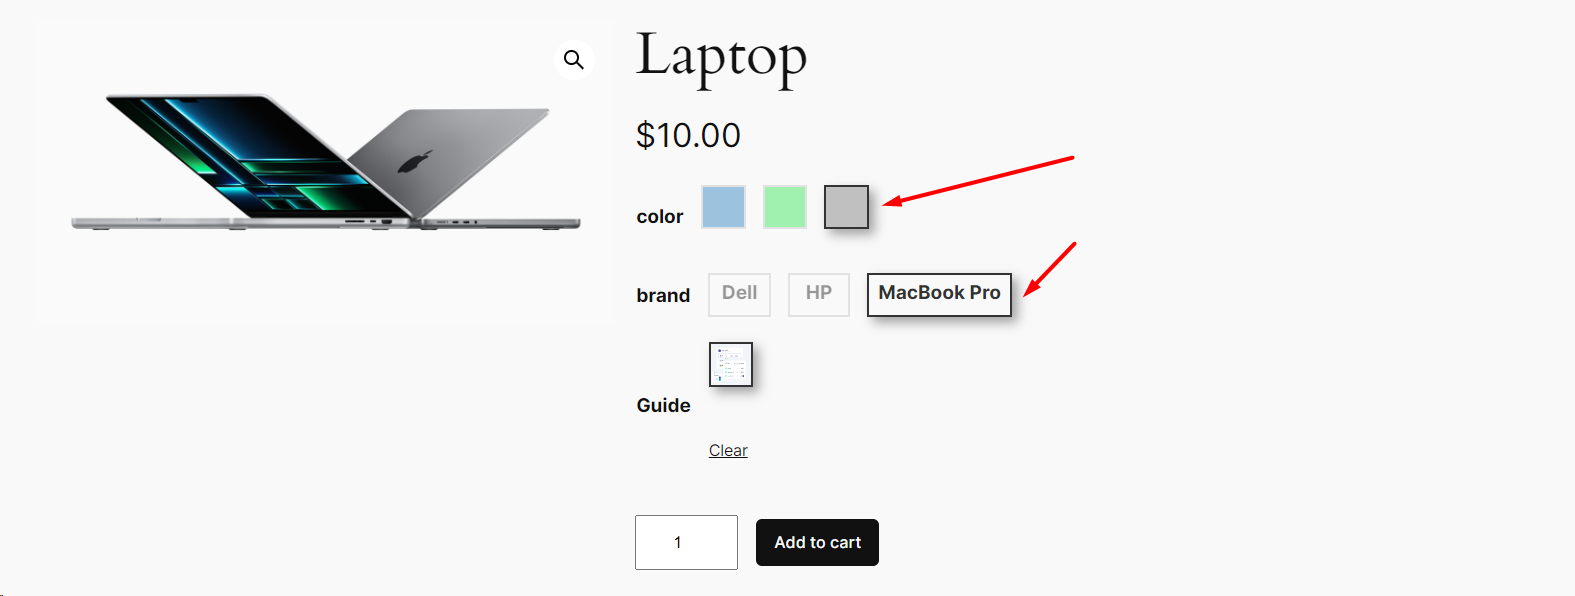
- Select: Use this for a dropdown menu with predefined options (e.g., Small, Medium, Large).
- Color: This allows assigning color swatches to each attribute value.
- Image: Use product images to visually represent each attribute value.
- Label: Great for simple text-based options (e.g., Material: Cotton).
Organizing Your Attribute Values
- Default sort order: Choose how attribute values appear by default (e.g., alphabetically, numerically).
- Custom ordering: Allows you to manually arrange the values using drag-and-drop for a specific order (e.g., Small, Medium, Large, X-Large).
Final Touches: Add the Attribute
Once you’ve configured the details, click the Add attribute button to save your new attribute.
By adding well-defined attributes, you’ll enhance your store’s organization and navigation, making it easier for customers to find what they need. Happy selling!