
Introduction
A well-designed Wishlist page is a crucial feature for any online store. It allows customers to save items for later, enhancing their shopping experience and increasing the likelihood of future purchases.
Setting Up Your Wishlist Page
Here’s how to make the most out of the ‘Wishlist Page’ tab in your WooCommerce Wishlist plugin settings
Step 1: Creating the Wishlist Page
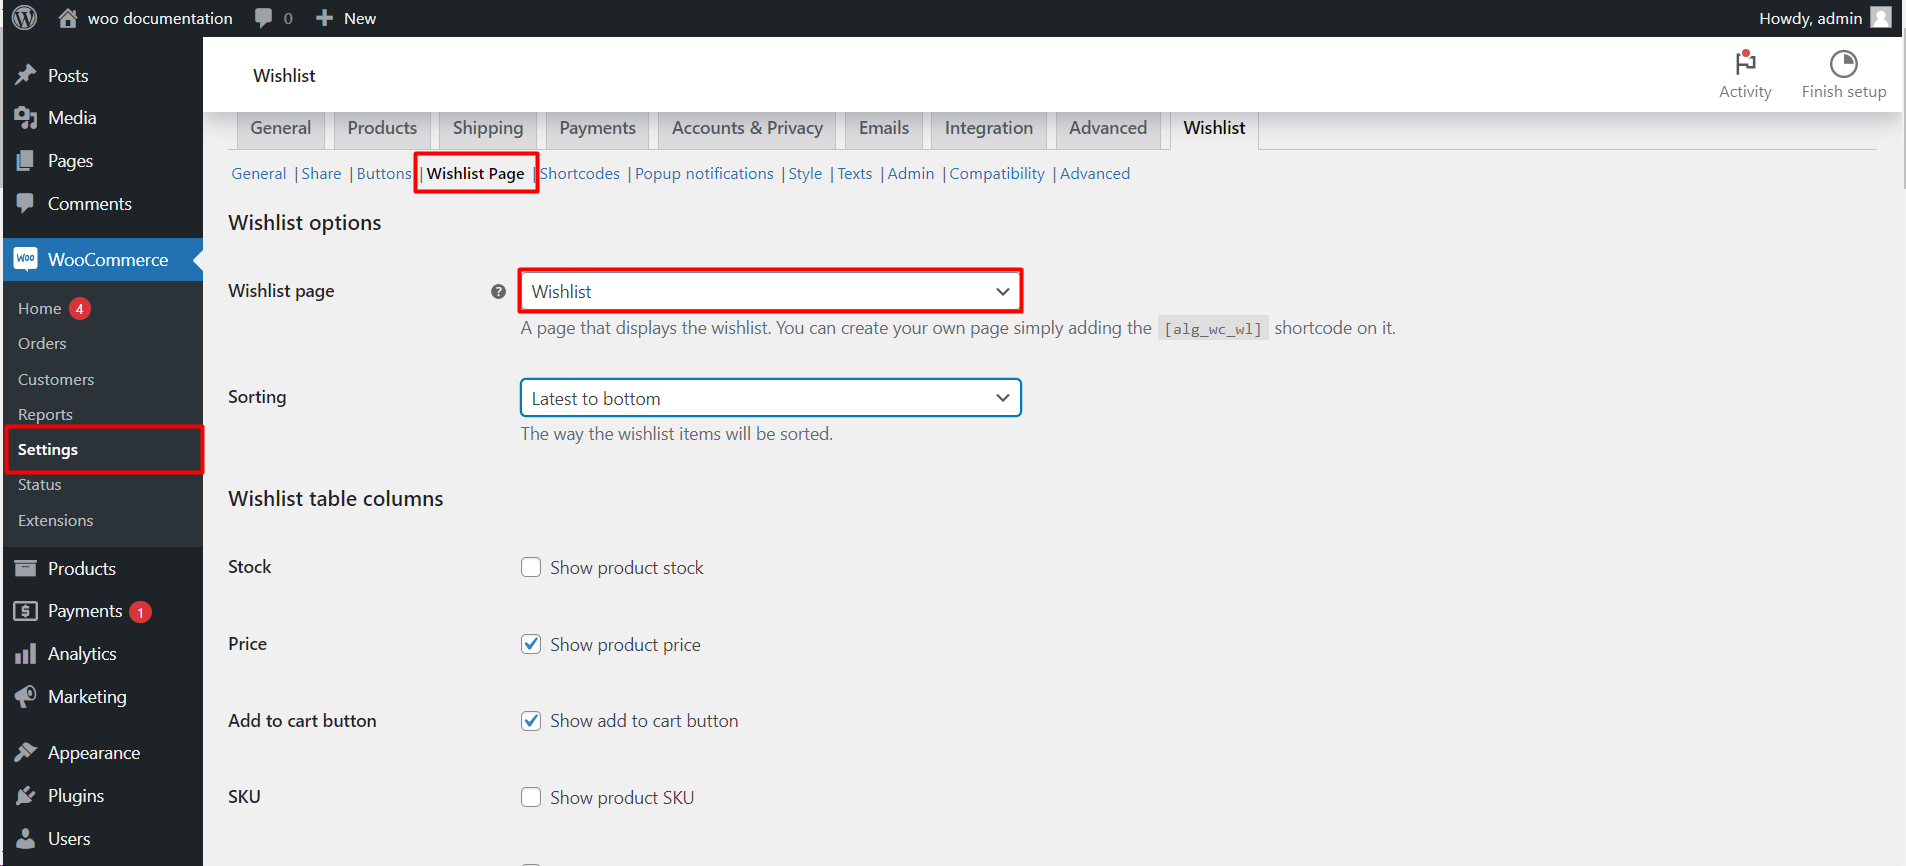
- Select an existing page or create a new one to serve as your Wishlist page. Then, insert the provided shortcode [alg_wc_wl] to integrate the Wishlist functionality into the page.
Step 2: Displaying Wishlist Content
- Customize what appears on your Wishlist page by choosing to show or hide product details such as stock levels, prices, SKUs, and descriptions. Also, decide whether to include an ‘Add to Cart’ button, product images, and more.
Step 3: Sorting and Organizing
- Determine the order in which wishlist items should appear, with options ranging from the latest added items to custom sorting based on customer preferences.
Step 4: Managing Wishlist Subtotals
- If needed, enable the display of subtotals for the items in the wishlist, providing a quick summary for customers of their potential purchase amount.
Step 5: Interaction Settings
- Configure how the Wishlist interacts with users when they add items to the cart or complete a purchase, including the option to remove items from the Wishlist upon purchase.
Step 6: Enhancing Functionality
- For stores with the Pro version, explore advanced features like drag-and-drop item sorting, compatibility with Gutenberg, and the ability for users to leave notes on their wishlist items.
Step 7: Save Your Settings
- Once you’re satisfied with the configurations, click ‘Save changes’ to apply them.