
Enhance the interaction and communication on your WooCommerce Wishlist page by incorporating note fields. With our plugin, you can easily set up note fields, customize their appearance, and manage their characteristics. Follow these steps to add a personalized touch to your wishlist page:
Step 1: Navigate to WooCommerce Wishlist Settings
- Log in to your WordPress dashboard.
- Find and click on “WooCommerce“ in the left-hand menu.
- Locate the “Wishlist“ tab and click on it.

Step 2: Access Wishlist Page Settings
- Under the Wishlist tab, find the “Wishlist Page“ or a similar option.
Step 3: Set Up Note Fields
- Within the Wishlist Page settings, look for the “Auto Note Field“ or a similar option.
- Enable this option to add a note field to your wishlist page.
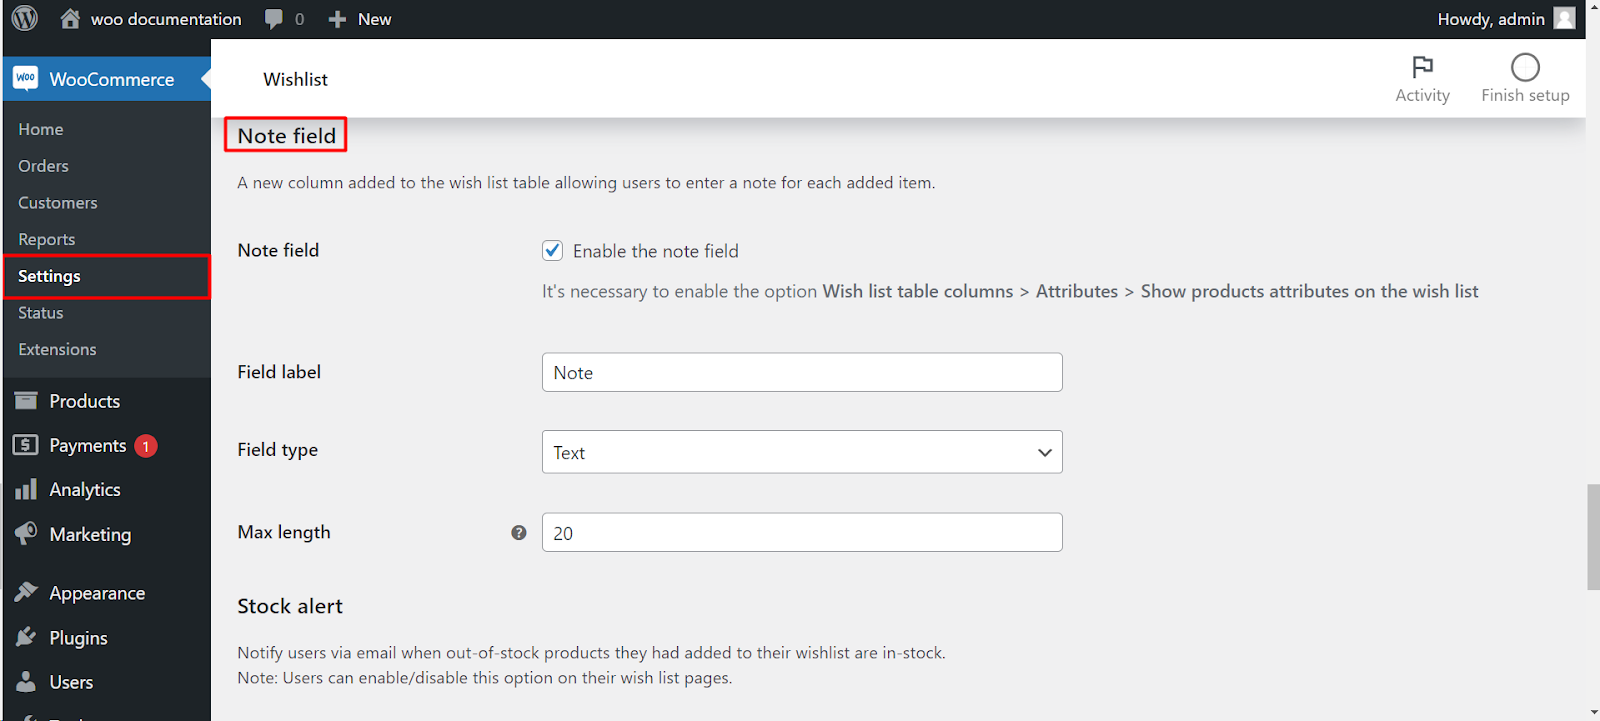
Step 4: Customize Note Field
- Once enabled, you’ll find options to customize the note field:
- Modify Label: Change the label of the note field to suit your preferences.
- Customize Type: Choose the type of field; the default is text, but you can customize it based on your requirements.
- Set Maximum Length: Define the maximum length of the text field. The default is 20 characters.
Step 5: Save Changes
- Don’t forget to save your changes to apply the new note field settings.
Now, your WooCommerce Wishlist page will feature a note field, allowing users to add personalized messages or comments to their wishlist items.