
Simplify your WooCommerce store management by incorporating Wishlist columns during product import and export. The WooCommerce Wishlist plugin offers seamless integration with the product exporter, allowing you to efficiently track wishlist-related data. Follow these steps to enhance your import and export processes:
Step 1: Navigate to WooCommerce Wishlist Settings
- Log in to your WordPress dashboard.
- Click on “WooCommerce” in the left-hand menu.
- Find and click on the “Wishlist” tab under WooCommerce settings.
Step 2: Access Admin Settings for Product Exporting
- Within the Wishlist settings, click on the “Admin” tab.
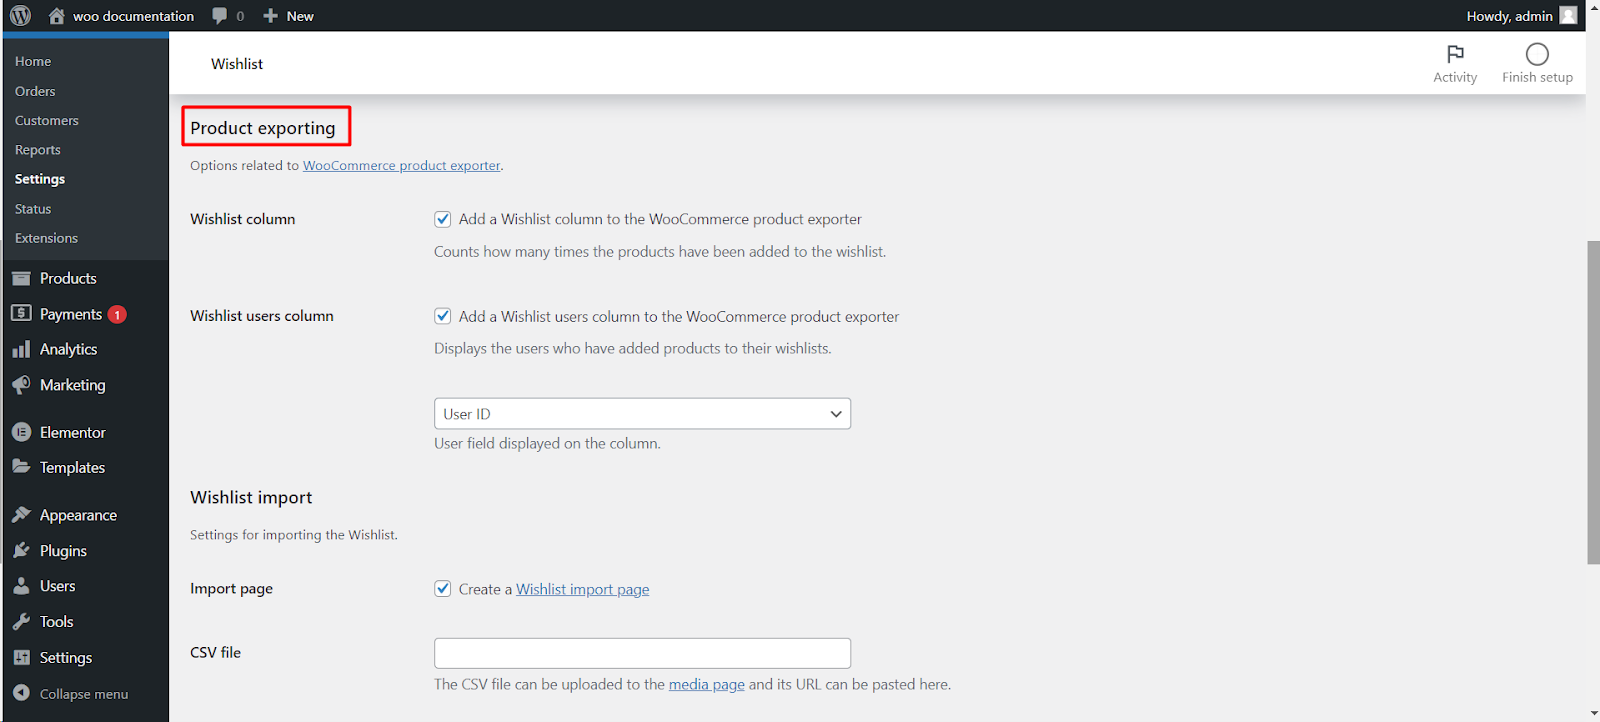
- Navigate to the “Product exporting” section.
Step 3: Add Wishlist Column to Product Exporter
- Enable the “Wishlist column” option to add a Wishlist column to the WooCommerce product exporter.
- This column will count how many times products have been added to wishlists.
Step 4: Add Wishlist Users Column to Product Exporter
- Enable the “Wishlist users column” option to include a Wishlist users column in the product exporter.
- This column will display users who have added products to their wishlists.
Step 5: Define User ID Column
- Customize the User ID column by specifying the user field to be displayed on the Wishlist users column.
Step 6: Save Changes
- Save your changes to apply the Wishlist columns to the product exporter.
Step 7: Set Up Wishlist Import Page
- Navigate to the “Wishlist import” section.
- Enable the “Import page” option to create a Wishlist import page.
Step 8: Upload CSV File for Wishlist Import
- Upload the CSV file to the media page.
- Paste the URL of the uploaded CSV file in the provided field.
Step 9: Define CSV Column Positions
- Specify the CSV column positions for User email (position 0) and Product SKU (position 1).
Step 10: Save Changes
- Save your changes to complete the Wishlist import settings.
Now, your WooCommerce store is equipped with enhanced capabilities for tracking wishlist-related data during product import and export.