
Streamline your WooCommerce Wishlist page by automatically removing items under specific conditions. Our plugin simplifies this process, offering options to control when items should be removed. Follow these steps to set up auto-removal for wishlist items
Step 1: Navigate to WooCommerce Wishlist Settings
- Log in to your WordPress dashboard.
- Find and click on “WooCommerce“ in the left-hand menu.
- Locate the “Wishlist“ tab and click on it.
Step 2: Access Wishlist Page Settings
- Under the Wishlist tab, find the “Wishlist Page“ or a similar option.
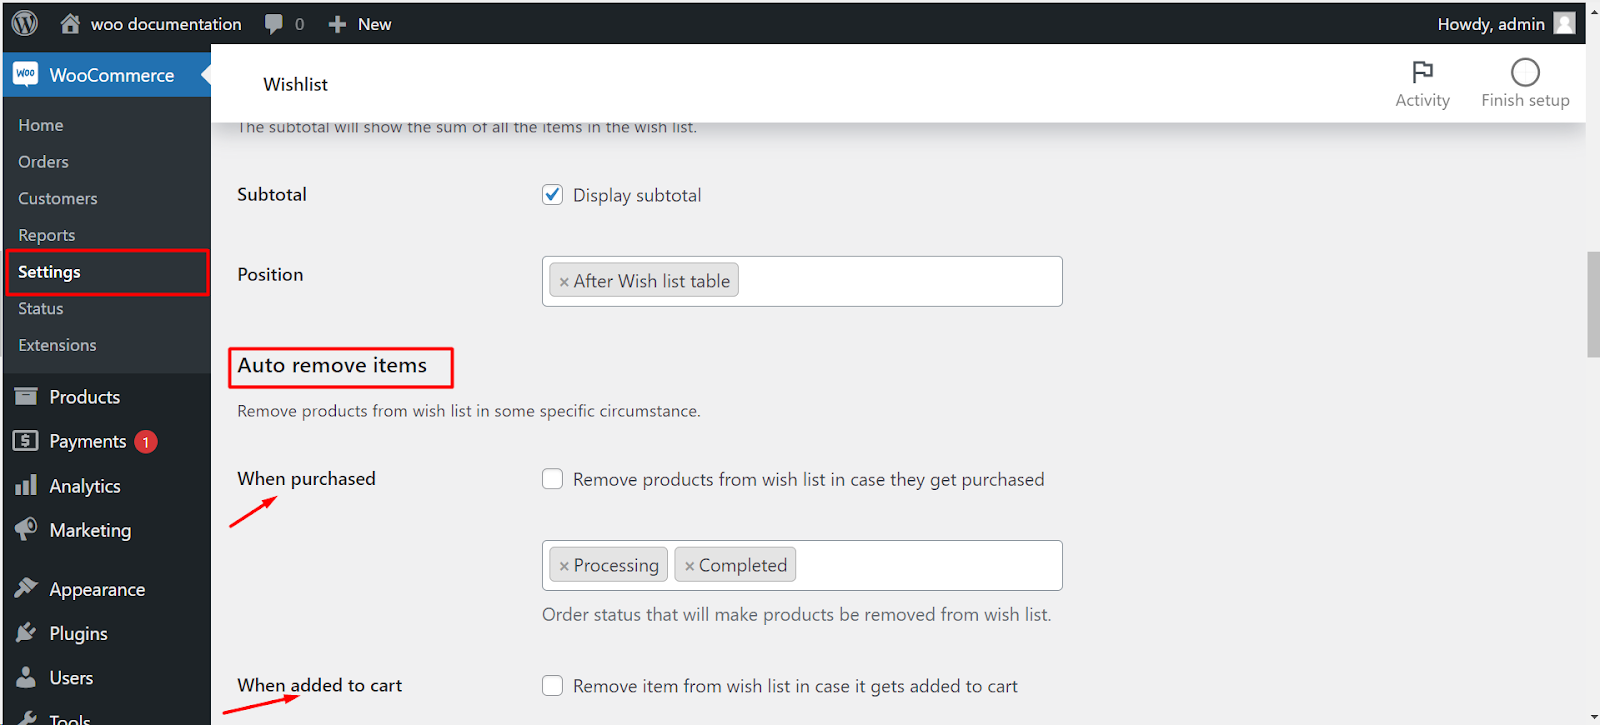
Step 3: Set Auto-Removal Conditions
- Within the Wishlist Page settings, look for the “Auto-Remove Wishlist Items“ or a similar option.
- You’ll find control options for auto-removal based on specific events.
- When Item is Purchased: Enable this option if you want items to be automatically removed when they are purchased.
- Order Status Changes: Choose this option if you prefer removal based on changes in order status.
- When Item is Added to Cart: Enable this if you want items to be removed when added to the cart.
Step 4: Save Changes
- Don’t forget to save your changes to activate the auto-removal settings.
Now, your WooCommerce Wishlist page will automatically manage and update, removing items based on the conditions you’ve set.