
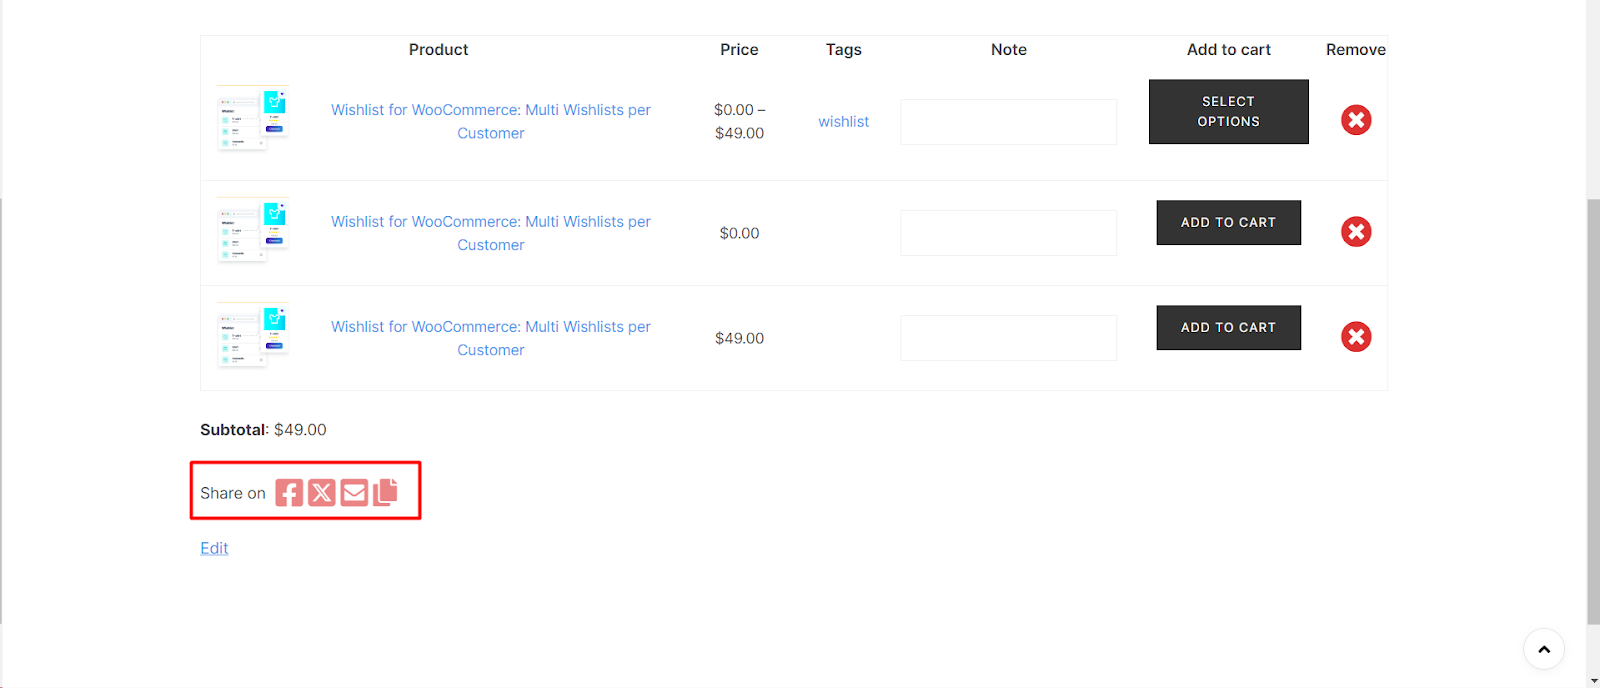
Give your WooCommerce Wishlist page a personalized touch by customizing the color of social icons. Our plugin’s intuitive settings make it easy to infuse your brand colors into the social sharing elements. Follow these steps to change the color of social icons on the Wishlist page:
Step 1: Navigate to WooCommerce Wishlist Settings
- Log in to your WordPress dashboard.
- Find and click on “WooCommerce“ in the left-hand menu.
- Locate the “Wishlist“ tab under WooCommerce settings.
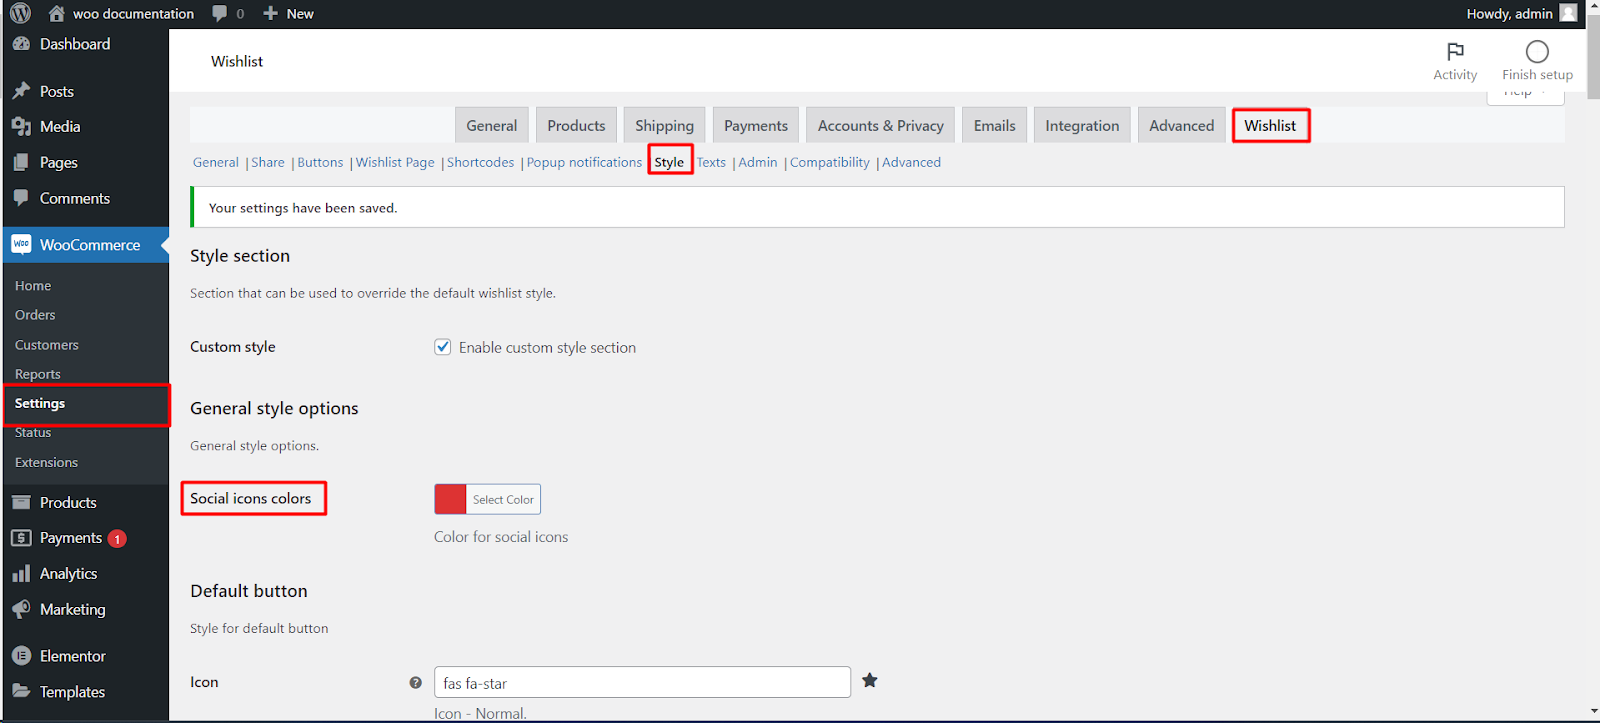
Step 2: Access Wishlist Style Settings
- Within the Wishlist settings, click on the “Style“ tab.
Step 3: Enable Custom Style Section
- Look for the “Custom style” section. Enable this to access advanced customization options.
Step 4: Customize Social Icons Colors
- Scroll down to the “Social icons colors” section.
- Click on “Select Color“ to choose the desired color for social icons on the Wishlist page.
Step 5: Save Changes
- Save your changes to apply the customized color to the social icons.
Now, your WooCommerce Wishlist page will showcase social icons in the selected color, creating a cohesive and branded appearance.