
Elevate the user experience on your WooCommerce store by customizing the Wishlist popup icons. Our plugin provides an easy way to modify the color and appearance of the icons displayed when items are added or removed from the wishlist. Follow these steps to tailor the Wishlist popup icons to match your store’s aesthetics:
Step 1: Navigate to WooCommerce Wishlist Settings
- Log in to your WordPress dashboard.
- Click on “WooCommerce“ in the left-hand menu.
- Find and click on the “Wishlist“ tab under WooCommerce settings.
Step 2: Access Wishlist Style Settings
- Within the Wishlist settings, click on the “Style” tab.
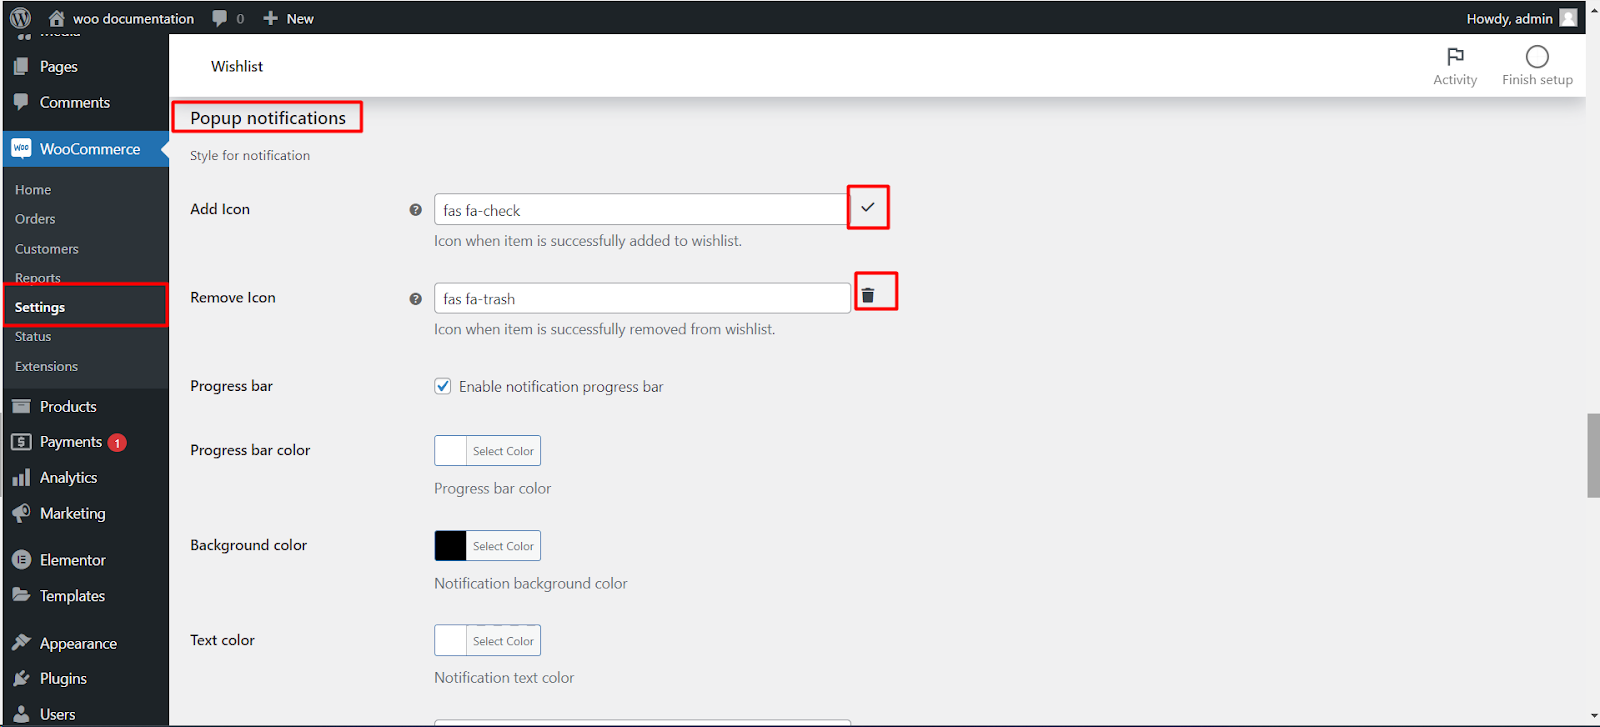
Step 3: Customize Popup Notification Icons
- Locate the “Popup notifications“ section under “Style for notification.”
- Customize the icon displayed when an item is successfully added to the wishlist using the “Add Icon“ option. For example, you can use `fas fa-check-circle`.
- Similarly, customize the icon for successful removal using the “Remove Icon” option. Consider using `fas fa-trash`.

Step 4: Enable Notification Progress Bar (Optional)
- If desired, enable the notification progress bar using the “Progress bar” option.
- Set the progress bar color using the “Progress bar color” and “Background color” options.
Step 5: Set Notification Styling
- Define the background color for the notification window using the “Background color” option.
- Choose the text color for the notification using the “Text color” option.
Step 6: Adjust Timeout Duration
- Set the timeout duration in milliseconds for automatically closing the notification window using the “Timeout” option. The default is 7000 milliseconds (7 seconds).
Step 7: Choose Notification Position
- Set the position where the notification window will appear using the “Notification position” option. Options include “Center.”
Step 8: Save Changes
- Save your changes to apply the customized popup notification icon settings.
Now, your WooCommerce store will showcase popup notifications with icons that align with your brand style.