
Introduction:
Managing the visibility of the wishlist icon on single product pages can be crucial for creating a seamless shopping experience in your WooCommerce store. Whether you want to declutter your product pages or highlight the wishlist feature, here’s how to control the display of the wishlist icon.
StepbyStep Guide
Step 1: Access WooCommerce Settings:
- Log in to your WordPress dashboard.
- Click on ‘WooCommerce’ in the sidebar, then navigate to ‘Settings’.
Step 2: Go to the Wishlist Tab:
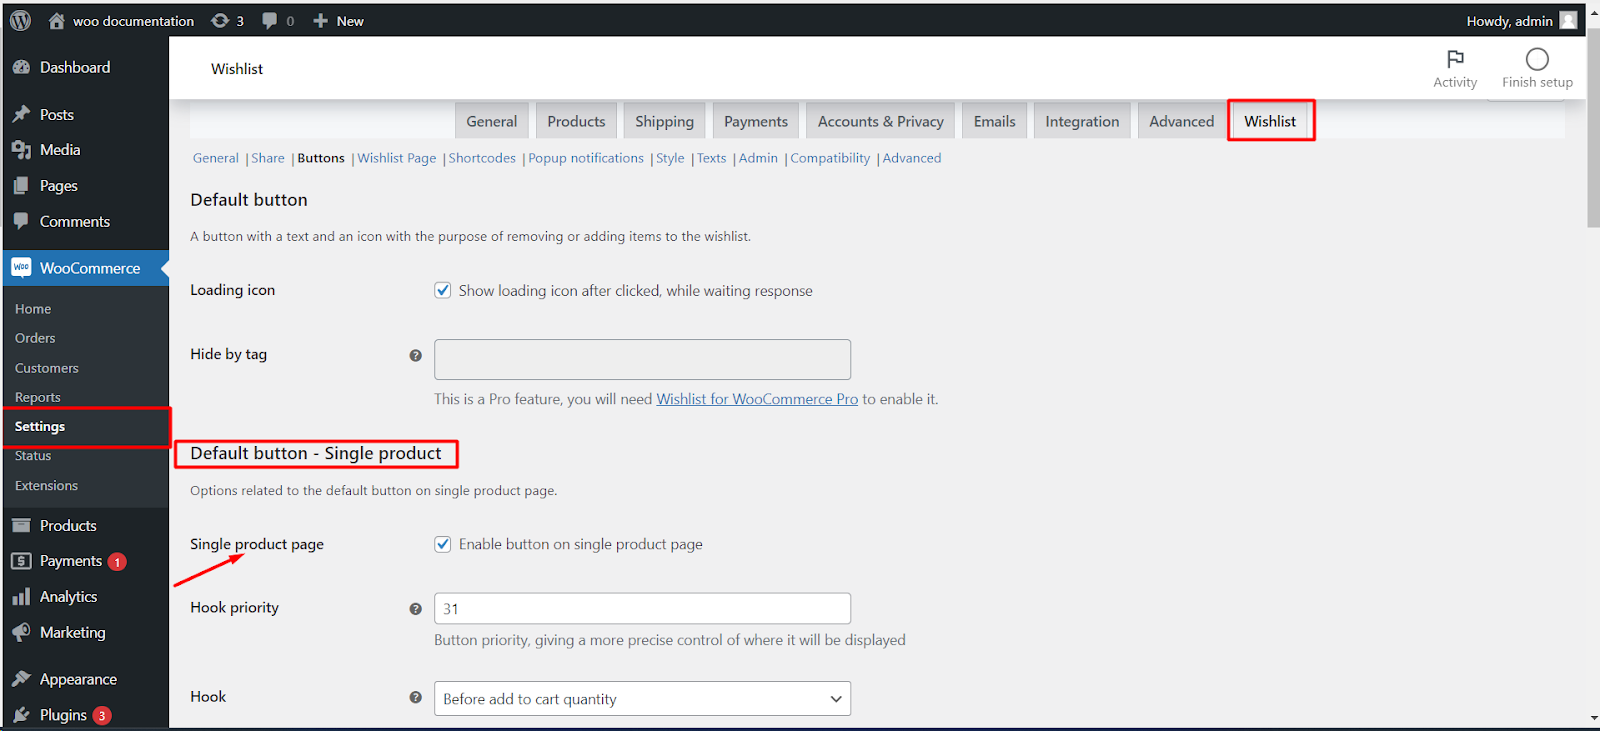
- In the WooCommerce settings, find and click on the ‘Wishlist‘ tab located at the top.
Step 3: Adjust Wishlist Icon Settings for Single Products:
- Scroll to the section labeled ‘Default button Single product’.
Step 4: Hide/Show the Wishlist Icon:
- To remove the wishlist icon from single product pages, uncheck the box labeled ‘Enable button on single product page’.
- To display the wishlist icon, ensure that this box is checked.
Step 5: Save Your Changes:
- After making your selection, click the ‘Save changes’ button to apply the new settings.
- Additional Configuration:
- Hook Priority: Adjust the ‘Hook priority’ number to change the order of where the wishlist icon appears relative to other elements on the product page.
- Hook Placement: Choose from the dropdown under ‘Hook’ to decide whether the wishlist icon appears before or after the ‘Add to cart’ button.