
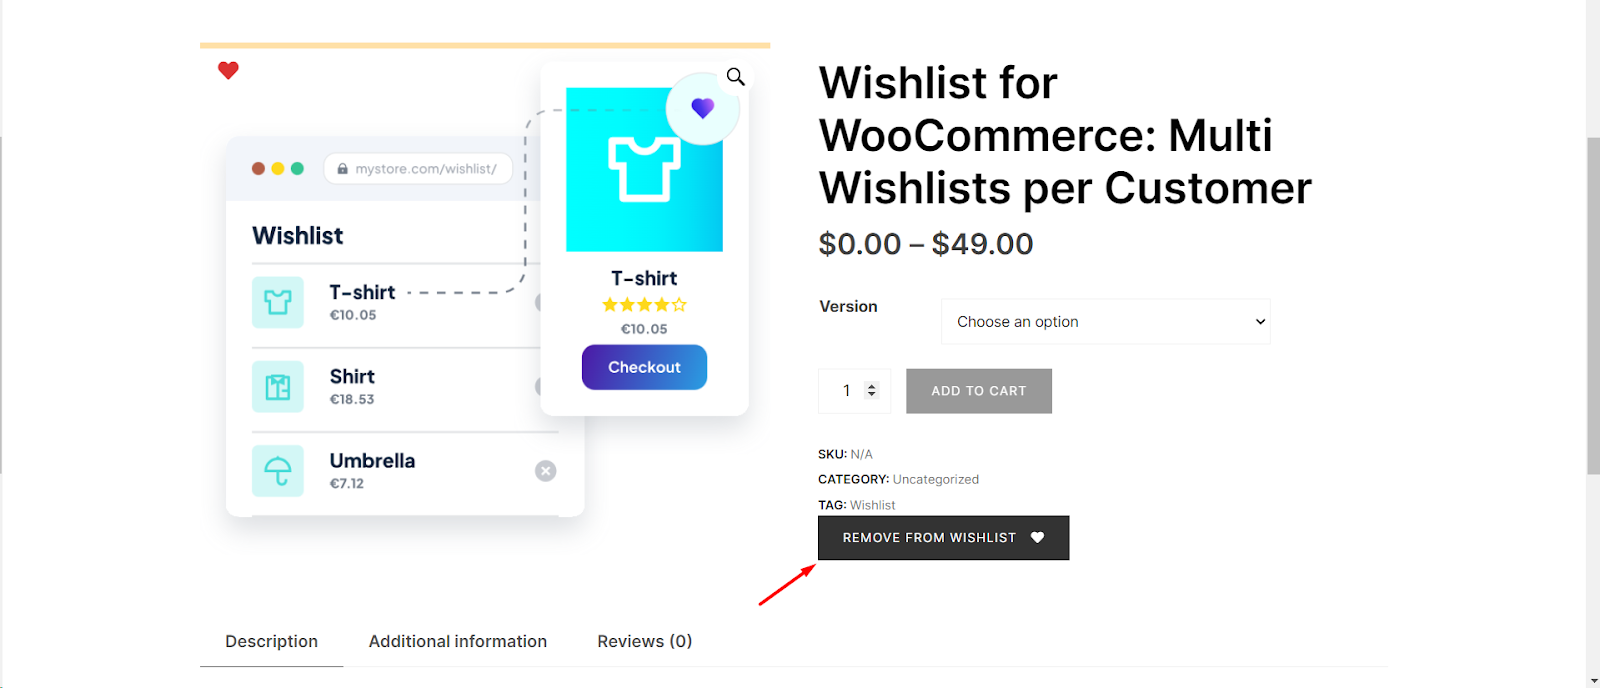
In our WooCommerce Wishlist Pro plugin, we offer a powerful feature that allows you to effortlessly set the position of the wishlist button on product pages using custom hooks. This feature is especially handy for those who want to integrate the wishlist button seamlessly into their store layout. Here’s a step-by-step guide on how to do it:
Step 1: Navigate to WooCommerce Wishlist Settings
- Log in to your WordPress dashboard.
- Locate and click on “WooCommerce” in the left-hand menu.
- Find the “Wishlist” tab and click on it.
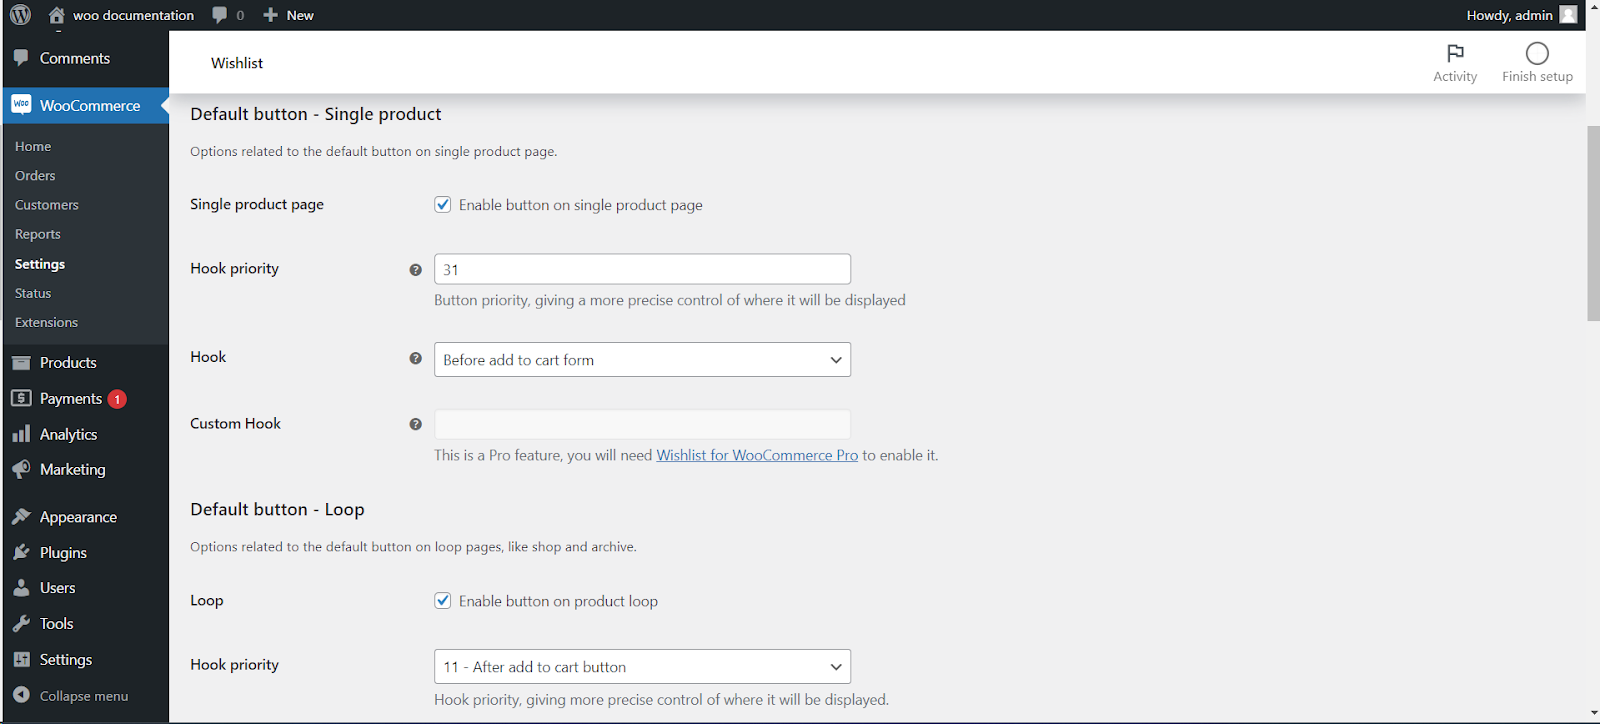
Step 2: Access the Button Settings
- Within the Wishlist settings, locate and click on the “Button” tab.
- Under the “Button” tab, you’ll find various options related to the wishlist button.
- Look for the “Custom Hook” option.
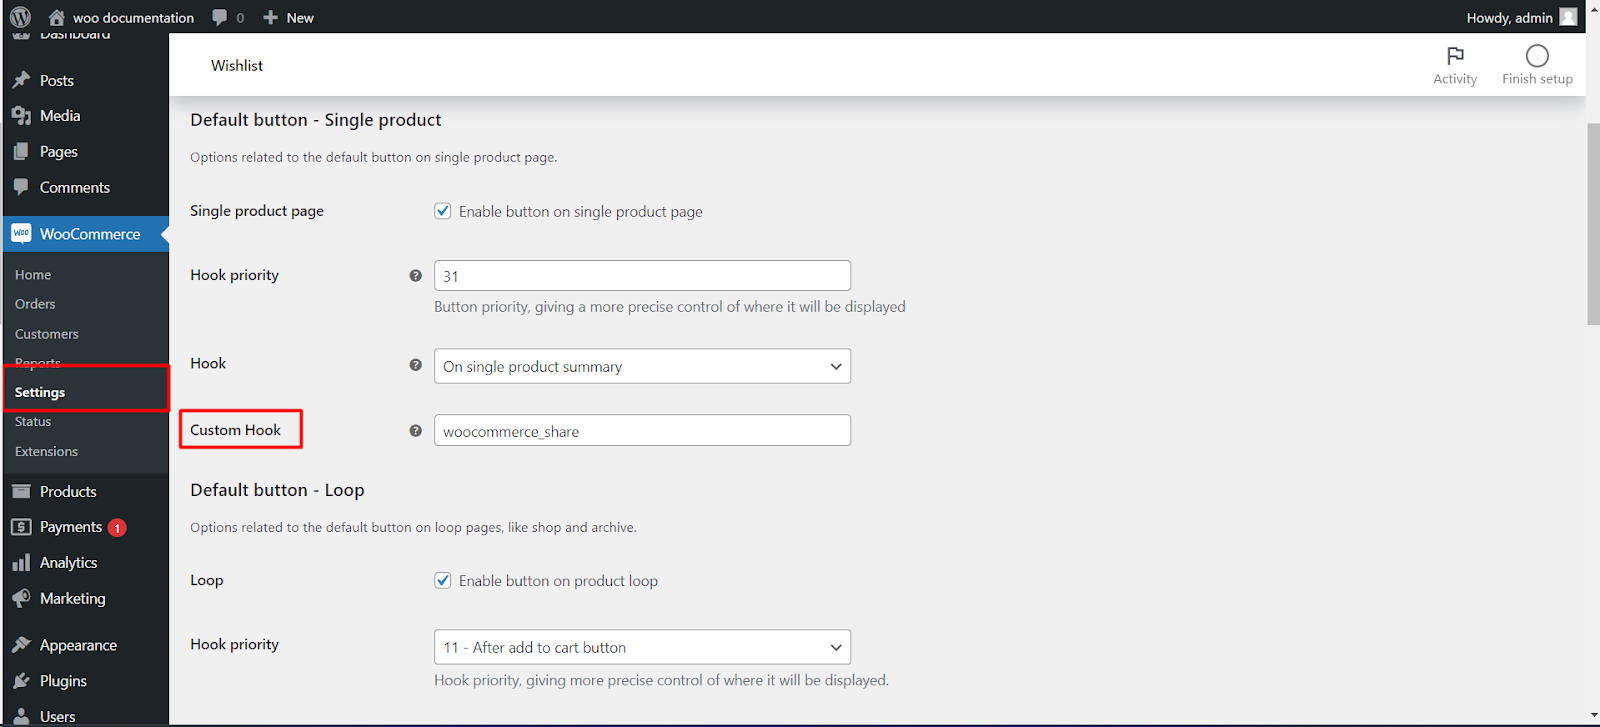
Step 3: Add Custom Hook
- Add the desired custom hook, for example, “woocommerce_share.”
- Visit URL for more Hooks
https://www.businessbloomer.com/woocommerce-visual-hook-guide-single-product-page/
Step 4: Save Changes
- Don’t forget to save your changes.
Now, the wishlist button will be repositioned on the product page, utilizing the custom hook you specified. This feature provides you with the flexibility to integrate the wishlist button seamlessly into your WooCommerce store layout.