
Our WooCommerce Wishlist Pro plugin comes packed with an amazing feature that lets you effortlessly organize your wishlist items through intuitive drag-and-drop functionality. This powerful “Drag and Drop Ordering” feature, found under the “Button” tab, allows you to use jQuery UI punch for seamless product sorting directly on your wishlist page. Let’s dive into the steps to make the most of this pro plugin feature:
Step 1: Navigate to WooCommerce Wishlist Settings
- Log in to your WordPress dashboard.
- Locate and click on “WooCommerce” in the left-hand menu.
- Find the “Wishlist” tab and click on it.
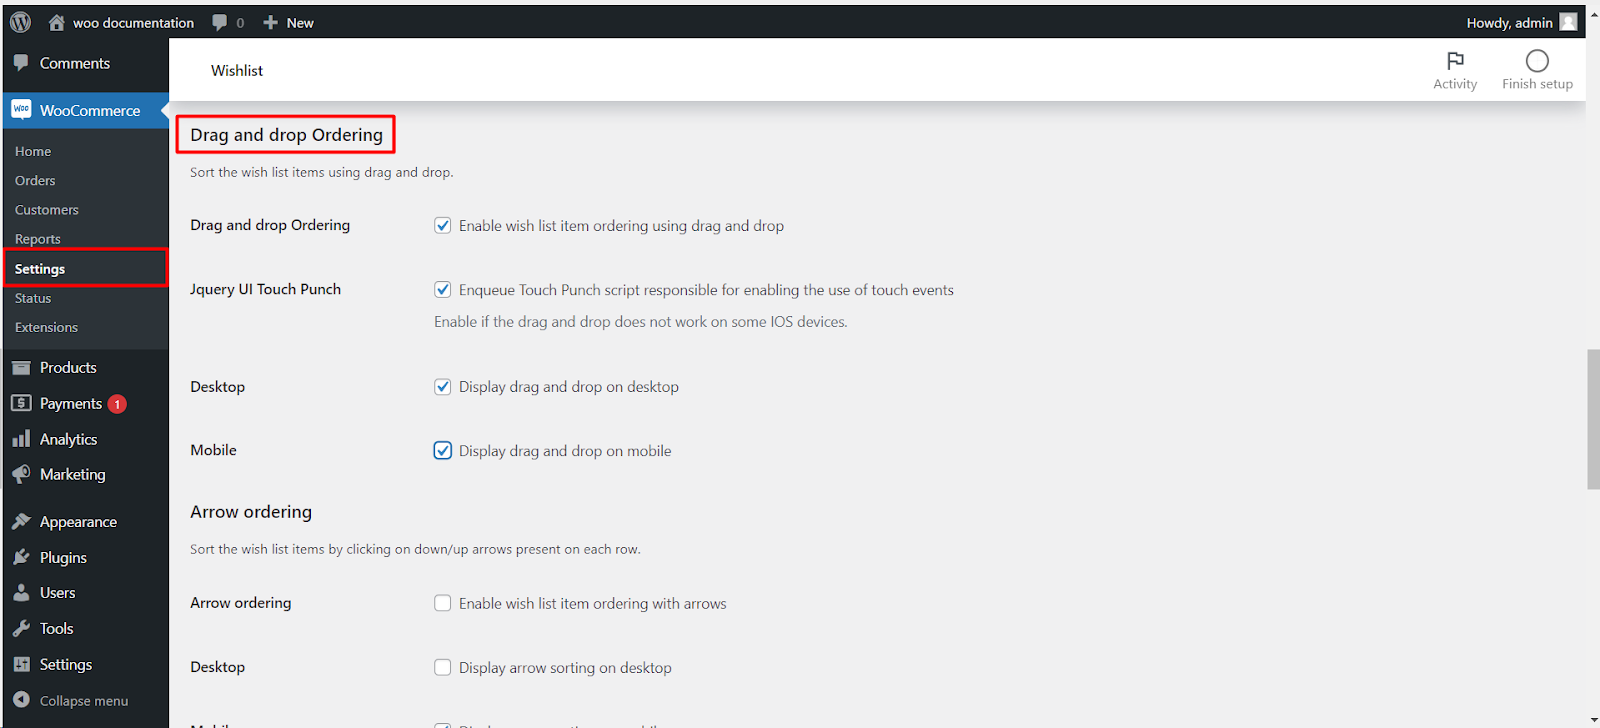
Step 2: Access the Button Settings
- Within the Wishlist settings, locate and click on the “Button” tab.
Step 3: Enable “Drag and Drop Ordering”
- Under the “Button” tab, you’ll discover various wishlist button customization options.
- Find and enable the “Drag and Drop Ordering” feature.
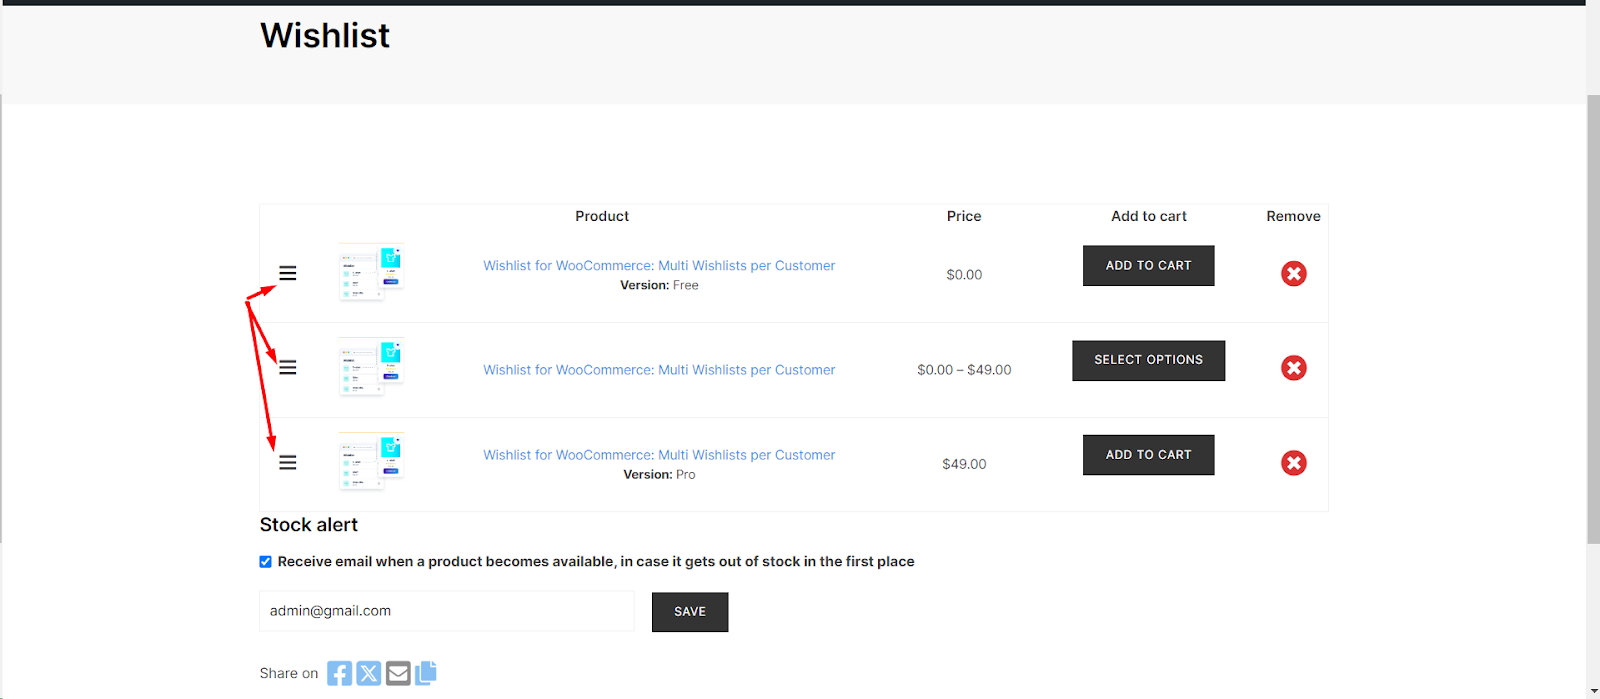
Step 4: Visit Your Wishlist Page
- Navigate to your wishlist page on your WooCommerce store.
Step 5: Arrange Products with Ease
- Take advantage of the intuitive drag-and-drop functionality to effortlessly reorder your wishlist items.
- Simply click, hold, and move items to your desired positions.
Now, you have successfully organized your wishlist with a personalized order that suits your preferences. This feature not only enhances the visual appeal of your wishlist page but also makes it easy for your customers to prioritize their most coveted items.