How to Add a Back Button Anywhere on Your WordPress Site
Have you ever visited a website and left it within minutes, simply because it was very difficult to navigate or go back to previous pages?
Absolutely, many of us have faced this issue.
One of the most important keys to keeping your customers on your store for as long as possible is “ease of use”, in other words, offering a smooth and simple user experience. When users can’t easily return to the previous pages or find them away around, this lets them to leave your store within a few minutes.
That’s why a simple back button placed exactly where users need it can make all the difference. By using this button, you make browsing easier, reduce frustration and bounce rate, and encourage people to stay longer on your WordPress site.
So, in this article, I’ll show you how to add a “Back Button Anywhere Widget for WordPress” plugin to your WordPress site.
Step1:
➡ Download the Plugin
To get started, you will need to download the “Back Button Anywhere Widget for WordPress” plugin, which allows you to add a back button easily through simple steps.
After downloading the plugin from your WPFactory account, upload it to your WordPress site.
Step2:
➡ Access the Plugin
Once the plugin is installed and activated, you can tailor it to fit your business needs.
Go to WordPress dashboard > Settings > “Back button”.
Step3:
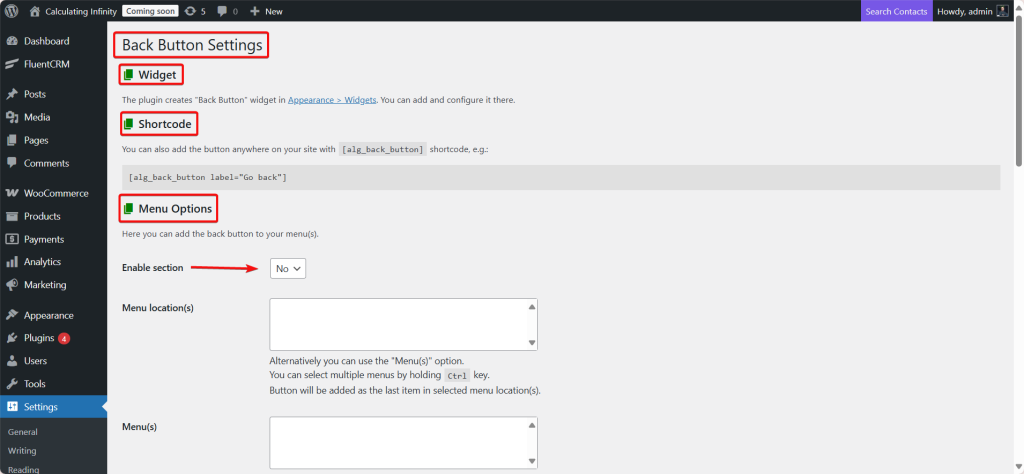
➡ Back Button Settings
- Widget
Go to Appearance > Widgets, from there, you can add it to any place that supports the widget (like the Sidebar or the Footer).
- Shortcode
If you want to add the button inside a blog post or page, you can use the shortcode:
[alg_back_button label="Go back"]
- Menu Options
This option allows you to add a back button as a part of the main or submains menus that appear on the site (like the main menu or footer menu).
- Menu Locations
Here you choose the location of the menu (like Main Menu, Footer Menu…).
Menu(s): You specify which list exactly you want the back button to appear in. The button will be added as the last item in the list.
- Button
Here you can determine how the back button looks or its text. If you leave it empty, it will use the default value:
[alg_back_button label=”Back” type=”simple”]
This means, by default, a simple button appears with the label “Back”.
- Item template
This option controls how the button is inserted into the menu. If you leave it empty, it will use the default value:
<li>%button%<li>
This means that the button is placed inside a list item <li>.
- Replace URL
If you activate this option, it gives you an alternative way to add the back button.
How? You go to Appearance > Menus and add a Custom Link to the menu.
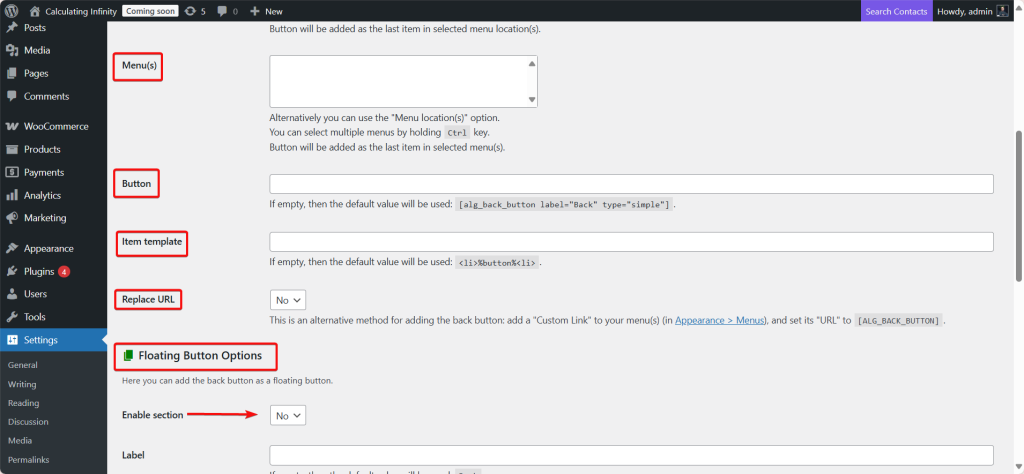
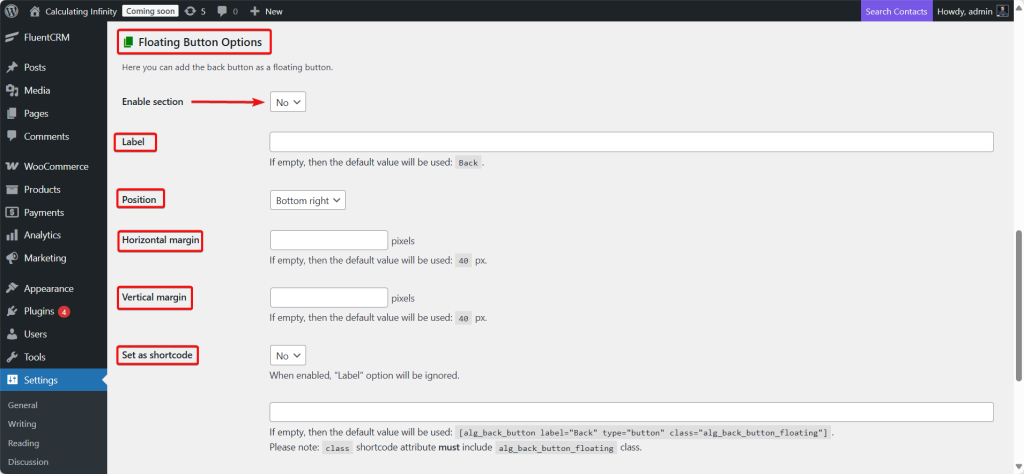
- Floating Button Options
When we say floating button, it means: A button that remains visible over the content of the page, even if the user scrolls down, and it is fixed in place.
For example: at the button right of the screen and doesn’t move with the texts or images.
Enable section: If you choose “Yes” the back button will be activated as a floating button on the page.
- Label
Here you can customize the text that will appear on the button, like (back, return, previous).
If you leave it empty, the default value will be “Back“.
- Position
The location of the button’s appearance on the screen.
The options are often:
-
Bottom right
-
Bottom left
-
Top right
-
Top left
- Horizontal margin
The horizontal distance between the button and the edge of the screen (right/left).
You enter the number in pixels (px). If you leave it empty → the default value is 40px.
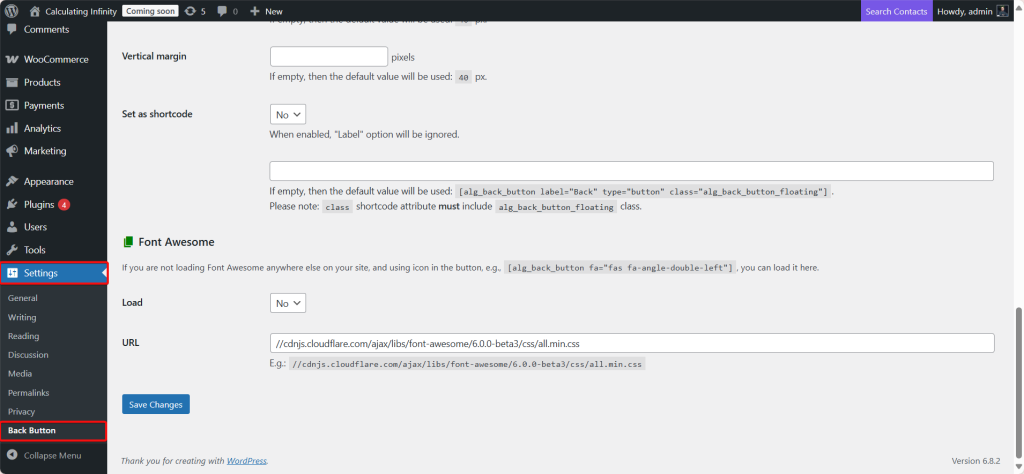
- Vertical margin
The vertical distance between the button and the bottom or top of the screen.
You enter the number in pixels. If you leave it empty → the default value is 40px.
- Set as shortcode
If you choose “Yes” the button will be created as a shortcode instead of being displayed directly.
So, if you enable this option, you can copy the code and paste it anywhere on the page/post.
Note: If you choose this option, the label above will not be affected (it will ignore the text).
- Font Awesome
If you want the back button to have an icon (like an arrow or any shape), your site must load the Font Awesome library.
If your site is already loading it (for example, your theme or another plugin you are using) → you don’t need to activate it here.
If you choose Yes → the plugin will download the Font Awesome file from the link you put below.

Final Thoughts
Sometimes, the small details make the biggest difference. Fr example, the absence of the “Back Button Anywhere Widget for WordPress” can cause to lose many customers who struggle to return to previous pages.
By adding the back button, you make navigation easier, reduce bounce rate, and offer a smoother user experience. Whether you prefer to add it as a floating button, widget, a menu option, or even a shortcode. And you have full flexibility to add it where your customers exactly need it.
So, don’t overlook the small details, sometimes they make a big difference.
Prefer watching? This short video summarizes the article in just a few minutes.