How to Set Up Dynamic Pricing and Bulk Discounts in WooCommerce
Remember the last time you were shopping online, you added a few items to your cart, and then a small popup notification appeared and saying: “Just add two more and save 10%”!
This small message might make you think twice and often lead you to buy more products to get the discount and save more, right?
Yes, that’s the power of dynamic pricing, it encourages shoppers to buy more to save more, as the greater the quantity the bigger the discount.
So, whether it’s a seasonal promotion like Black Friday, you want to clear out some old inventory, or you sell to wholesalers, smart pricing rules can turn a simple visit into a profitable sale.
For that, in this article, I will walk you through how to install and configure the dynamic pricing & bulk quantity discounts plugin for WooCommerce, so you can apply smart and flexible pricing rules that encourage larger orders and boost your store sales.
Let’s get started!
Step1:
➡ Download the Plugin
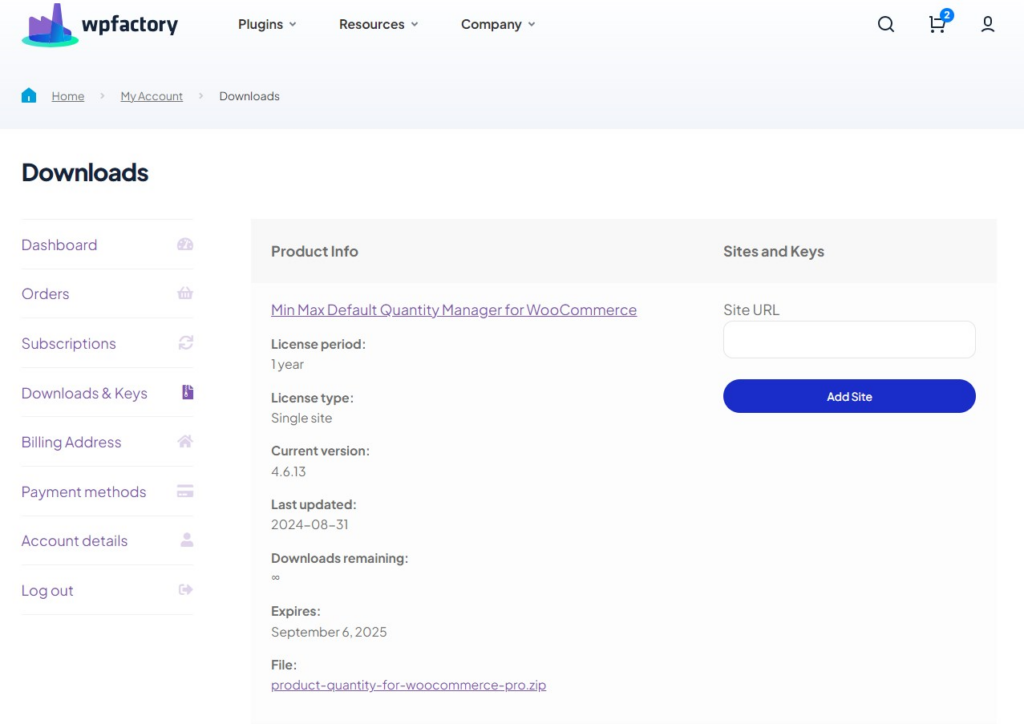
To get started, you will need to download the “Dynamic pricing & bulk quantity discounts plugin for WooCommerce” plugin, which allows you to create smart and flexible discount rules through simple steps.
After downloading the plugin from your WPFactory account, upload it to your WordPress site.
Step2:
➡ Access the Plugin
Once the plugin is installed and activated, you can tailor it to fit your business needs.
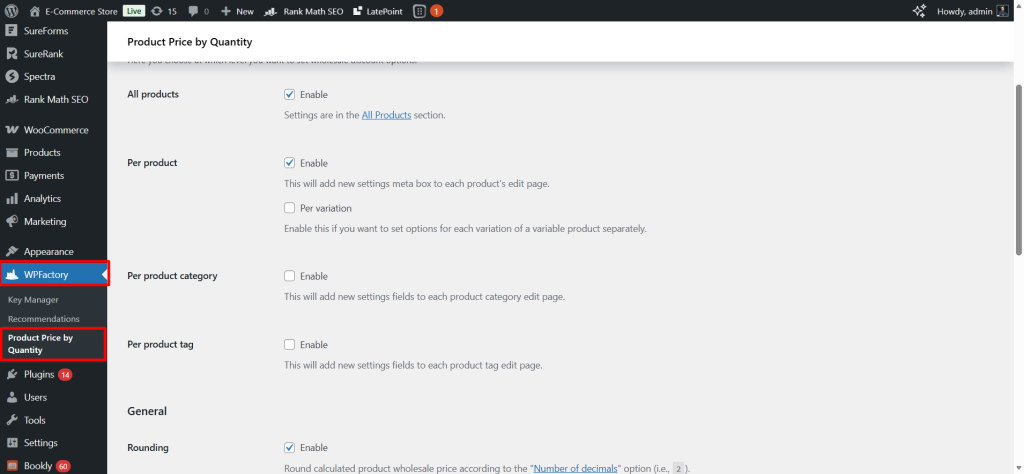
Go to WordPress dashboard > WPFactory > “Product Price by quantity”.
Step3:
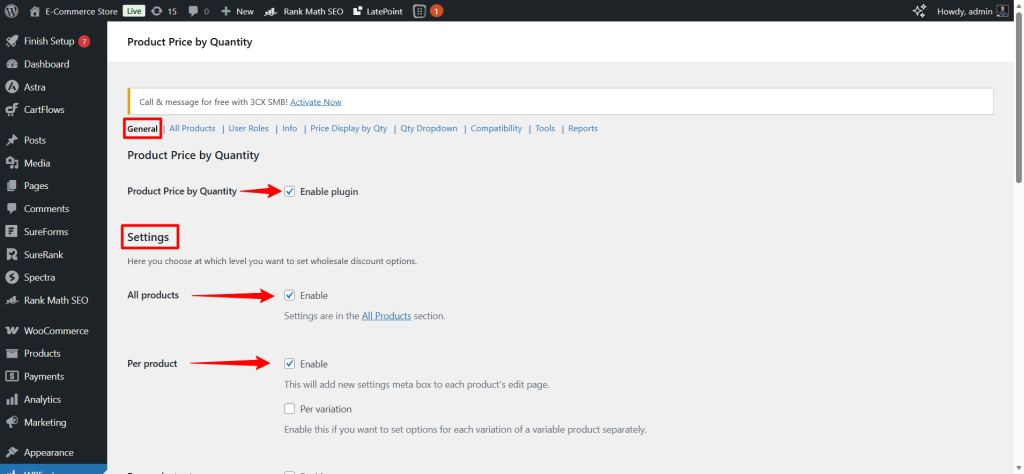
➡ General
- Enable plugin
First thing, you should activate the plugin to be able to configure bulk discount settings and price-based quantity.
- Settings
Here, you choose at which level you want to set wholesale discount options.
All Products: From here, you can enable discounts for all products in the store at once.
Per Products: Here, you can enable discounts for each product individually. This will add a new settings meta box to each product’s edit page, so you can set discounts directly for each product.
Per variation: If you have variable products, you can set different discounts for each variation separately.
Example: Small size at a certain price, large size at a discounted price.
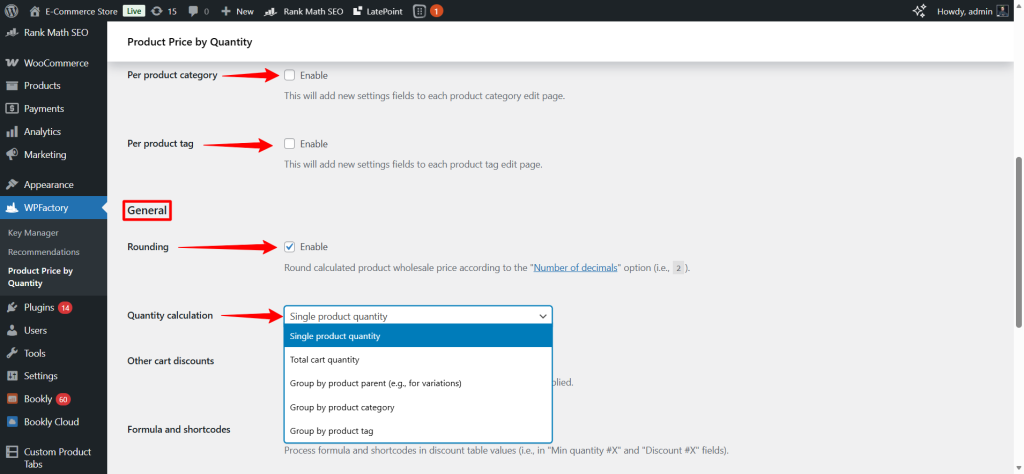
Per product category: Here, you can add discounts for each specific product category. A new settings field will appear on the edit page of each category.
Per product tag: The same idea applies to categories, but according to the product tags. It gives you more flexibility to apply discounts to specific products within a certain category.
- General
Rounding: When this option is enabled, you can round the final price after the discount according to the number of decimal places you choose.
For example, if the price is 12.567 and the specified number is 2, it will be rounded to 12.56.
Quantity calculation: Setting up the quantity account determines how product quantities in the customer’s cart are calculated for applying discounts. The method of calculating quantities directly affects the activated discounts and the amount the customer saves.
You can choose to calculate the quantity for each product individually, for the entire cart, or group products by main product, category, or tag.
- Single product quantity: The discount is calculated for each product individually.
Example: You have products A and B, and a discount on product A if you buy 5 pieces. If you add 3 pieces of A and 2 of B, the discount will not apply to B, only to A if the required quantity is reached.
2. Total cart quantity: The discount is calculated on the total number of products in the carts regardless of the type.
Example: You have a discount when purchasing a total of 10 items. If you add 4 items of A and 6 items of B, the discount will be applied because the total quantity = 10.
3. Group by Product Parent: Dedicated to variable products. All the quantities for each parent product were combined to apply the discount.
Example: You have a shirt in different colors (red, blue, black). If the customer buys 3 red + 2 blue, a total of 5 pieces will be counted together to apply a discount according to the total quantity of the parent product.
4. Group by Product Category: Quantities are collected for each product category to apply the discount.
Example: All products in the “Shoes” category. If the customer buys any combination of different shoes, the total number of items in the category will be calculated to apply the discount.
5. Group by Product Tag: It is similar to the previous option, but it aggregates quantities based on product specific tags.
Example: If you assign a tag named ‘Summer Sale’, any products with this tag will have their quantities combined to apply a discount based on the total quantity of the tag.
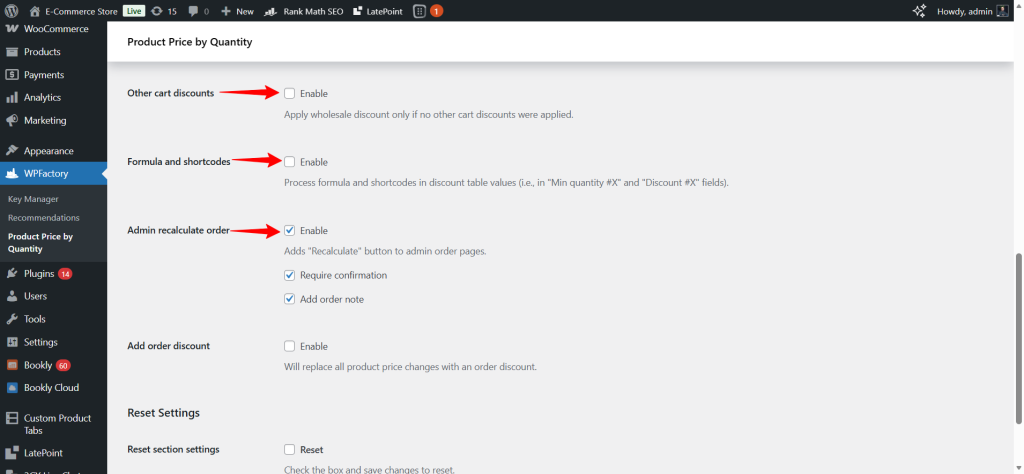
Other cart discounts: If this option is activated, the bulk discount will only be applied if there are no other discounts in the cart. This prevents the overlap of different discounts and ensures that the price is not reduced more than necessary.
Formula and shortcodes: It allows you to use formulas or shortcodes within the discount table in fields.
Admin recalculate order: The recalculate button is added to the orders management page in the control panel. It allows you to recalculate the order discounts after changes in prices or quantities.
Step4:
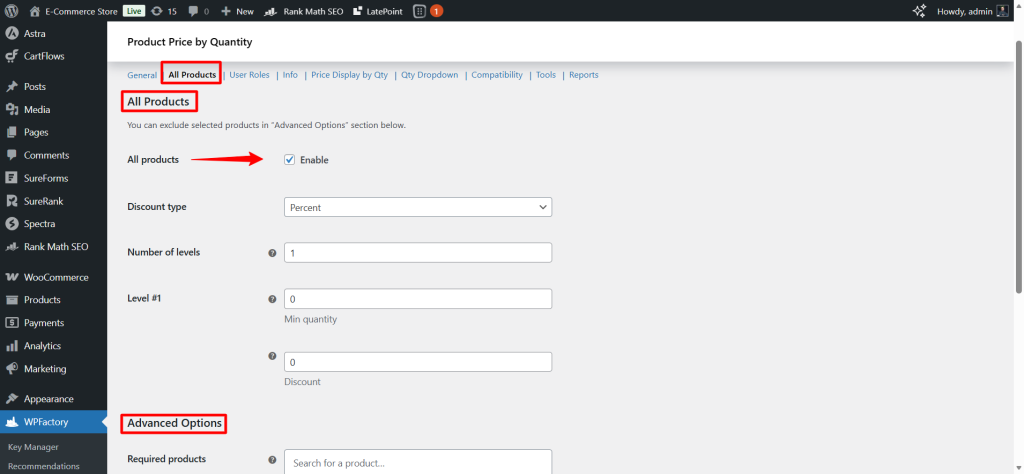
➡All Products
This section allows you to apply the discount to all products in the store at once, with the ability to customize exceptions.
All products enable: Enabling this option means that the discounts you set here will apply to all products in the stores.
Discount Type: Here, you can specify the type of discounts you want to apply.
There are two options: “percent” which means the discount is calculated as a percentage of the product price or as a “fixed amount”.
Number of levels: Number of discount levels or tiers.
Example: If you set 3 levels, you can apply a different discount for each level based on the quantity of the product.
Each level includes minimum quantity and Discount.
Min Quantity: The minimum quantity required to activate the discount at this level.
Discount: The amount of discount that will be applied upon reaching the minimum.
Example: Min Quantity = 5, Discount = 10% → When purchasing 5 pieces or more, a 10% discount will be applied.
- Advanced Options
Here, the required products and the excluded products are specified.
Step5:
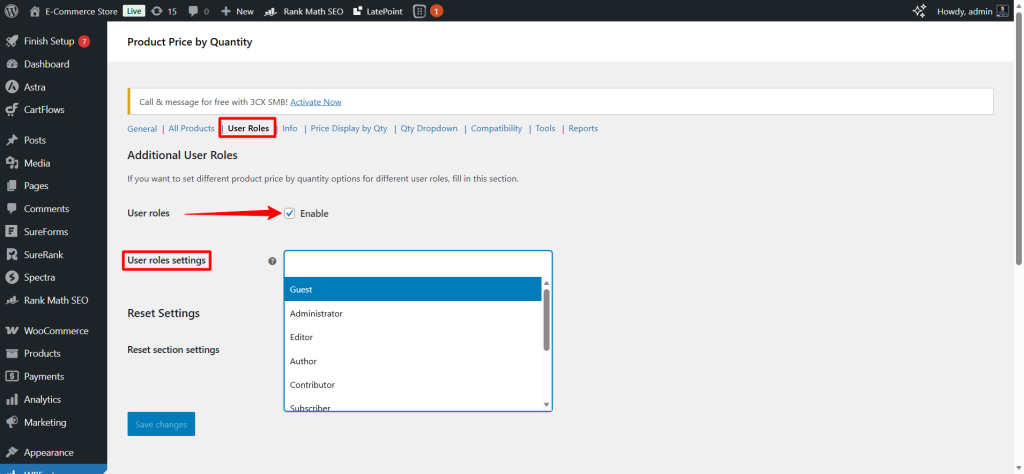
➡User Rules
- Additional User Roles
This section allows you to set different discounts or prices according to the user type (User role) on your site. In other words, you can give each category of users their own pricing ow discount based on their roles in the store.
- User roles settings
Here is a list of all the roles registered on your site:
- Guest
- Customer
- Shop Manager
- Administrator / Editor / Author / Contributor / Subscriber
- LatePoint Agent / LatePoint Customer
Step6:
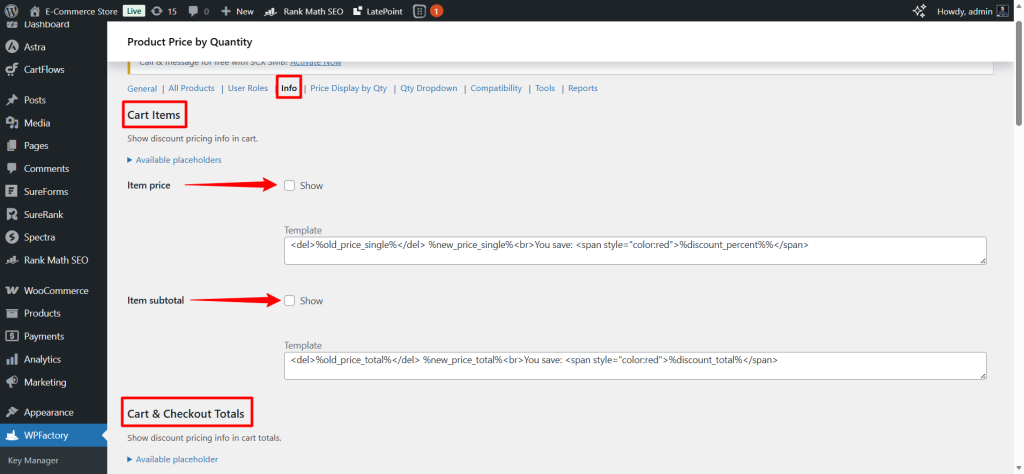
➡Info
- Cart Items
This section allows you to view discount information inside the cart while shopping.
Item price show: Enable or hide the display of the discounted price for each product in the cart.
Template: You can modify the appearance of the displayed text, such as showing the old price crossed out and the new price below it.
Item subtotal: used to display the subtotal after discount.
- Cart & Checkout Totals
It allows discounts to be displayed in the total cart amount or on the checkout page.
Template: You can customize the style of the line that shows the discount in the total.
Positions: Here you can determine the location of the discount appearance (before or after the total in the cart or checkout page)
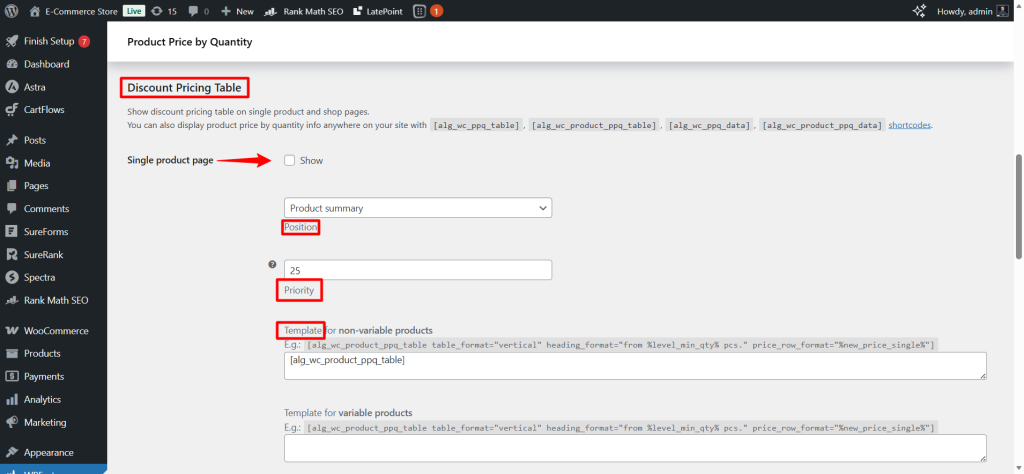
- Discount Pricing Table
Here, the discount table is displayed on the product pages or the store pages.
Position & Priority: Here, you specify the location of the table within the product page and arrange its appearance.
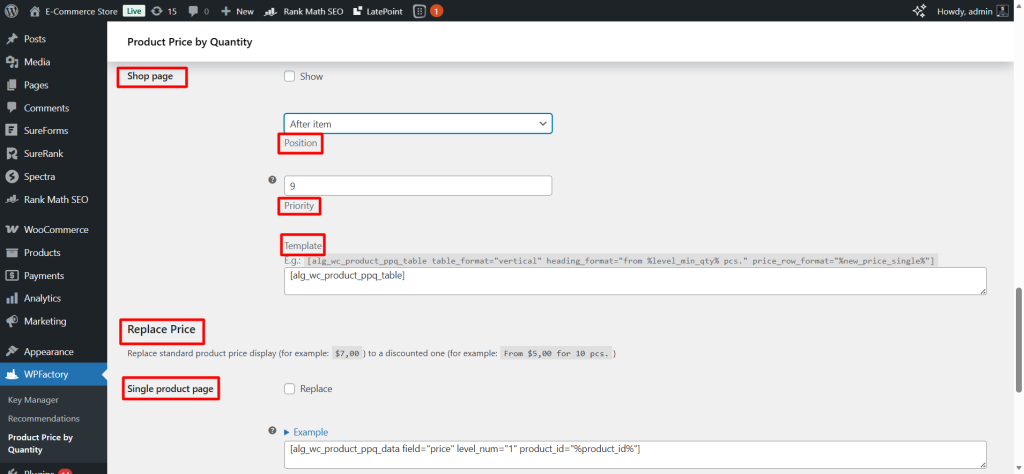
- Shop Page
When this option is activated, you can display the discount table on the store page.
- Replace Price
Here you can replace the regular price on the page with the discounted price.
For example: “From $5 for 10 pieces.”
Step7:
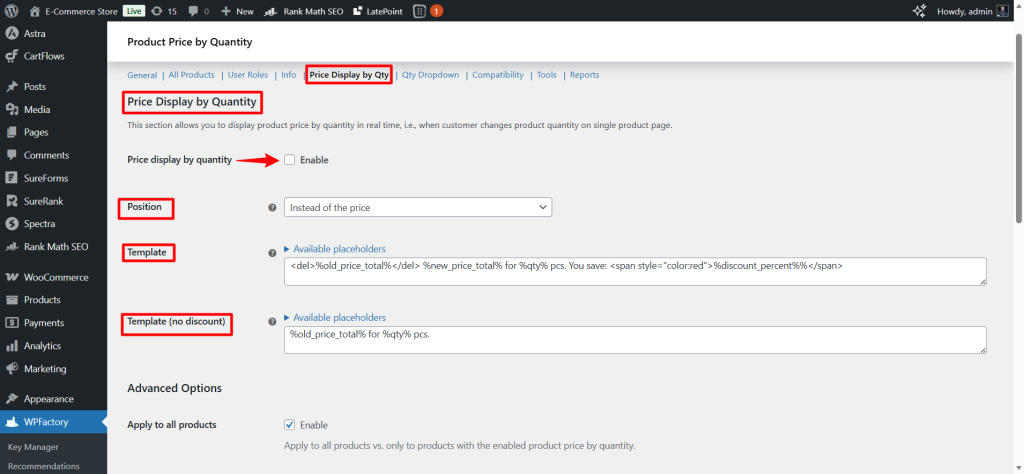
➡Price Display by Quantity
This section allows you to display the product price dynamically based on the quantity selected by the customer on the individual product page.
Enable Price display by quantity: When enable this option, the price on the page will change in real time as the customer changes the quantity of the product.
Position: Here, you can set where the price is displayed based on the quantity relative to the original product price.
The options are usually like:
-
Instead of the price
-
Before the price
-
After the price
Template: From here, you can design how the price is displayed based on quantity using text or HTML.
Template without discount: Used if there is no discount on the product.
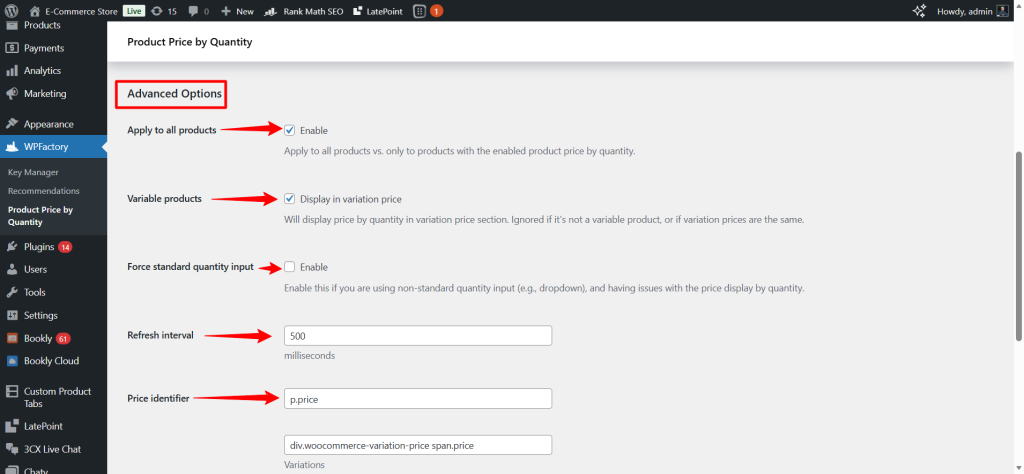
- Advanced Options
Apply to all products: Its function is to determine whether the price offer by quantity applies to all products or only to the products that have been activated individually. When enabled, it will apply to all products.
Variable products: This option allows displaying the price based on the quantity within variable products (such as color or size).
If disabled, the price will not change based on the quantity for variable products.
Note: It will not work if all variable prices are the same.
Force standard quantity input: Its function enforces the use of a standard quantity input field instead of any custom quantity method (like dropdown or buttons).
It is used if you have problems displaying the price by quantity when using a non-standard method.
Refresh interval: Its function is to quickly update the price when the quantity changes, in milliseconds.
Step8:
➡Quantity Dropdown
This section allows you to replace the slandered quantity field on the product page with a dropdown list.
Each option in the dropdown represents the minimum quantity for each tier of quantity-based pricing.
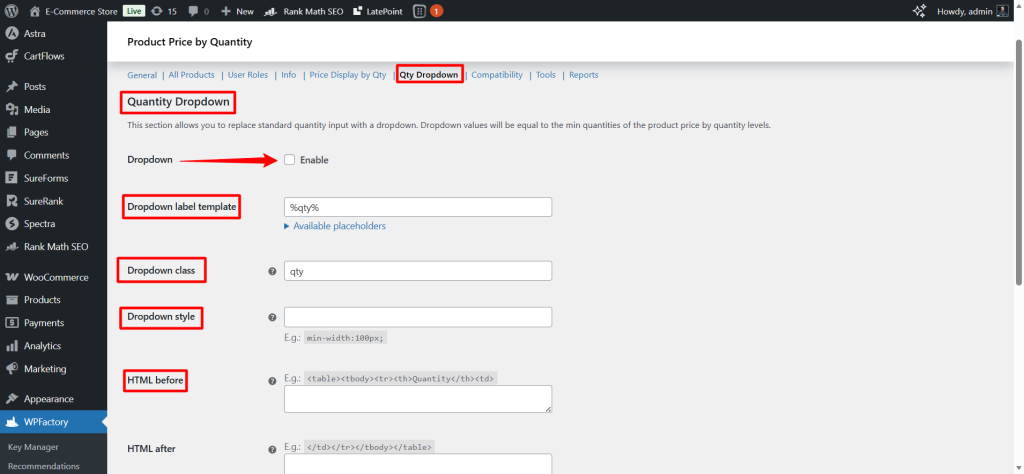
Step: The change step in quantity (e.g., increase by 1 or 5).
Min: Minimum quantityMax: Maximum quantity
Step9:
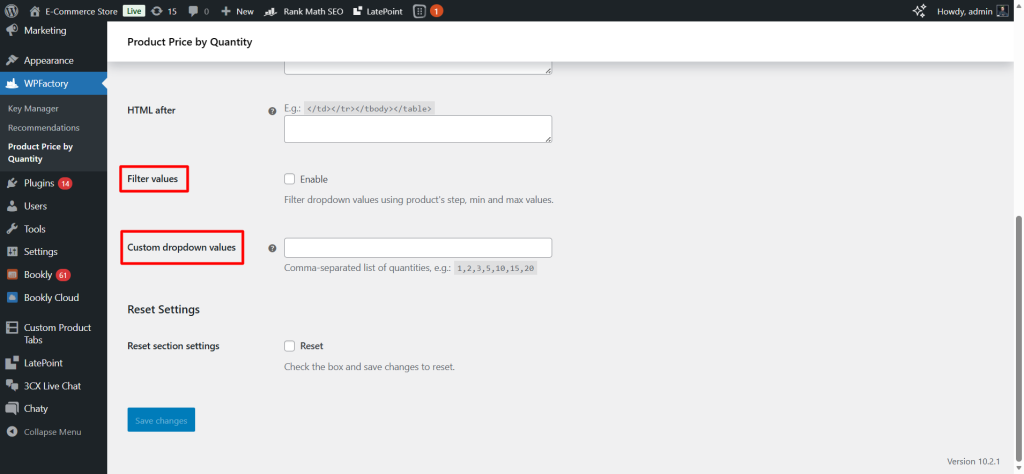
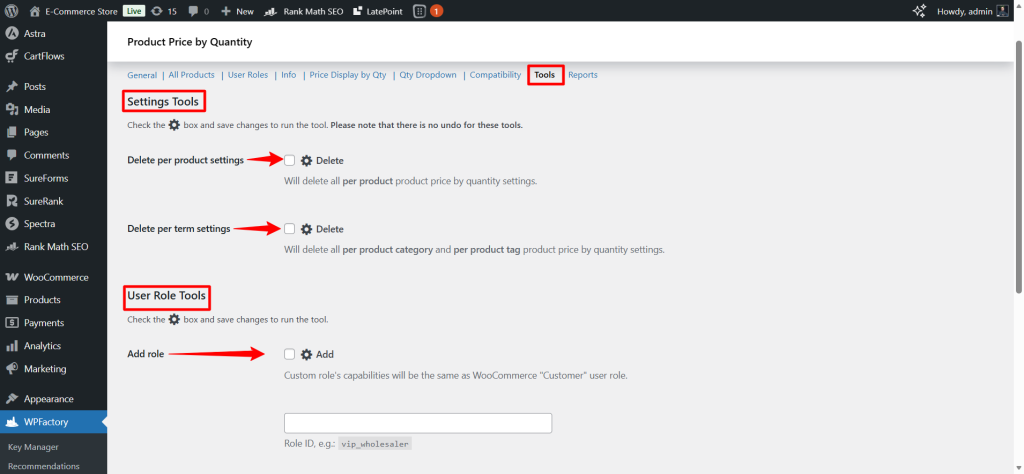
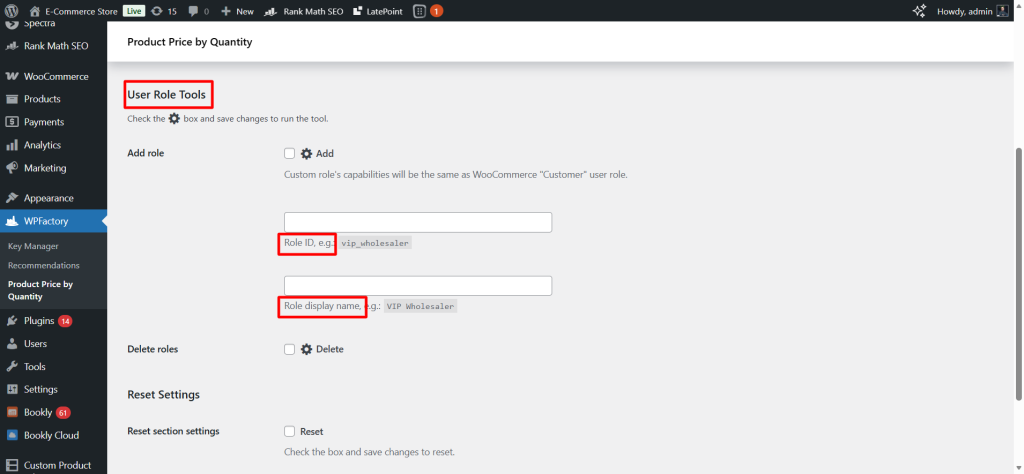
➡Tools
This section contains advanced administrative tools used to manage or reassign prices by quantity settings.
Note: When using these tools, changes cannot be undone, so it is recommended to use them with caution.
Final Thoughts
As we have seen, dynamic pricing isn’t just about offering discounts or offers, it’s a complete, integrated strategy to set up flexible pricing rules that motivate customers to buy more while keeping your profit margins over your control.
So, whether you want to move more inventory faster, reward loyal customers, or increase average order value (AOV), the powerful “Dynamic pricing & bulk quantity discounts plugin for WooCommerce” plugin gives you full control over how discounts are applied.
Now, you have all the power and flexibility you need to turn every visit into potential revenue.
Prefer watching? This short video summarizes the article in just a few minutes.