

How to Create WooCommerce Bundle Products – Step by Step Guide
What is WooCommerce Bundle Product?
Some call them grouped, others say packaged, paired, or the most common “bundled”, regardless of these names, they refer to the same type or product in WooCommerce.
In definition, a bundled product means several products wrapped together in one sale, meant to:
- boost sales of different product types,
- offer customers reasonable benefits, and
- encouraging them (unintentionally) to spend more money on one purchase.

There are various ways of creating WooCommerce bundle products: using the built-in feature or through a plugin, and we will look into both ways.
Why Bundle Products?
Product bundling could be a great opportunity for upselling and cross-selling products to increase sales, profitability, and revenue.
It’s a more convenient option for customers and offers a better shopping experience to suggest to the customers other products that they may need when buying a certain item or what other customers have bought when buying the item they’re ordering.
That way you open the door for more sales opportunities to come in as it’s easier to sell more items to customers who’ve already bought from you instead of convincing new customers to buy.
This way profit margins will increase as the cost of acquiring new customers stays constant thus increasing revenue accordingly.
Examples of Bundled Products
If you’re moving to a new house or doing house renovation you would probably start shopping for new furniture for your home.
Furniture items are probably bought in bundles as someone who needs a sofa and a couch for his home will probably need a table also. This would be an opportunity to bundle products and sell them together to your customers.
If you’re buying a digital camera for example you would probably be interested in a memory card to store the photos you capture with your camera on it. So these are types of products that are frequently bought together.
The examples of product bundling are enormous and it’s a great marketing strategy to deploy to increase your profit margins by upselling and cross-selling related products and thus increasing your store’s revenue.
Creating WooCommerce Bundle Products Using the Built-in Feature
Requirements
To use this method, it is assumed that you have done the following:
- You have already installed and activated the WooCommerce plugin and set up your store (read: How to install a WordPress plugin).
- You have already added products to your store. These are the products that will be in the product bundles.
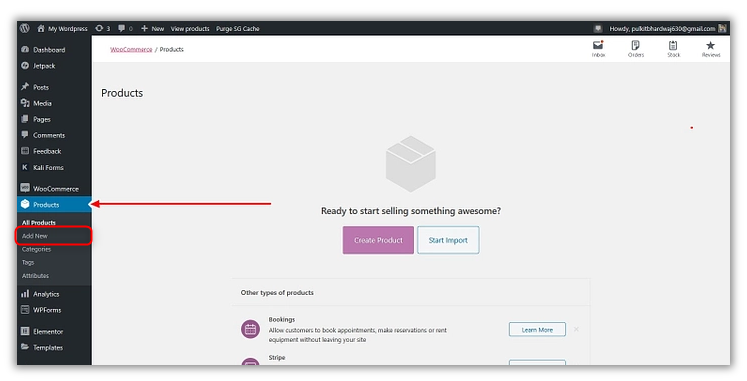
1. Create a new bundle product
On your WordPress dashboard, go to the Products > Add New.
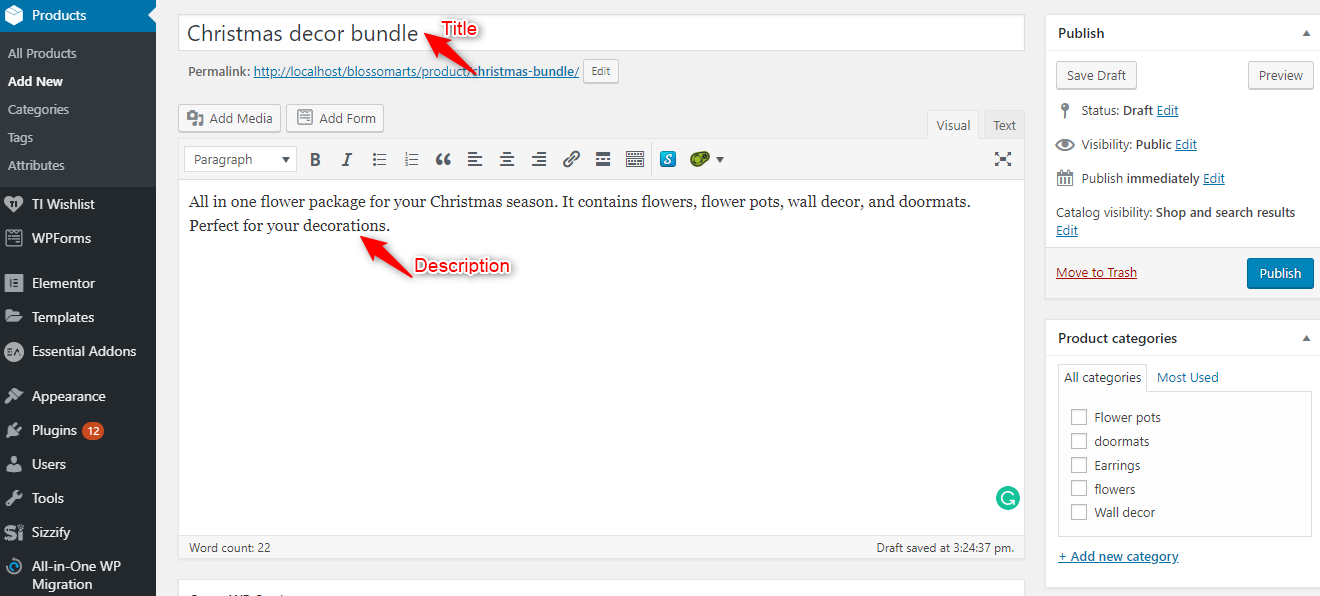
Enter the name and the description of the bundle. The title should be relevant to the product and should contain terms like “bundle”, “package” etc. to show that it is a group of products. The description should explain the various products in detail, why are the products bundled, and the benefits the buyer gets from buying the bundle over the individual products.
2. Configure the product data
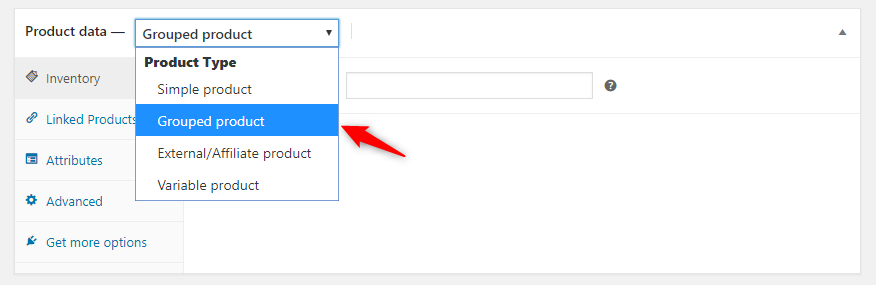
Scroll down to the Product Data section on the product page. Click the product data dropdown and select Grouped product.
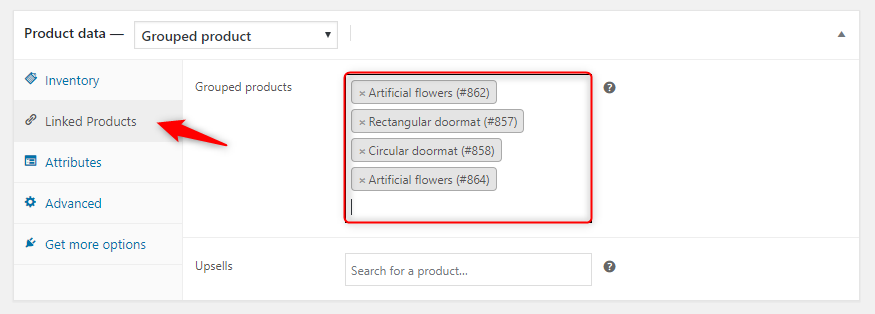
After that, click Linked Products. You will see a Grouped products field, where you will add the products in the bundle. Just type the name of the product you wish to include, and you will get suggestions. Click on the suggestion to add it. For other settings, we can use the defaults.
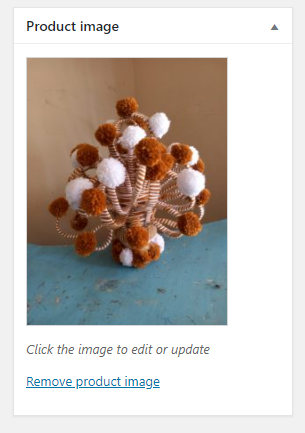
3. Upload product image
Scroll down the bottom right till you find the Product image box. Click the Set product image link and select your product bundle image. It can be better to use an image that includes images of products. You can take screenshots of the pictures of products and combine them using Photoshop or similar software.
4. Add product category
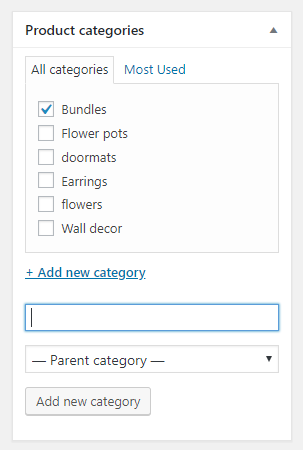
Under the Product Categories box on the right, select the category under which the product bundle falls. Select add a new category to add more categories.
5. Publish the bundled product
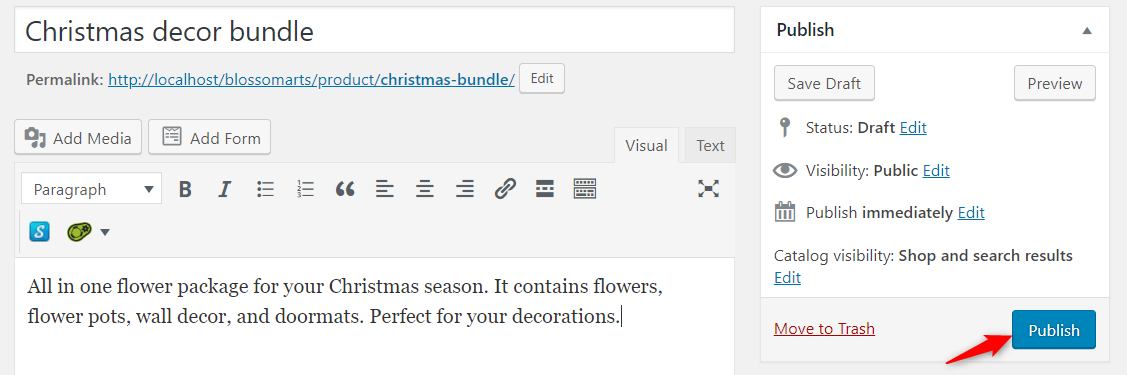
Hit the Publish button on the right to make the bundled product live.
6. Testing the bundled product
To confirm if the bundled product is working properly, go to the products page, find the bundled product, and click on it.
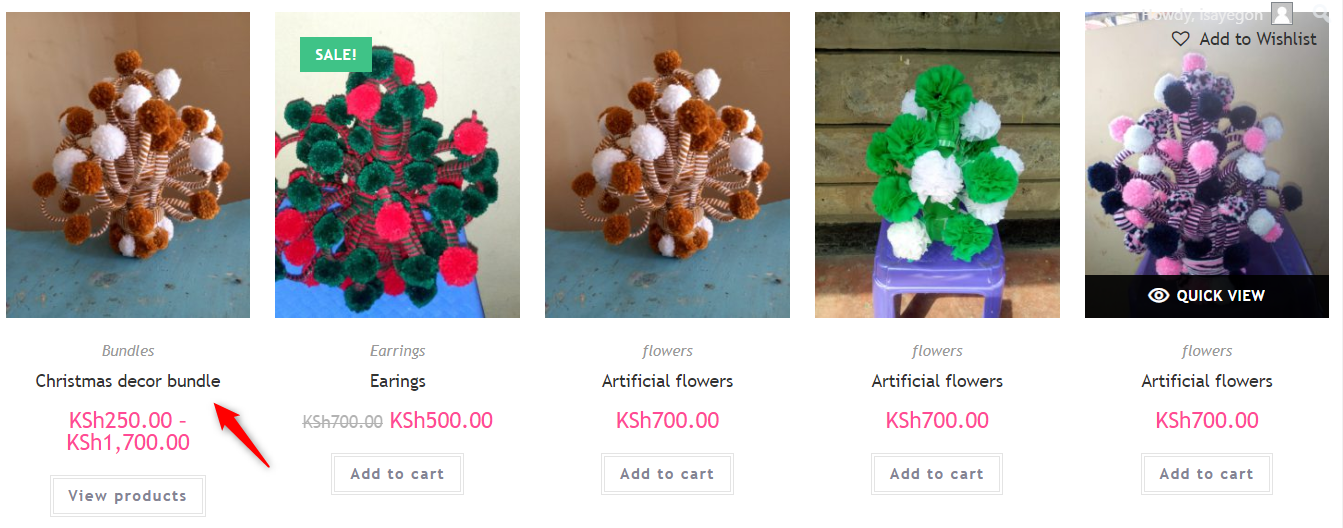
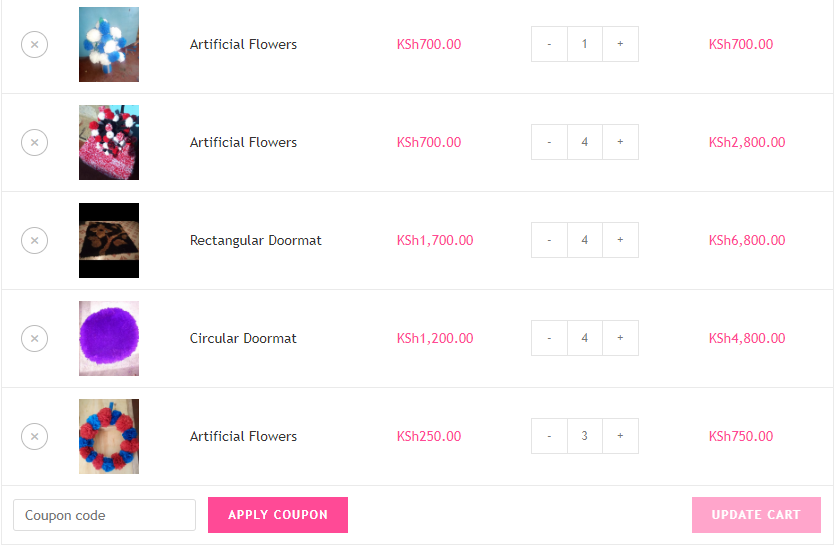
You will be taken to its page containing each product title and pricing. The user can edit the quantities of the individual products and even remove a product.

When the bundled product is added to the cart, each product is displayed as an individual item.
7. Adding coupons
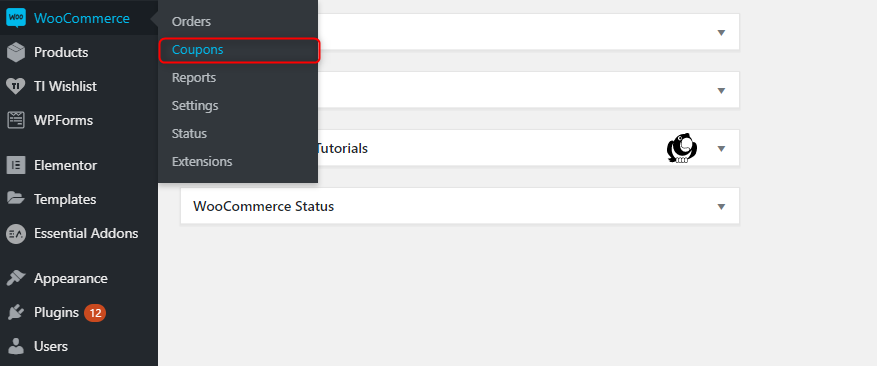
A coupon is a voucher that gives the user a discount on a particular product. This is a code that when a user types when buying a product, gets a specified discount on the product. To add a coupon, navigate to the WooCommerce > Coupons.
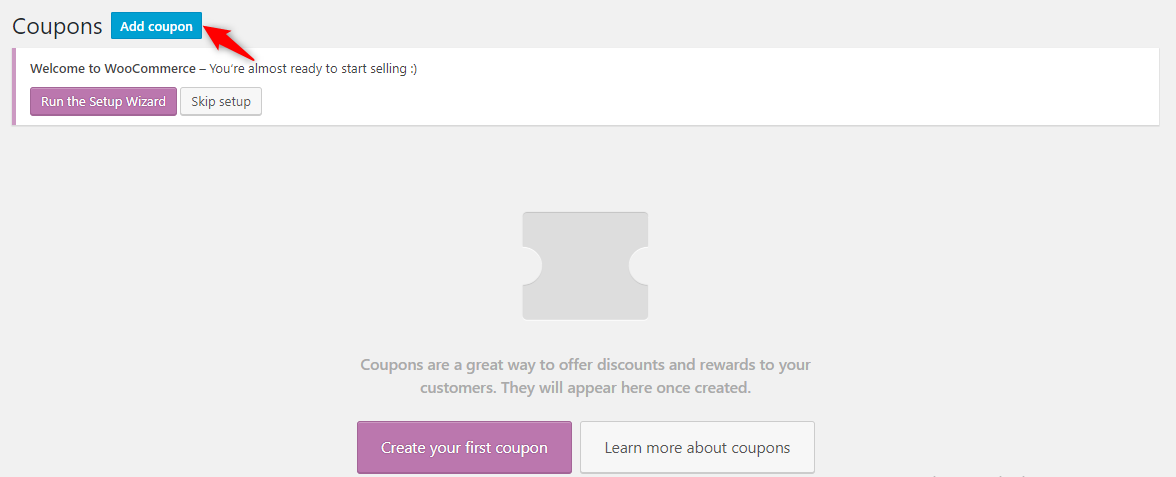
You will be taken to the Coupons page. Click the Add Coupon button to add a new coupon.
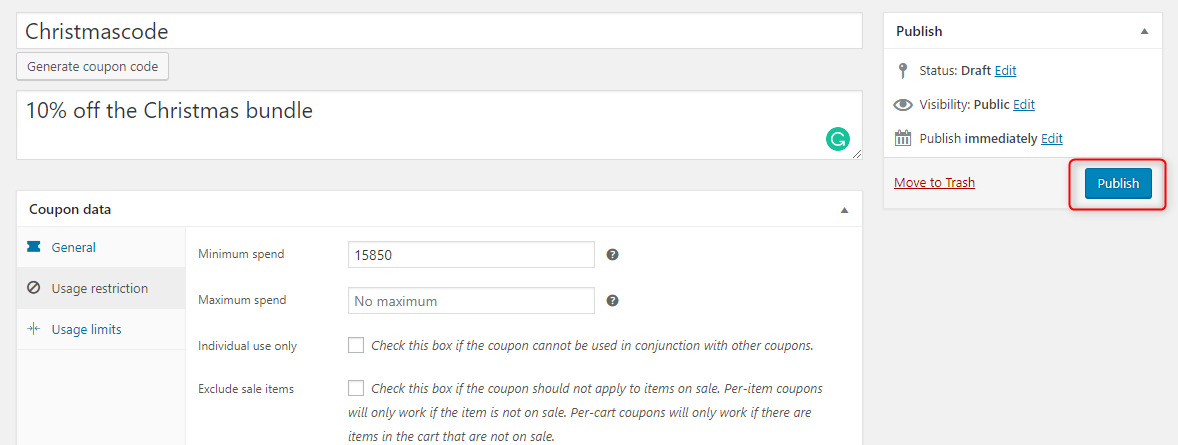
Enter the name and description of the coupon.

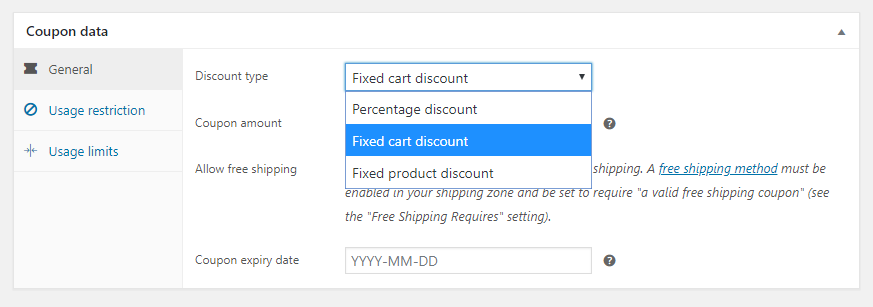
Go to the Coupon data > General. On the Discount type dropdown, select Fixed cart discount.
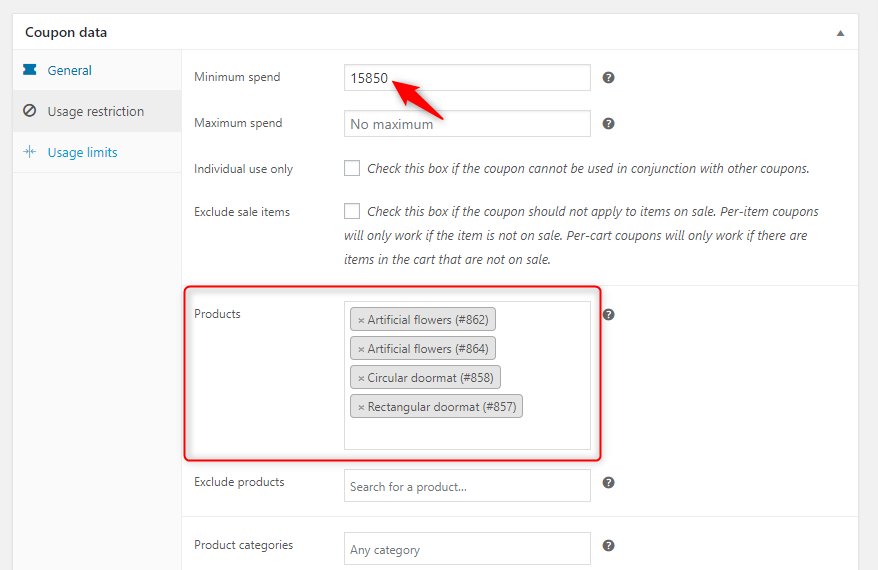
After that, click the Usage restriction tab. On the Products field, type the products included in the bundle. Doing this implies that a discount will be added when any of the products are added to the cart.
However, you do not want to issue a discount anyhow. You need to make sure that only users who spend a certain amount will enjoy the discount. To do that, set the minimum spend value in the Minimum Spend field. This way, you will only ensure users who spend at least the set amount will be offered a discount.
Click Publish on the right to save changes.
8. Testing the coupon
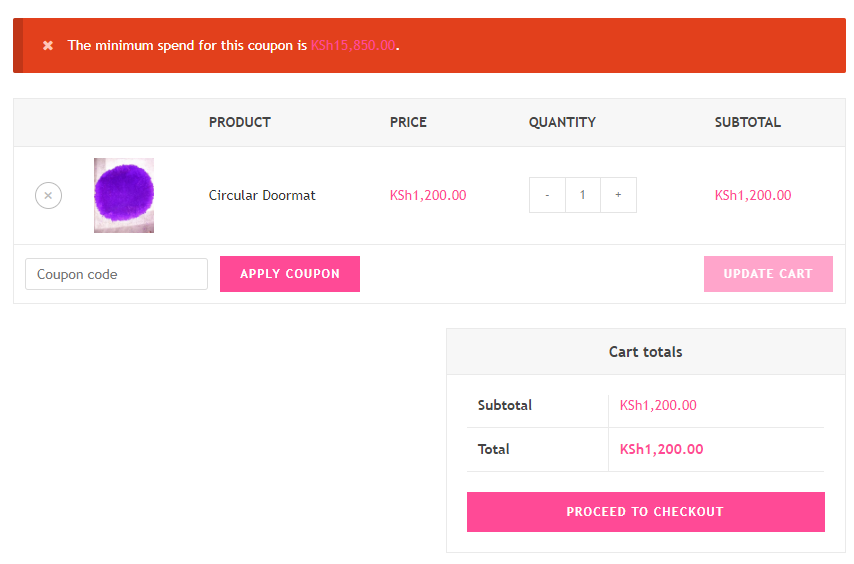
To make sure that our coupon code works, find the bundled product, and click on it. On its page, add all the products to the cart. On the cart page, type the coupon code we added on the Coupon code field and click the Apply Coupon button. You will notice that the cart totals will be deducted by the coupon value you had specified.

Now let’s take out some of the products in the cart and try to apply the coupon code. You will get the following error. This means that the coupon code works.
While this method is useful, the problem is that the discount is not added automatically and the user has to manually enter the coupon code to get the discount. To solve this problem, you can consider using a plugin.
Creating WooCommerce Bundle Products Using Plugins
There are various plugins for creating WooCommerce bundle products, some free and some premium. However, we will use the WooCommerce Product Bundle plugin as it is very powerful. It costs $49 but it’s worth it.
Steps to create a product bundle using the plugin:
1. Installation
- Download the plugin .zip file from the plugin’s page.
- Go to the WordPress Dashboard > Plugins menu > Add New.
- Click the Upload Plugin button at the top.
- Click on Choose File and select the .zip file you downloaded earlier.
- Click Install Now and then Activate the plugin.
2. Creating the product bundle
- Navigate to Products > Add New.
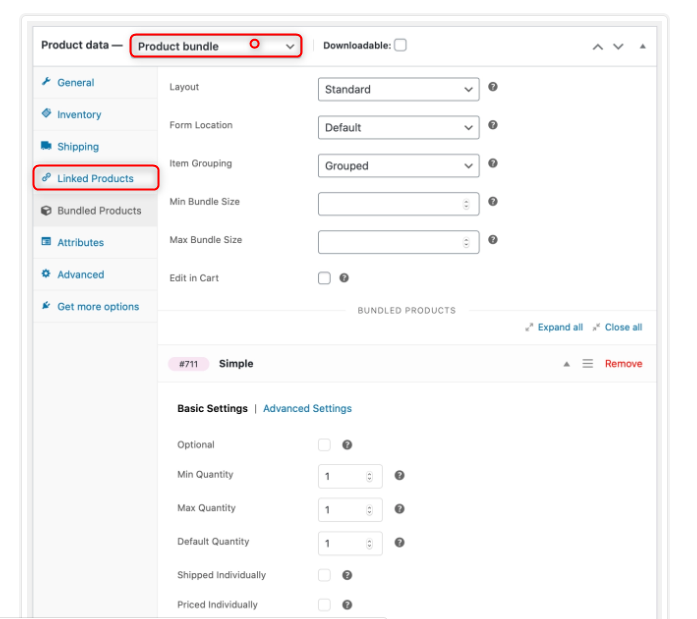
- Go to the Product data > Product Bundle.
- Click the Bundled Products tab.
- Click the Add Product button and use the search field to search and add products to the bundle. Just type the product name on the search field and click on the result to add it. You can add as many products as you wish. Each product added under the product bundle has options that can be configured to control how they can be handled e.g. minimum quantity, maximum quantity, priced individually, etc. Make sure to configure them properly.
- Click Publish to save changes.
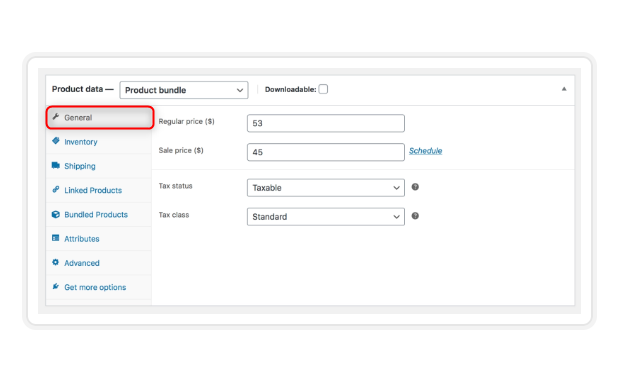
3. Pricing
You can either set a static price for the whole bundle and/or keep the prices of the individual bundled products.
Static pricing
- Go to Products > All Products and select the bundle you need to edit.
- Click the General tab on the left menu.
- Enter a static Regular price and a Sale price if required.
- Click update to save changes.
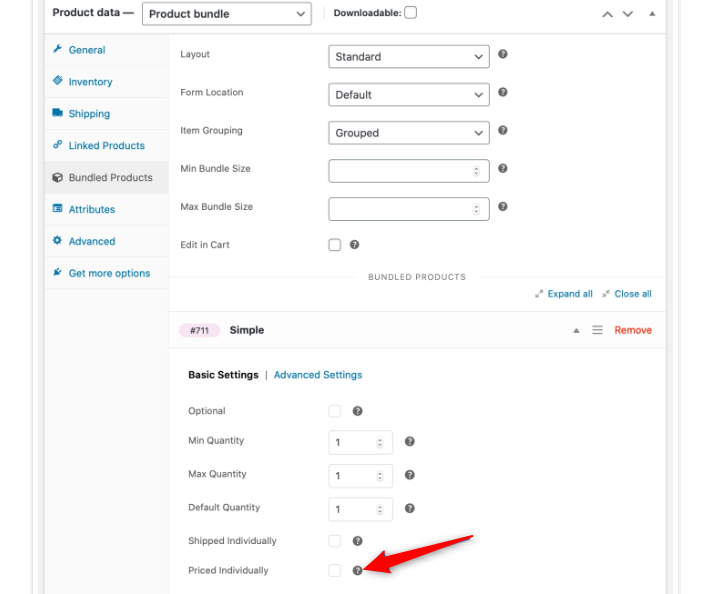
Individual item pricing
This can be applied if the individual items in the product bundle are configurable, i.e. optional products, variable products, have configurable quantities, etc. When this is the case, you may keep the prices of individual bundled products, by checking the Priced Individually option, under the Basic Settings tab.
4. Shipping
From a shipping perspective, WooCommerce products can be classified as:
- Virtual – Do not require shipping e.g. services or digital products.
- Physical (non-virtual) – Products that have weight and dimensions and require shipping.
Bundles are made up of various virtual and/or physical products. Also, the physical properties (weight & dimensions) of a bundle are not always equal to that of its product components.
From a shipping perspective, physical product bundles are classified as assembled and unassembled:
- Assembled bundles – Made up of physical products assembled in a common container.
- Unassembled bundles – Consists of products that do not need assembly. The WooCommerce Product Bundle plugin supports both types.
Configuring a bundle for shipping
Step 1
Determine if the bundle you are creating is assembled, partially assembled, or unassembled:
- Assembled – Have a common container and are shipped in a single box.
- Partially assembled – Have a common container that includes at least one assembled product. However, some products are shipped in their original packaging.
- Unassembled – Made up of products that do not require assembly.
Product bundles made up of virtual products fall into the Unassembled category.
Step 2
Go to the Shipping > Bundle Type: Assembled or Unassembled. If your product bundle is partially assembled, select Assembled.
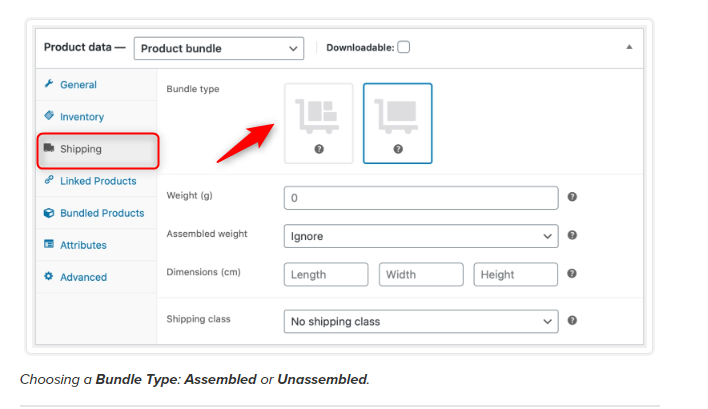
If you chose the Assembled option, configure the Weight, Dimensions, and Shipping class of the container.
5. Bundled product settings
Click the Bundled Products tab to configure individual product settings. These are divided into Basic Settings and Advanced Settings. Select the options that you require and Update.

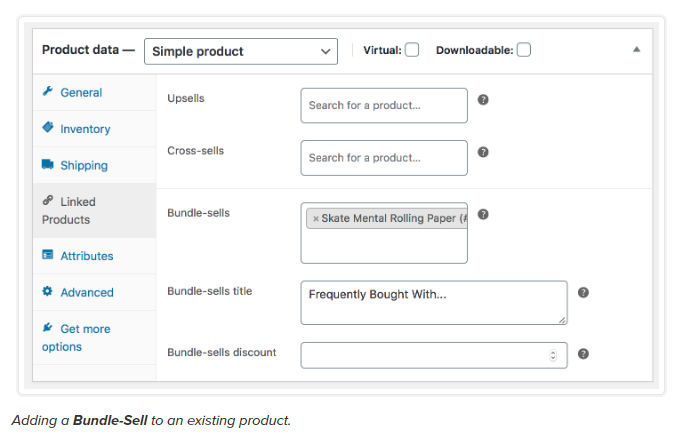
6. Bundle-sells
A bundle sell is an offer to the customer to buy a useful add-on with the currently viewed product.
- Go to the Products.
- Find the product for offering bundle sells and click edit.
- Go to Product Data > Linked Products > Bundle-sells field.
- Add product recommendations.
- Enter a Bundle-sells title.
- Update the product to save changes.
7. Inventory management
Go to WooCommerce > Reports > Stock > Insufficient stock. From here you will get an overview of the products that are included in the bundle but they do not meet the stock/quantity requirements of the container in which they are included.
Inventory Settings
Go to the Inventory settings tab of a bundle to enable stock management and set bundle-level stock quantities. Enabling stock management at the bundle level doesn’t override the inventory of bundled products.
That is just a brief explanation of how to use a WooCommerce Product Bundle plugin to create WooCommerce bundle products. For more information on using WooCommerce Product Bundle plugin, you can check the plugin’s documentation.
Summary
Product bundles are essential types of products in WooCommerce, and now or later, you might find yourself in a need to start using them in your store. We hope this article was informative to show you in steps how to create, configure, publish, and even set up shipping for your bundle products, using a plugin or by your own.
Have any thoughts or feedback? Feel free to leave it for us in the comments.
