How to Set Maximum Purchase Limits in WooCommerce?
Out of stock, high demand for limited or custom products, or even unfair product distribution for some customers. Do these scenarios sound familiar to you?
I think that sounds familiar!
For sure, as an eCommerce store owner, you’ve likely encountered these cases at some point.
Whether it’s during sales periods, seasonal peaks, or trending moments, certain products may face a surge in demand, which can lead to some challenges like, demand exceeding supply, stock depletion, and difficulties in fulfilling some orders, this means, harm your inventory management.
That’s why we’re here to help you tackle this challenge. With just simple steps, you can set a maximum purchase limit for specific products, based on user roles, categories, or individual products at designated times, daily, weekly, monthly, or even yearly. This will ensure fair distribution of limited items, and a smooth inventory flow.
Let’s walk through this step by step.
Step1:
➡ Download the Plugin
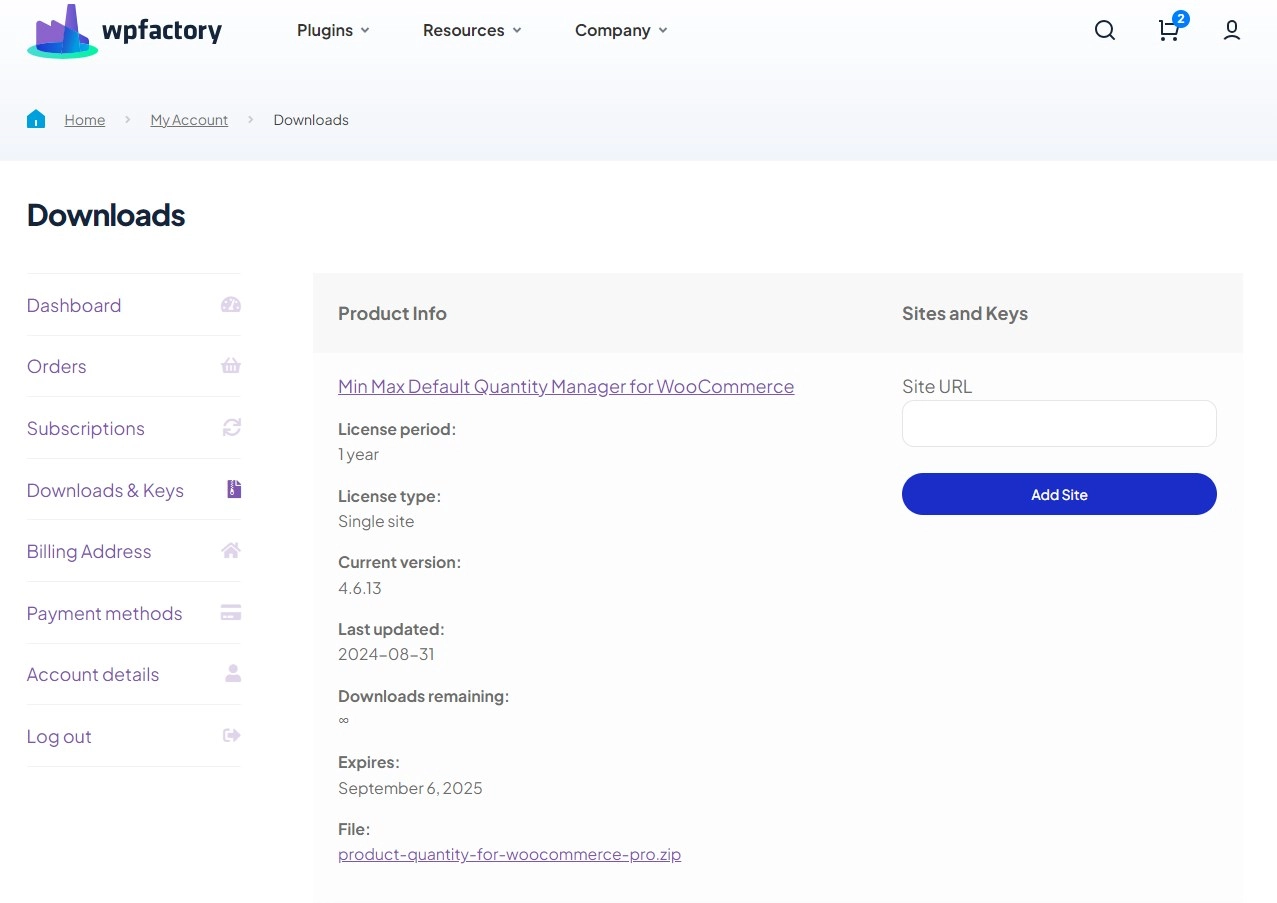
To get started you will need to download the “Maximum Products per User for WooCommerce” plugin that allows you to set maximum quantities based on your store’s needs.
After downloading the plugin, from your WPFactory account, upload it to your WordPress site.
Step2:
➡ Access the Plugin
Once the plugin is installed and activated, you can tailor it to fit your business needs.
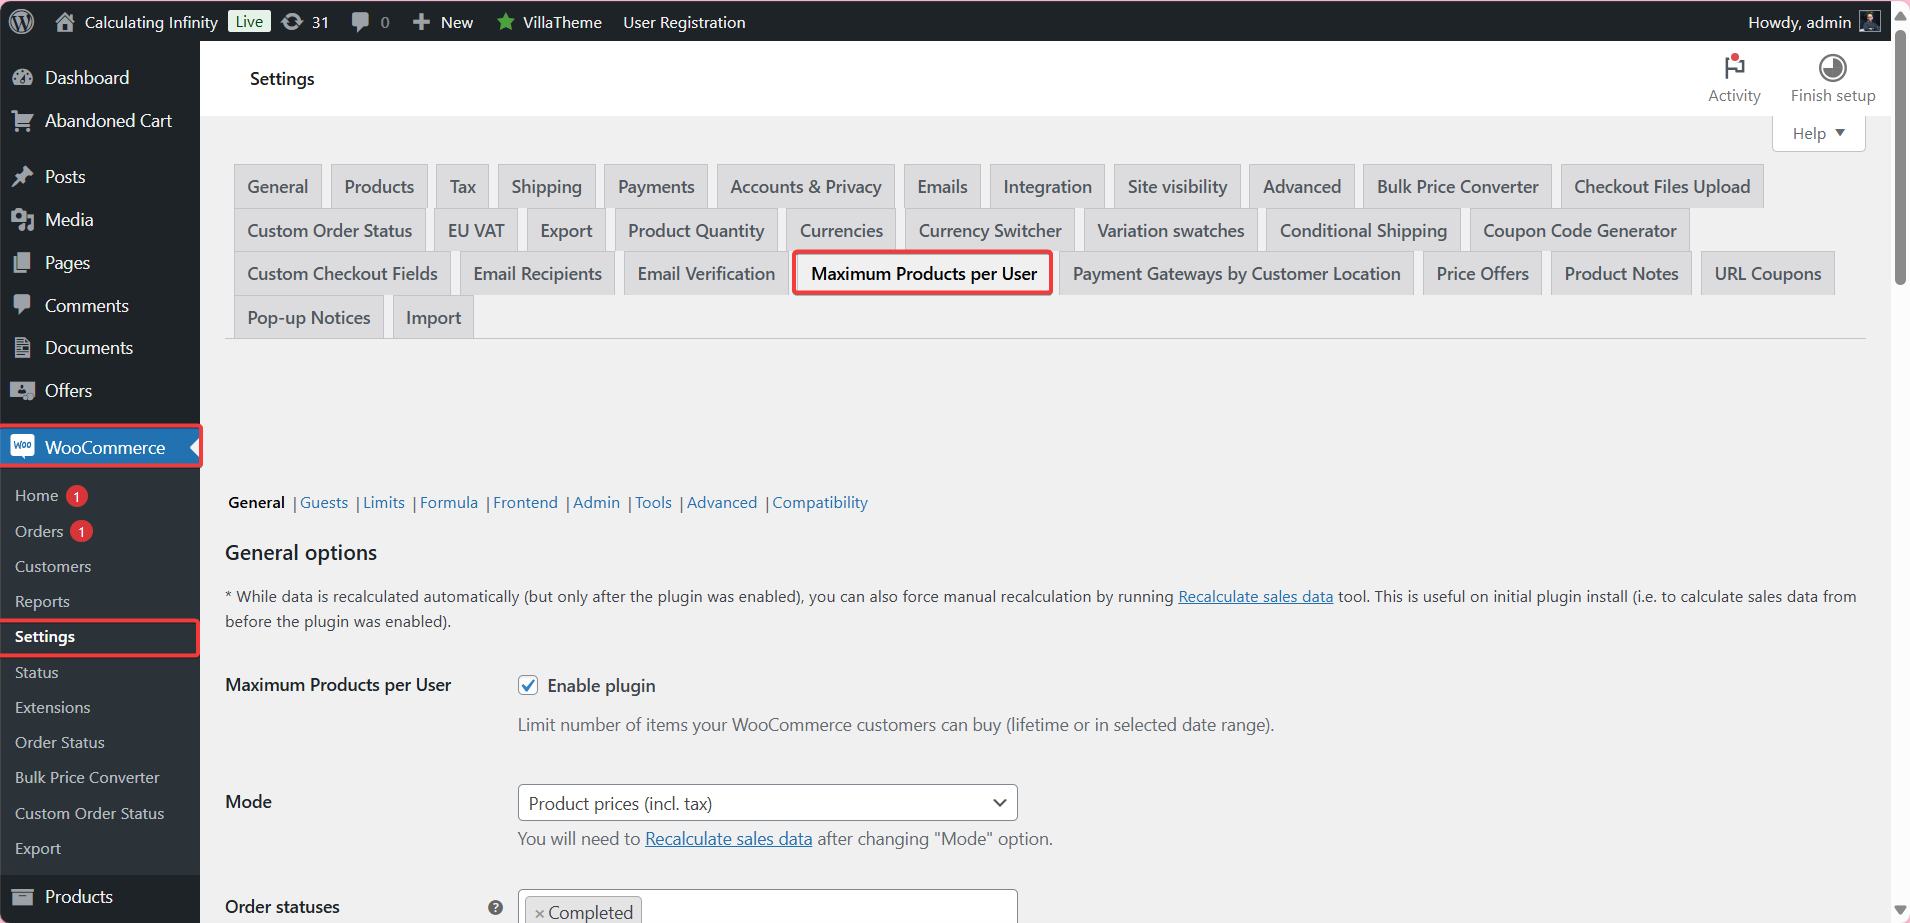
Go to WooCommerce > Settings > Maximum Products per Users.
Step3:
➡ General Options
From here you can set the maximum number of products customers can purchase.
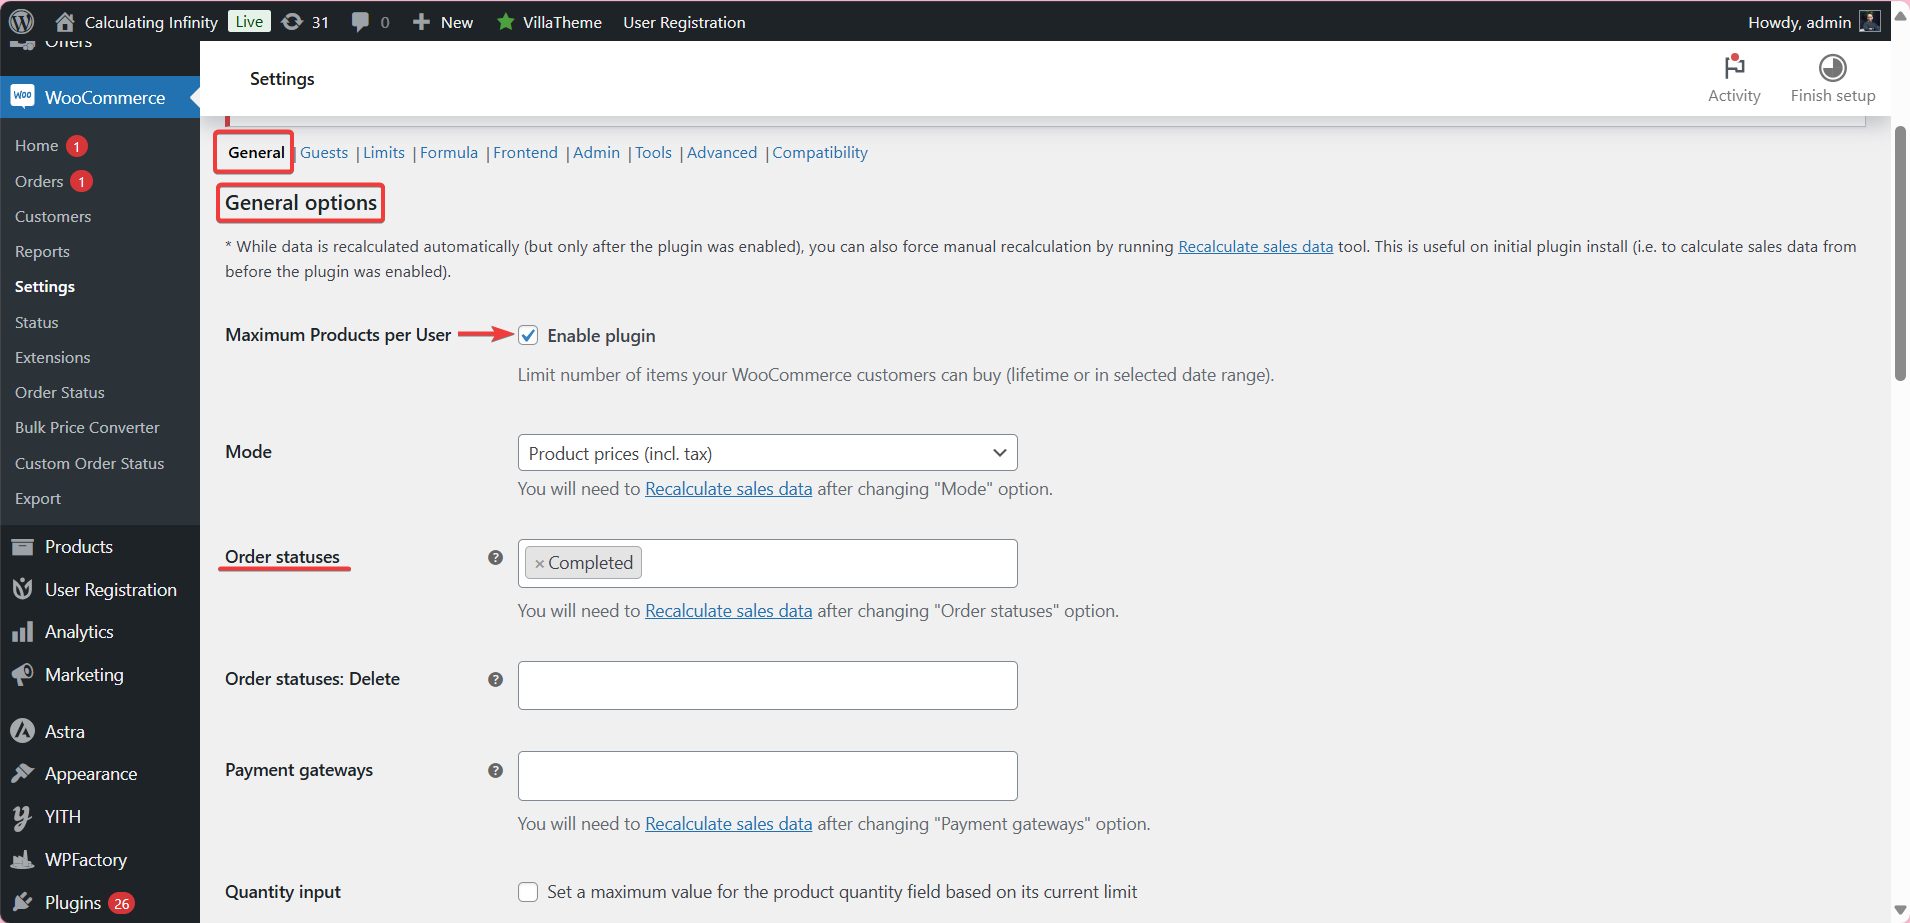
The first thing you need to do is enable the plugin by checking the box. When you activate this option you can specify the maximum number of products for each user, (lifetime or in selected date range, daily, weekly, monthly, yearly.)
-
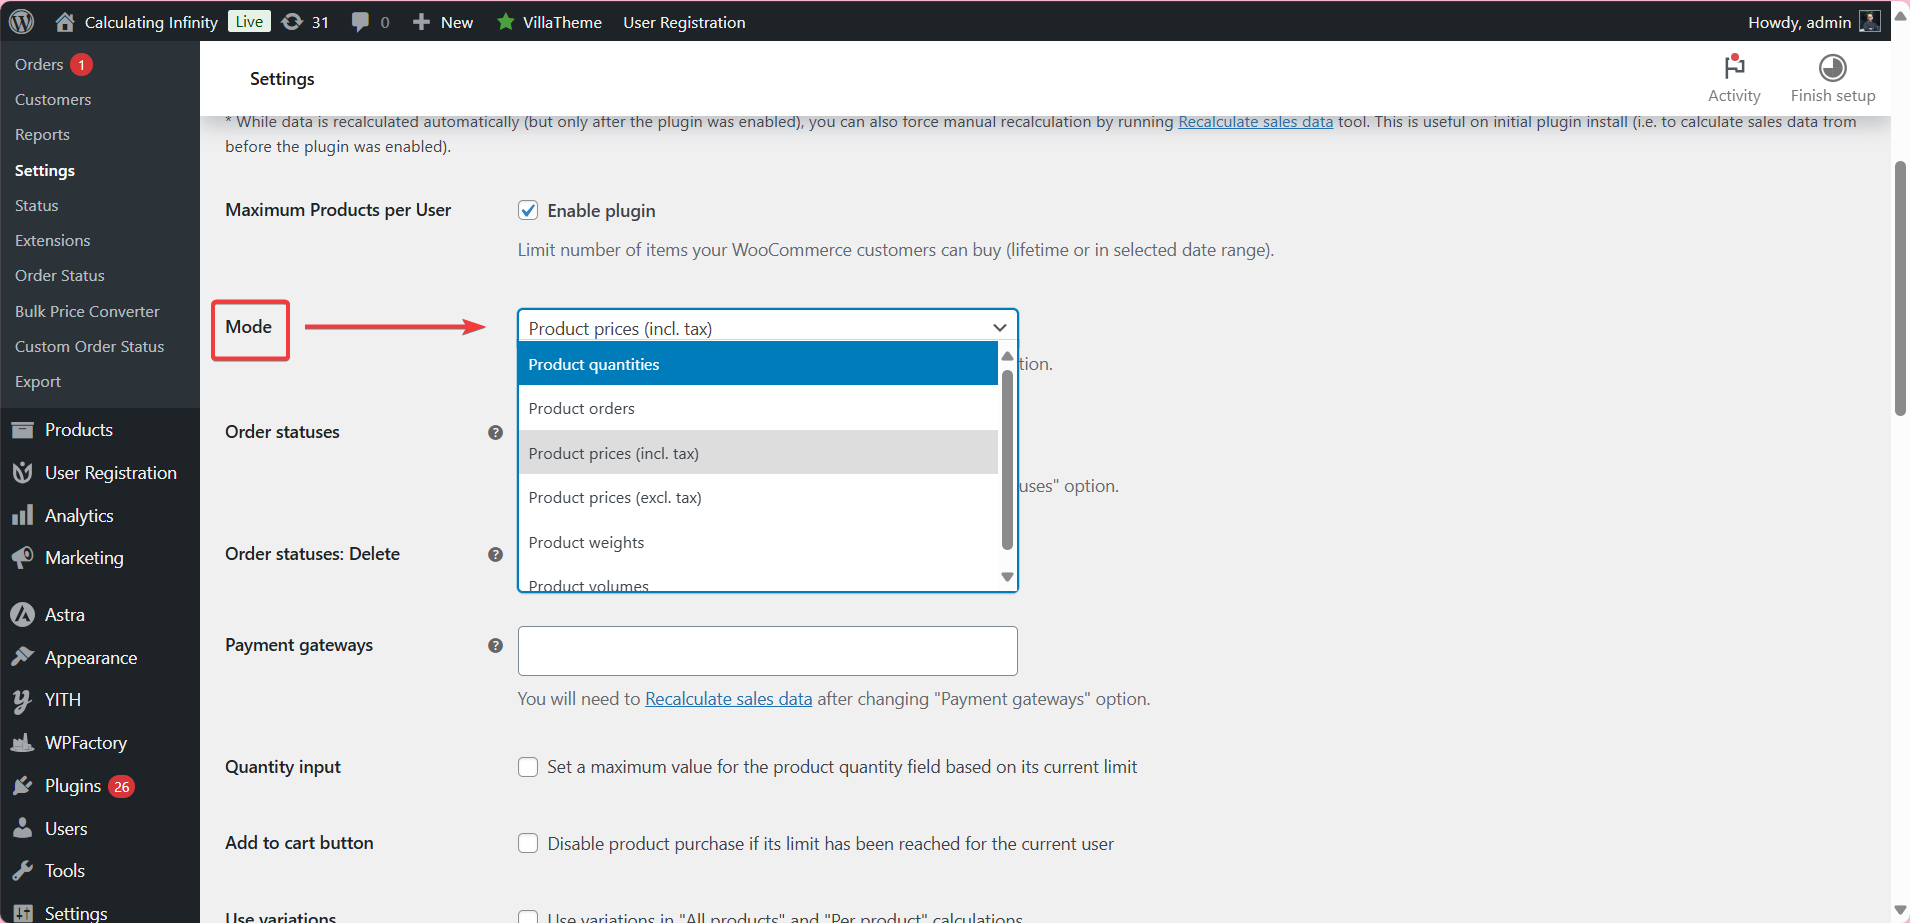
Mode
From the mode option, you can choose the method you want to calculate the maximum purchase, based on:
- Product prices (Incl.tax)
- Product prices (excl.tax)
- Product orders
- Product Volume
- Product weights
- Product quantities
Note: You will need to Recalculate sales data after changing the “Mode” option.
-
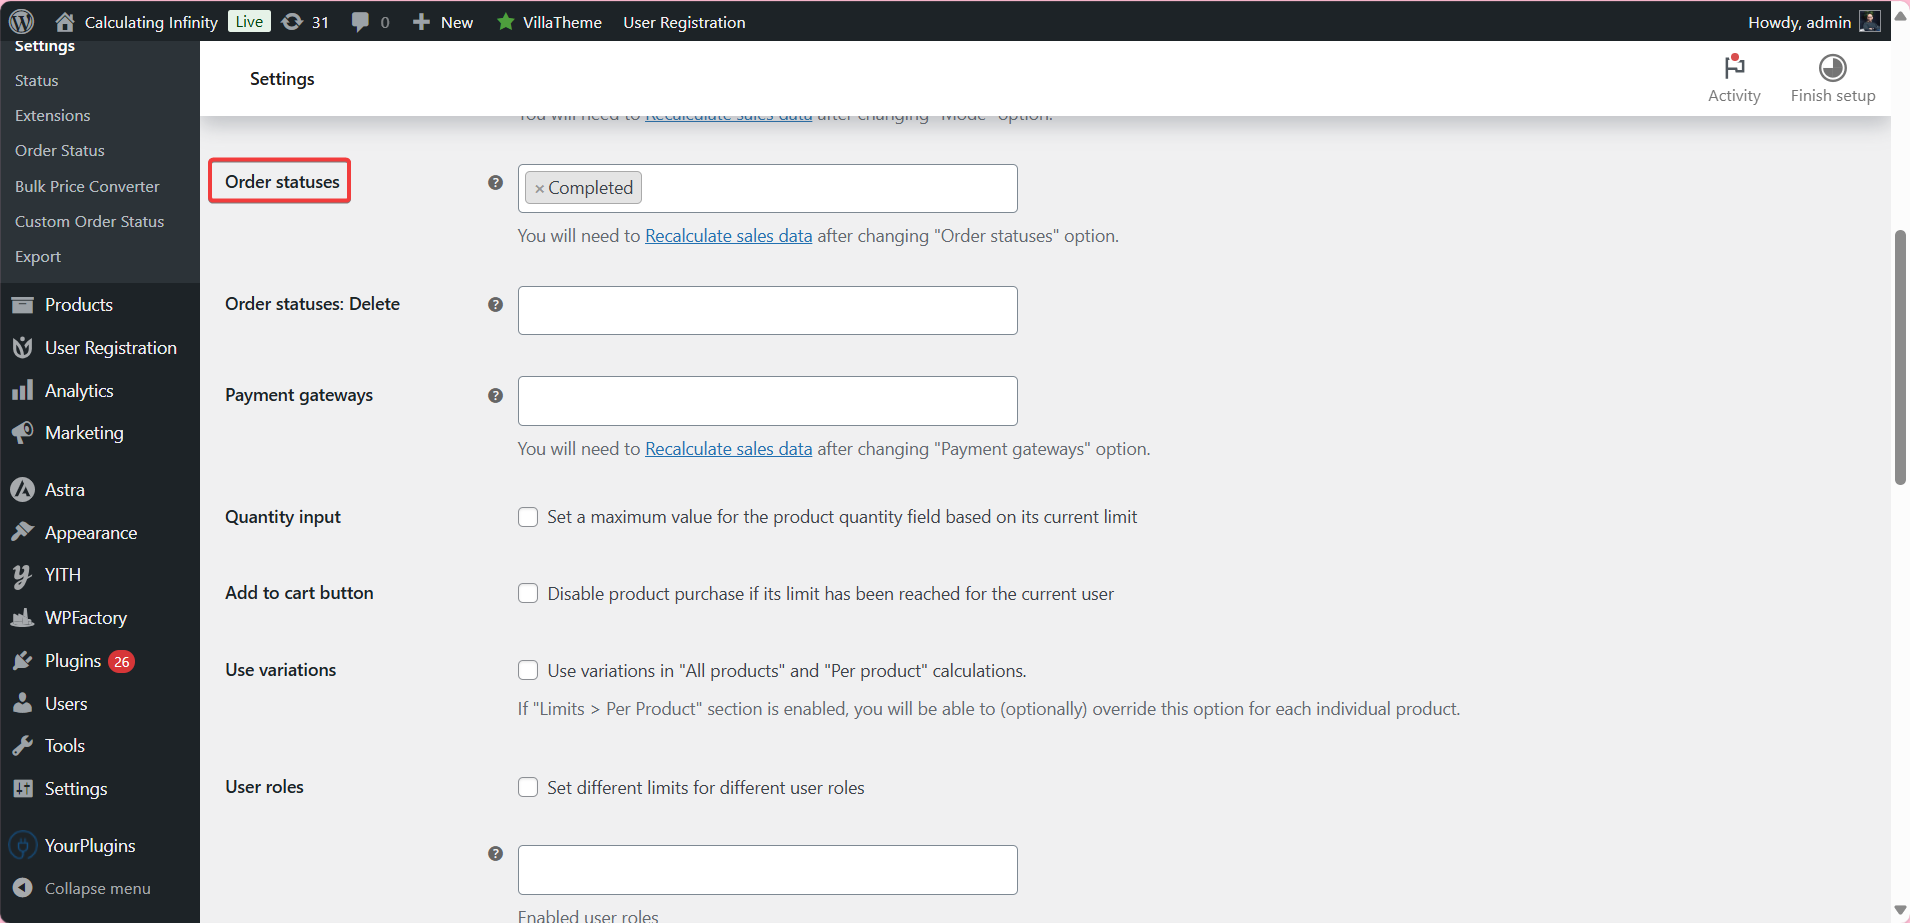
Order statuses
This option determines the order statuses for which purchased products are counted toward the maximum limit. For example, if you choose “complete” as order status, the maximum limit will only be calculated when the order is completed.
Order statuses:
- Pending payment
- Processing
- On hold
- Completed
- Cancelled
- Refunded
- Draft
- Fail
-
Order statuses: Delete
From here you can select the orders that you don’t want to count towards the maximum, such as canceled or refunded orders.
-
Payment gateways
Here you can select the payment gateways to which the maximum limit will be applied.
-
Quantity input
If you activate this option, the maximum purchase will be set directly in the product quantity failed on the product page. This means customers cannot enter an amount greater than the permitted limit.
-
Add to cart button
If you add this option, the add cart button will be disabled for users who have reached the maximum purchase limit.
-
Use variations
Here you can use product variations like color, size, etc. In calculating the maximum limit for each product.
-
User roles
You can set different limits for different user roles.
-
Hide Products
When this option is activated, products that have exceeded the purchase will be hidden from the catalog and search results.
Note: Products will still be accessible via the direct links.
-
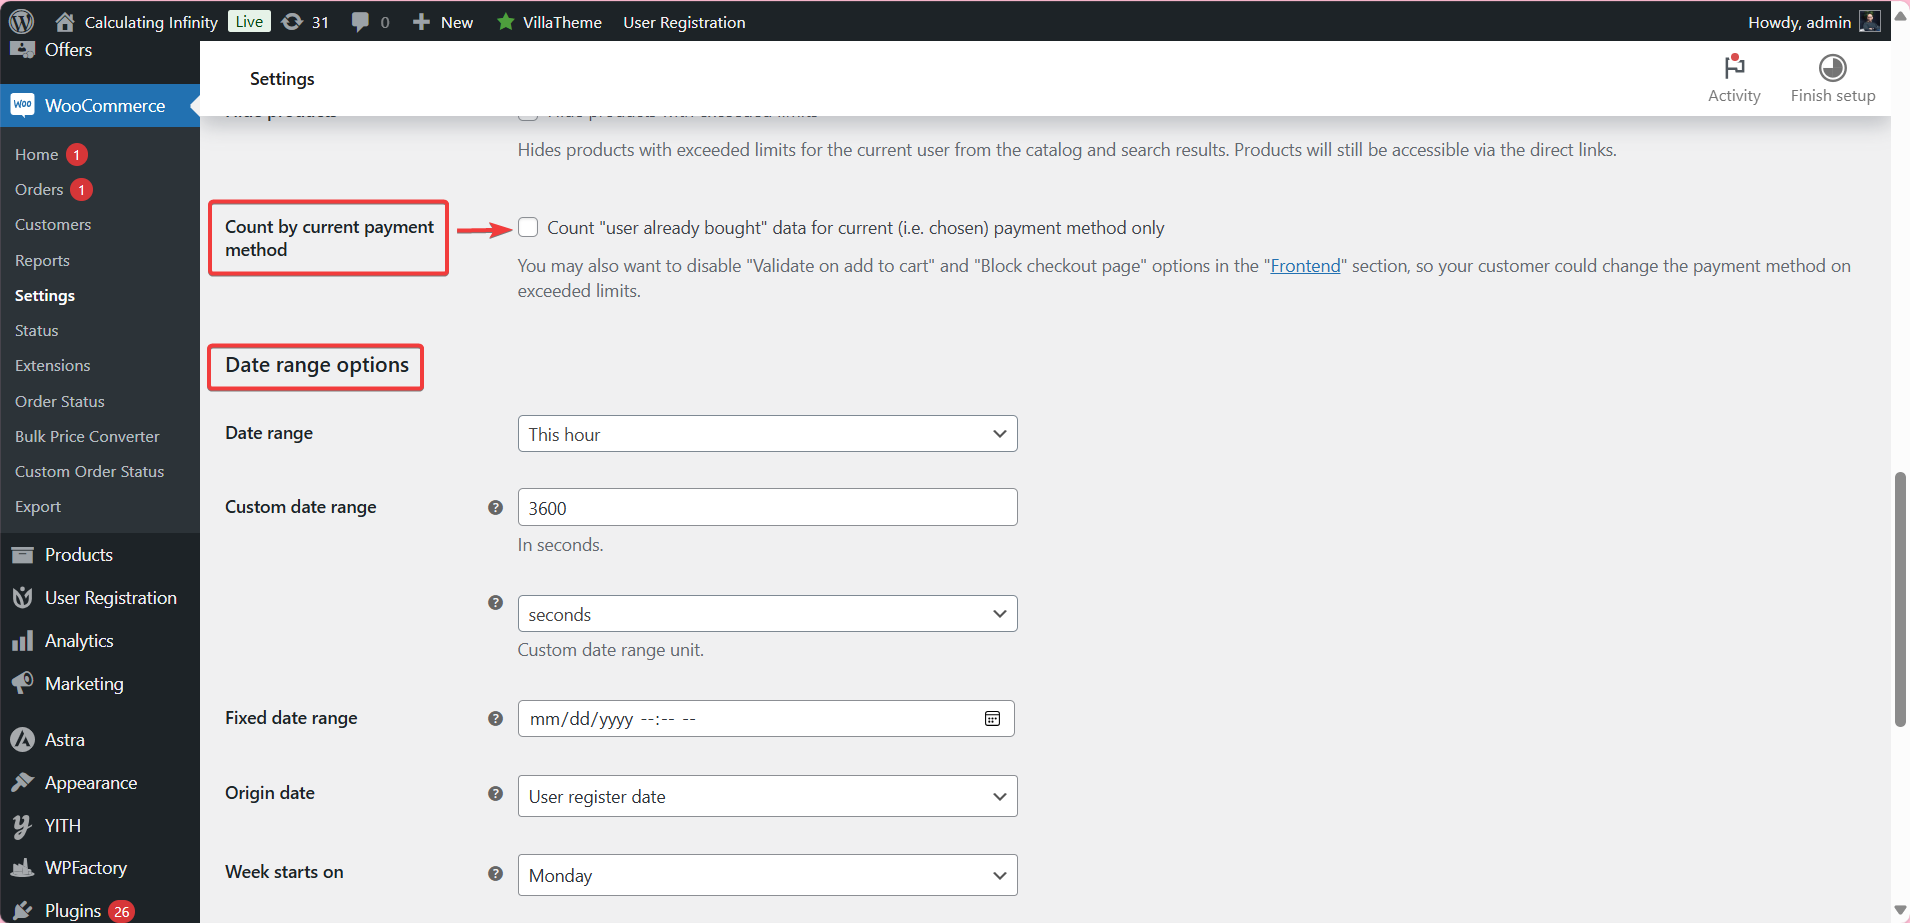
Count by current payment method
You can calculate the maximum purchase limit only based on the payment method that the customer used.
-
Date range options
This option allows you to specify the period in which the maximum number of products is calculated.
Step4
➡ Guest Users Options
These settings allow you to control how unregistered (Guests) users are treated when purchase limits are applied.
The image below shows options for how to deal with unregistered users when purchasing. So, you can do nothing, or block the guest from buying products, or any option else.
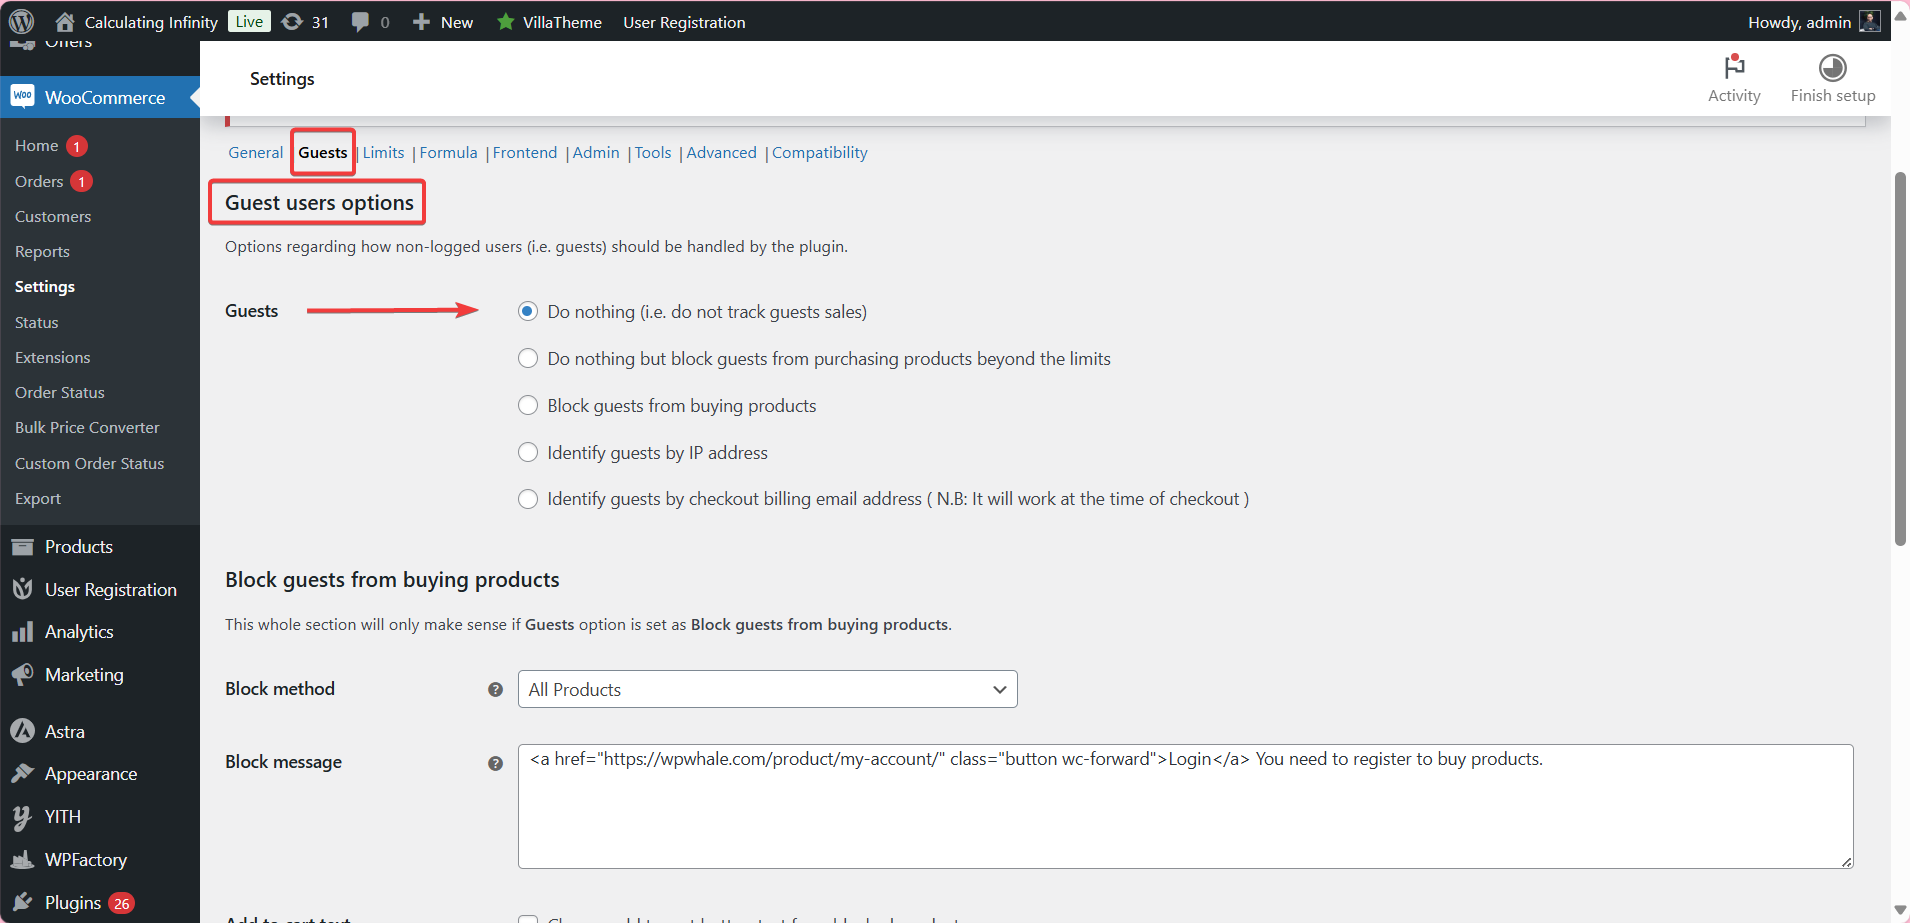
You need this section in case the “Guests option” is set as Block guests from buying products.
The blocking method is either by blocking all products or according to the limit option. And you can customize the block message as you want.
-
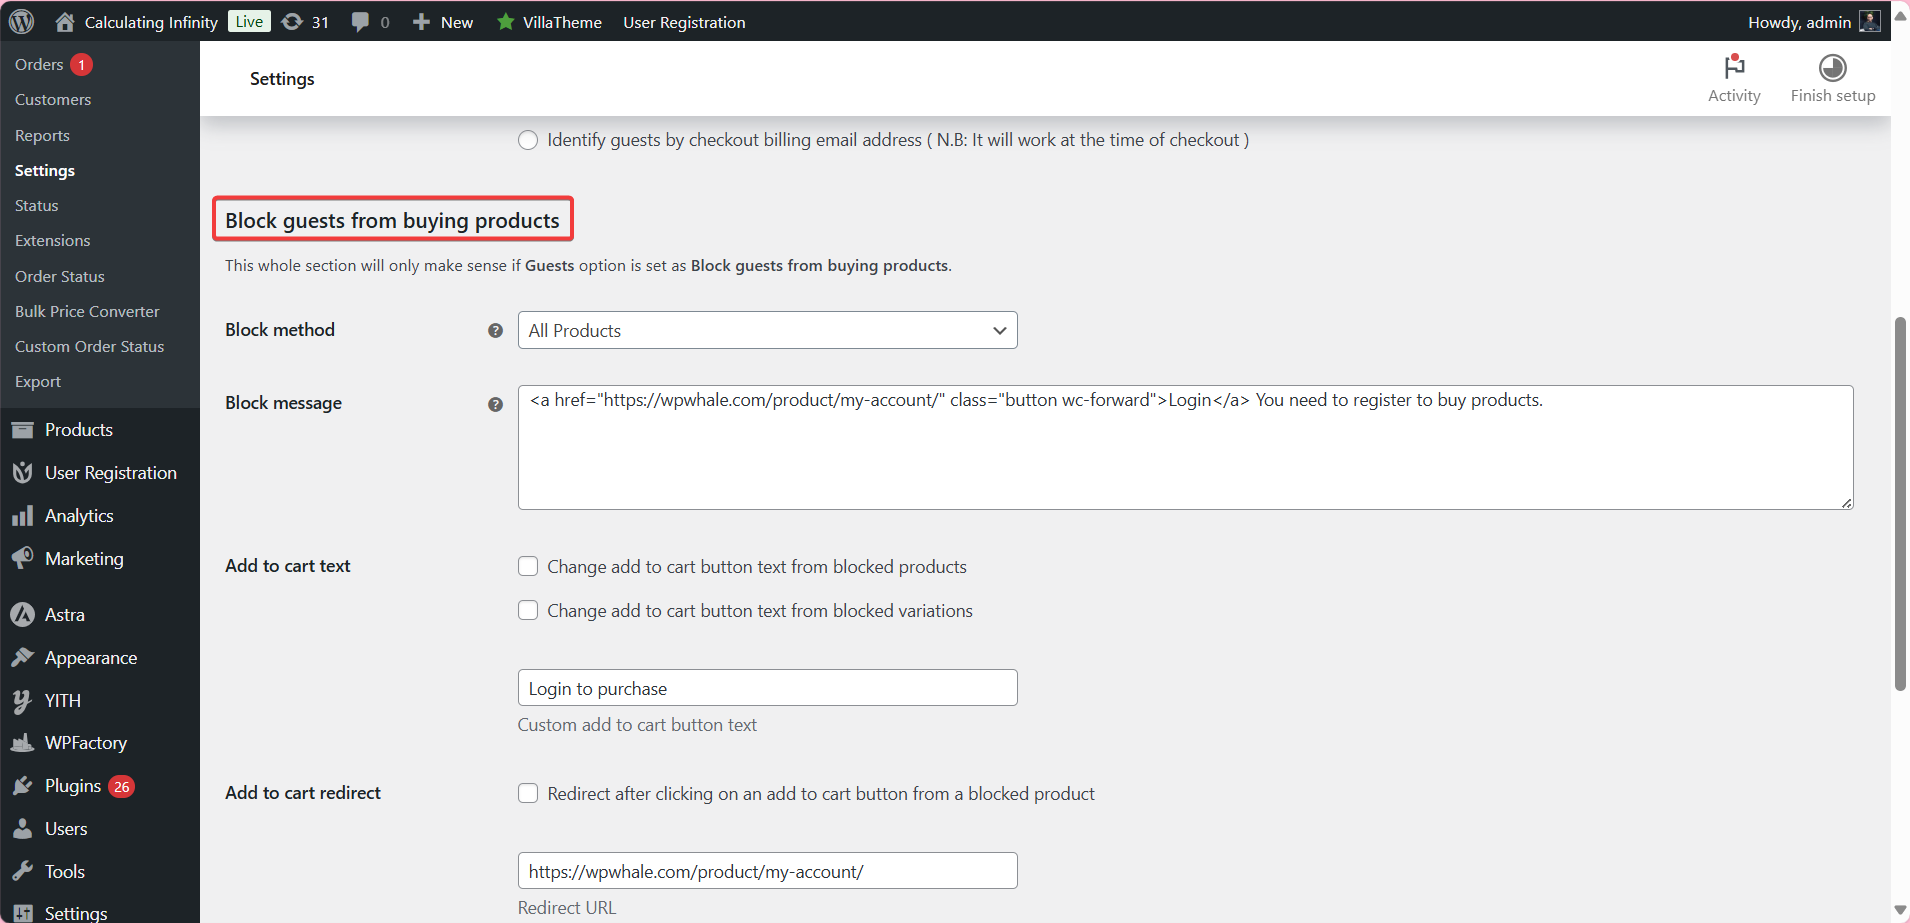
Add to Cart Text
You can change the text of the “Add to Cart Button” for products that are prohibited to guest users to something like: “Login to purchase” or any other custom text.
You can redirect gusset users after clicking on an add to cart button from blocked product by enabling the “Add to cart redirect option”
-
Hide products
You can hide the products from the catalog and search results from guest users.
Step5
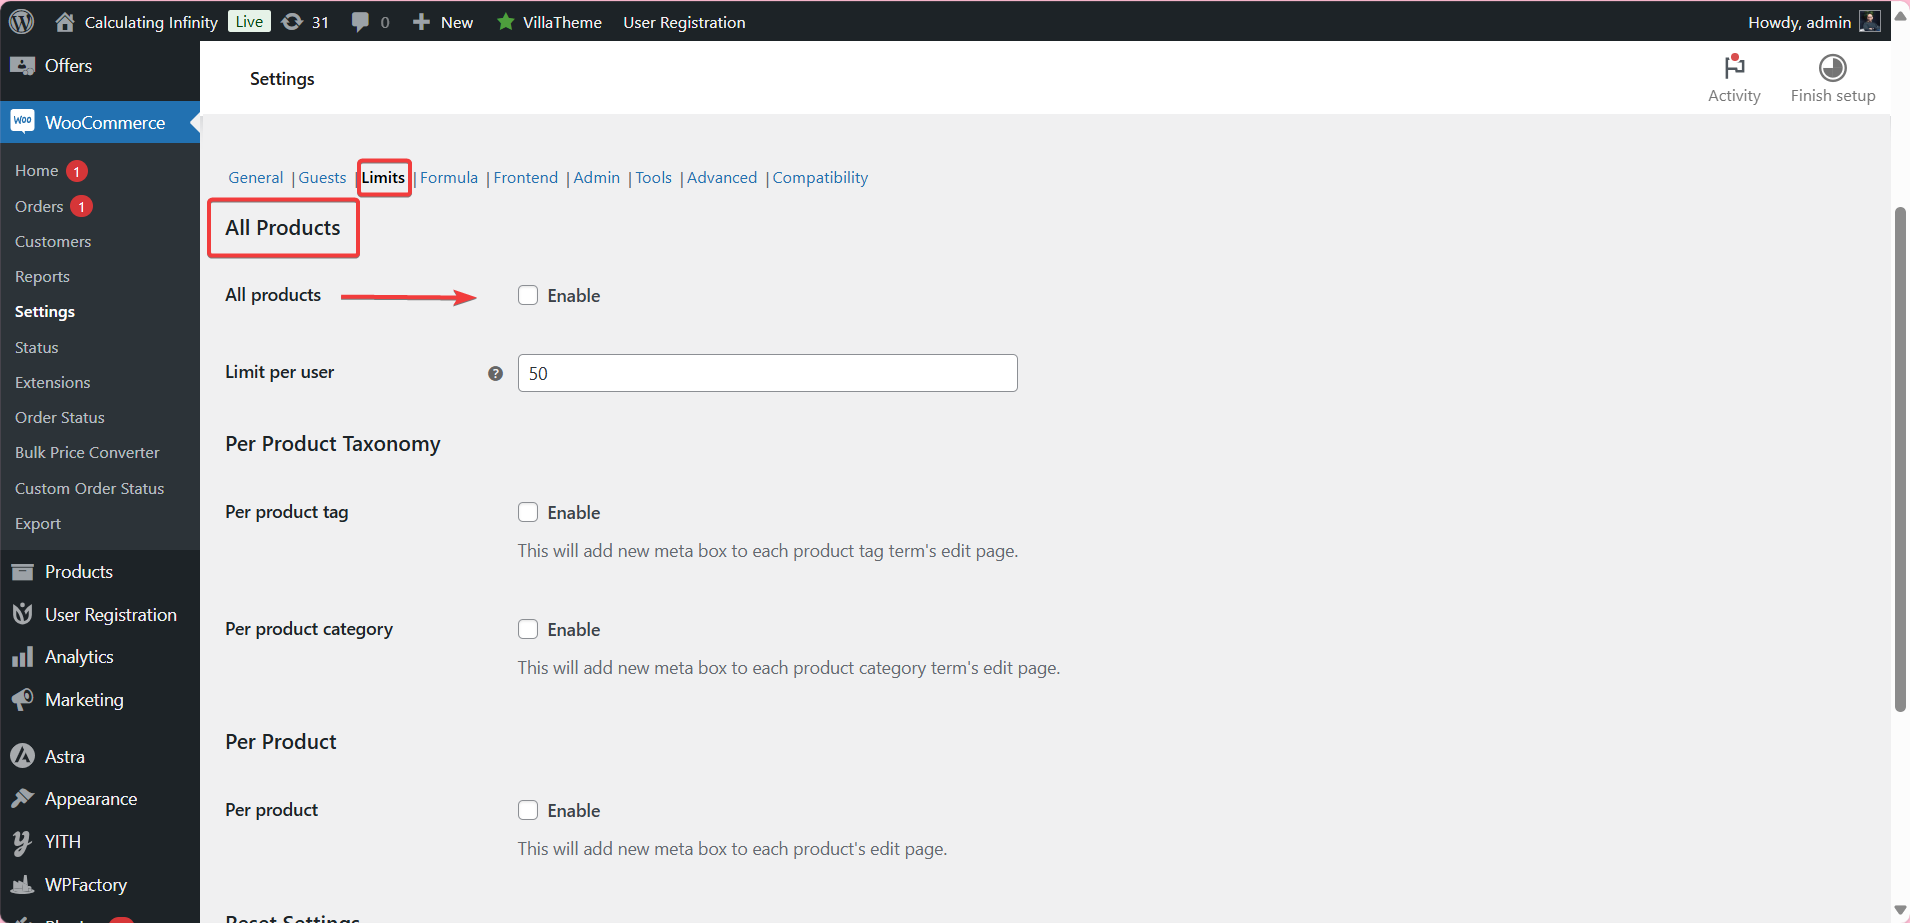
➡ Limits
These settings allow you to set purchase limits for all users, whether across all products, specific categories, or even for each individual product.
You can specify the maximum allowed for each product’s limit per user.
-
Per Product Taxonomy
These options allow you to apply purchase limits at the category levels or tags.
Step6
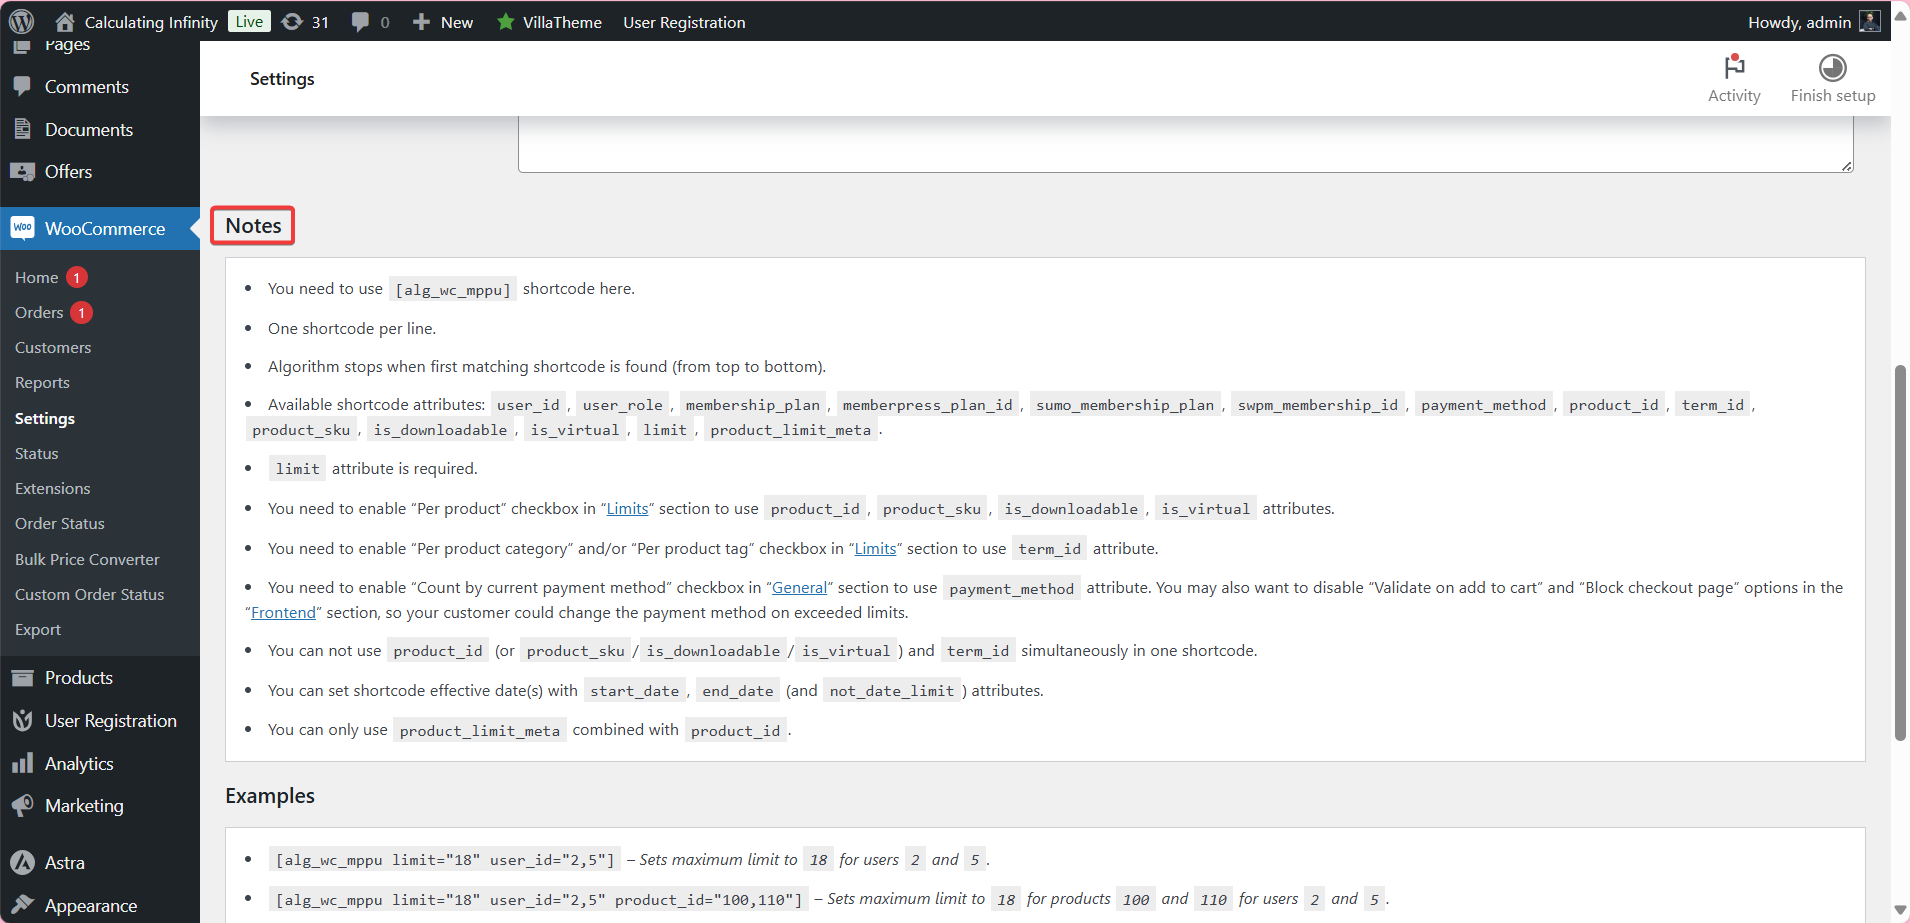
➡ Formula
From here you can determine the maximum purchase limit using the short code.
When this option is enabled, you can use shortcodes to set purchase limits based on several factors:
User, payment gateways, product category, and others.
Note: Each short code must include a limit code to determine the maximum.
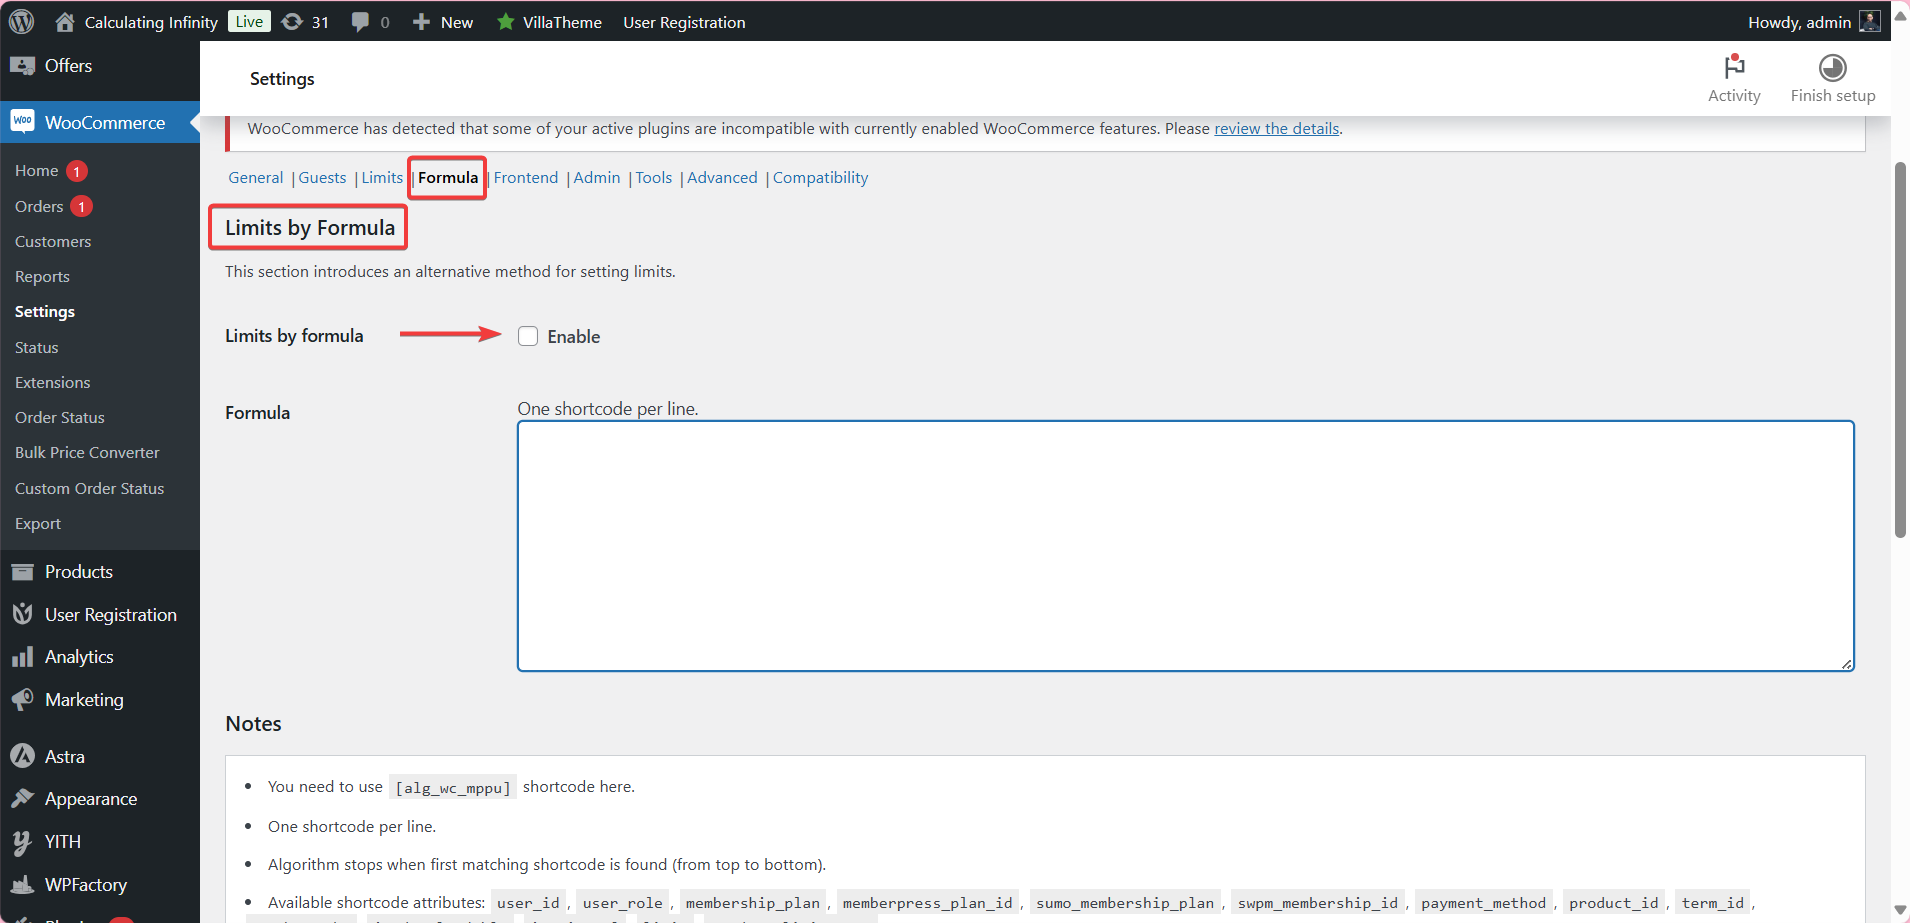
Here are some notes to take into concentration when writing and using shortcodes to determine the maximum purchase limit.
Step7
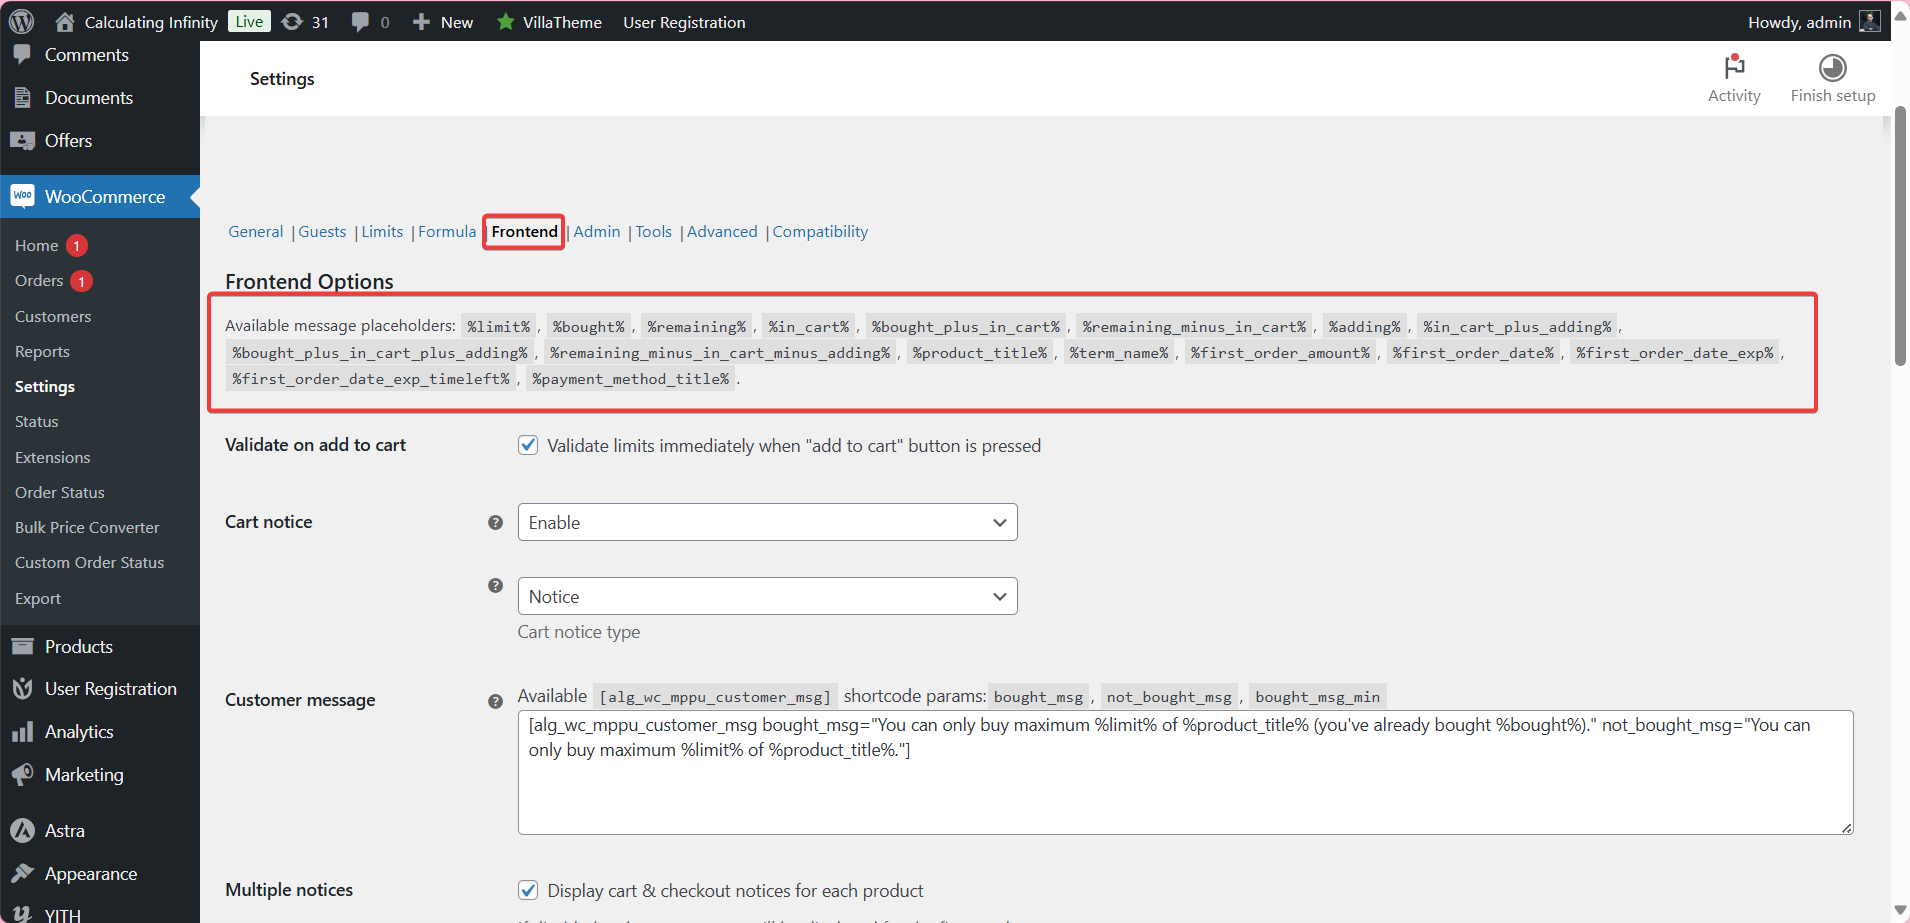
➡ Fronted
These settings control how purchase limit messages are displayed to users.
These variables are used in messages to display custom information such as maximum number purchased, remaining quantity, and others.
-
Validate on add to cart
When this option is activated, the purchase limits are checked immediately after pressing the “Add to cart button”. Instead of waiting until the checkout page.
This option is useful to prevent customers from exceeding the limit from the start.
-
Cart notice
When activated, a warning message is displayed on the cart page when the limit is exceeded.
You can also customize the notification type and message body using shortcodes, for example:
“woocommerce_review_order_before_submit”.
This means that if a customer has previously purchased the product, the first message will appear.
-
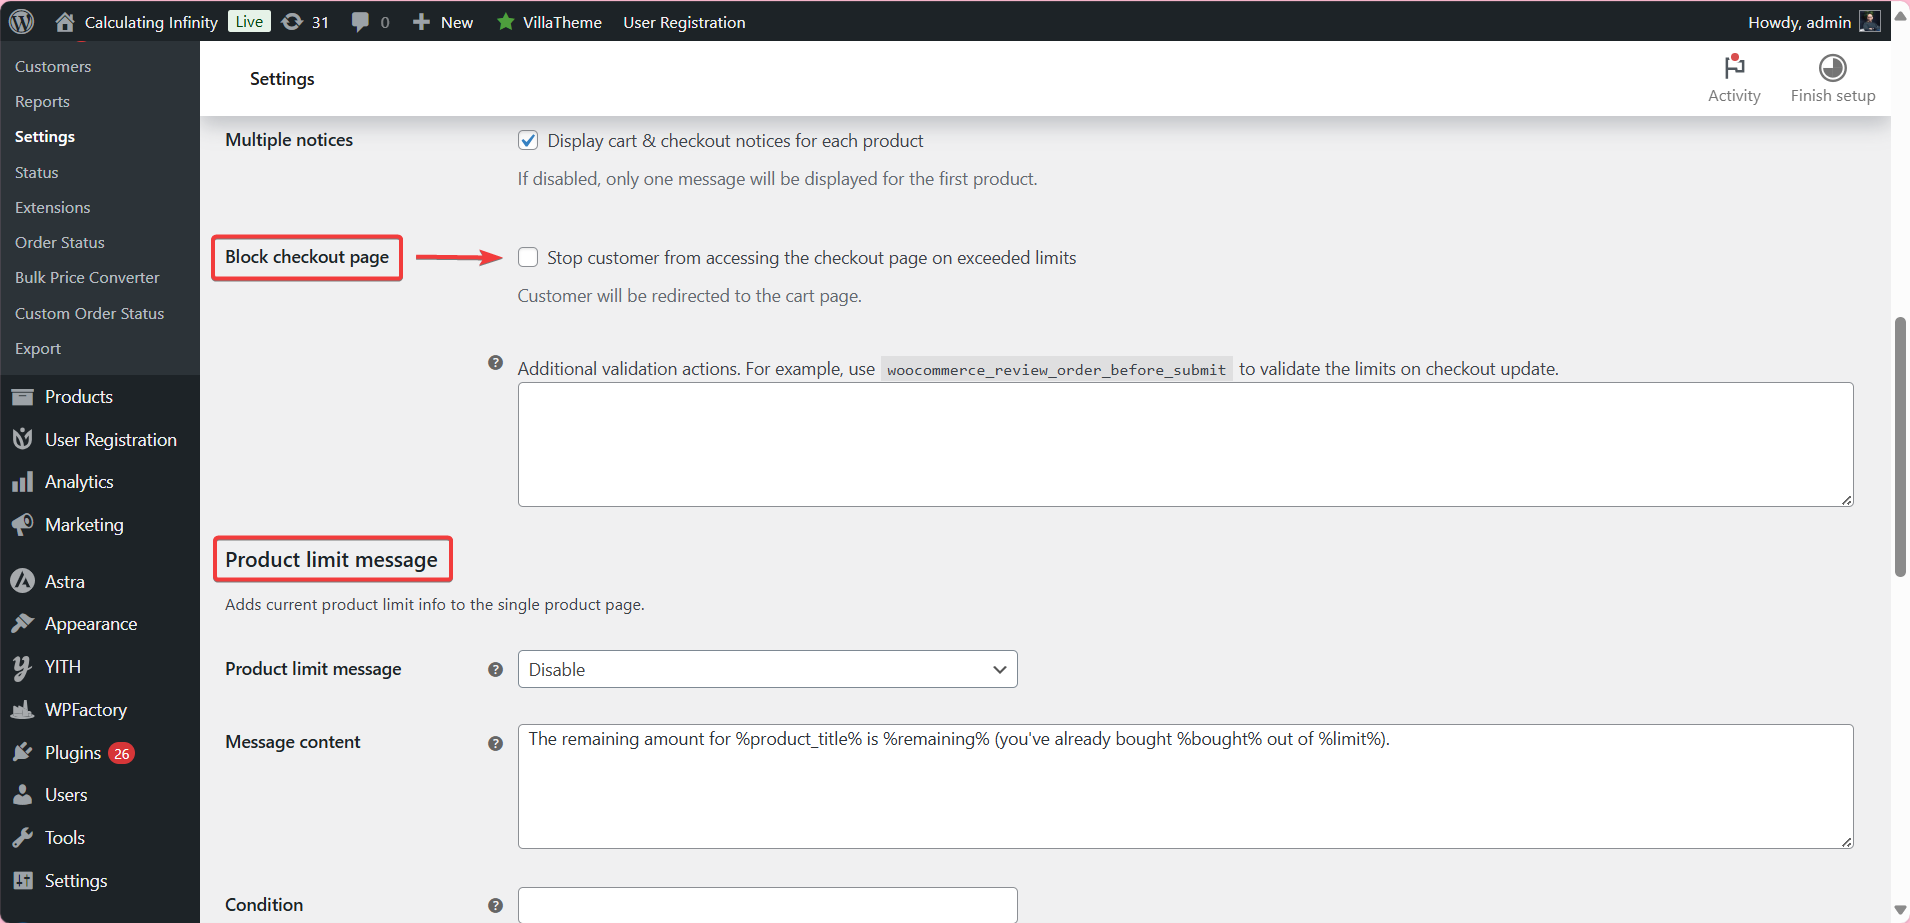
Block checkout page
If this option is activated, customers will stop from accessing the checkout page on exceeded limits. And they will be redirected to the cart page.
-
Product Limit message
When you activate this option, a message explaining the maximum product is added on the individual product page.
And you can customize the message as you want.
In addition to the possibility of having a condition to display the message, for example, the message will be displayed only when there is no quantity left available for purchase.
-
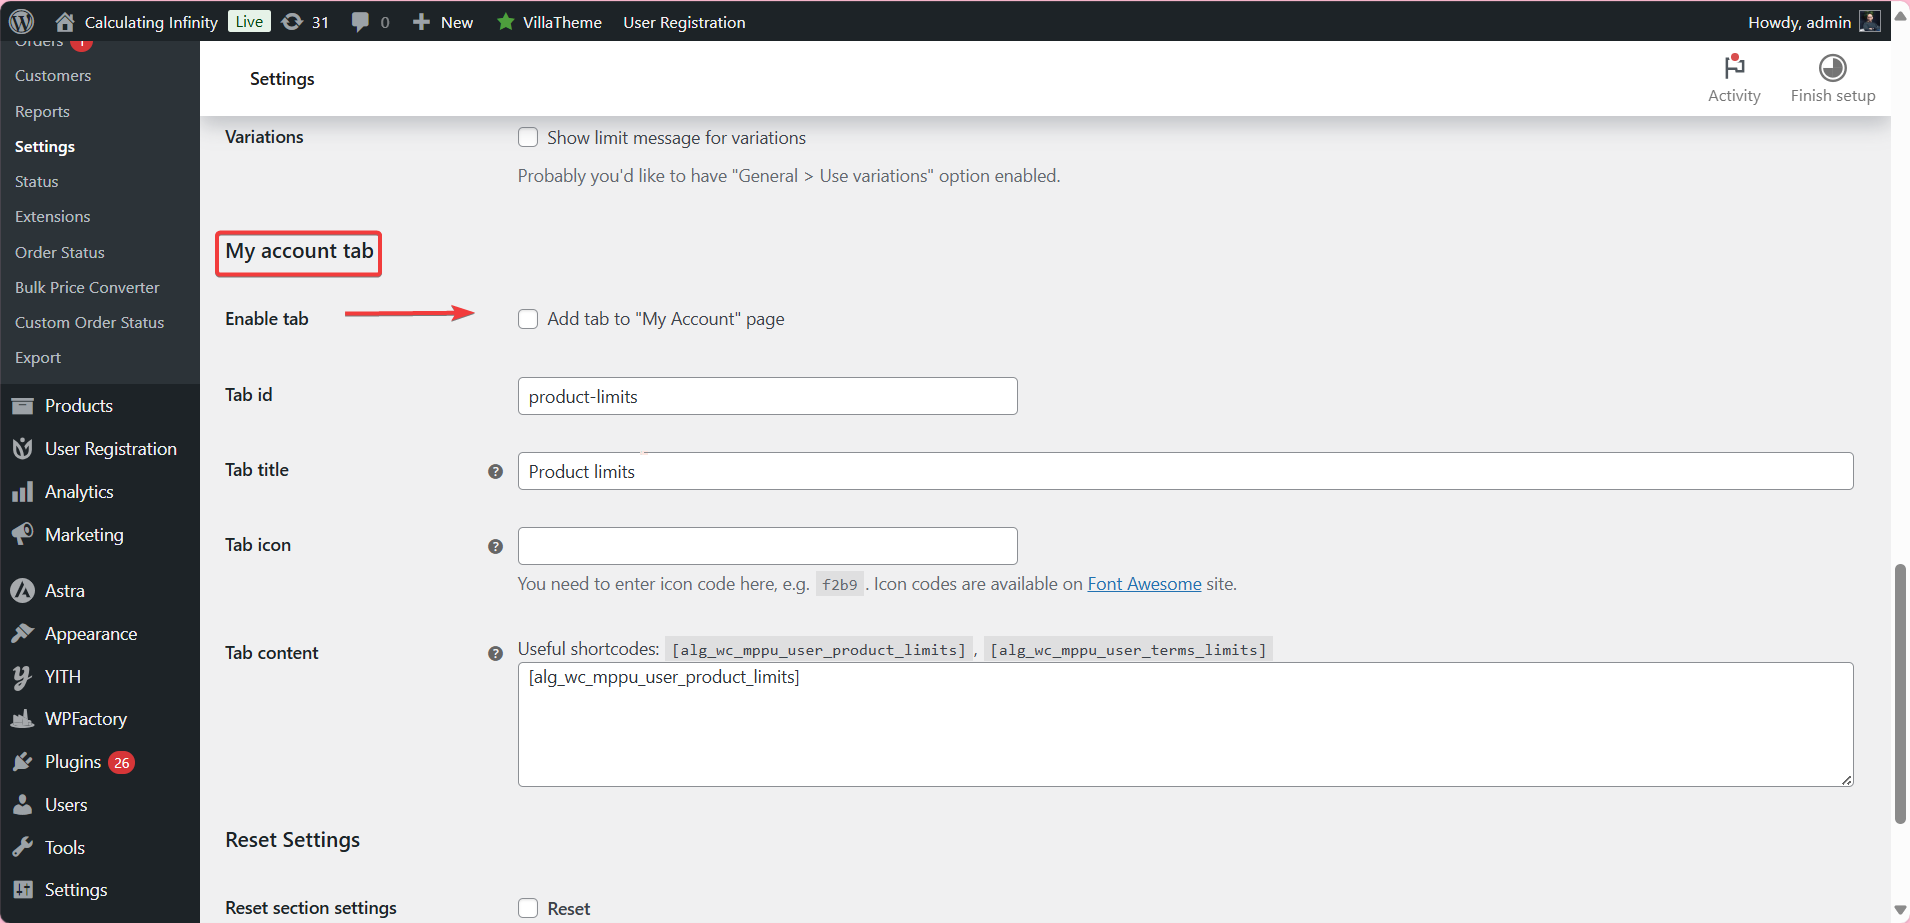
My Account tab
When this option is activated, a new tab will be added on the “My account page” showing the customer’s product limits.
- Tab ID: Here you should enter the product limit.
- Tab title: You can use shortcode here
- Tab icon: Here, you need to enter icon code, e.g. f2b9.
Icon codes are available on Font Awesome site.
- Tab content: Here you can use shortcodes to dynamically display customer limits.
Step8
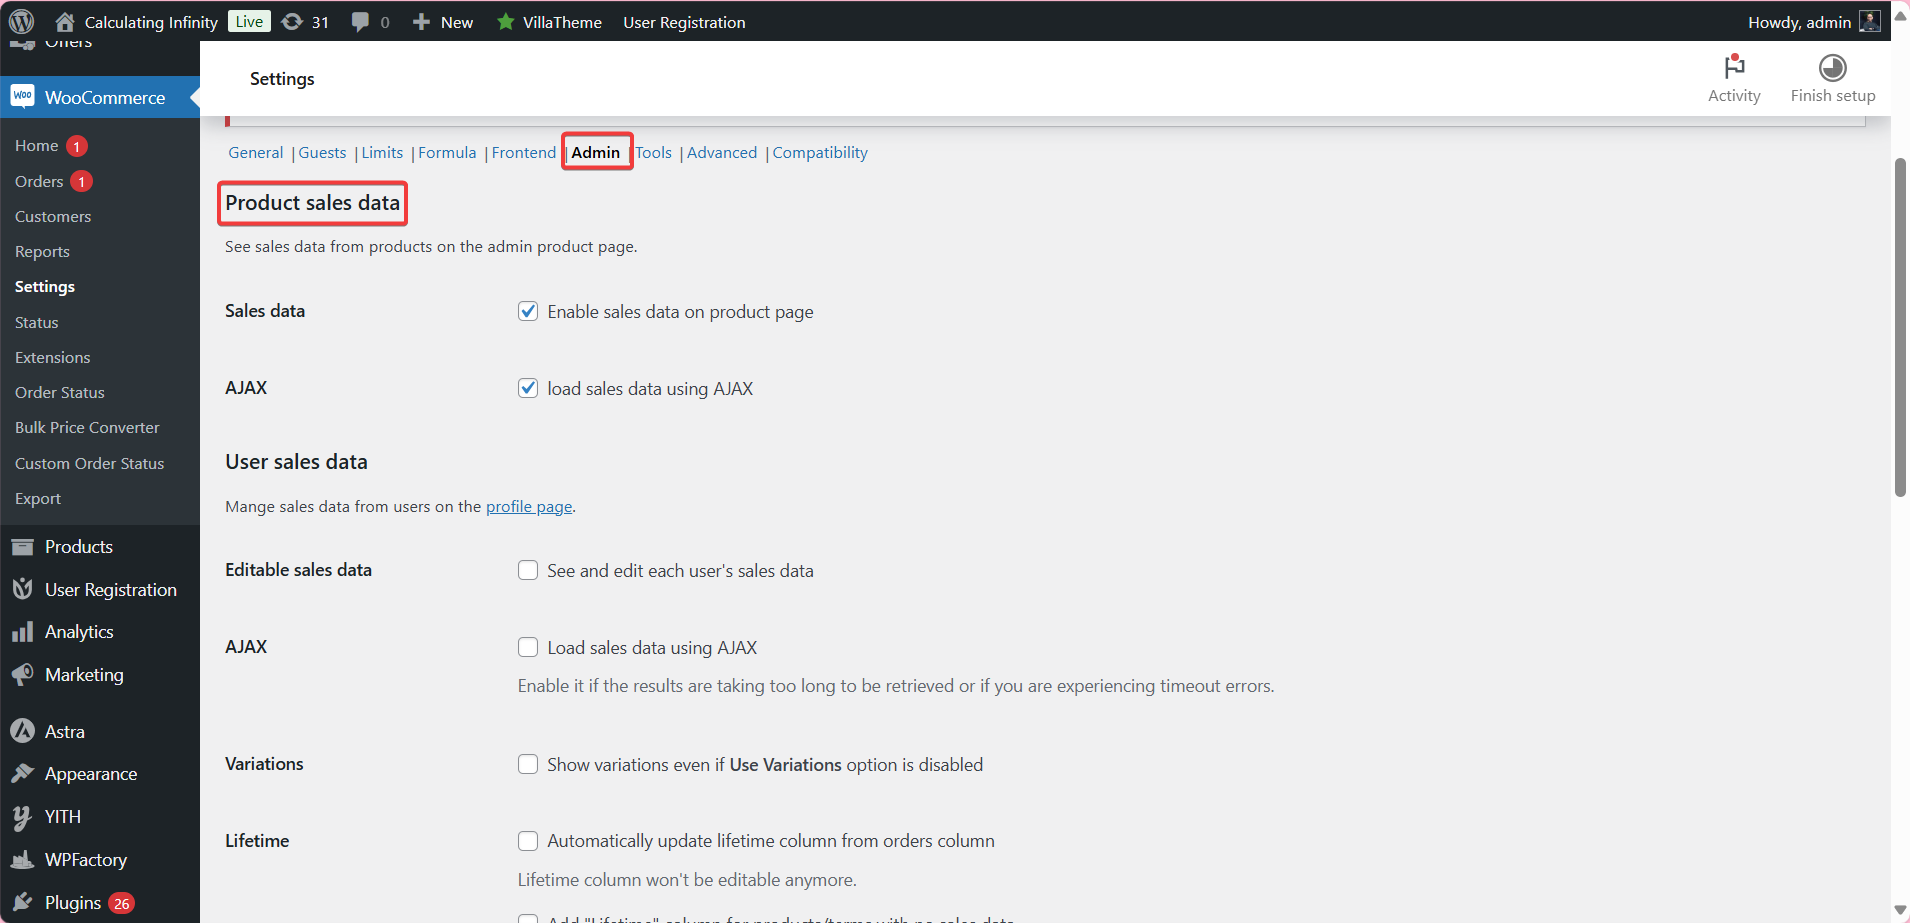
➡ Admin
These settings relate to viewing and managing product sales data.
- Sales data: When this option is activated, sales data for each product is displayed on the product page within the control panel.
-
User sales data
From here you can see and edit user sales data from each user’s profile page.
-
AJAX
If the data is used for a long time to download, you can use the AJAX option, which uploads sales data.
-
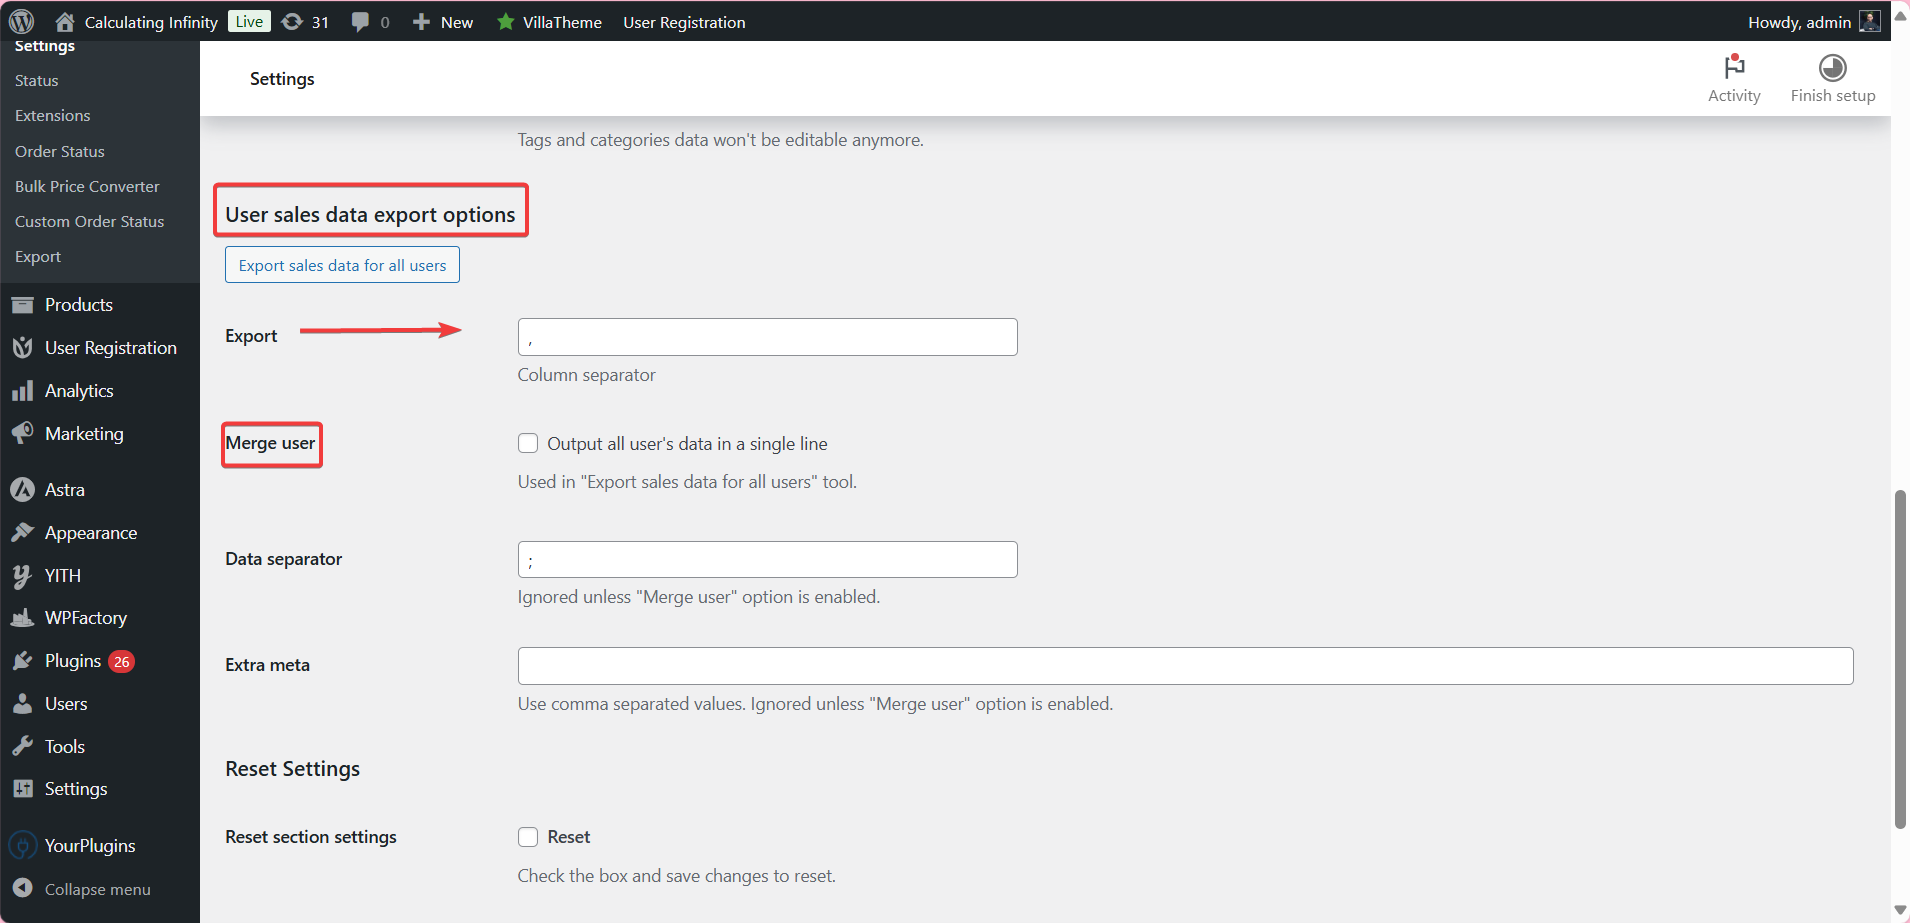
User sales data export options
From here you can export sales data for all users.
- Merge user: When enabled, all user’s data is combined into a single line.
Step9
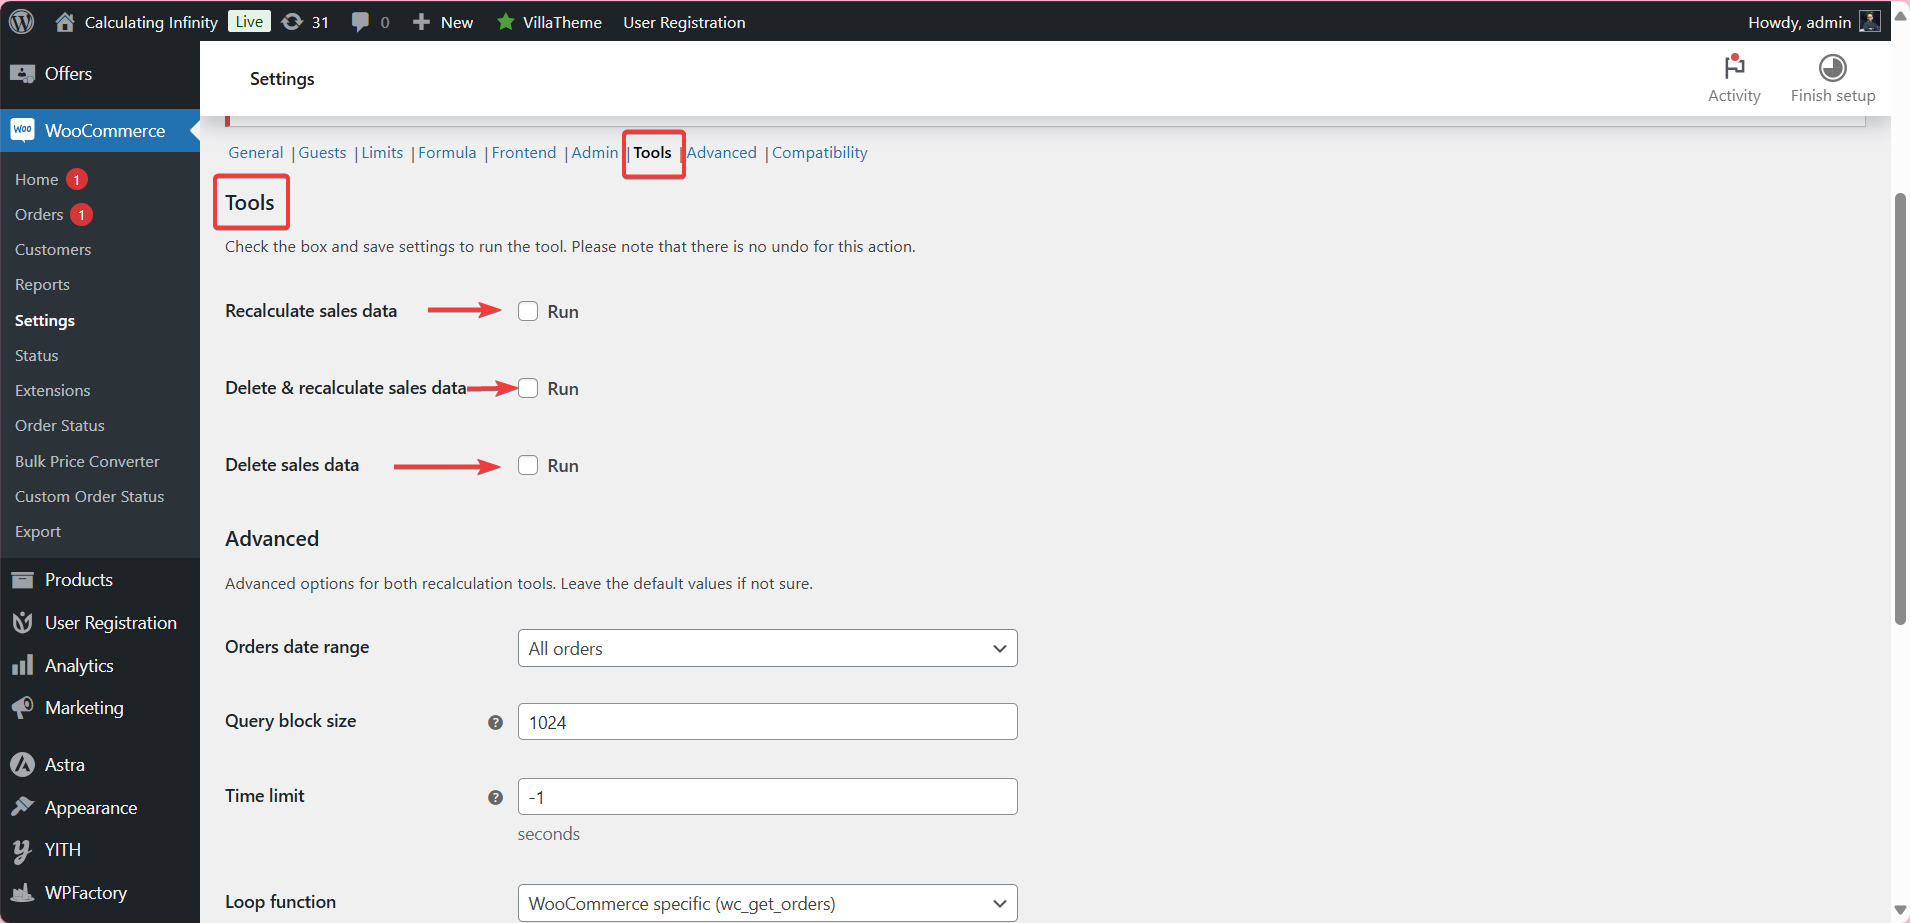
➡ Tools
These settings are for a tool for recalculating sales data.
- Recalculate sales data: When you activate this option, the sales data stored in the database, such as total sales and number of orders, will be recalculated based on current orders.
- Delete & recalculate sales data: Here, the stored data is first deleted and then recalculated again based on registered orders.
- Delete sales data: This option deletes stored sales data without recalculating it.
-
Advanced
Order data range: You can choose whether you want the recalculation to affect all orders or a specific data range.
– All orders
– Only orders in general > data range.
- Query block size: The number here (1024) determines the number of orders that will be processed per cycle during the calculation.
- Time limit: Here the maximum time for carrying out the operation is determined. A value of “-1” means there is no time limit, which means that the process will continue until it is complete.
- Loop function: It means choosing the method of retrieving orders. Usually using the default WooCommerce function, which is the safe and preferred option for most users.
- Debug: When this option is activated, process details will be recorded to facilitate error detection in case of problems.
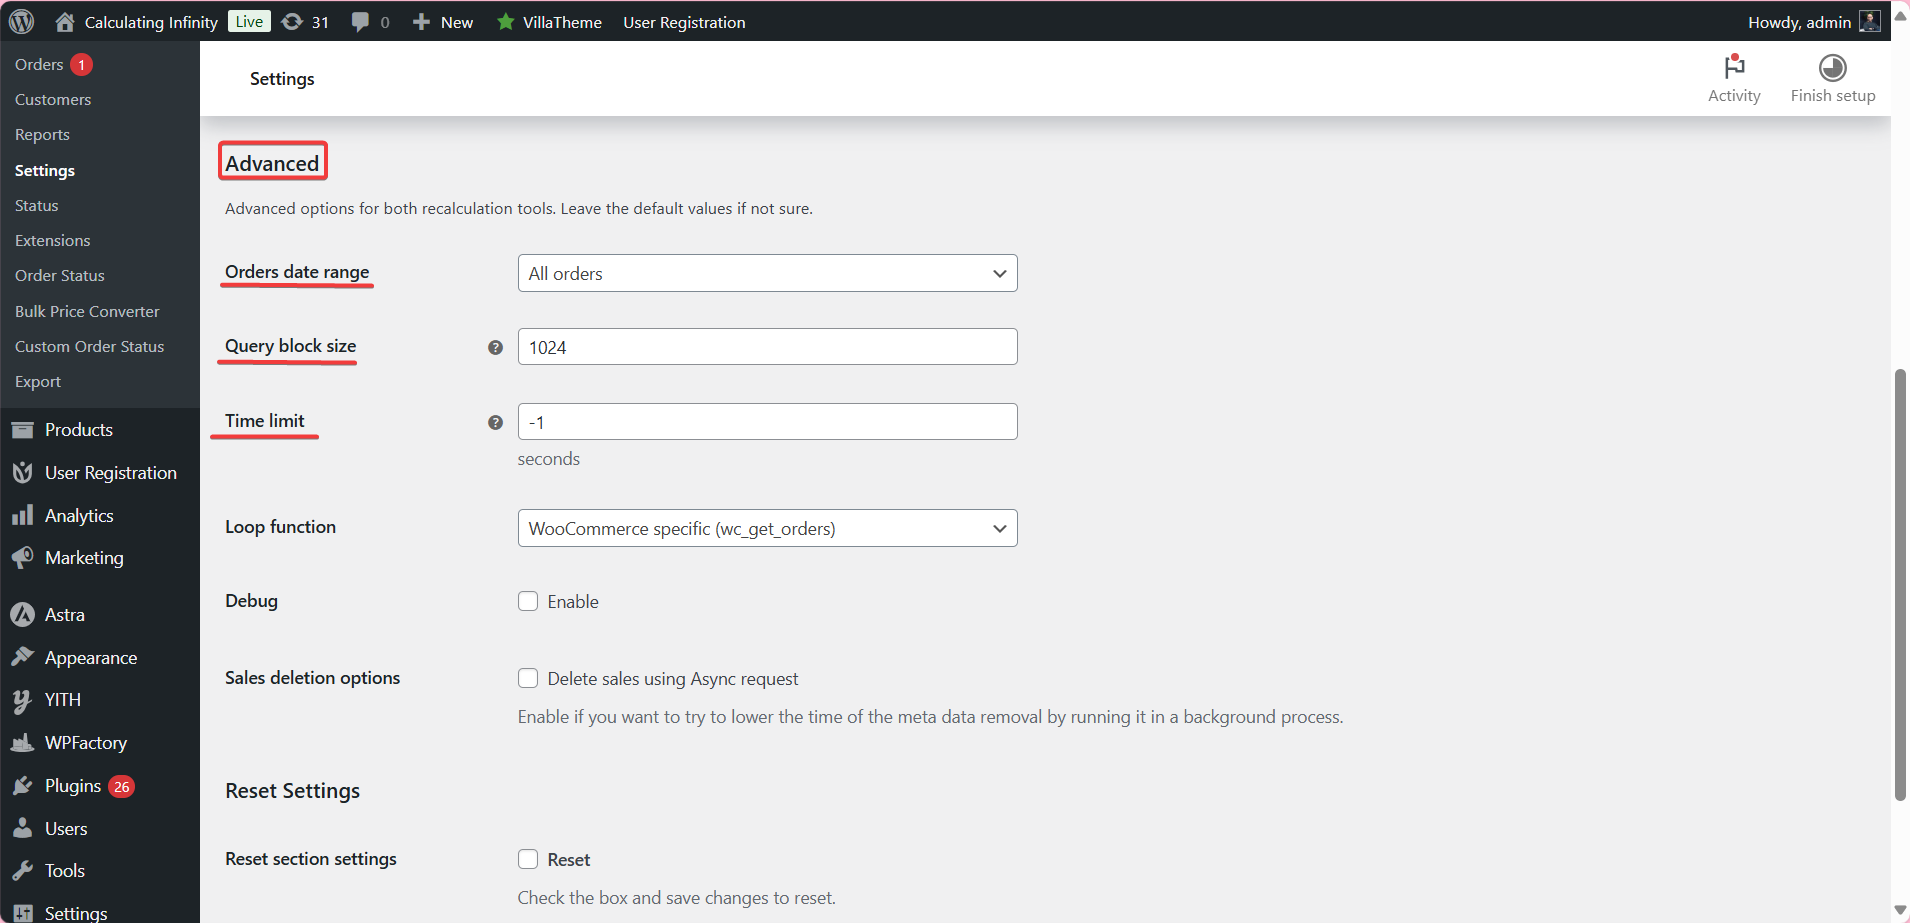
Step10
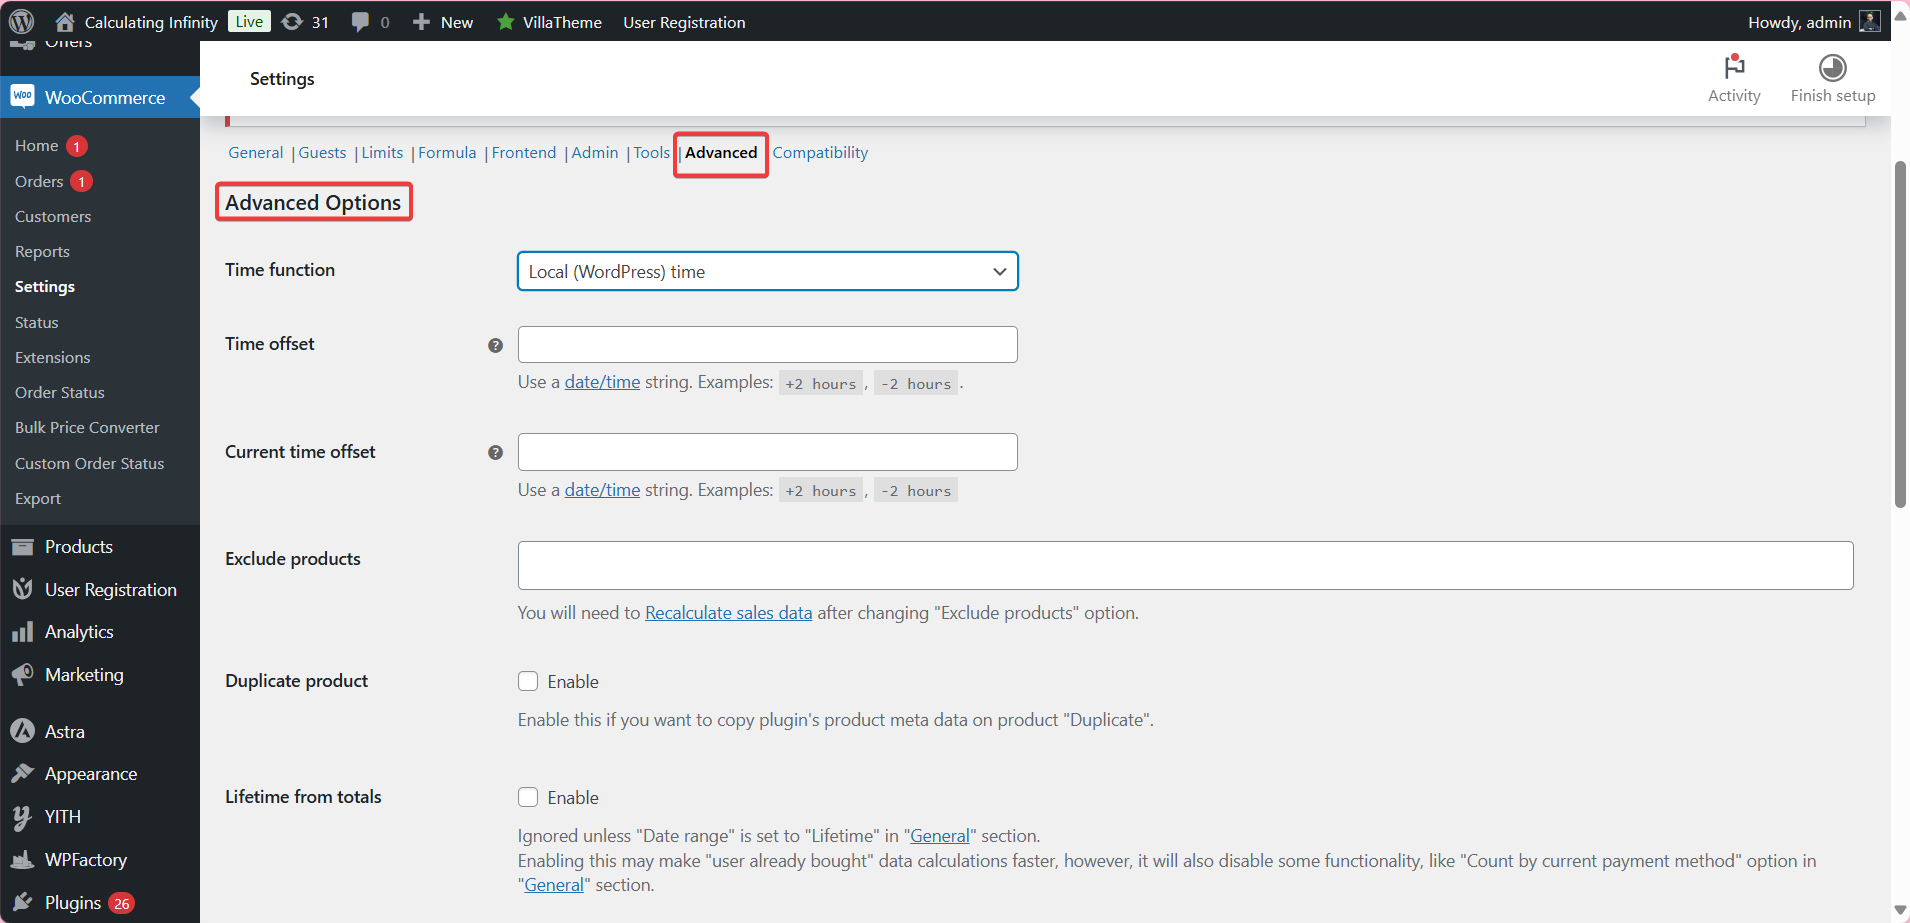
➡ Advanced
- Time offset: From here you can set a specific time difference for calculation.
Examples: +2 hours, -2 hours.
This option is useful if you need to synchronize order times with different time zones
- Current time offset: Same as the previous option, but immediately applied to existing data.
- Duplicate product: When you activate this option, the associated product data will be copied as an addition when a product is duplicated in WooCommerce.
- Lifetime from totals: This option uses total sales over the lifetime of the accounts instead of the specific time data.
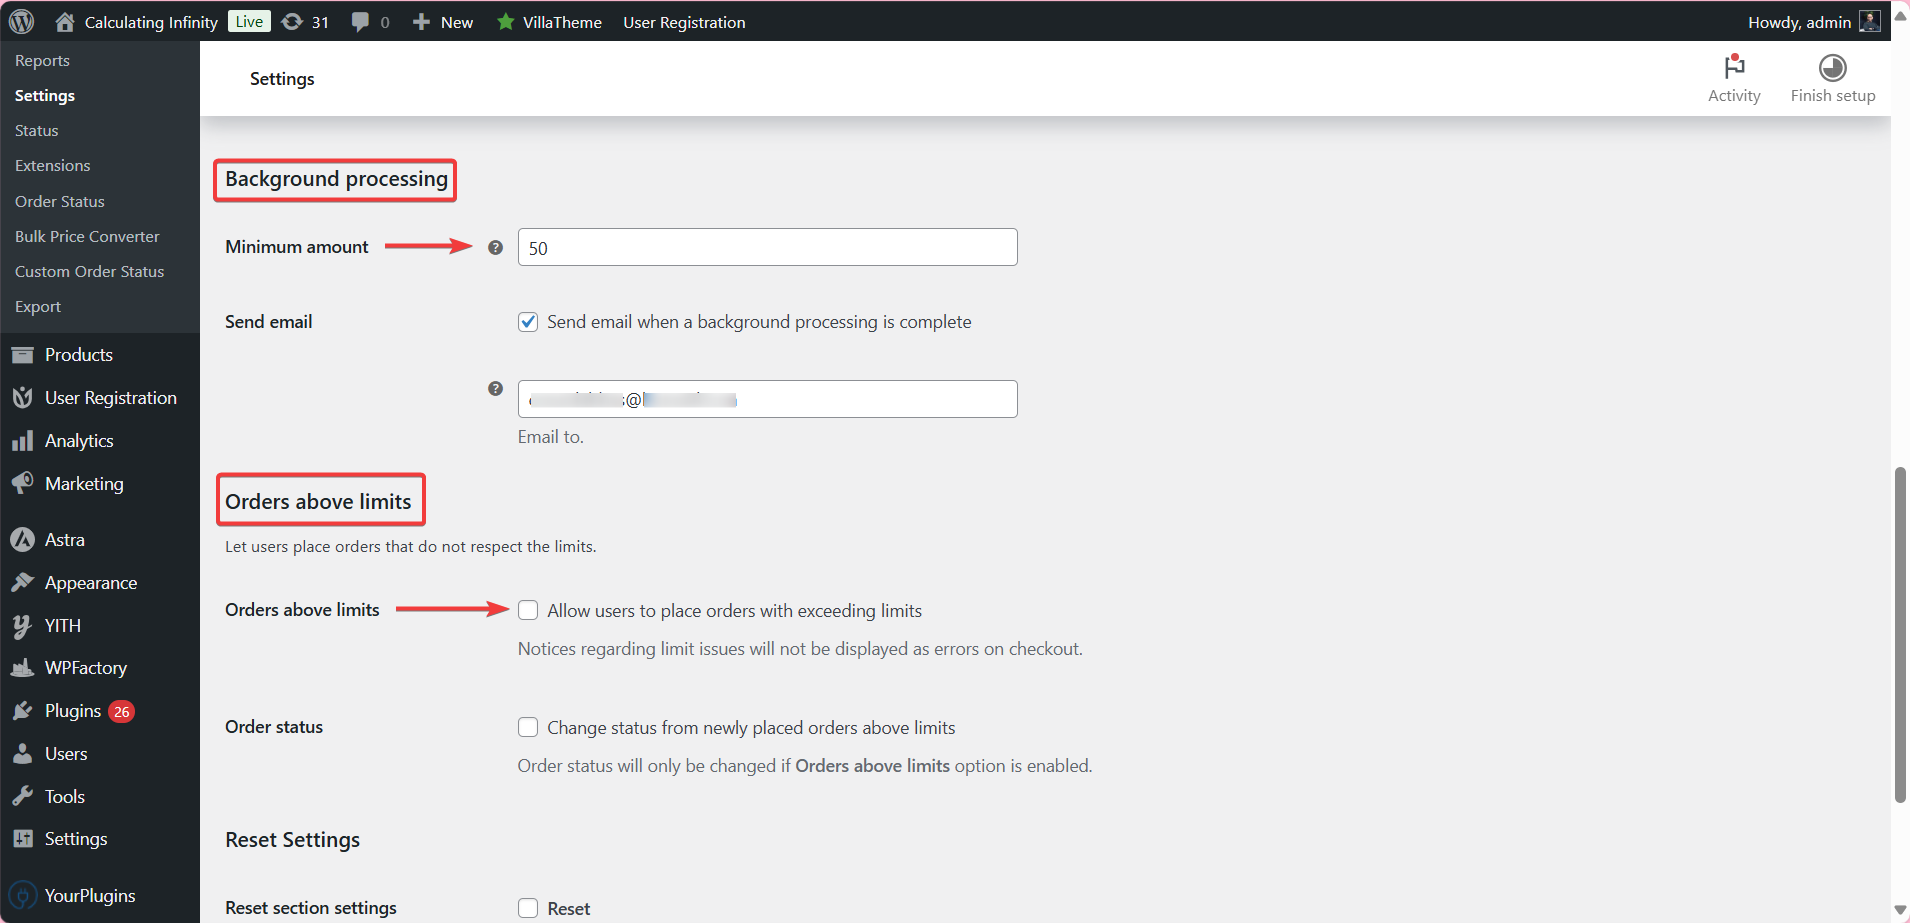
- Background processing: From here the minimum operations required before processing begins in the background.
- Orders above limit: If you want to allow customers to place orders without being bound by maximum restrictions, enable “orders above limits”.
So, customers can place orders exceeding limits.
Step11
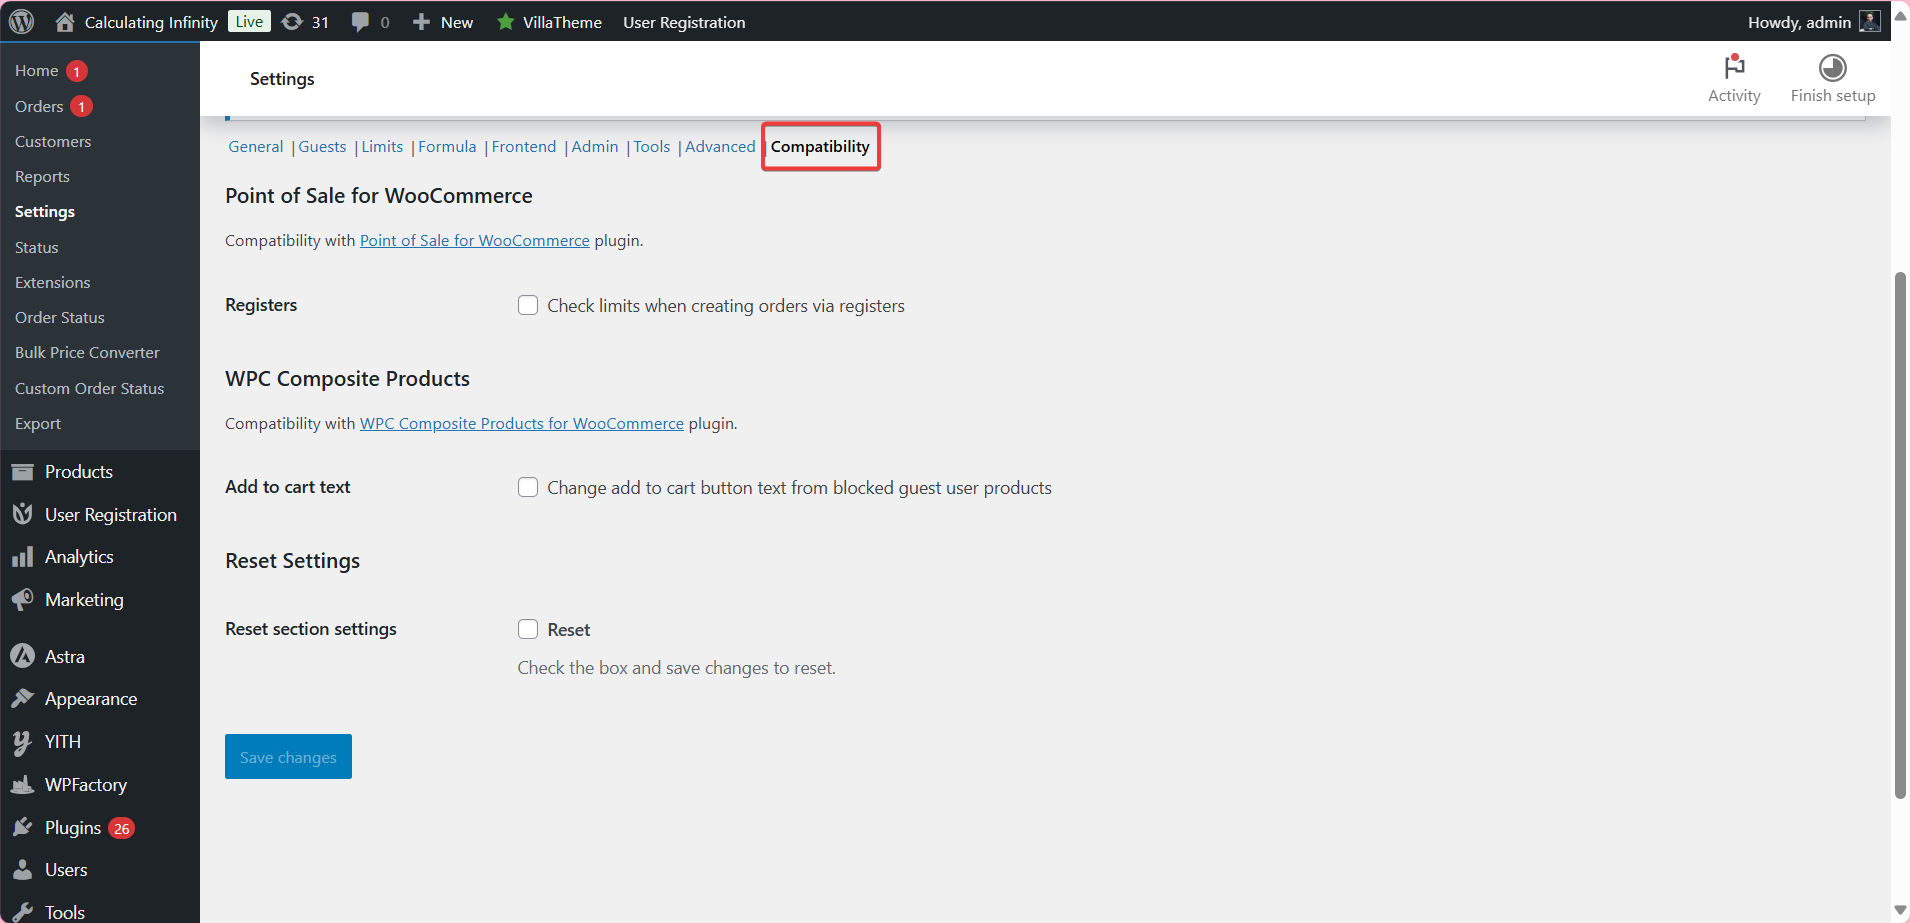
➡ Compatibility
This section shows you the tools compatible with this plugin.
Final Thoughts
As a store owner, it’s normal to face some challenges with high product demand and stock management during the seasonal season. But now, you can say goodbye to stock shortages and overwhelming demand for some products!
With Maximum Products per User for WooCommerce, control is in your hands.