
Do you enjoy getting coupon codes or discounts? Of course, we all love, and what if we get a coupon code without even lifting a finger?
Discounts play a critical role in boosting sales and driving more traffic to your website or eCommerce store. However, the real challenge often lies in how these coupon codes are applied and used.
Many eCommerce stores offer great coupon deals, but? the customer can not apply them, or try once, twice and even three times, and he forget a letter, or mistype a single character, or even forget to copy a code correctly. This makes applying coupon codes frustrating for some customers, and even make the checkout process complicated, and more likely to abonnement their carts.
But what If I told you that, you could apply a coupon code through a one click URLs?
With a single custom URLs coupon, the discount automatically applied to the products, and those products are added to the shopping cart with active discount. There is no need for manual copying, no searching for discounted products, and no extra effort from the customer side. In addition, this helps optimize the checkout process, making it easier and improve conversion rate.
This means, easily applied coupons = Happy customers = more sales and profits, It’s a win for everyone!
SO, why you should use WooCommerce coupon URLs?
Because URLs coupons are quick and easy for customers to use, and these smart coupons are a great way to increase your eCommerce sales.
In this article, I will walk you on how to install WooCommerce Coupons & Add to Cart by URL Links, and how to use it effectively.
Now, let’s go to see how easy it is to get started with this amazing tool in just a few simple steps.
Step1: #
➡ Download the Plugin #
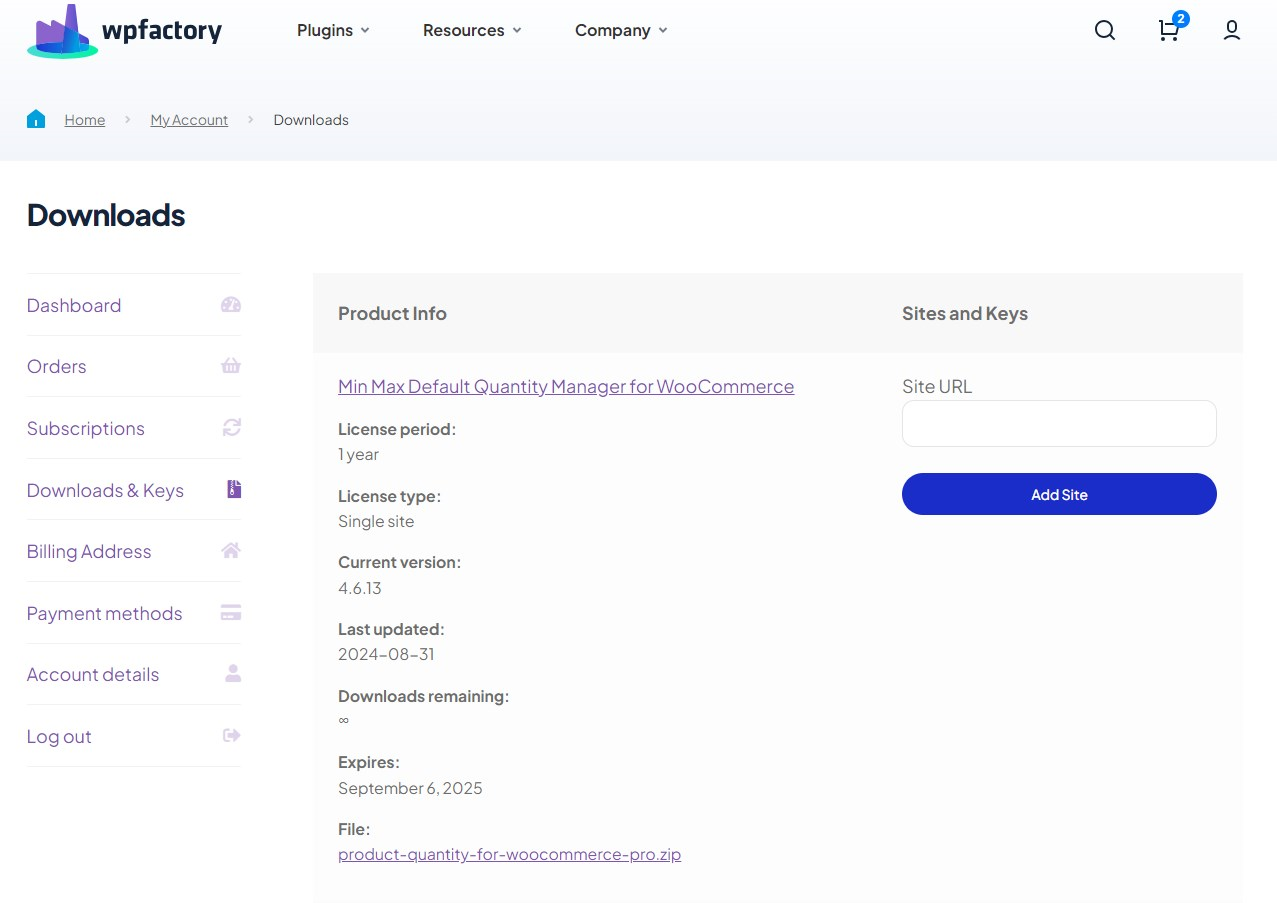
To get started you will need to download the “WooCommerce Coupons & Add to Cart by URL Links” plugin that allows you to set maximum quantities based on your store’s needs.
After downloading the plugin, from your WPFactory account, upload it to your WordPress site.
Step2: #
➡ Access the Plugin #
Once the plugin is installed and activated, you can tailor it to fit your business needs.
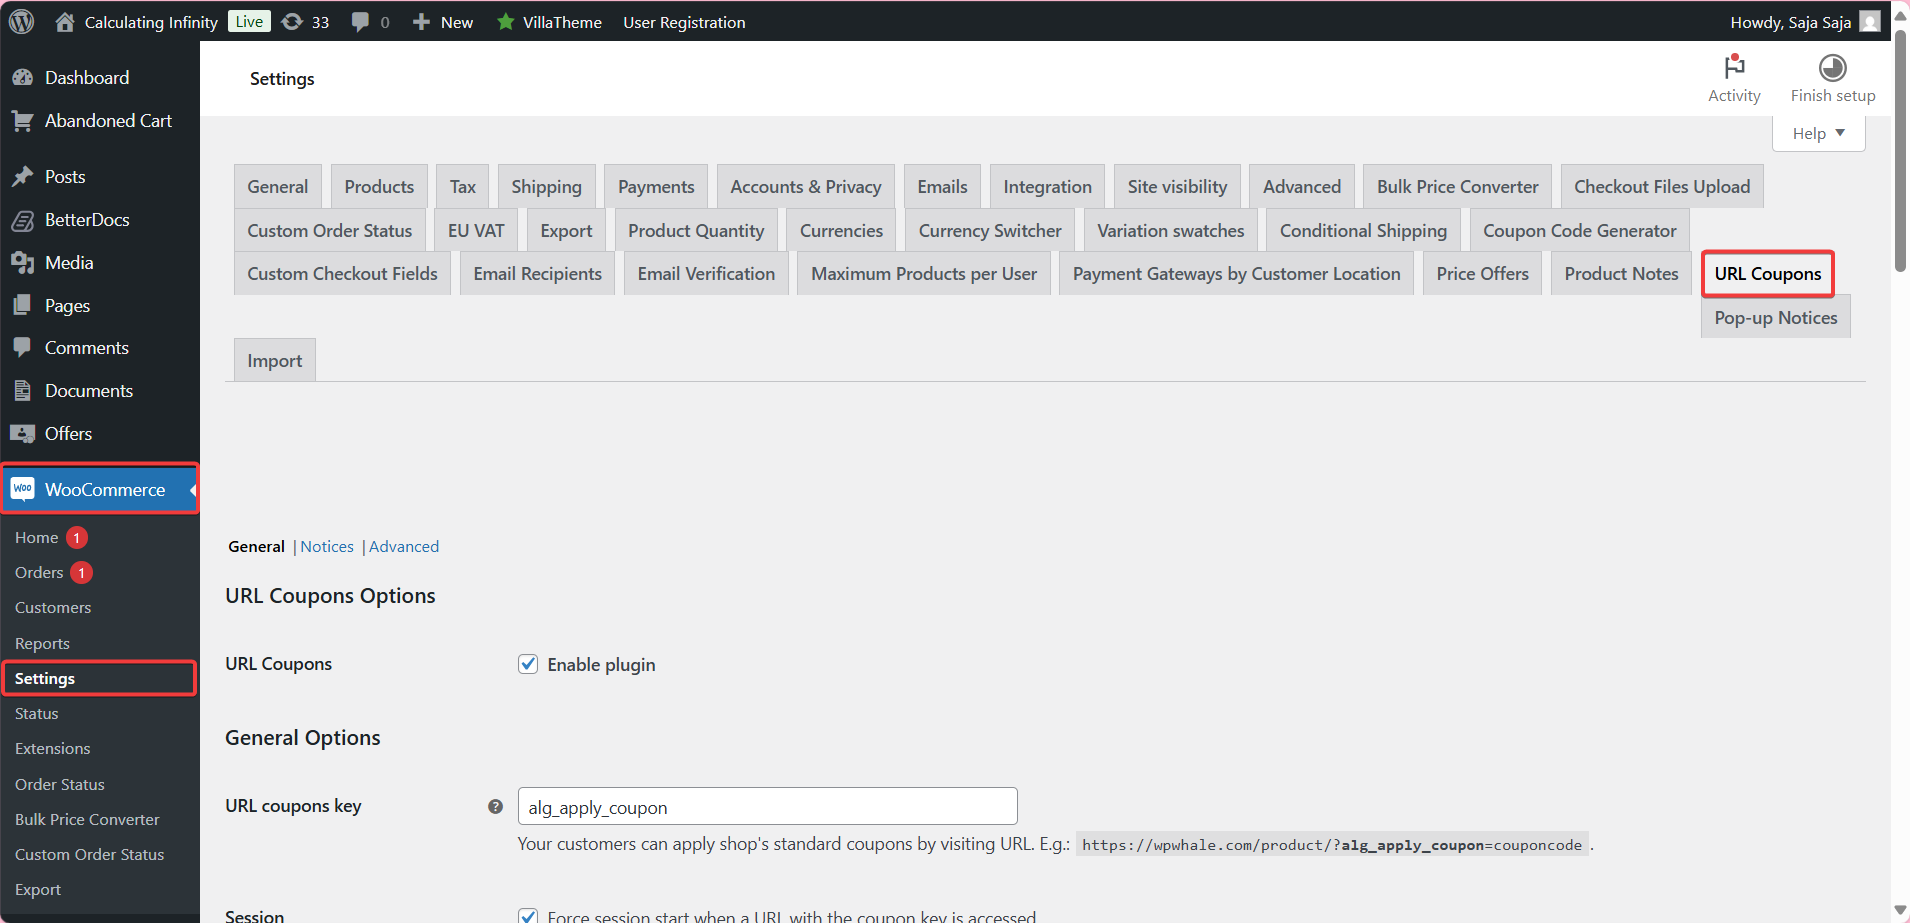
Go to WooCommerce > Settings > “URLs coupon”
Step3: #
➡ URLs Coupons General Options #
- Enable plugin ✔
The first thing you need to do is enable the plugin option. Once this option is enabled, coupons can be used via URLs.
- URLs Coupons Key
This option refers to the keyword used in the coupon URLs.
➡For example:
there is this URL: https://yourstore.com/product/?alg_apply_coupon=couponcode
Keyword is “alg_apply_coupon“, you can change it to any other word that suits you.
- Session
✔Force session start when a URL with the coupon key is accessed.
If the coupon isn’t applied to non-registered visitors (guests), enable this option to force the system to start a session (cached) when coupon URL is visited.
This cache helps the website remember certain information about the visitor, such as what they added to their cart, whether they used a discount coupon, or whether they logged in.
Therefore, some settings, such as coupon URLs, won’t work unless this session (cache) is enabled.
In short, if a visitor opens a URL with a coupon, and this session is active, the coupon will be applied.
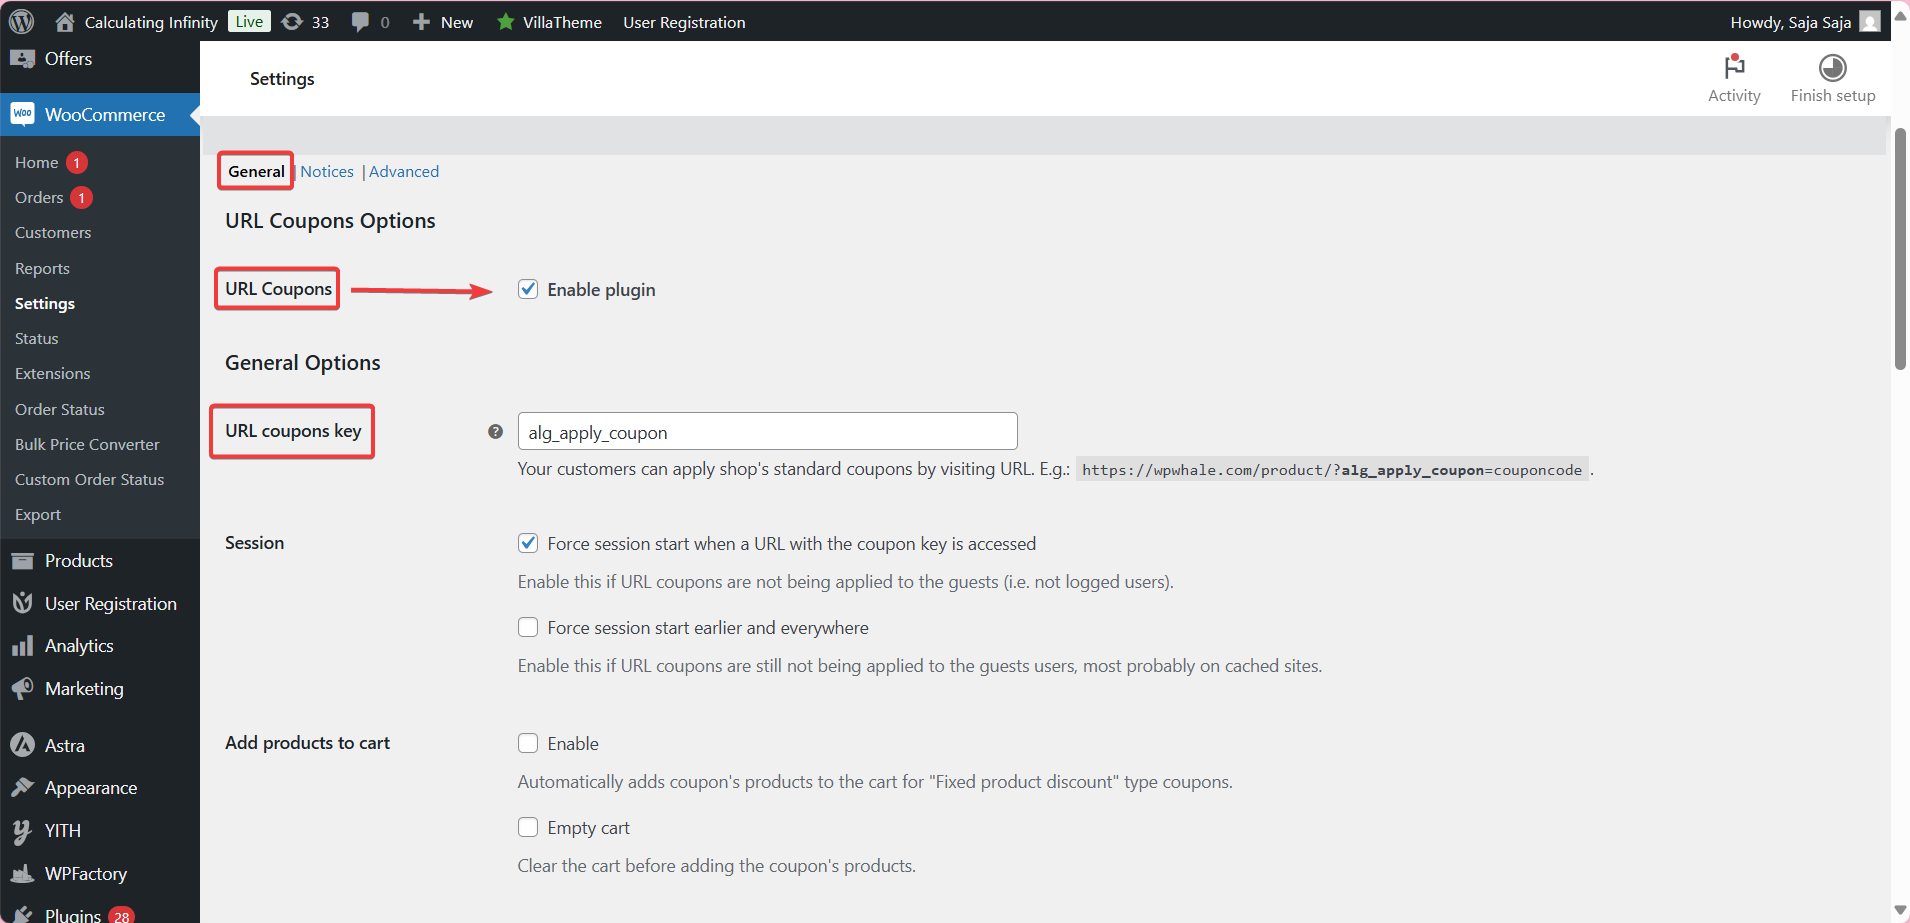
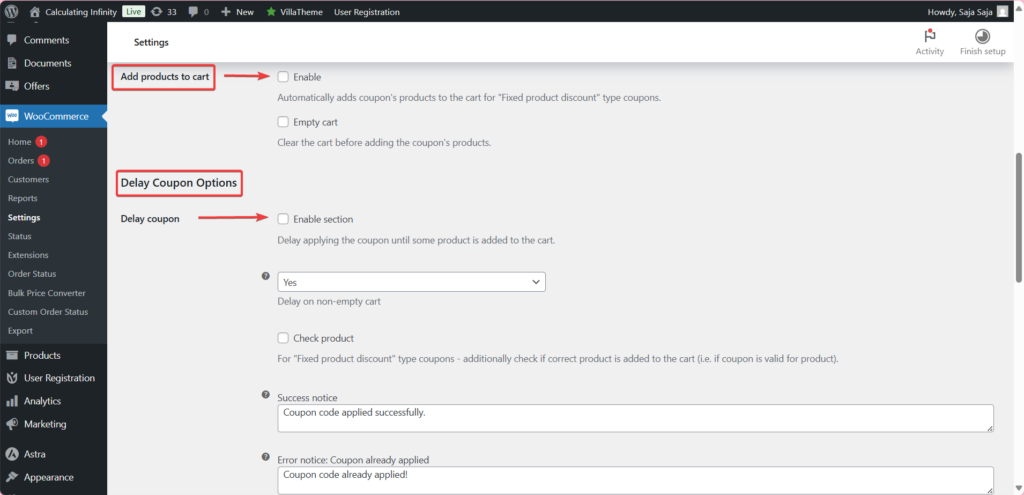
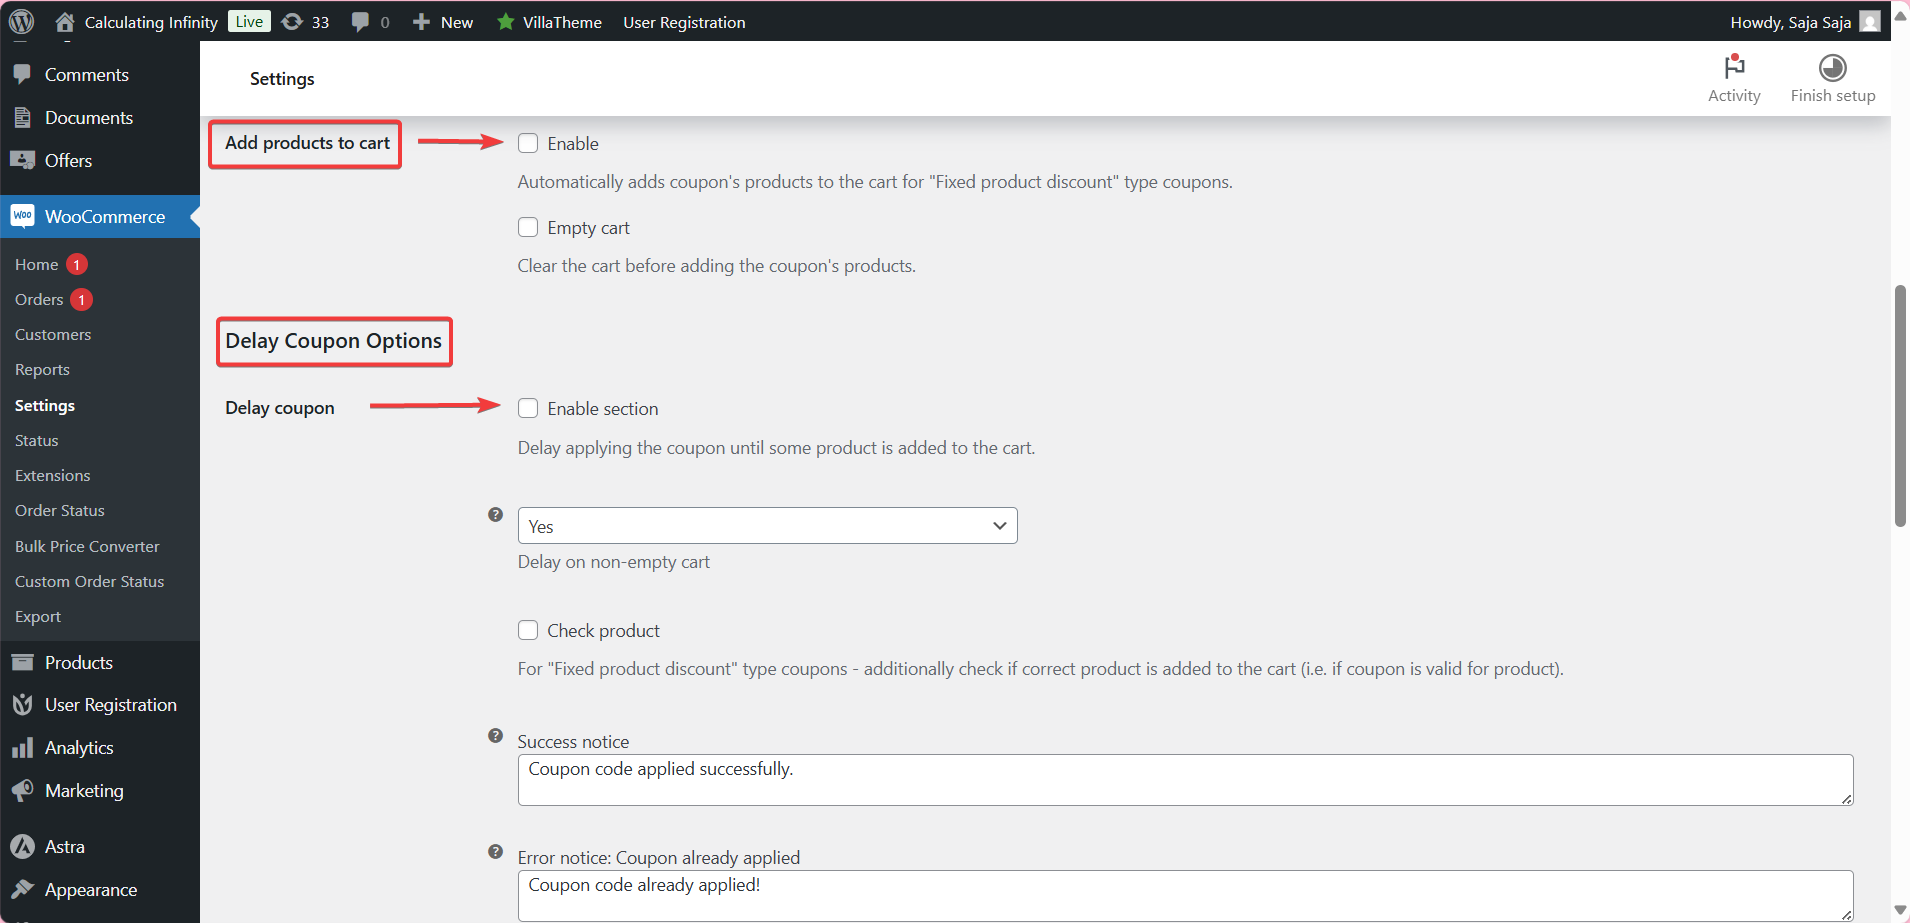
- Add Products to Cart
This option is only used with fixed product discount coupons. When this option is enabled, the products associated with the coupon are automatically added to the cart.
- Empty Cart
If enabled, the cart will be completely emptied before adding the coupon products.
- Delay Coupon Options
Delay Coupon, if you enabled this option, the coupon will be delayed until the customer adds a product to their cart first.
You can only delay the coupon if the cart is not empty.
Check product, for additional verification, whether the correct product has been added to the cart, this option is used with “fixed product discount”
- Sucess and Errors Notices
You can customize the success and errors notices message, such as:
-
Coupon code applied successfully.
-
Coupon code already applied!
-
Coupon “%coupon_code%” does not exist!
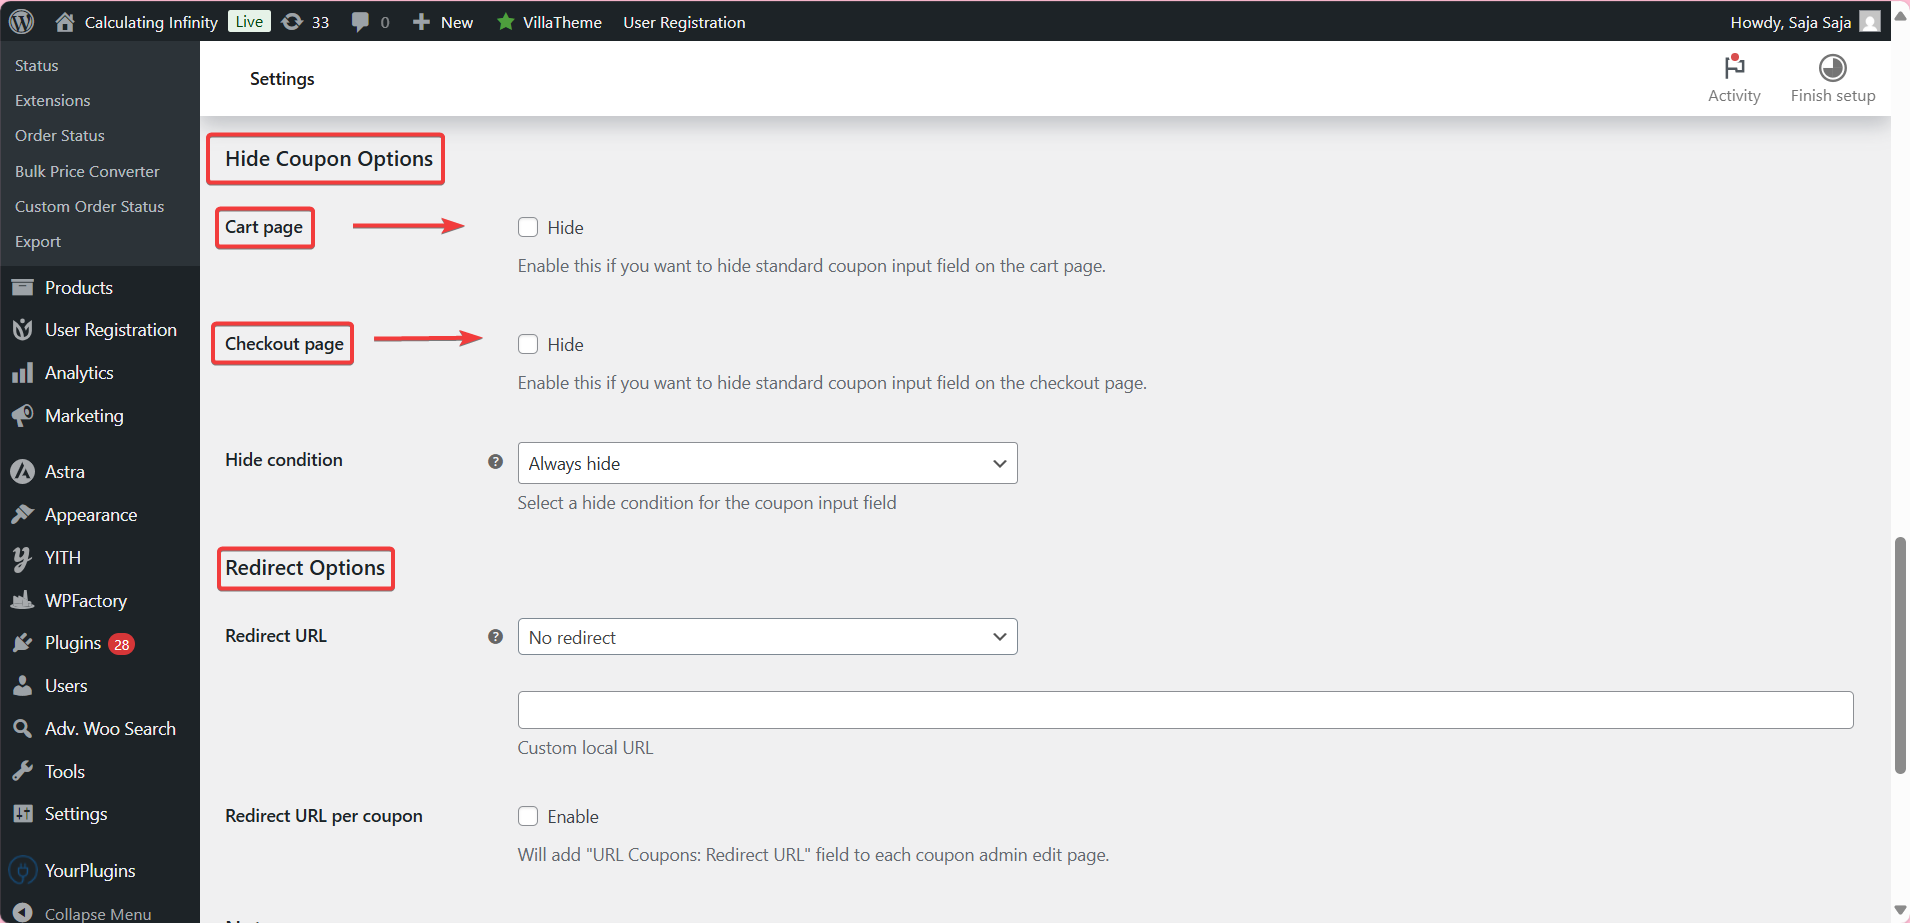
- Hide Coupon Options
-
Cart Page: Here you can hide the coupon entry box on the cart page.
-
Checkout Page: Here you can hide the coupon entry box on the payment page.
-
Hide Conditions: Here you can choose when to hide the box, always or under certain conditions such as, hide if coupon applied via URL.
- Redirect Options
Redirect URL: From here you can specify the redirection page after applying the coupon:
-
No redirect
-
Redirect to cart
-
Redirect to checkout
-
Redirect to custom local URL
Redirect URL per coupon: When this option is activated, a custom field will be activated to specify a specialized redirect link for each coupon separately within the coupon editing page.
Notes:
If you are using URL to a page where no WooCommerce notices are displayed, try adding our[alg_wc_url_coupons_print_notices] shortcode to the content. Please note that this shortcode will print all WooCommerce notices (i.e. not only from our plugin, or notices related to the coupons).
Step4: #
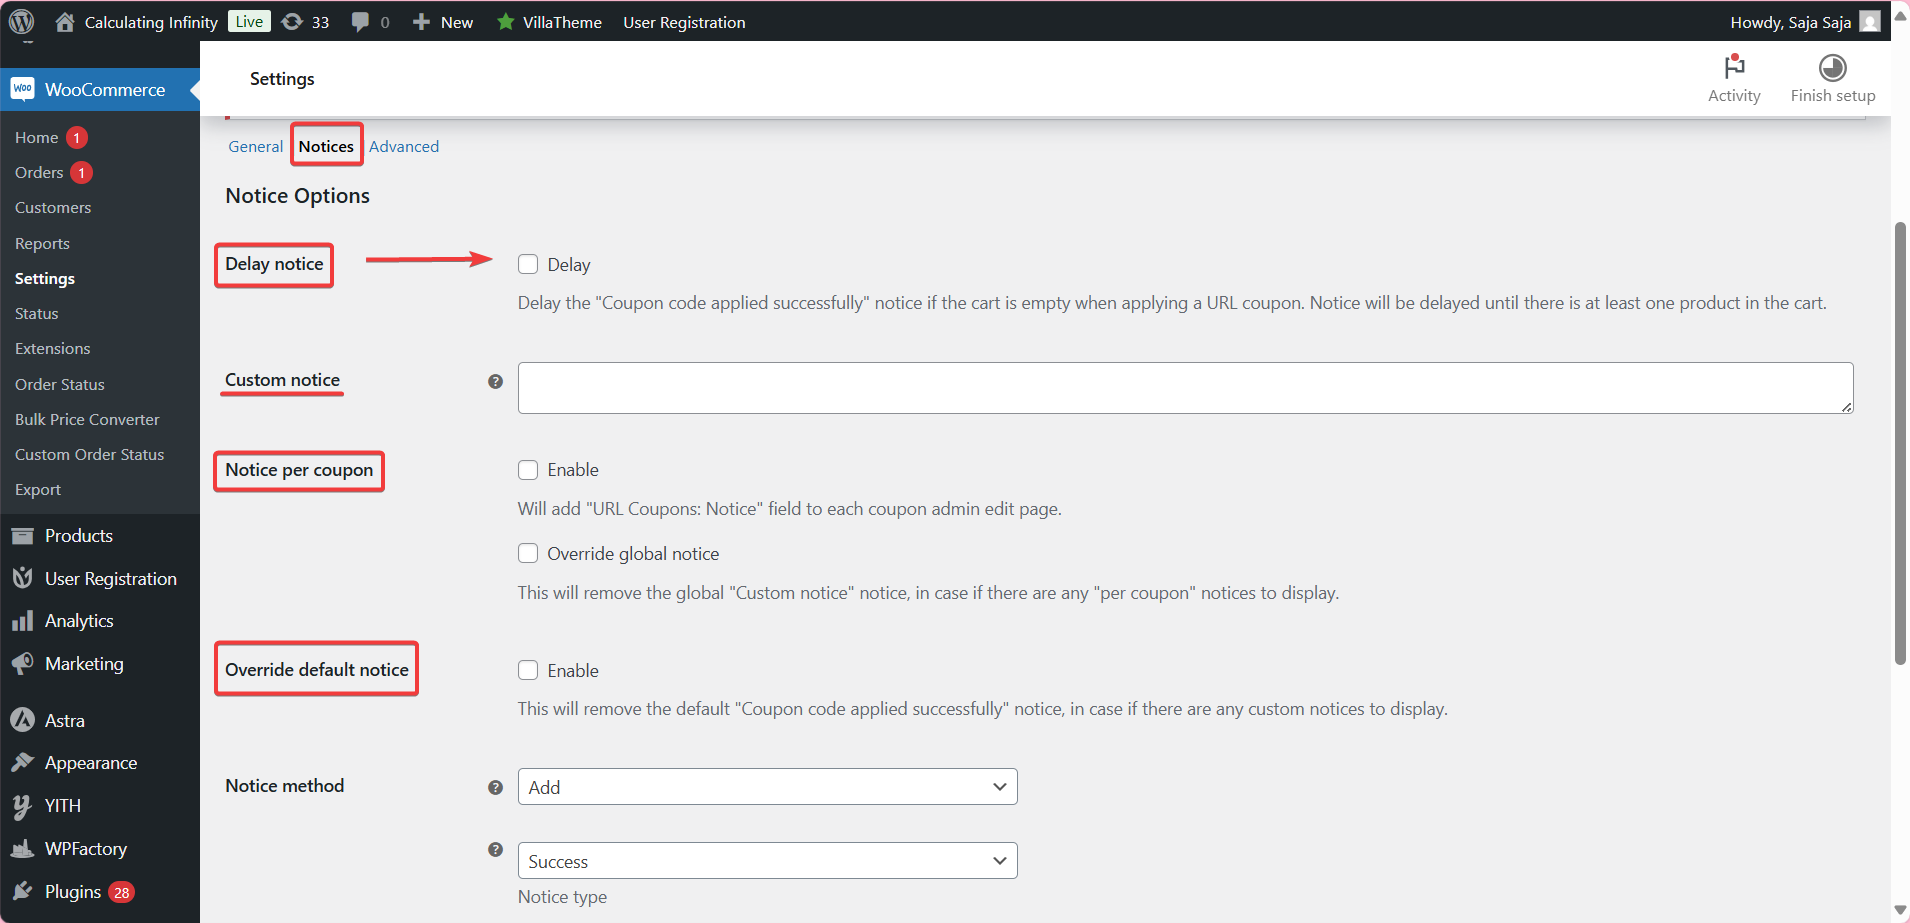
➡ Notices #
- Delay Notices
If this option is enabled, the notification, “Coupon applied successfully” will be delayed if the shopping cart is empty when applying the coupon through a URL.
This notification will only appear after the customer adds one product to the cart.
- Custom Notice
This section allows you to customize coupon notification instead of using the default notifications.
- Notice per Coupon
When activated, a new field will be added to the coupon editing page in the WooCommerce control panel with the name URL coupons: Notice
- Override Global Notice
If you are using custom notifications for each coupon, this option will prevent the general notice (written in custom notice), from being displayed if there is a custom notice for the coupon
- Override default notice
When this option is enabled, the default WooCommerce “Coupon applied successfully” notification will be cancelled, and instead the notification you wrote in custom notice will be displayed.
Step5: #
➡ Advanced #
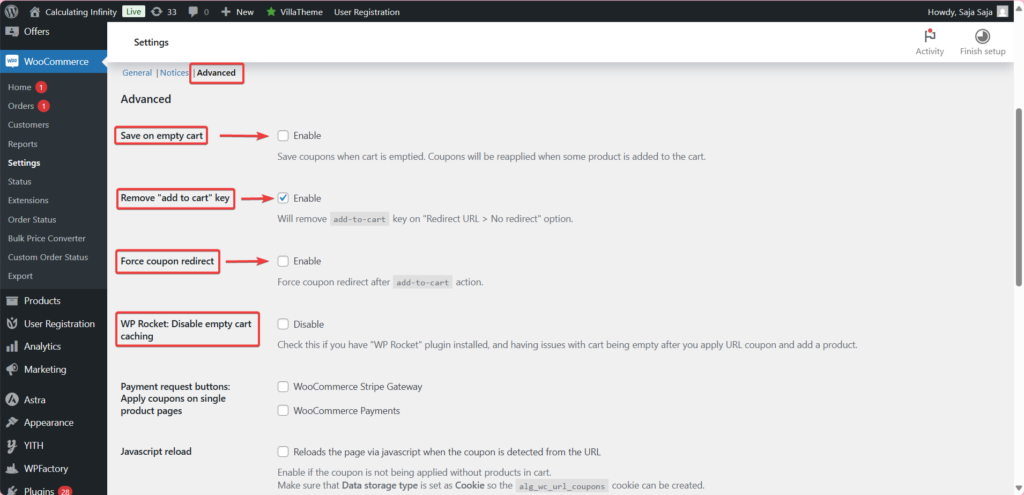
- Save an empty Cart
If this option is enabled, even if the customer empties the cart completely, the coupon will be temporarily saved and will be automatically applied again when the customer adds another product to the cart.
- Remove “add to cart” key
This option is enabled when you select “No redirect” in the redirect URL option. Activating it means that the coupon URL will not automatically add the product to the cart but will simply apply the coupon without executing the “add to cart command”.
- Force coupon redirect
If you enable this option, after the coupon is applied and when you perform an “Add to cart” checkout, the user will be automatically redirected to the page you specified in the coupon.
- Payment request buttons: Apply coupons on single product pages
-
WooCommerce Stripe Gateway
-
This option ensures that coupons applied from a link are activated even on the product page when the customer uses the direct payment button.
- Javascript reload
When activated, if the coupon is detected in the link, the page will automatically reload using JavaScript.
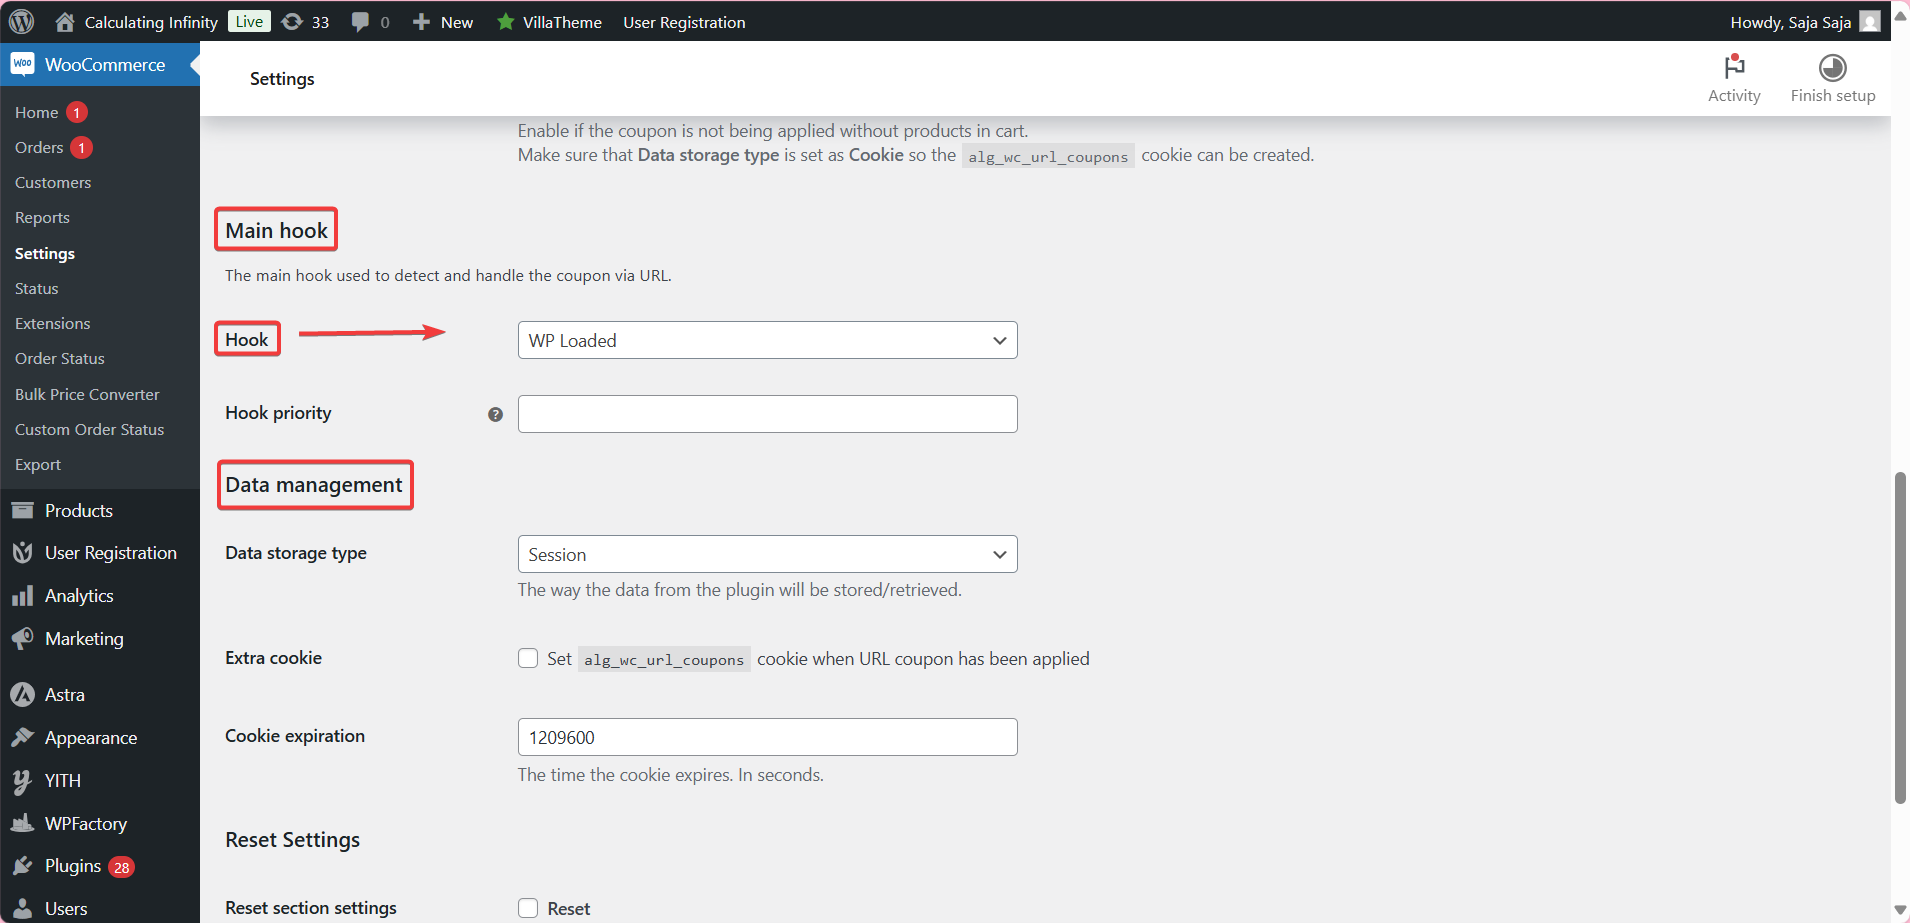
- Main Hook
Hook: Here you specify the tie at which you want the coupon to be detected from the link you can change this if you need a different page load time.
- Data management
Here the type of data storage is specified.
-
Session: Coupon data is saved in the user’s temporary session.
-
Cookie: The coupon is saved in a cookie file in the user’s browser, useful for remembering the coupon after reloading the page.

Final Thoughts #
Now, with just one click, your customer can get automatic discount coupons applied directly to their cart, without any confusion, or mistyping the coupon codes, no need for manual codes, just click, and enjoy with the discount.
And for you as the store owner, this “WooCommerce Coupons & Add to Cart by URL Links” makes it easier for you to collaborate with other websites, influencers, or partners, by sharing custom URLs, that are easy to promote and simplify the experience for new customers!
This is powerful tool now in your hand, giving you a greater chance to convert your social media followers to actual buyers. With a simple, trackable URL, you can encourage them to take action without hesitation,