WooCommerce Checkout Optimization Best Practices
Is your WooCommerce checkout feeling a bit clunky? Don’t worry, we’ve got you covered. In this article, we’ll explore some awesome tips and tricks for WooCommerce checkout optimization.
You’ll learn how to make the process smoother, improve user experience, and tweak payment options.
By the end, you’ll have a checkout that’s quick, easy, and super user-friendly. Let’s dive in and get started!
Why WooCommerce Checkout Optimization Matters?
Isn’t just about making things look pretty; it’s about creating a smooth, hassle-free experience that keeps your customers coming back.
Think about it:
The easier and faster your checkout process, the less likely customers are to abandon their carts. According to Statista, did you know that nearly 70% of online shopping carts are abandoned?!
Plus, a streamlined checkout can build trust and boost your store’s credibility.
Alright, let’s break it down. Why are we optimizing our WooCommerce checkout in the first place? What’s the big deal? Well, it all boils down to 4 main goals👇
Reduce Cart Abandonment 🛒 ➡ Make sure customers don’t ditch their carts at the last second.
Enhance User Experience ➡ Create a smooth, user-friendly process.
Speed Up Transactions ➡ Quick checkouts mean happy customers.
Increase Conversion Rates ➡ Turn those visitors into buyers.
So, let’s dive in and see how we can nail these goals!
1. Simplifying the Checkout Process
Let’s make checkout as painless as possible! One of the easiest ways to simplify WooCommerce checkout is by cutting down on the number of steps. The fewer clicks and pages, the better. Aim for a single-page checkout if you can.
Next, only ask for the information you really need. Do you need their middle name or fax number? Probably not. Stick to the essentials: shipping address, payment details, and contact info.
This way you’ll speed up the process and keep your customers happy.
2. Enhancing User Experience
-
First up, Mobile-Friendly Design.
Most shoppers are on their phones, so your checkout needs to look good and work smoothly on smaller screens, test it out on different devices to make sure it’s easy to navigate.
-
Next, Clear and Concise Instructions.
Guide your customers through each step with simple, straightforward language, if they know exactly what to do, they’re less likely to get frustrated and abandon their cart.
-
Finally, Progress Indicators.
These are awesome for showing customers where they are in the checkout process, a simple bar or steps can keep them informed and reduce anxiety about how much longer it will take.
Also, if you’re offering free shipping, show a progress bar indicating the “Amount Left for Free Shipping.” It’s a great way to motivate them to add more items to their cart!
3. Improving Checkout Speed
Speed matters! Here’s how to keep things zippy:
-
Optimizing Page Load Times
Make sure your checkout page loads quickly. Use a reliable image compression tool like Smush to shrink image sizes without losing quality. Pair this with a solid caching plugin like W3 Total Cache to speed up your site.
-
Using Efficient Code and Plugins
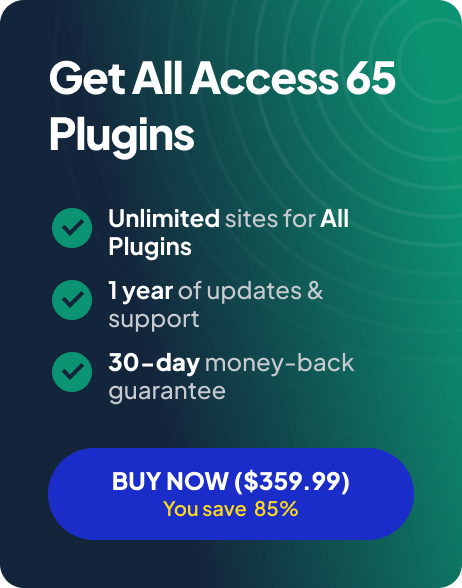
Stick to lightweight, well-coded plugins to avoid bogging down your site. Regularly update your themes and plugins to ensure they run smoothly. We recommend using plugins from WPFactory. It is a specialized and trusted plugin company with over 65 plugins designed to improve WooCommerce store performance.
4. Customizing Checkout Fields
-
Why Custom Fields Enhance Your Checkout?
Customizing your checkout fields can really enhance the shopping experience for your customers. Here’s why:
-
-
Personalization
-
Tailor the checkout process to gather specific information that’s relevant to your business, this makes the experience more personal and efficient for your customers.
-
-
Streamlined Process
-
As we mentioned above, only ask for the information you need, this helps speed up the checkout process and reduces cart abandonment.
-
Examples of Useful Custom Fields
Here are some practical examples:
-
-
Gift Message
-
Allow customers to add a personalized message if their purchase is a gift.
-
-
Delivery Instructions
-
A field for special delivery notes can help ensure packages are dropped off in the right spot.
-
-
Order Notes
-
Let customers add any specific requests or preferences related to their order.
-
-
Customer Preferences
-
Collect preferences for future recommendations or personalized offers.
-
-
Referral Source
-
Ask customers how they found your store for valuable marketing insights.
-
How to Customize Checkout Fields?
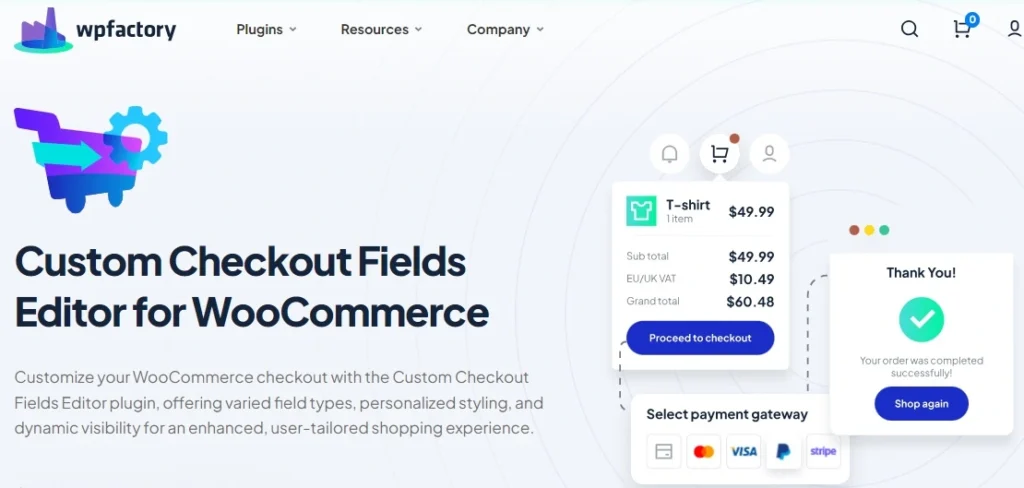
The Custom Checkout Fields Editor for WooCommerce plugin makes it super easy.
Here’s how to get started:
-
-
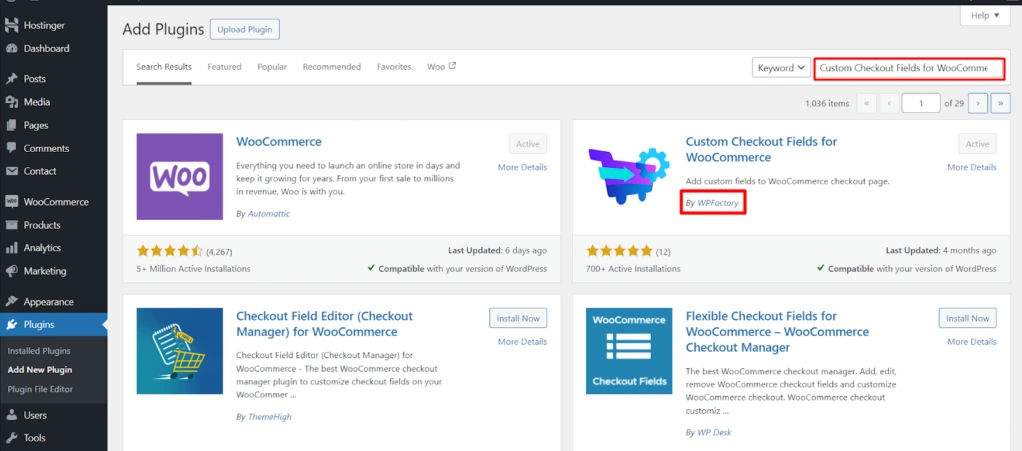
Install and Activate
-
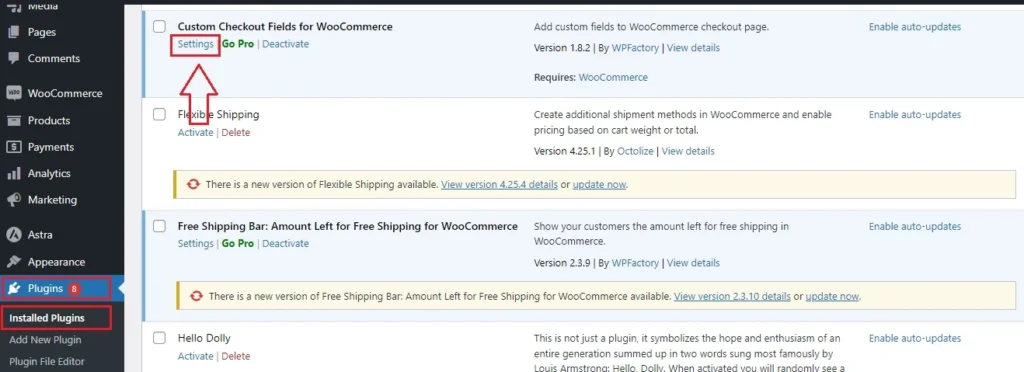
Go to your WordPress dashboard, navigate to the Plugins section, and click on “Add New.” In the search bar, type “Custom Checkout Fields for WooCommerce WPFactory” Click “Install Now” and then “Activate“
-
-
Customize Fields
-
Navigate to the plugin settings and start adding, editing, or removing fields. You can include text boxes, drop-downs, date pickers, and more.
-
-
Set Conditions
-
Use conditional logic to show or hide fields based on customer input.
This plugin gives you the flexibility to tailor your checkout process perfectly to your store’s needs. For more instructions about how to use it, check out the Custom Checkout Doc of Custom Checkout Fields Editor for WooCommerce.
5. Optimizing Payment Methods
-
Making Checkout Easy with Multiple Payment Options
Why does it matter?
Because it gives your customers the flexibility to choose their preferred method, making their shopping experience smoother and more convenient.
-
Tailoring Payment Options to Customer Preferences
Different customers have different preferences—some might want to use credit cards, others might prefer PayPal, and some may go for newer options like Apple Pay or Google Pay. By providing a variety of payment methods, you cater to everyone, which can lead to fewer abandoned carts and more completed purchases.
Remember:
Keep your checkout process flexible and customer-focused to make paying a breeze! the easier you make it for your customers to pay, the happier they’ll be!
-
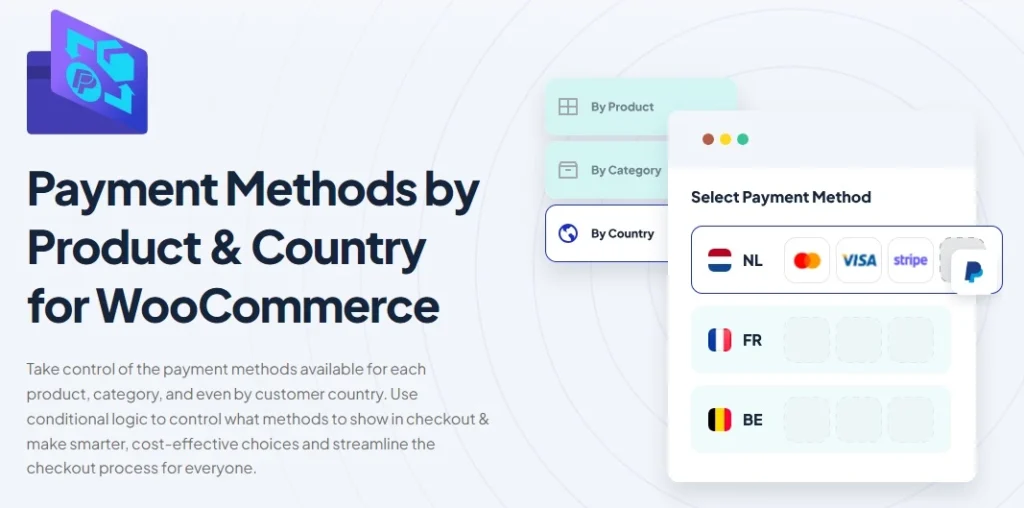
Enable/Disable Payment Method for Specific Product or Country in WooCommerce
The Payment Methods by Product & Country for WooCommerce plugin is your go-to tool. This plugin lets you customize payment methods based on specific products, categories, and even customer locations.
Here’s how to get started:
-
-
Install and Activate
-
Go to your WordPress dashboard, search for “Payment Methods by Product & Country for WooCommerce” click “Install Now” and then activate the plugin.
-
-
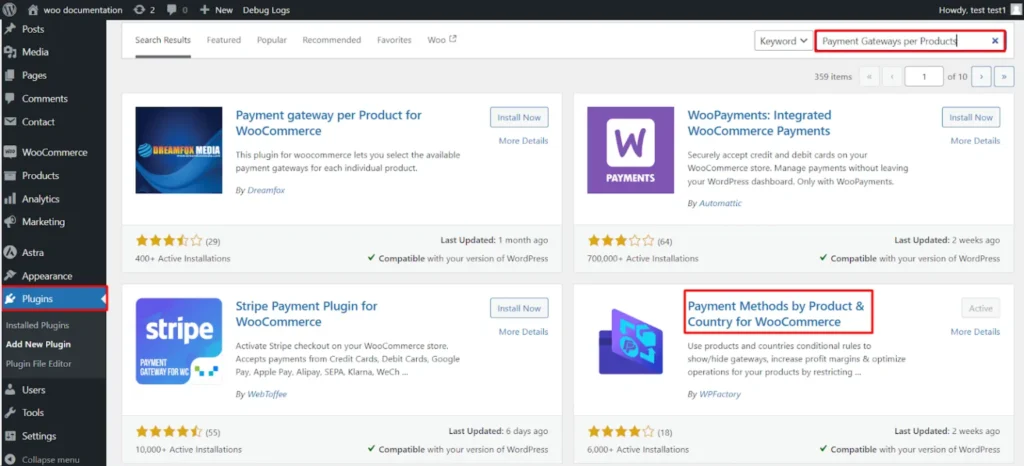
Customize Payment Options
-
Head to WooCommerce > Settings > Payment Gateways per Products tab. From here, you can tailor which payment methods appear for different products or regions.
-
-
Set Preferences
-
Adjust settings to show or hide payment methods based on your criteria, ensuring a tailored checkout experience for each customer.
This plugin helps you offer the most relevant payment methods, making the checkout process smoother and more efficient. For more instructions about how to use it, check out Doc of Payment Methods by Product & Country for WooCommerce. Don’t worry it’s easy!
6. Ensuring Security and Trust
Building trust with your customers is crucial, and a secure checkout process is a big part of that. Here’s how to ensure security and trust:
-
SSL Certificates
Make sure your site has an SSL certificate, it encrypts data and keeps your customers’ information safe. Plus, that little padlock icon in the browser boosts confidence.
According to a study by Econsultancy, nearly 48% of respondents said that trust badges, like SSL certificates, are crucial for building trust on eCommerce sites.
-
Trust Badges and Seals
Display security badges from reputable sources like Norton or McAfee, these visual cues reassure customers that their data is protected.
According to VWO, Trust badges can significantly impact conversions, with some sites seeing a 32% increase in sales after adding a simple trust badge.
-
Clear Privacy Policies
Be transparent about how you handle customer information. A clear, easy-to-find privacy policy builds trust and lets customers know you value their privacy.
Check out Top 5 WordPress Security Plugins to Keep Your Website Safe
7. Testing and Analyzing
It’s crucial to test and analyze different elements. Here’s how you can do it:
-
A/B Testing Different Checkout Flows
Try out different versions of your checkout process to see which one works best.
For example:
You could test a single-page checkout against a multi-page one. Use tools like Google Optimize or Optimizely to set up and track your tests, this helps you figure out what changes boost conversions and what doesn’t.
-
Analyzing Checkout Abandonment Rates
Keep an eye on how many customers leave their carts before completing the purchase, tools like Google Analytics can help you track abandonment rates.
Okay, could you explain in more detail what I need to do?
Sure!
✔ Identify patterns or points where customers are dropping off.
✔ Make necessary adjustments.
Maybe they’re getting stuck on the payment page, or perhaps the shipping options aren’t clear enough, and speaking of shipping, you might be interested in:
Boost Loyalty with WooCommerce Free Shipping Strategies
-
Using Analytics Tools
Utilize tools like Google Analytics, Hotjar, or Crazy Egg to get insights into user behavior.
What do I take into consideration?
✔ Where users are clicking.
✔ How far they’re scrolling.
✔ Where they might be encountering issues.
By analyzing this data, you can make informed decisions on how to optimize WooCommerce checkout page process further.
Keep experimenting and tweaking to find what works best for your WooCommerce store.
Conclusion
Alright, let’s wrap this up! We’ve covered a lot about how you optimize checkout process in WooCommerce checkout. So, here’s a quick recap of the best practices:
- Reduce the number of steps and streamline the information required to make checkout as easy as possible.
- Ensure your design is mobile-friendly, provide clear instructions, and use progress indicators to guide your customers.
- Optimize page load times and use efficient code and plugins like those from WPFactory to keep everything running smoothly.
- Use custom fields to gather only the essential information and tailor the checkout experience to your needs.
- Offer multiple payment options and tailor them to your customer’s preferences with plugins like Payment Methods by Product & Country for WooCommerce.
- Use SSL certificates, trust badges, and clear privacy policies to build trust and make your customers feel secure.
- Regularly A/B test different checkout flows, analyze checkout abandonment rates, and use analytics tools to make data-driven improvements.
Last word:
Optimizing your checkout isn’t a one-time task but an ongoing process. Keep testing, tweaking, and improving to ensure the best possible experience for your customers.
Thanks for sticking with us through this guide! Here’s to fewer abandoned carts and more happy customers. Cheers!