
The “Additional Custom Emails for WooCommerce” plugin empowers you to personalize communication with your customers by creating custom email notifications. This knowledge base article guides you through customizing the content and appearance of these custom emails within the plugin.
Recipients
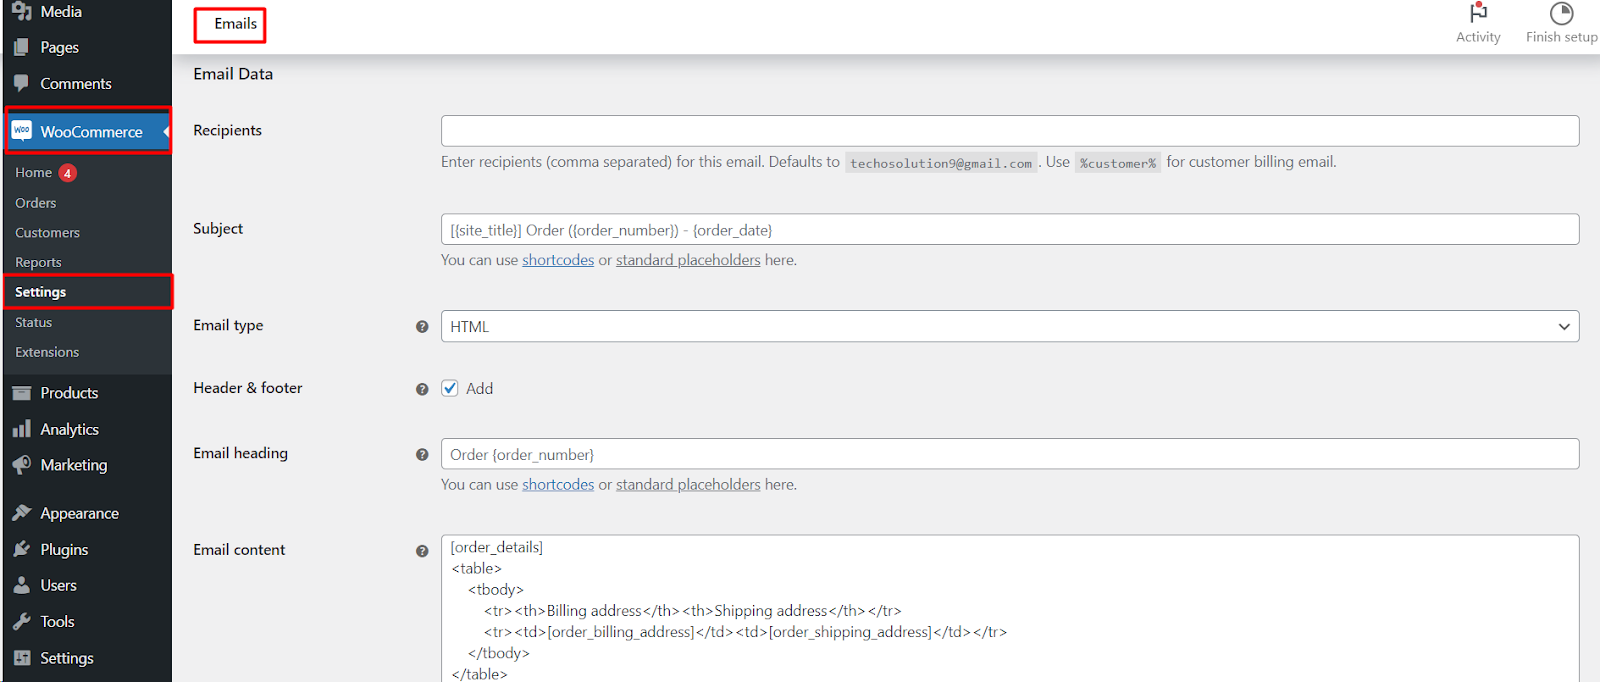
- In the “Recipients” field, enter comma-separated email addresses to specify who receives the custom email.
- By default, the plugin sets “[email address removed]” as the recipient. You can replace this with your desired email address(es).
- Use the %customer% shortcode to dynamically insert the customer’s billing email address.
Subject Line
- Craft a clear and informative subject line for your email.
- This helps grab the recipient’s attention and gives them an idea of the email’s content.
- You can use shortcodes (refer to plugin documentation for available options) or standard placeholders (e.g., ) to dynamically insert relevant information into the subject line.
Email Type
Choose the email format you want to use
- Plain Text: A basic text-only email.
- HTML: Allows you to design the email with HTML formatting for a more visually appealing presentation.
- Multipart: Sends both a plain text and HTML version of the email, ensuring compatibility with different email clients.
Header & Footer
- Click the “Add” button to define a header and/or footer for your email.
- This allows you to add consistent branding elements across all your custom emails.
- You can use shortcodes and standard placeholders within the header and footer content.
Email Heading & Content
- The “Email Heading” field allows you to create a headline within the email body.
- The “Email Content” field is where you craft the main message of your email.
- Both sections support the use of shortcodes and standard placeholders to dynamically insert details like order information, customer names, or product details.
Testing Your Email
- The plugin allows you to test your custom email before sending it to actual customers.
- While editing a specific order, navigate to the “Order Actions” section and select “Send email: Custom email.” Choose your custom email from the dropdown and click “Send Test Email.”
Default Content (Optional)
- This option allows you to pre-populate the email content with a default message.
- This can be a starting point for customizing your emails.
Email Style (Optional)
- If you’re comfortable with CSS code, you can define custom styles for your email within this field.
- However, avoid including the <style></style> tags.
Email Attachments (Optional)
- Specify file paths to documents or images you want to attach to the email.
- Ensure the files are uploaded to your WordPress site and accessible through the provided paths.
Admin Access
All these options for customizing email content and appearance are accessible to administrators within your WordPress dashboard. Navigate to WooCommerce > Settings > Emails. Within the “Custom Emails” section, select a specific custom email and you’ll find all the settings mentioned above for crafting your desired email notifications.
Additional Notes
Consider testing your custom emails thoroughly before sending them to a wider audience.
By effectively utilizing the “Additional Custom Emails for WooCommerce” plugin and its content customization options, you can create informative and visually appealing email notifications that enhance customer communication and strengthen your brand image within your WooCommerce store.