Comprehensive Guide to the New WordPress Gutenberg Editor
WordPress was introduced in 2003 and has evolved from a simple blogging platform to a full-fledged content management system. It has also grown to be the most popular CMS. It currently powers over 30% of websites on the Internet. One of the main reasons behind this growth and popularity is the constant evolution WordPress has gone through.
In December 2018 WordPress introduced a new block-based editor called Gutenberg. The Gutenberg editor replaced the TinyMCE editor that people have grown used to over the years. This is one of the major updates to WordPress in recent times.
The Gutenberg editor introduced a significant change to content creation. It uses blocks for various content types. In this article, we will take an in-depth look at how you can use blocks. We will also go through other features of the new editor.
- Switching to the code editor
- Gutenberg keyboard shortcuts
- Create reusable block templates
- Conclusion
What is Gutenberg?
As mentioned earlier Gutenberg is a block-based editor. This means you will not have access to the regular single edit field for content editing. Instead, you will use blocks for different content types such as text, images, CTA buttons, archives, blog posts, categories, etc. You will no longer have to use HTML and shortcodes as previously done in the classic editor. However, these are options that can still be used in the Gutenberg editor. Gutenberg takes content editing to a whole new level.
Blocks are simply elements for various content types. Gutenberg allows you to reposition blocks easily. You can change the alignment of blocks and reposition them vertically as well. Making changes to the content inside blocks is easy. Simply click within the block to start making changes. Editing pages and posts in the back end using Gutenberg will give a similar view to the front end. Gutenberg creates a user-friendly environment for content editing.
Different websites have different purposes. Gutenberg understands this and allows you to create custom blocks.
Here is a visual comparison of the two WordPress editors.
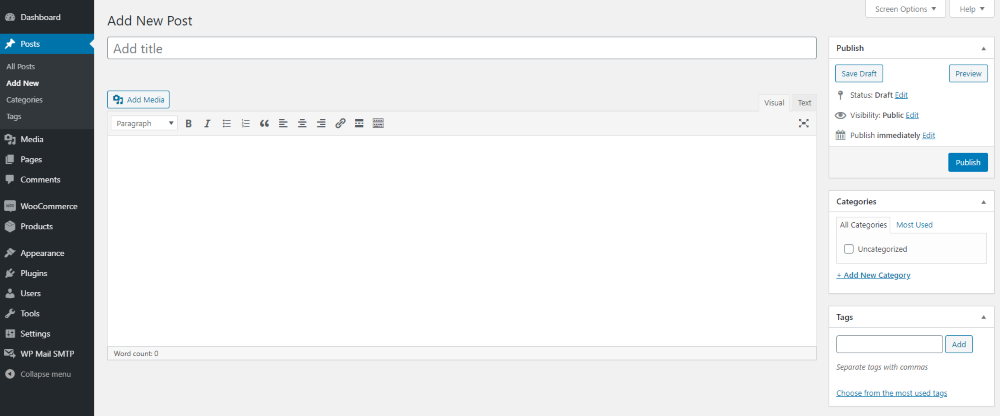
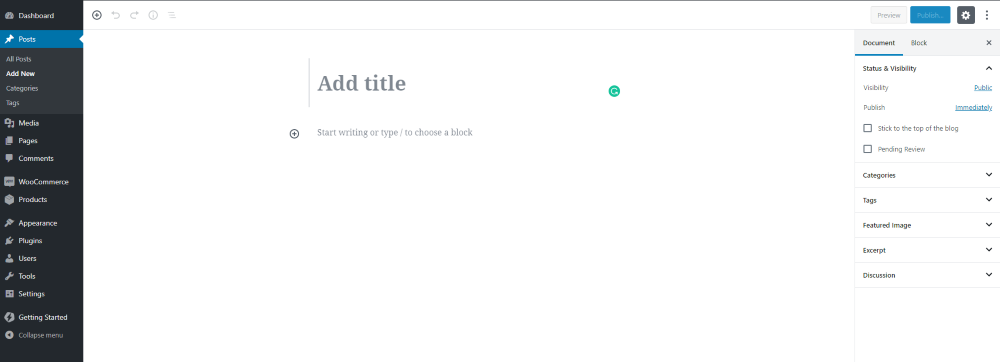
Both editors are different both visually and in functionality.
Working with Gutenberg Blocks
1. Discovering blocks
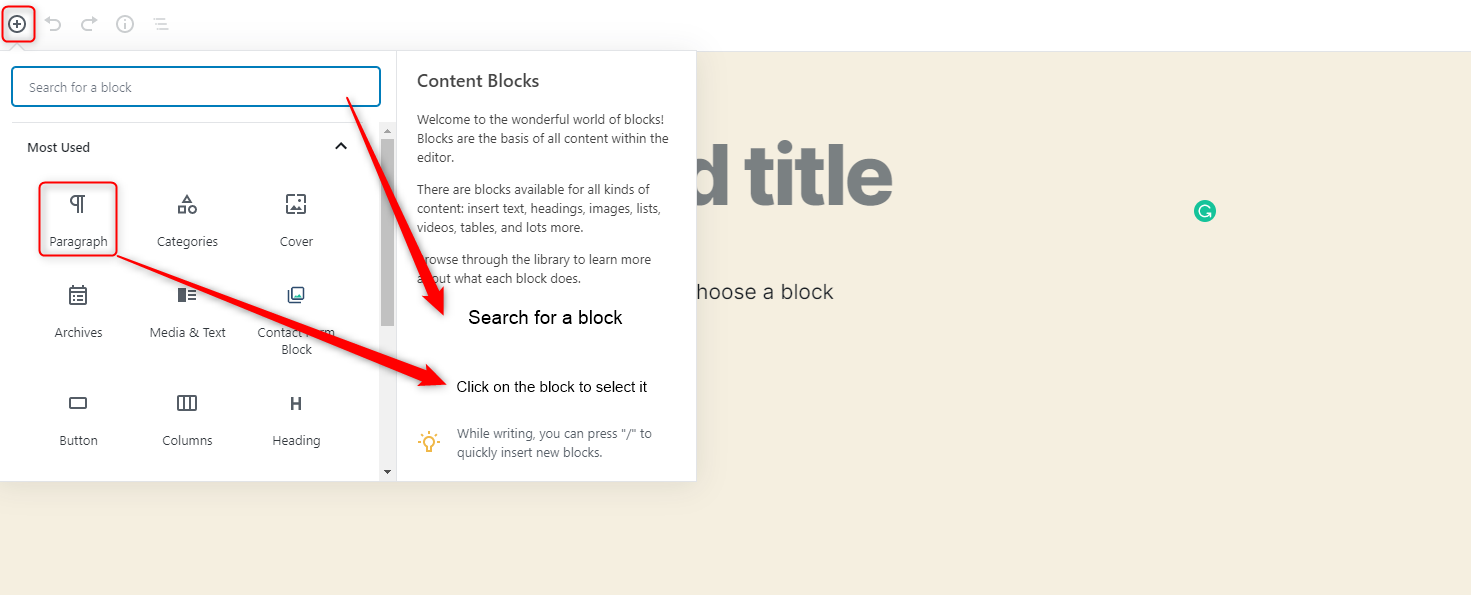
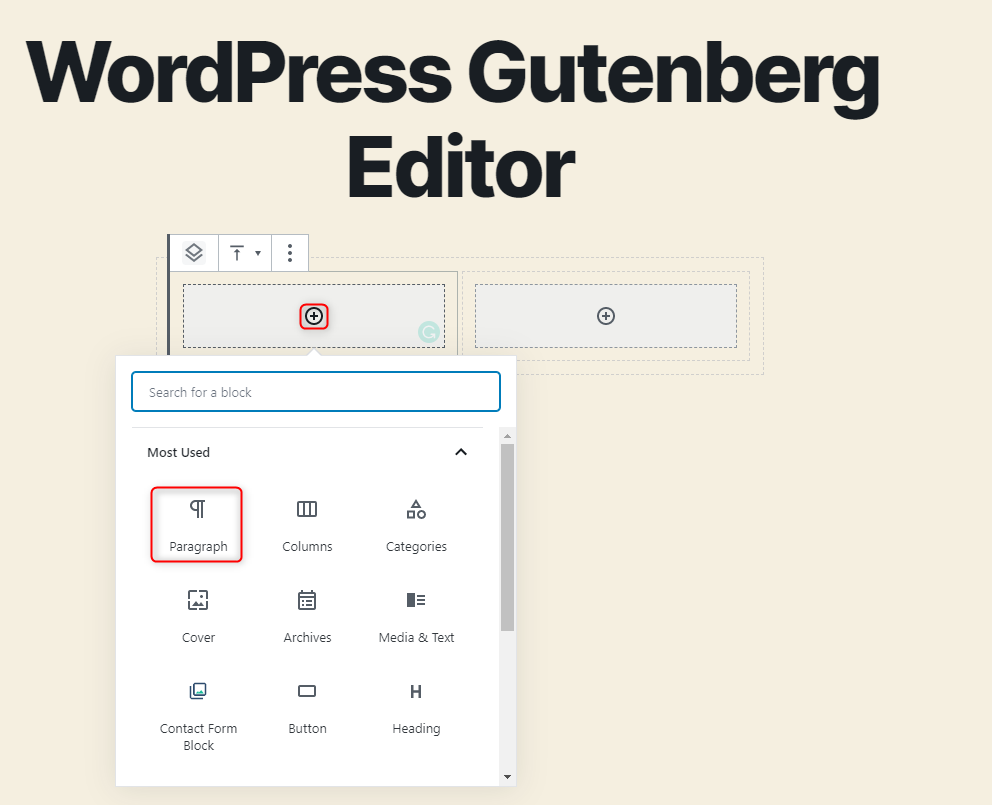
Click on the + sign in the top left-hand corner as shown in the screenshot below. This opens the content block section that organizes blocks into various groups.
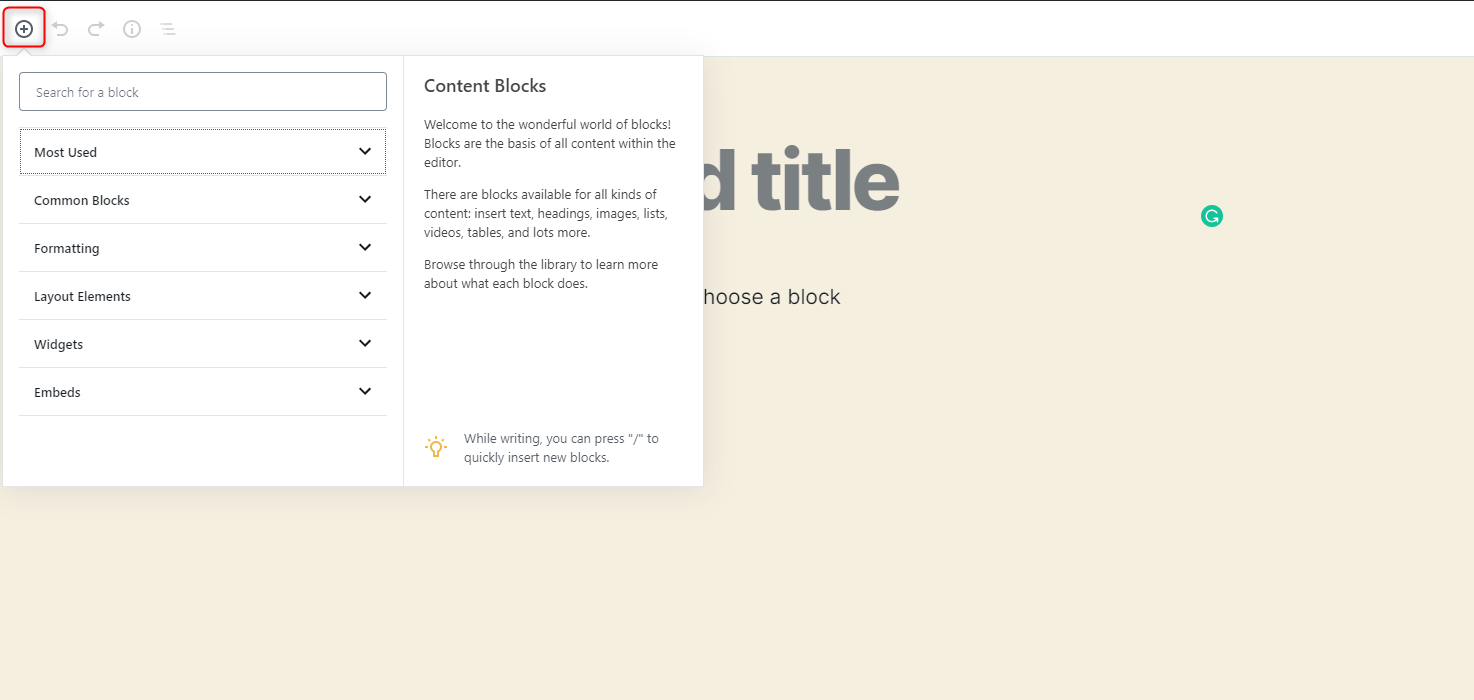
Under the “Most Used” group you will find blocks that are often used by you.
Under the “Common Blocks” group you will find typical blocks such as the paragraph block, image block, headings blocks, links blocks, etc.
Under the “Formatting” group you will find blocks that are helpful in formatting such as code block, custom HTML block, classic editor block, table block, etc.
The “Layout Elements” group has blocks such as the columns block, media and text block, spacer block, separator block, etc.
The “Widgets” group has blocks such as embedded shortcodes, archives, calendar, etc. These were widget elements in the classic editor.
The “Embeds” group has blocks useful for external integrations such as Facebook, Twitter, YouTube, etc. In the classic editor, you would usually have to use plugins for this kind of functionality.
To add a block, click on the + sign in the top left-hand corner and click on the relevant block that you would like to add. You can use the search section to search for a block.
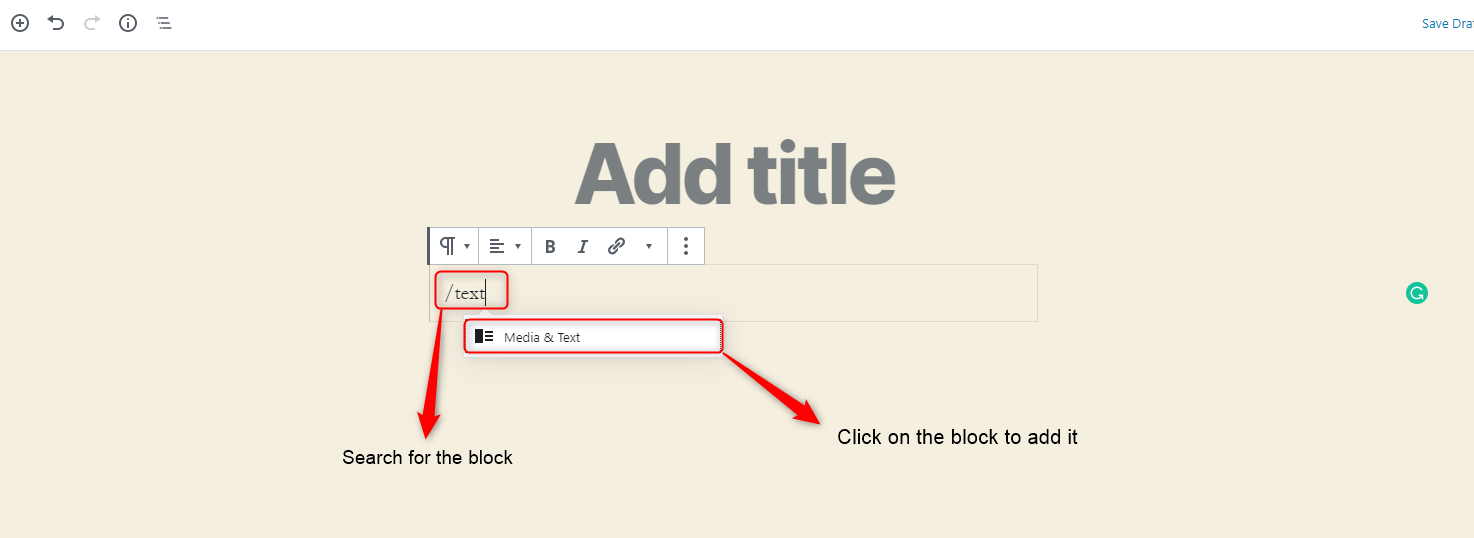
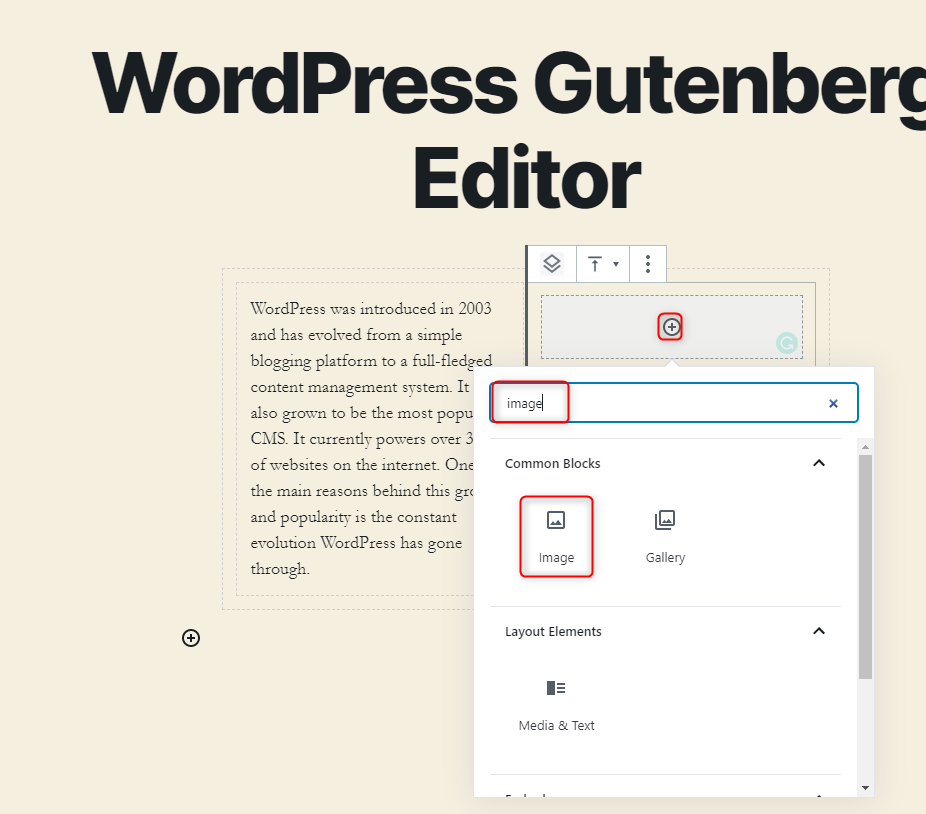
Alternatively, to add a block in the content area of your WordPress post add a forward slash / and type the name of the block to search for it. Click on the relevant block to add it. An example is shown in the screenshot below.
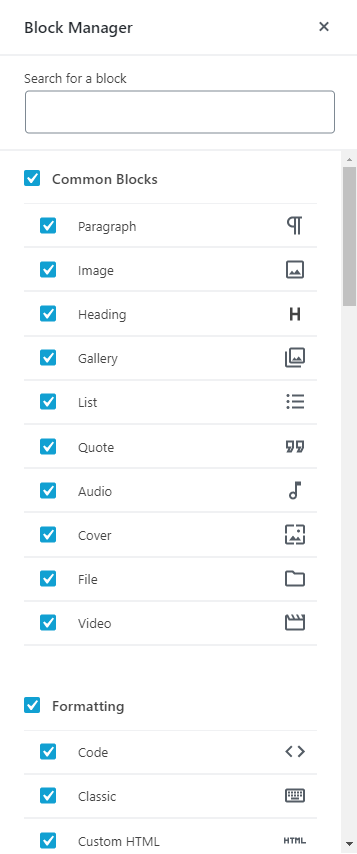
2. Customizing Blocks Using the Block Manager
As you can see from above there are several blocks available for you to use. Often you may not need all these blocks and your workspace will be cluttered by unnecessary blocks. You can use the block manager to disable blocks that you don’t need.
In the top right-hand corner click on the More tools and options button and then click on the Block Manager.
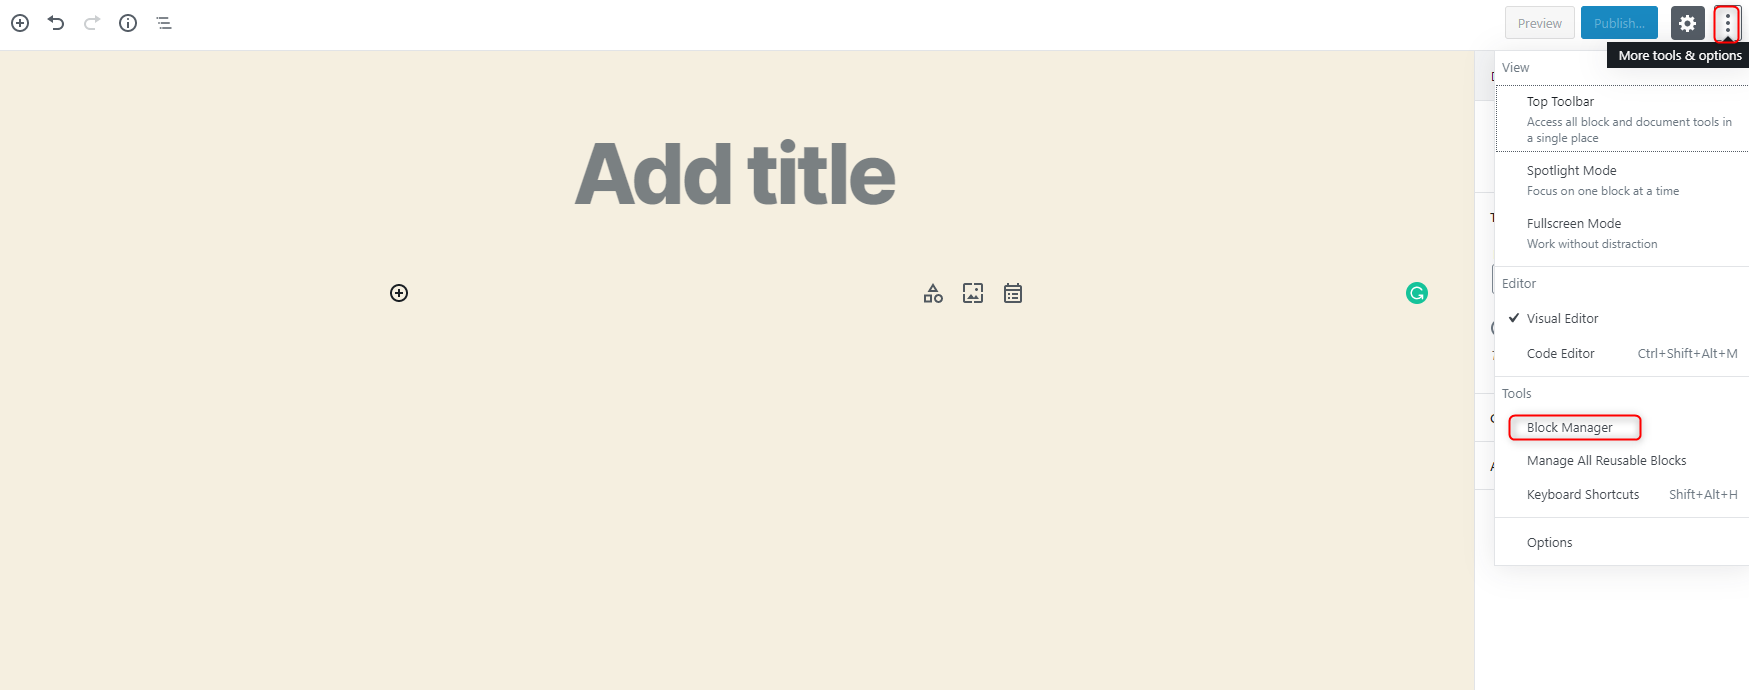
In the block manager, you can unselect blocks that you don’t need.
The Gutenberg Interface
The Gutenberg interface has 6 main sections. Each section is explained below.
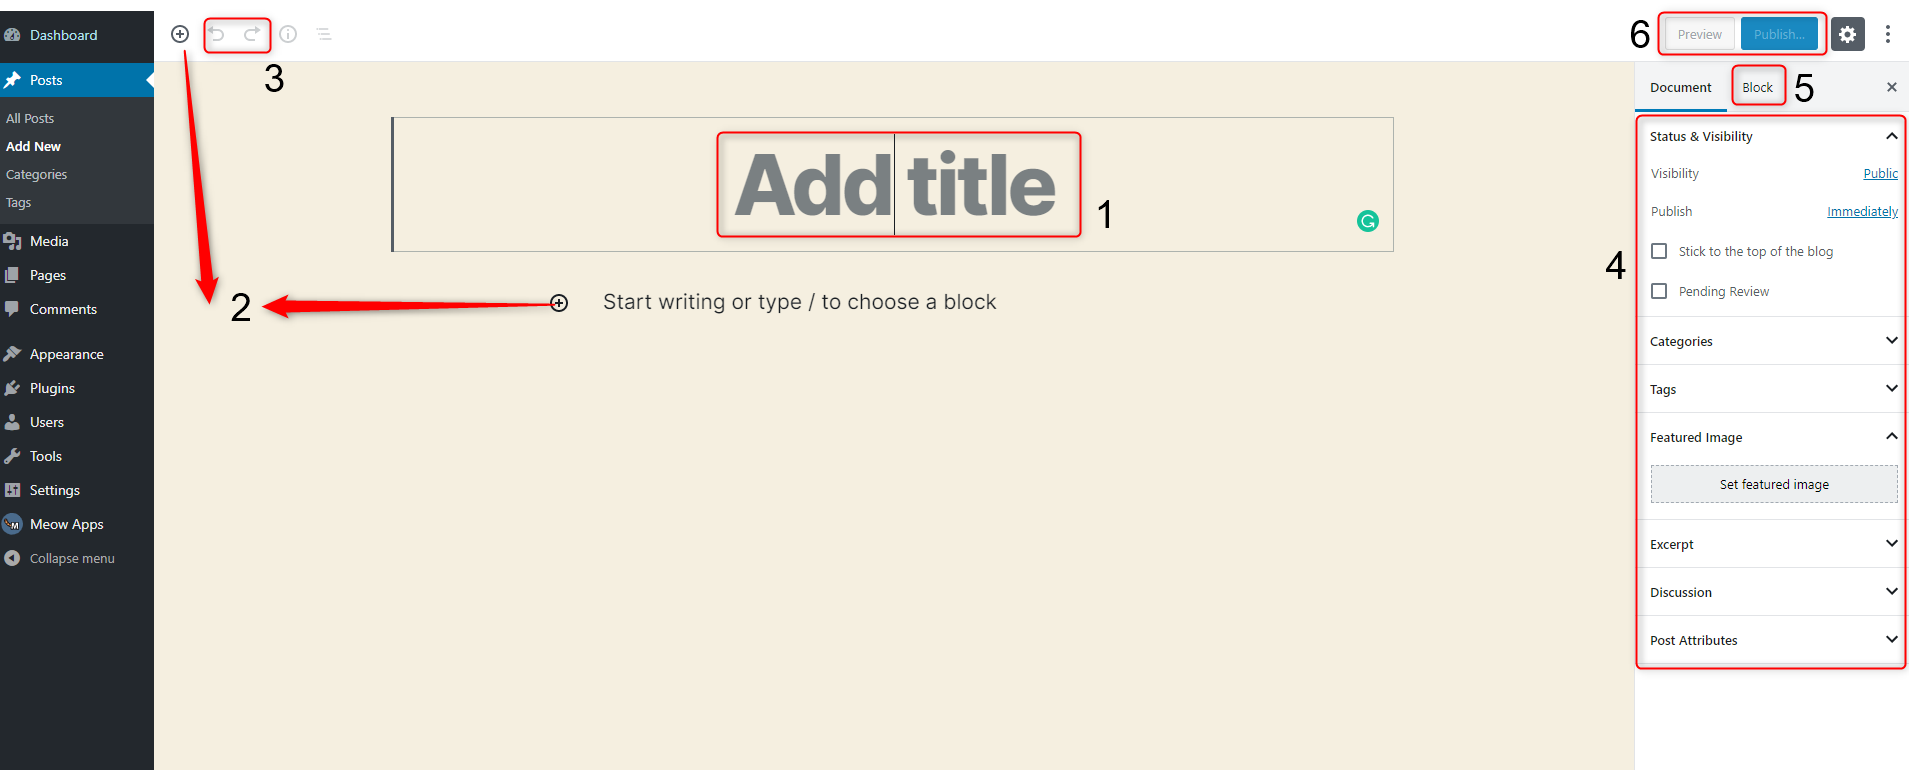
- Allows you to add a title for your page or post.
- The plus sign allows you to add new blocks for your content.
- Allows you to undo and redo changes.
- This is the setting area. It is similar to the classic editor. It allows you to add a featured image, define tags, select categories, change the status, visibility, etc.
- The block tab allows you to edit block-specific settings.
- The preview and publish button are self-explanatory. They allow you to preview your page or post or to publish it.
Building a Basic layout with Gutenberg
The best way to discover the Gutenberg editor is to use it. We will guide you on how you can use the Gutenberg editor to create a simple WordPress post with text, images, and an embedded video. This will get you started on using Gutenberg as you discover it more comprehensively.
Step 1: Add a Title for your Post
Start off by adding a title for your WordPress post as shown in the example below.

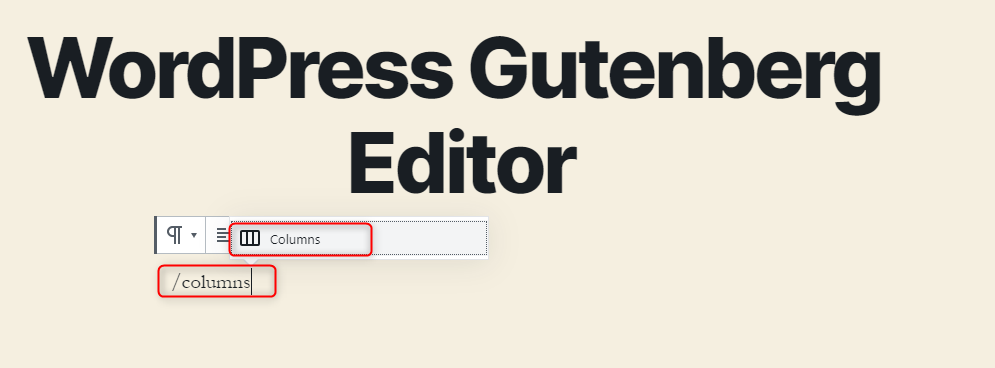
Step 2: Adding the Columns Block
The columns block allows you to easily organize your content into columns. You can use up to 6 columns.
In the content area of your WordPress post add a forward slash / and search for the columns block. Click on it to add it.
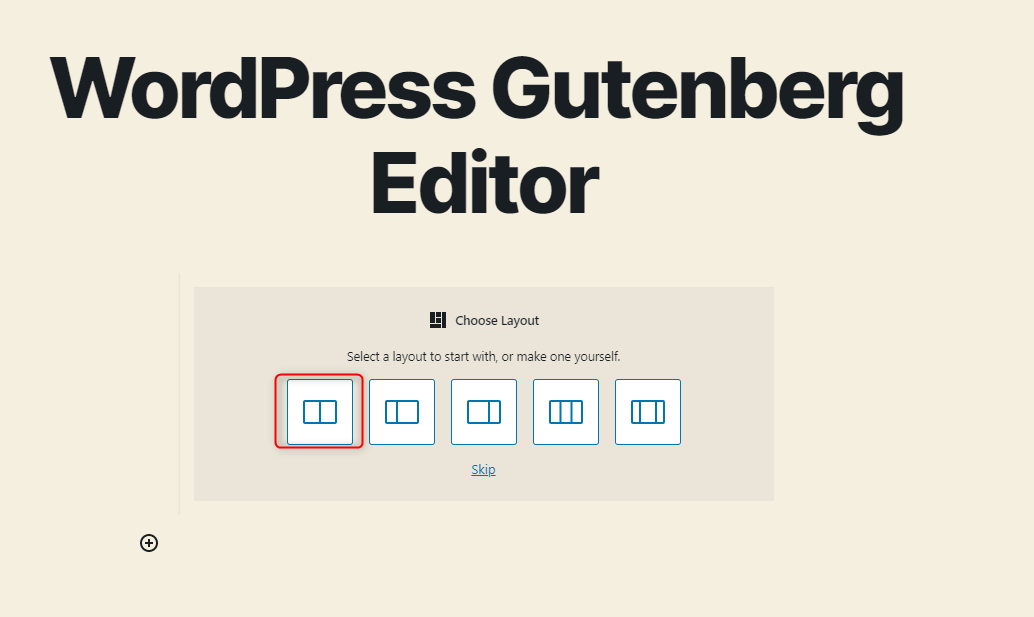
Once added you will need to select the appropriate layout for the columns. You can select any of the pre-built layouts or you can create one yourself. For this tutorial, we will use the 2 columns layout.
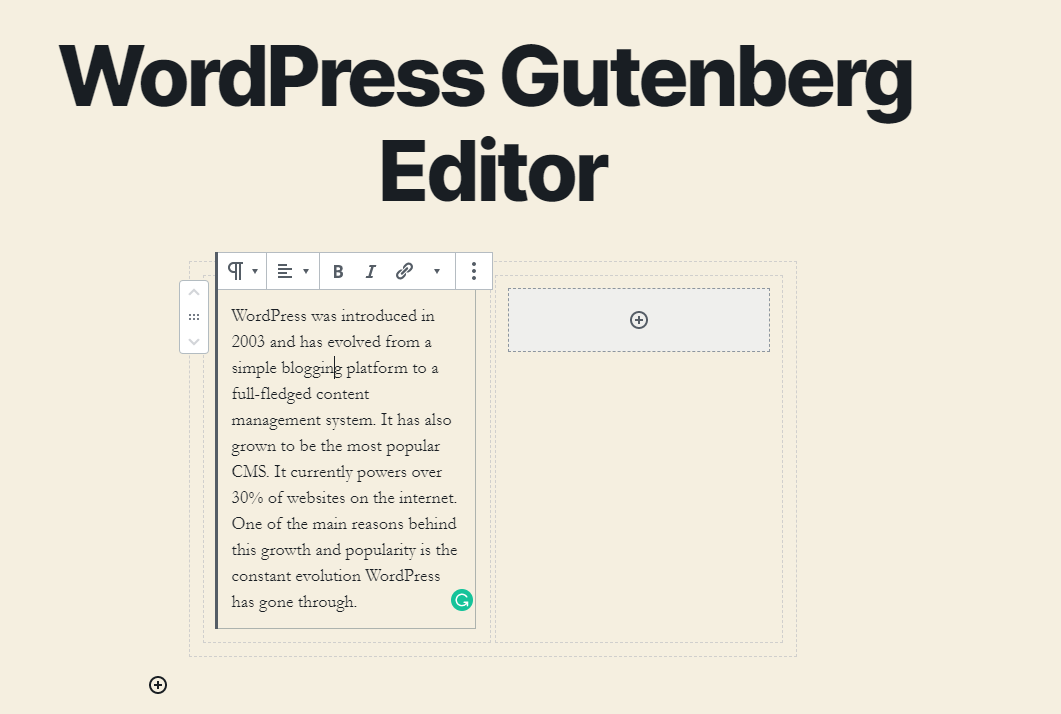
Step 3: Adding Content to the Columns Block
Once the columns block has been added you can now start adding content to each of the columns. To add content, you will have to add blocks to each of the columns. Click on the + sign in the left column and add a paragraph to it.
Add some text to the paragraph block as shown below.
Step 4: Adding the Image Block
To add an image in the right column, click on the + sign in the right column, search for the image block and click on it to add it.
You can either insert an image from the media library, upload one from your computer or add one from a URL.
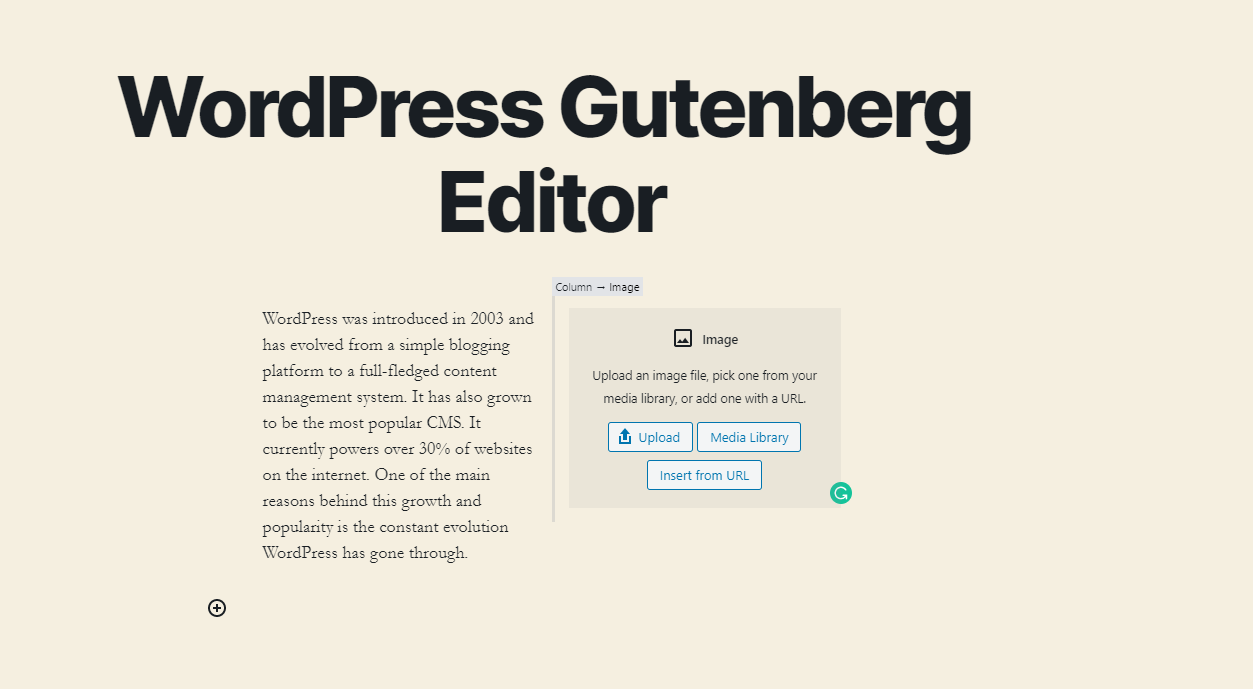
An example is shown below where an image has been added to the post.

Step 5: Customizing Individual Blocks
In the steps so far, we have added 3 blocks. The columns block, the paragraph block, and the image block. Each of these blocks has some customization options.
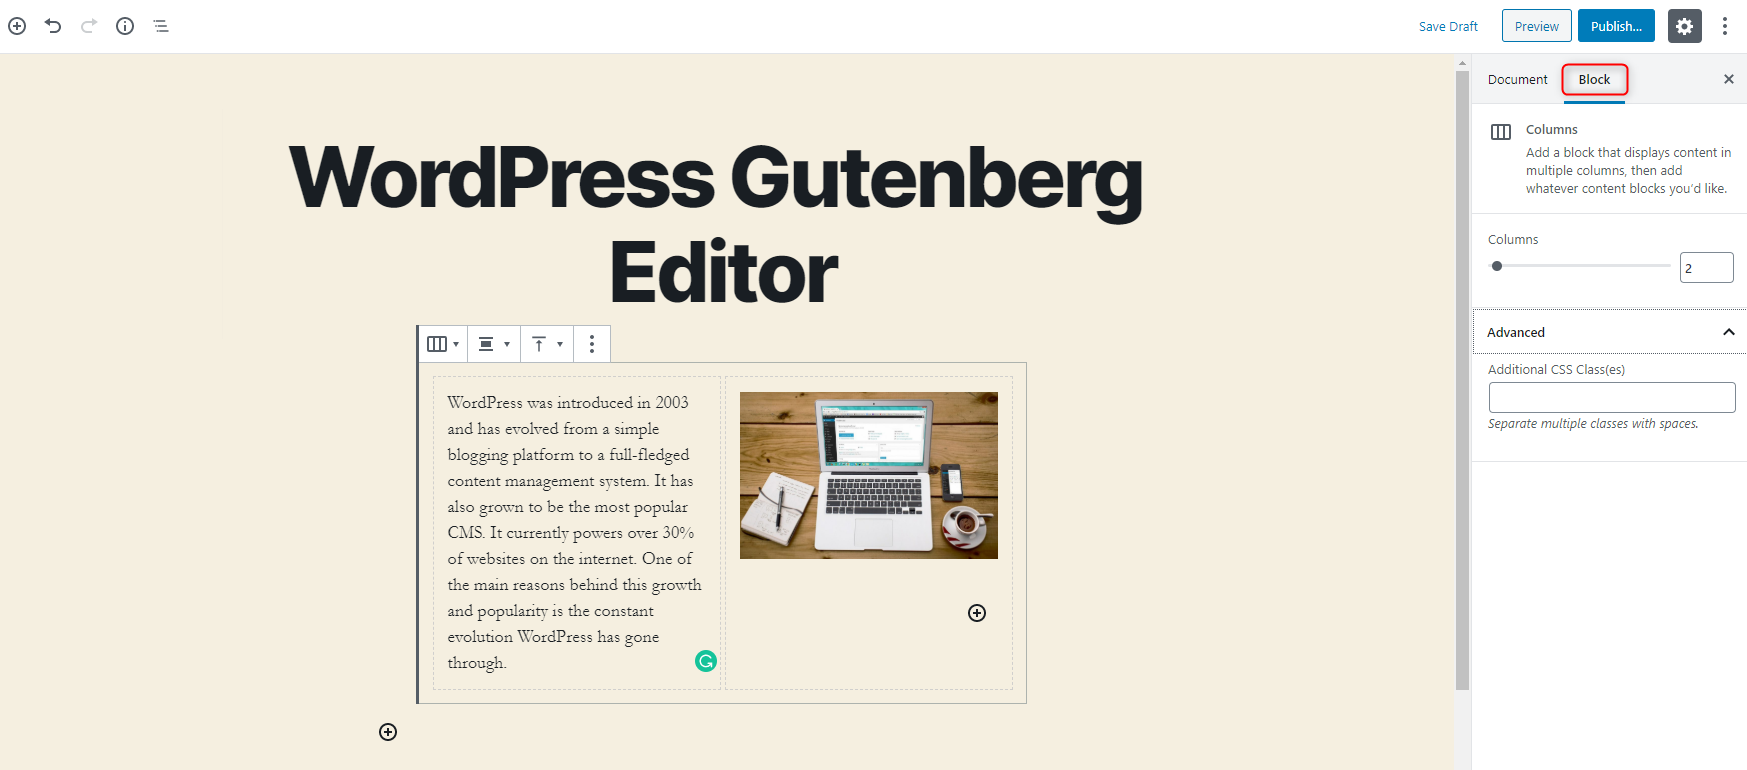
To access the customization options of the block, select the relevant block that you would like to customize and click on the block tab as shown in the screenshot below. The columns block settings will allow you to increase or decrease the number of columns. The maximum number of columns you can use is 6.
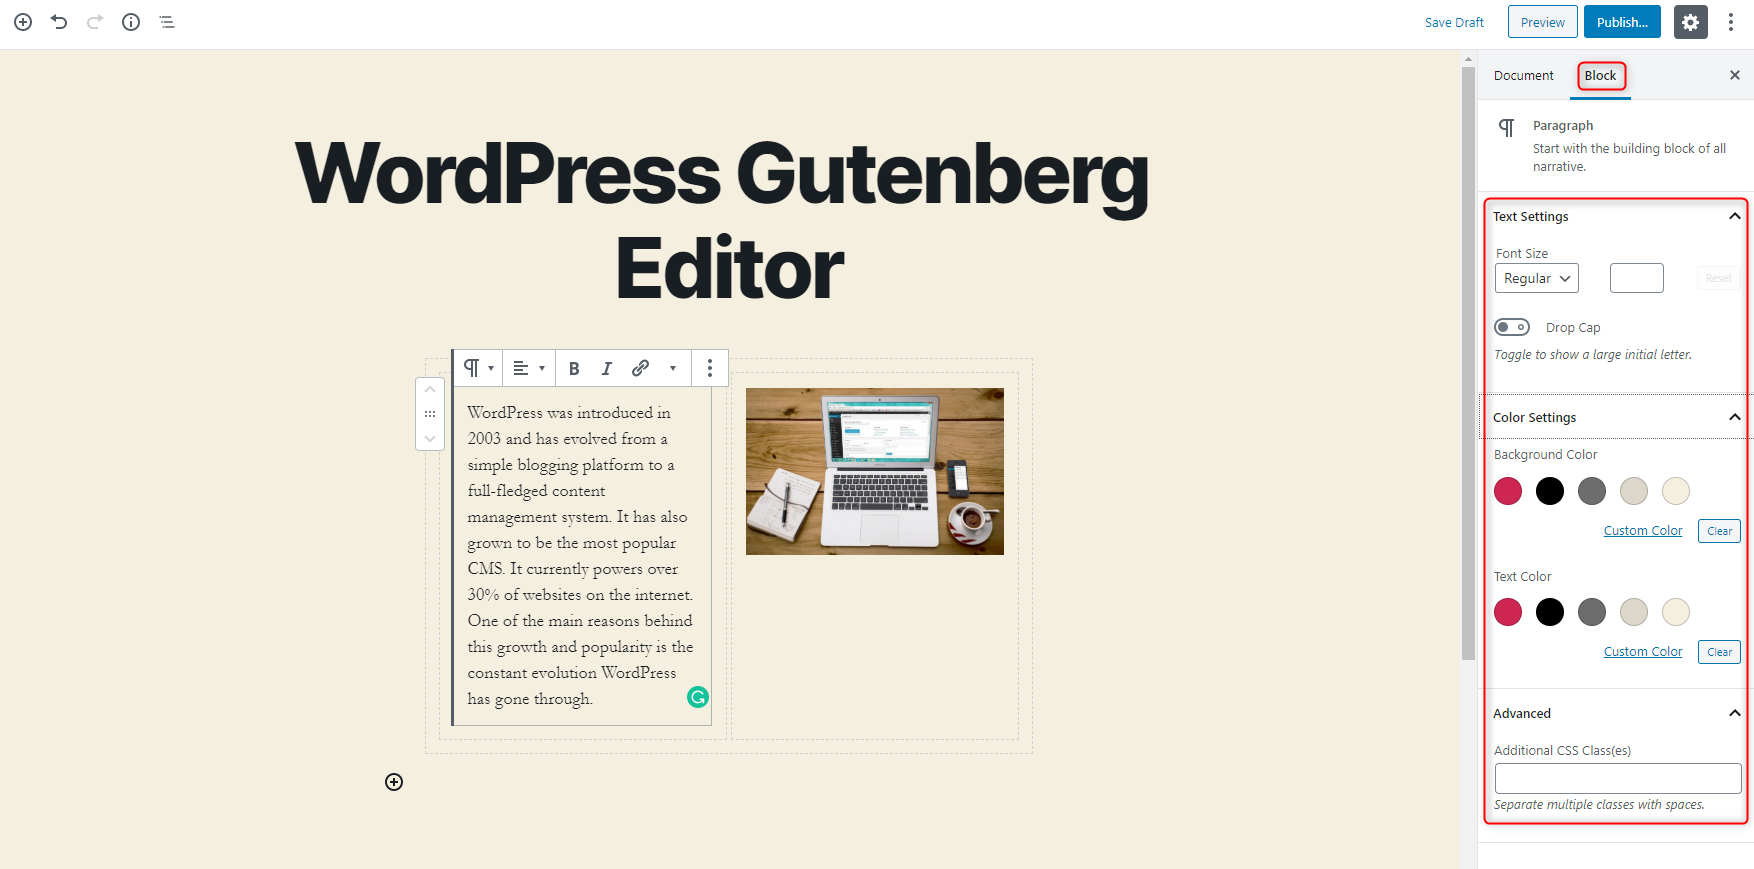
If you select the paragraph block you will have access to different customization options. You can change the text size, use a drop cap, add some background color to the text, change the text color, and add additional CSS classes.
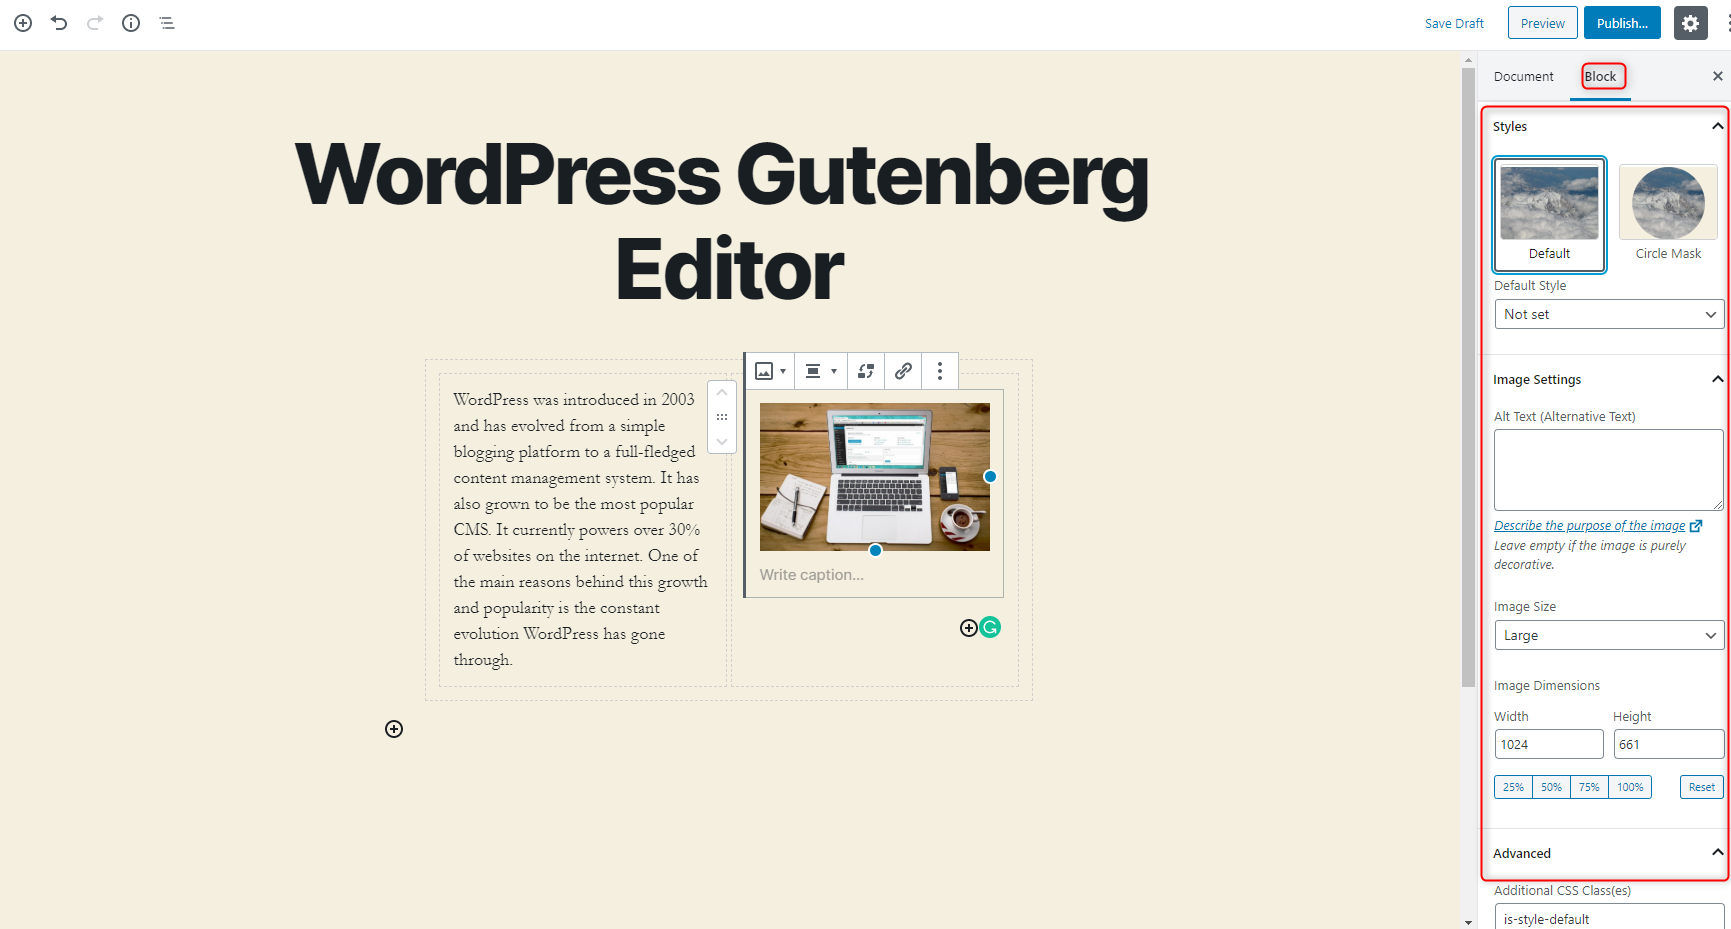
If you select the image block you will have access to customization options of the image block. You can select the shape of the image, add some alt text, select the size of the image and add some additional CSS classes.
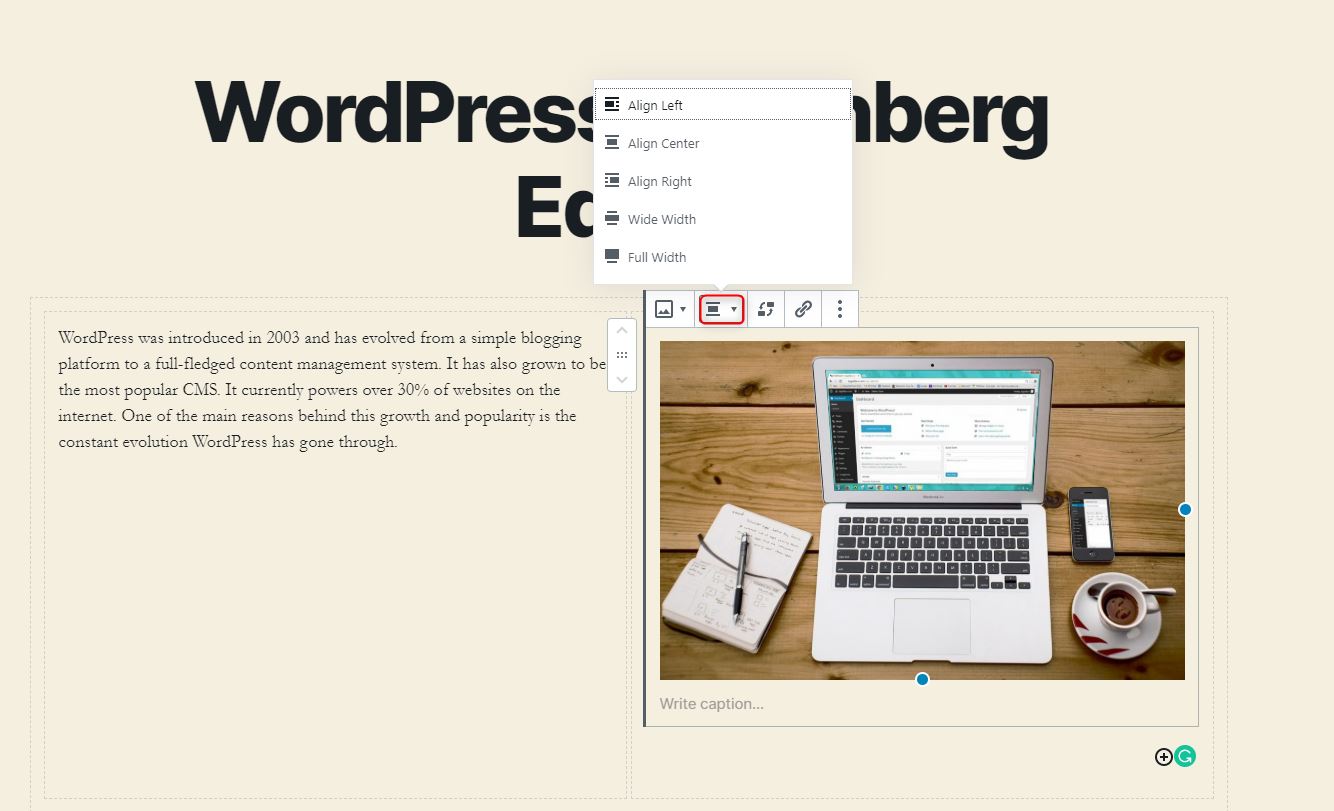
Step 6: Changing the Alignment of the Blocks
Depending on the theme that you are using you will have the option to change the alignment of the blocks.
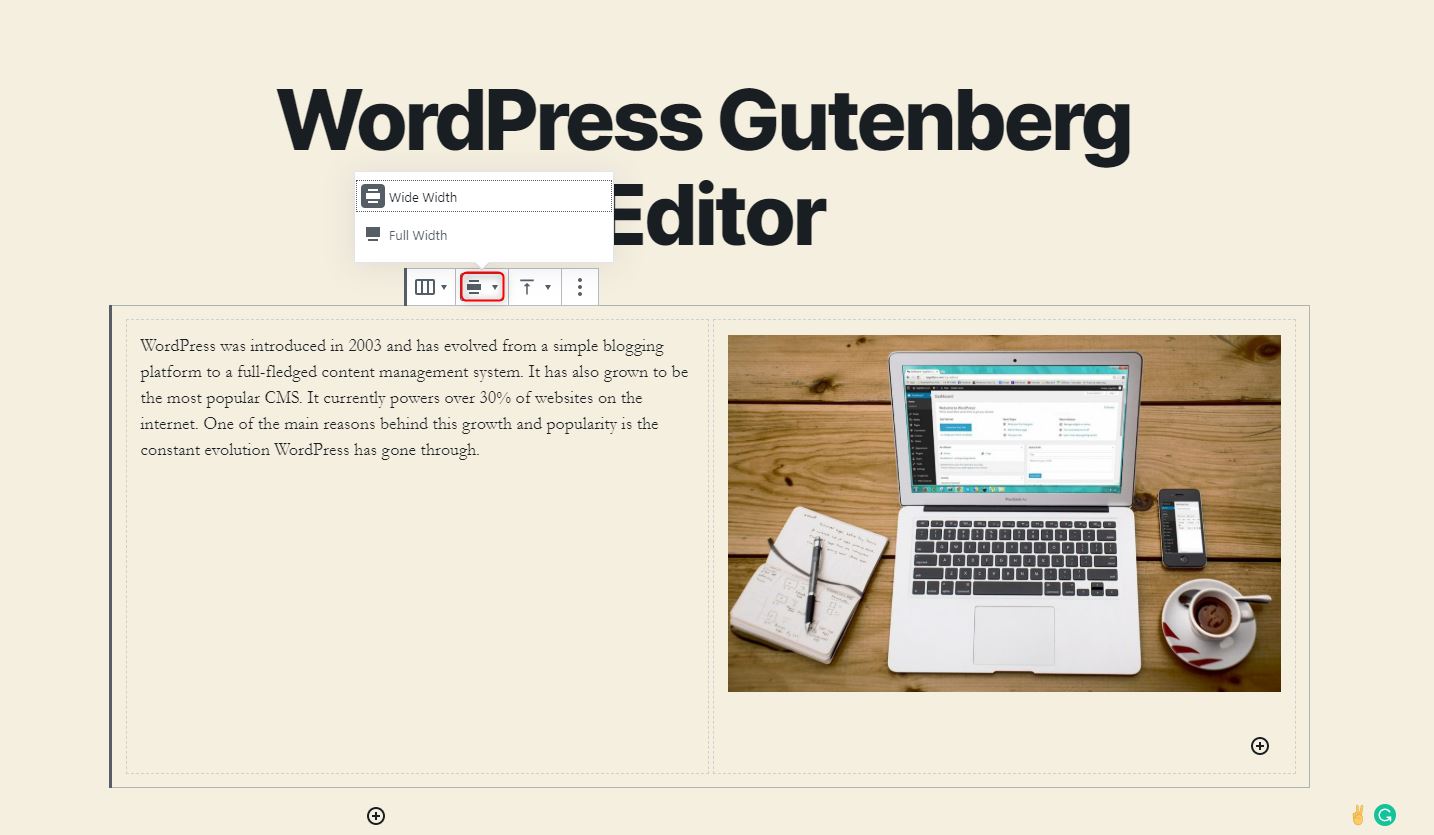
To change the alignment of the columns block, click on the change alignment button and select the appropriate alignment as shown below.
Similarly, to change the alignment of the image block, select the image block and click on the change alignment button as shown below. Again, the options you have here will depend on the theme that you are using.
Step 7: Changing the Position of Blocks
Once you have added multiple blocks you can easily rearrange them by clicking on the move up or down button. An example is shown in the screenshot below. We have added a cover block and wish to have the cover block on top of the columns blocks.
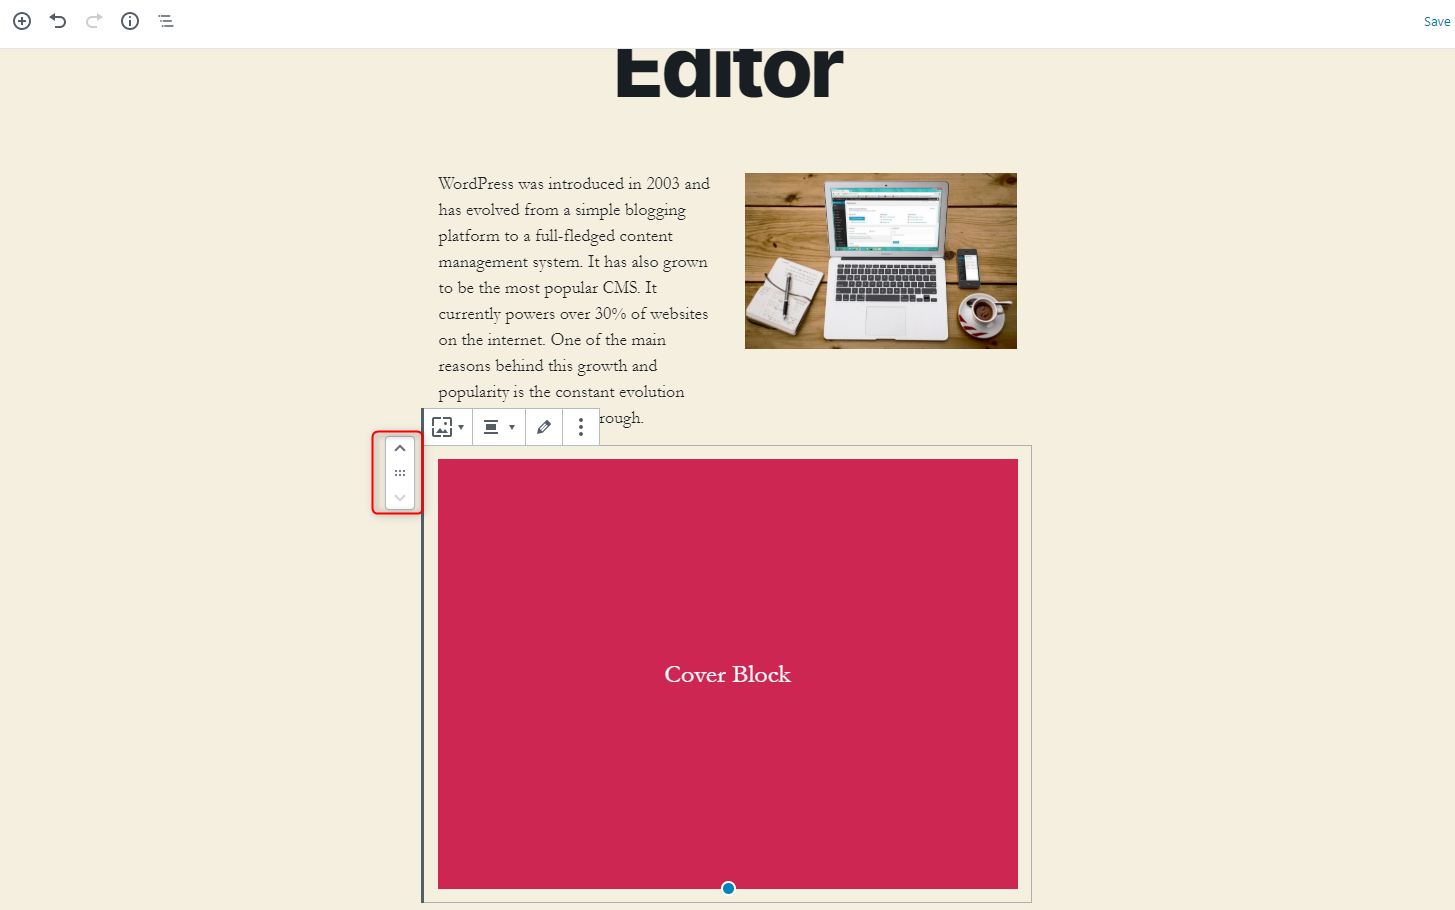
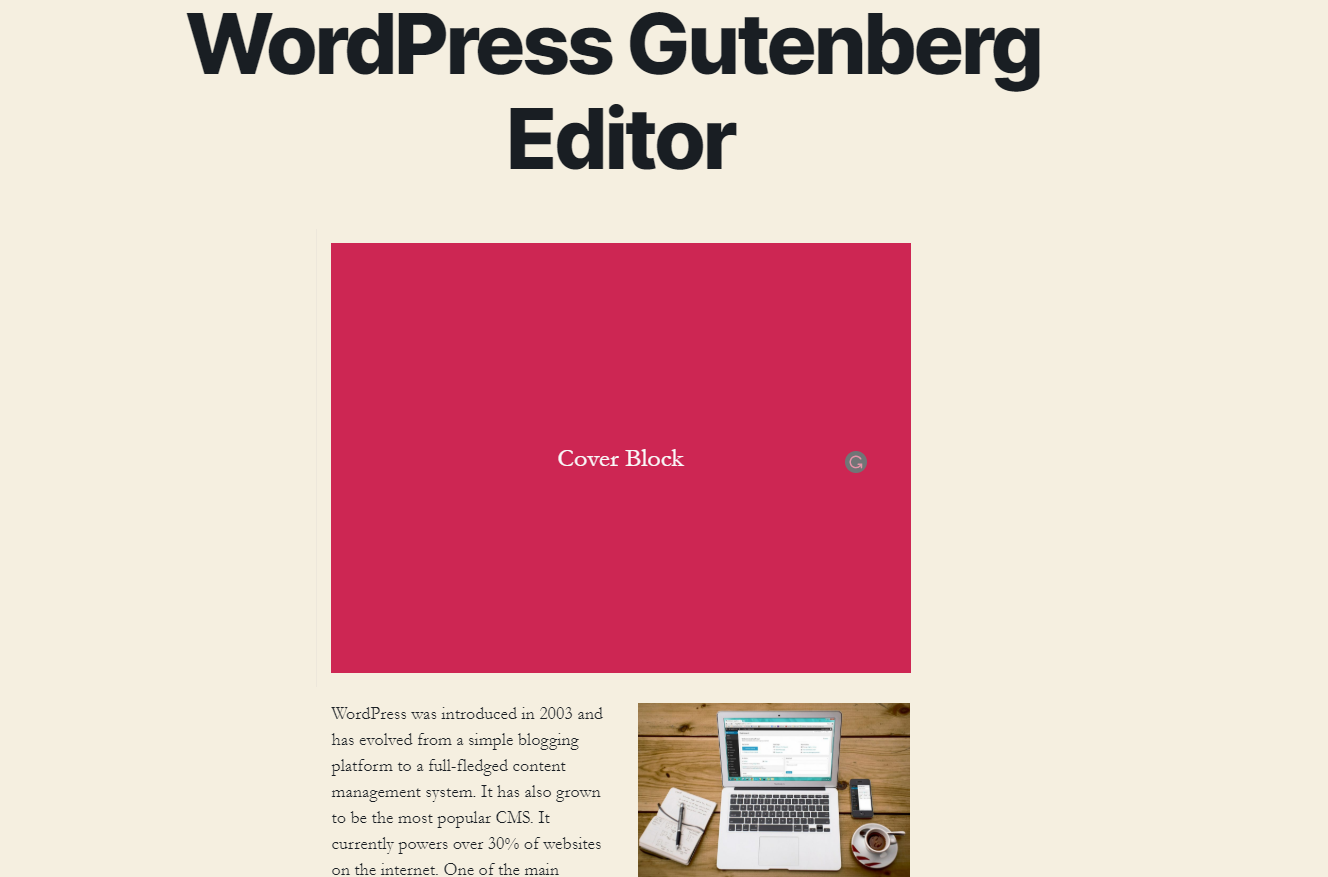
As shown below the cover block is now on top of the columns block.
Switching to the Code Editor
Often, you need to access the code of the content that you are creating. In the classic editor, you could easily do this by clicking on the text tab.
In Gutenberg, the process is slightly different. To access the code of the entire post or page click on the More tools and options button in the top right-hand corner and select the Code Editor.
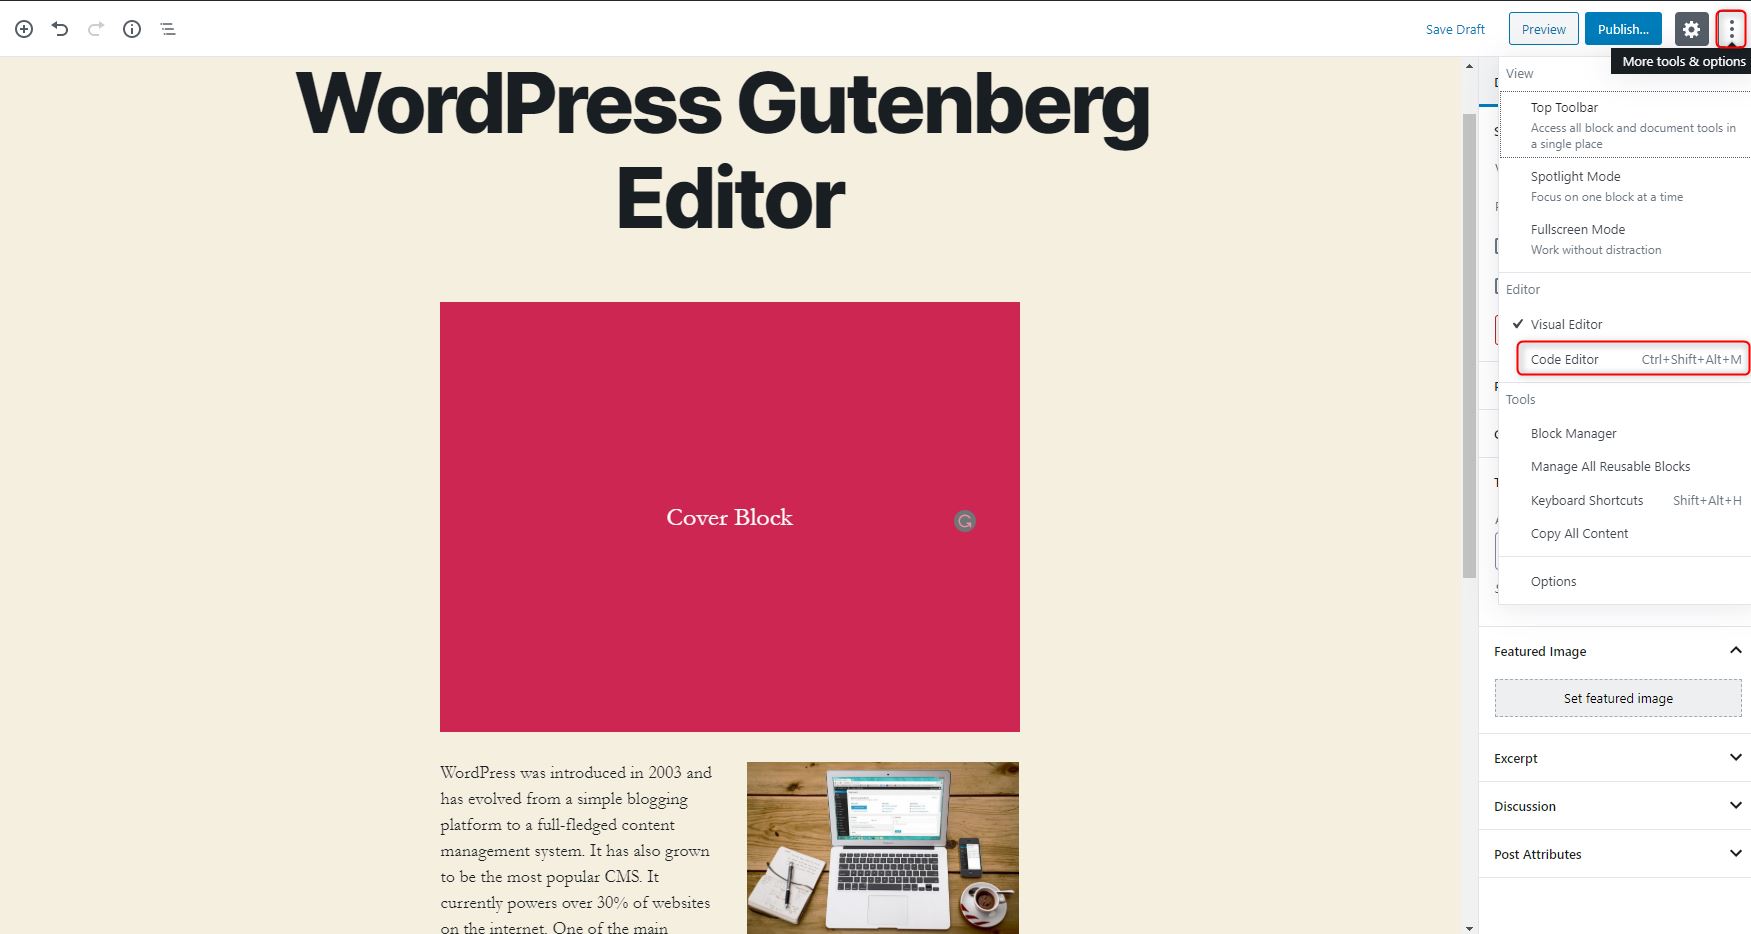
Alternatively, you can use the keyboard shortcut Ctrl + Shift + Alt + M.
Gutenberg keyboard Shortcuts
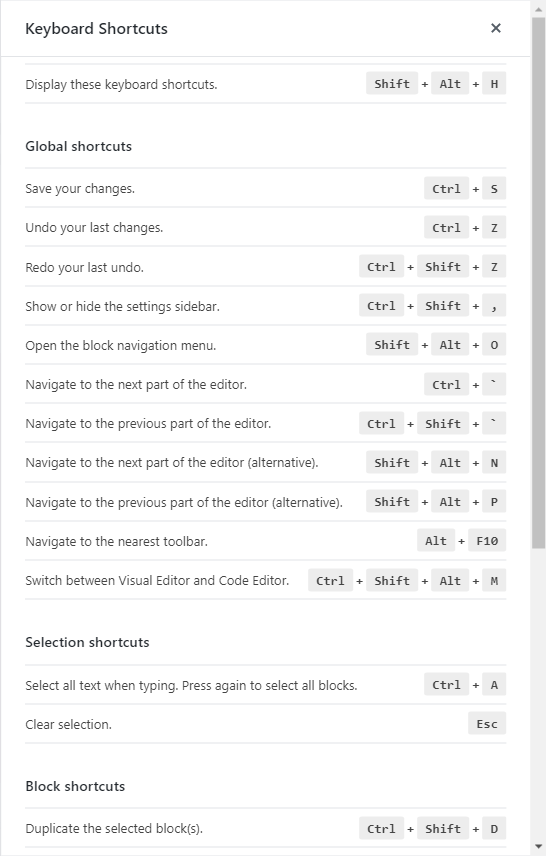
The Gutenberg editor comes with standard keyboard shortcuts. Once you get used to these, you will find yourself working much faster. To access the full list of keyboard shortcuts, use the Shift + Alt + H. This will give you a pop-up with all the keyboard shortcuts available.
Create Reusable Block Templates
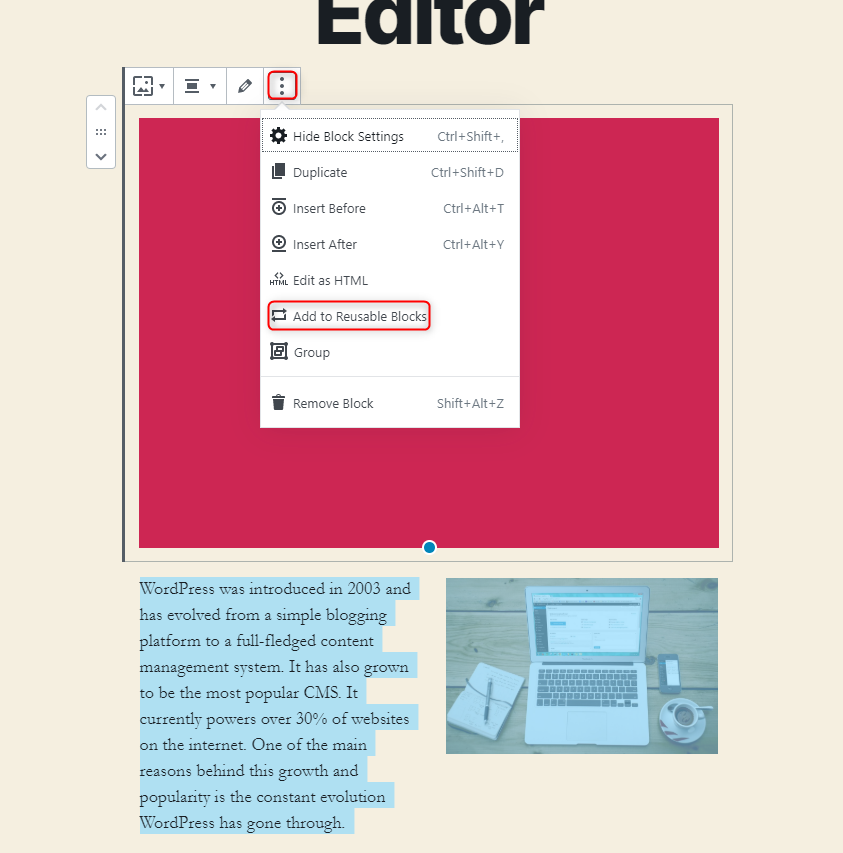
If you have a layout of blocks that you would like to reuse in other pages or posts, you can save that layout as a template to reuse later on. You will need to name your template and you can insert it in other pages or posts just like a normal block.
To create a reusable template, select the blocks that you would like to use, click on the more options button and then click on Add to Reusable Blocks.
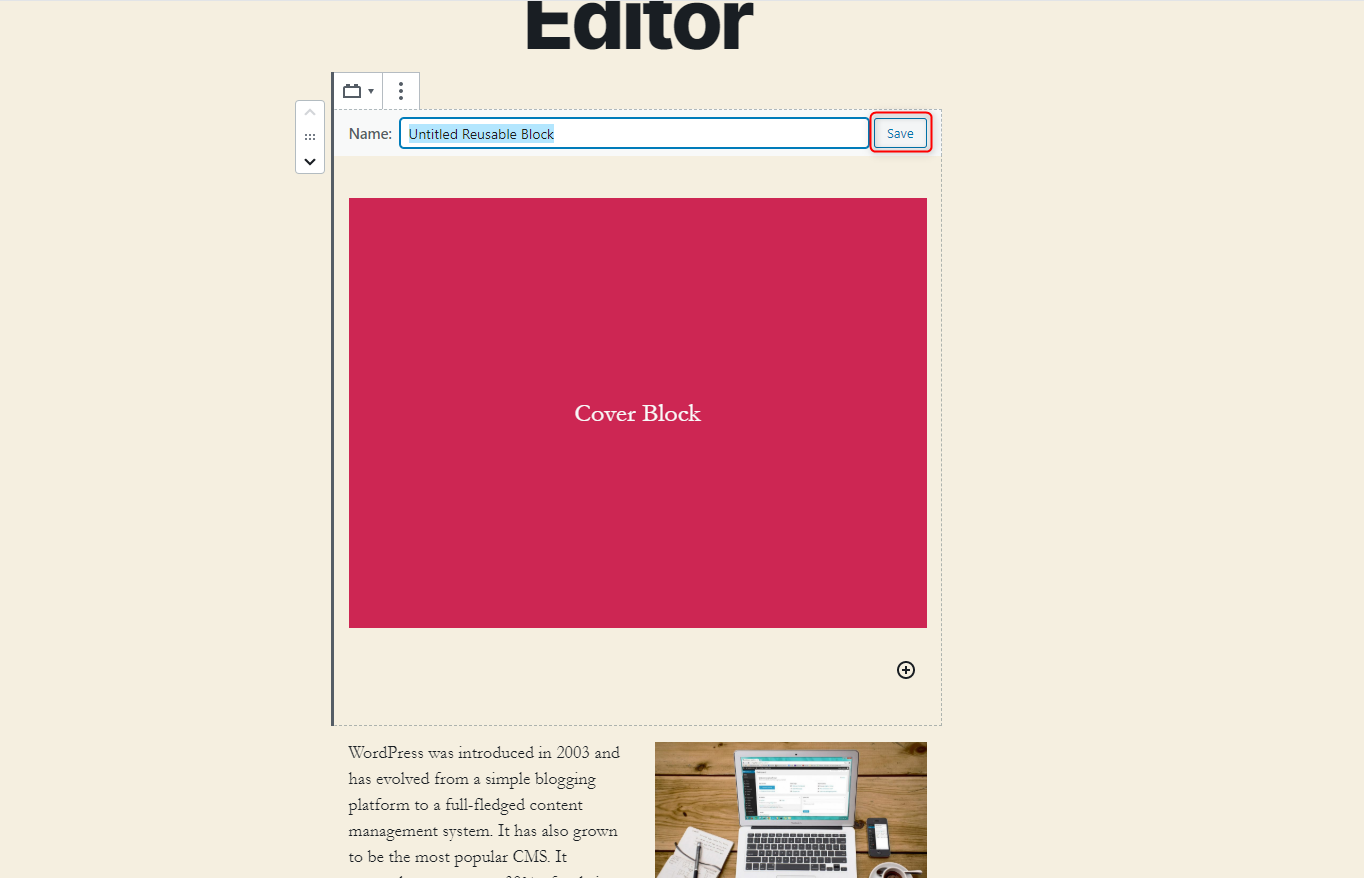
Define a name for your template and click on save.
Conclusion
At first, the Gutenberg editor may seem difficult to use. Initially, you may even have difficulties in performing minor actions that you have taken for granted. However, once you get used to it, it becomes a great tool to have at your disposal. You should easily be able to build layouts, create new pages and posts. As you get a hang of advanced Gutenberg blocks you will have greater flexibility than the classic editor.