WooCommerce Free Shipping for Specific Products: 3 Ways to Set It Up
WooCommerce free shipping for specific products is a fantastic way to attract more customers and boost your sales👌
Imagine offering free shipping on your most popular items and watching your orders skyrocket!
So, in this guide, you’ll learn how to set up free shipping for certain items in your WooCommerce store. We’ll cover everything from configuring your shipping settings to using handy plugins that make the process a breeze.
By the end of this article, you’ll have the ability to offer free shipping on selected products, making your store even more appealing to shoppers.
Why Should You Offer Free Shipping on Specific Products?
Offering free shipping for specific products in your WooCommerce store brings a ton of benefits!!
First, it significantly boosts your sales.
Customers love free shipping, and when they see it offered on popular or high-value items, they’re more likely to complete their purchase.
Second, it helps clear out inventory.
If you have products that aren’t moving as quickly, offering free shipping makes them more attractive to buyers, helping reduce excess stock.
Third, free shipping enhances customer loyalty.
When customers have a positive shopping experience, they’re more likely to return. Offering free shipping on certain items leaves a lasting impression and keeps them coming back for more.
Lastly, it improves your competitive edge.
In a crowded market, free shipping sets your store apart from others. It’s a small incentive that makes a big difference in attracting and retaining customers.
Adding Free Shipping to Specific Products
-
Using Shipping Classes to Define Free Shipping Products
This method lets you run targeted promotions and incentives without changing your whole shipping setup or impacting your entire inventory.
It’s an awesome way to showcase special items and get customers to add them to their carts.
Here’s how to set it up:
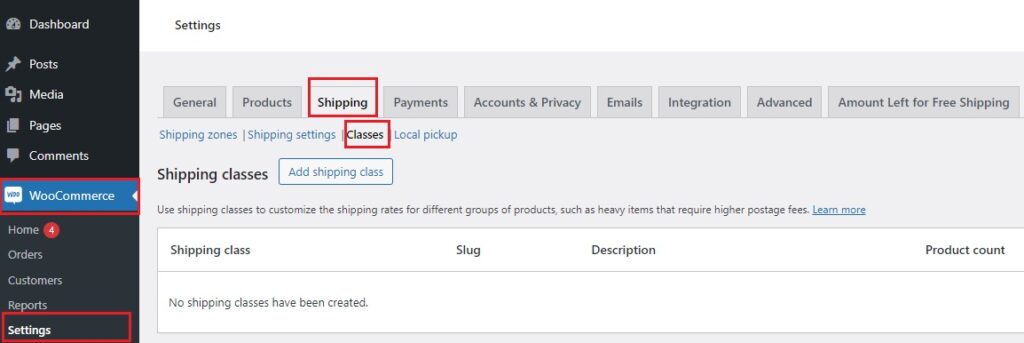
1. Access Shipping Classes:
- Go to your WooCommerce dashboard and navigate to WooCommerce > Settings > Shipping.
- Click on the Shipping Classes tab.
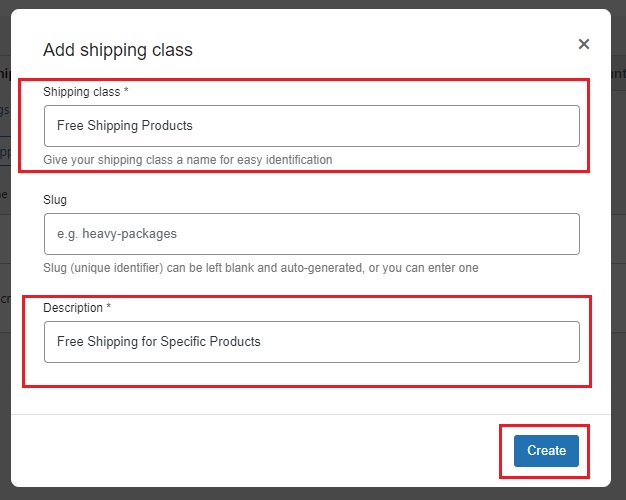
2. Create a New Shipping Class:
- Click the Add Shipping Class button.
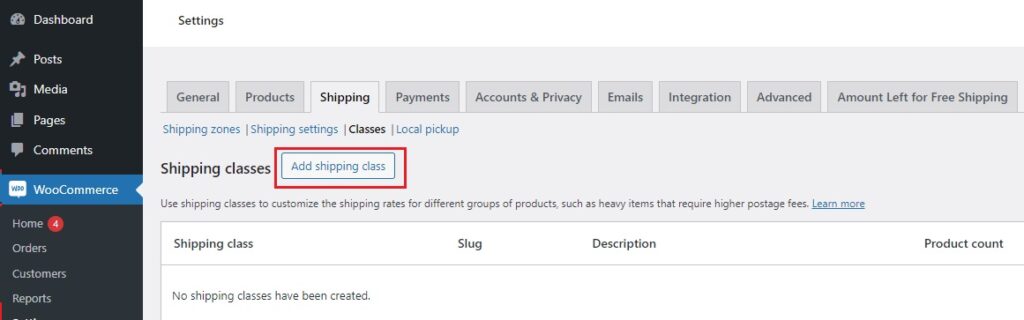
- Name your class something like “Free Shipping Products” and add a description.
- Click Create.
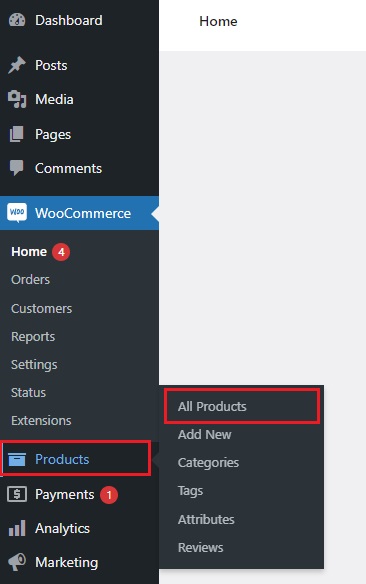
3. Assign Products to the Shipping Class:
- Go to your Products section in the dashboard > All products
- Edit a product that you want to offer free shipping on.
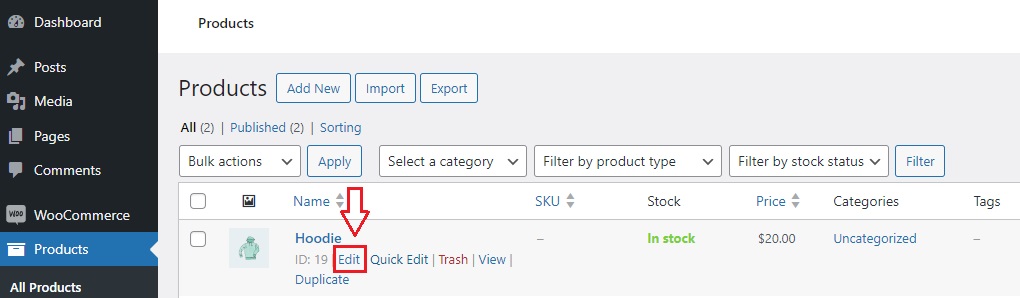
- In the Product Data section, click on the Shipping tab.
- Select the “Free Shipping Products” class from the Shipping Class dropdown menu.
- Save your changes.

4. Set Up Free Shipping for the Class:
- Go back to WooCommerce > Settings > Shipping and select the Shipping Zones tab.
- Edit the zone where you want to apply the free shipping class.
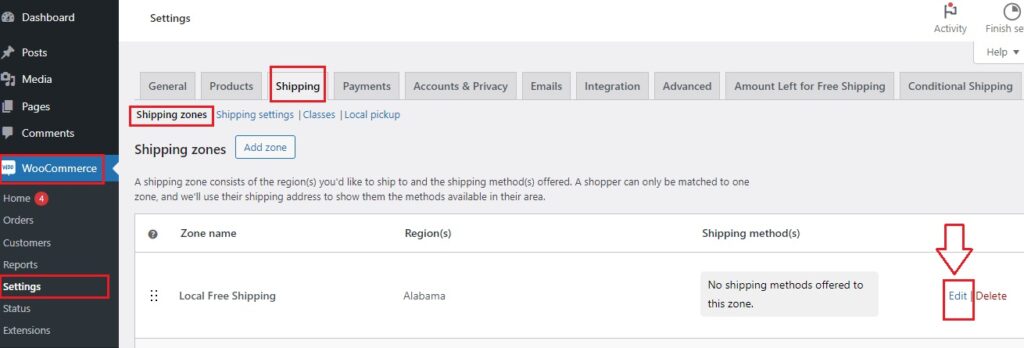
- Click on the Edit button next to the Shipping method.
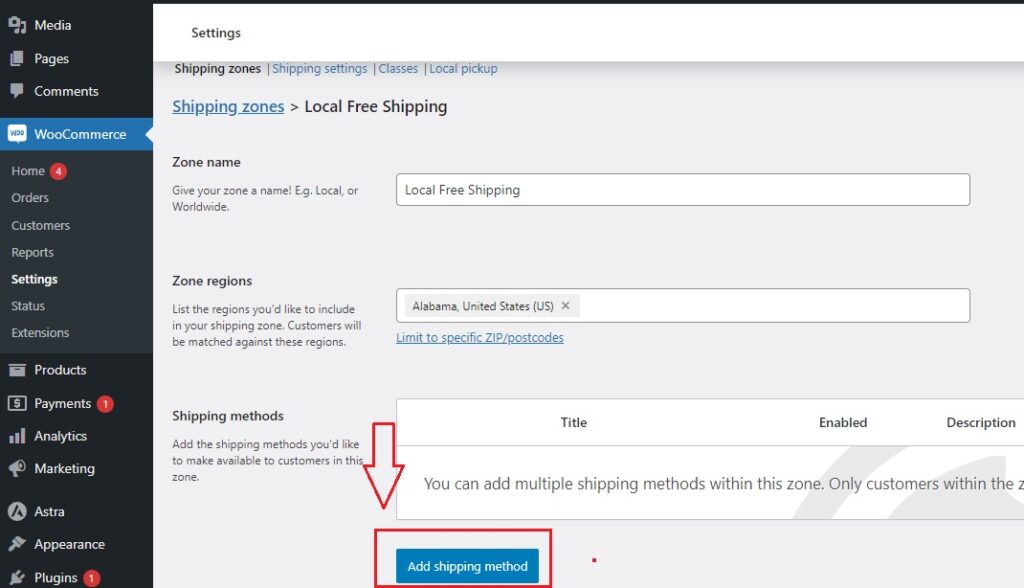
- Click Add shipping method button.
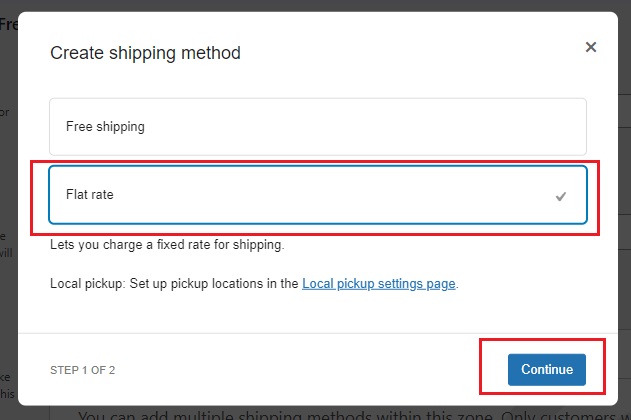
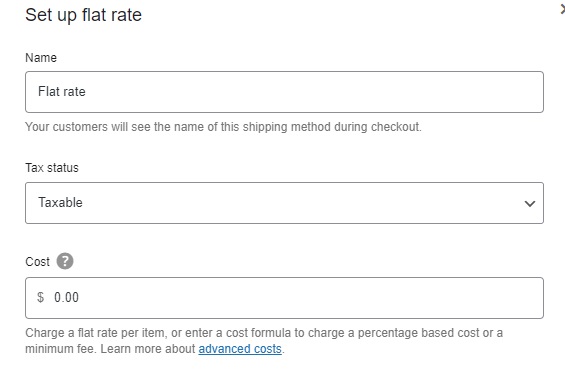
- Choose flat rate > Continue
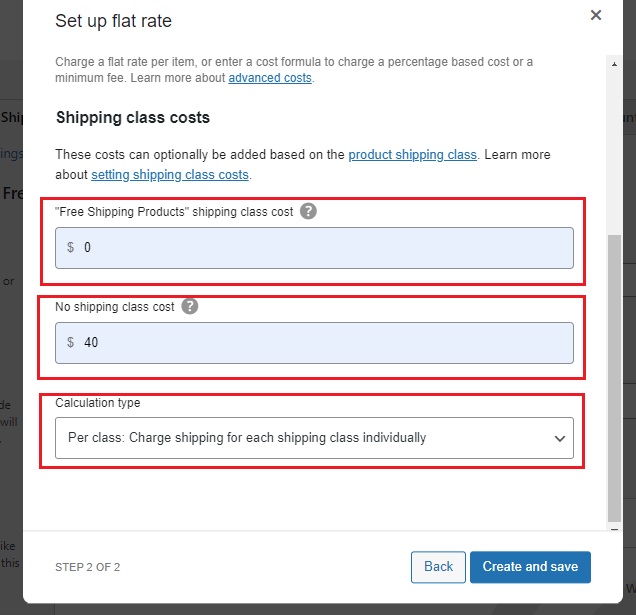
- Now, make sure:
The cost is $0
“Free Shipping” (or whatever you called the custom shipping class) class cost is $0
“No shipping class” cost is whatever it would be for other products
“Charge per class” is enabled
- Save your changes.
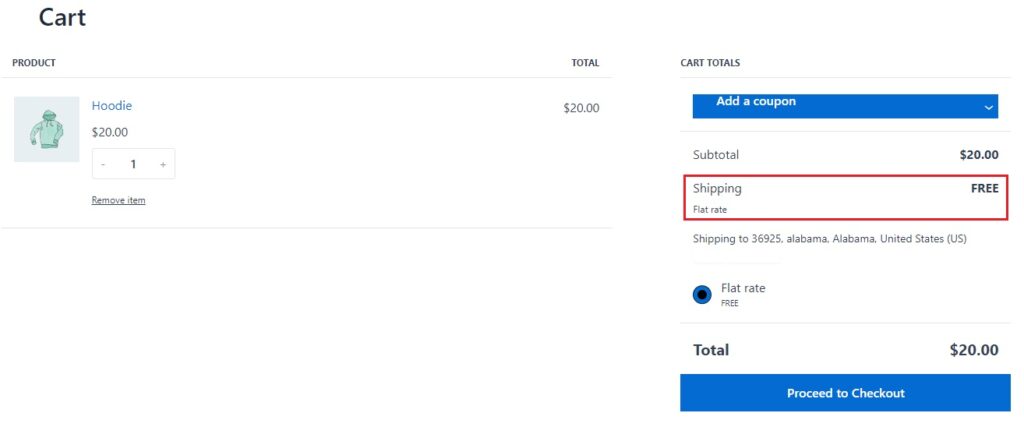
5. Test Your Settings:
- Add one of your free shipping products to the cart and proceed to checkout.
- Ensure that the free shipping option appears correctly and that no shipping cost is applied.
Next, we’ll explore setting up free shipping coupons for specific products!
Setting Up Free Shipping Coupons for Specific Products
Free shipping coupons provide a flexible way to reward your customers and encourage them to purchase specific items, it’s a simple yet effective strategy to drive more sales and enhance the shopping experience.
Here’s how you can set this up for specific products in WooCommerce:
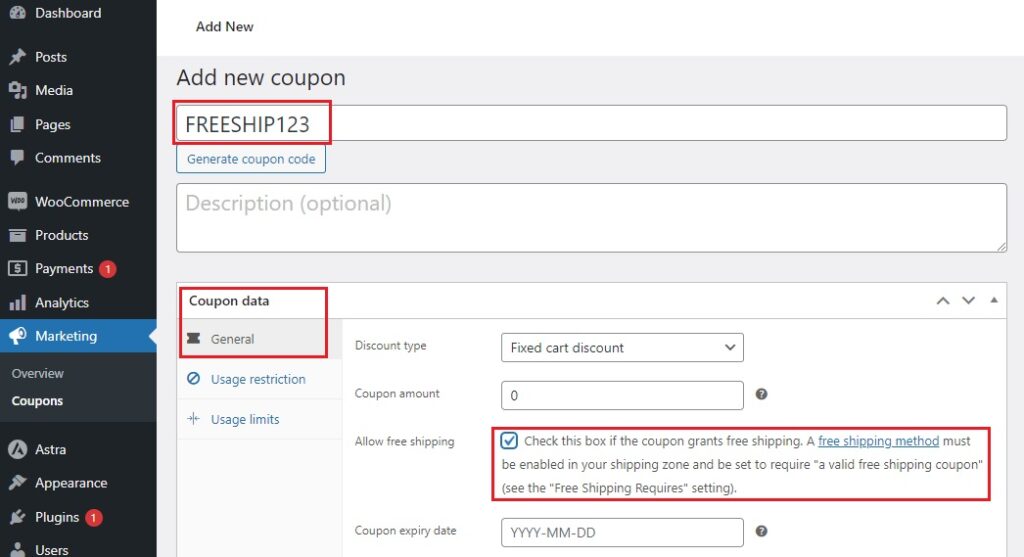
1. Create a Free Shipping Coupon:
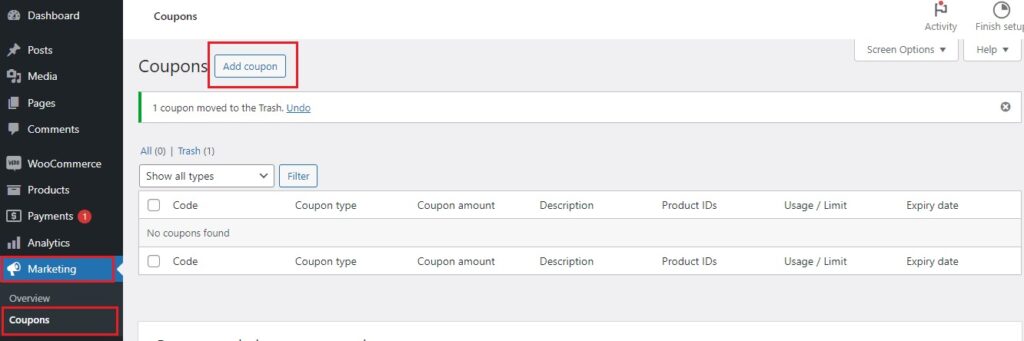
- Go to your WooCommerce dashboard and navigate to Marketing > Coupons.
- Click Add Coupon and enter a unique code for your coupon, like “FREESHIP123”.
- In the Coupon Data section, check the box for Allow free shipping.
Note: A free shipping method must be enabled in your shipping zone and be set to require “a valid free shipping coupon”
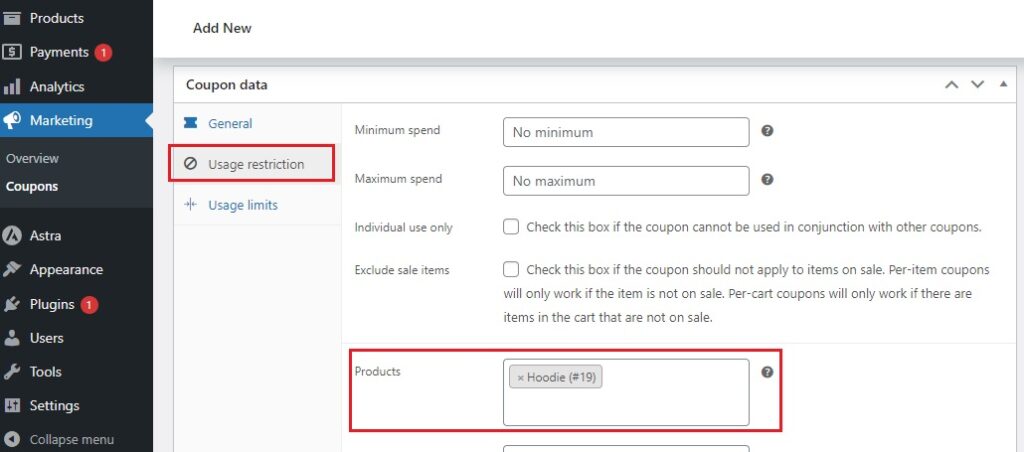
2. Set Usage Restrictions:
- Click on the Usage Restrictions tab.
- In the Minimum Spend field, you can set a minimum order amount if you wish.
- To limit the coupon to specific products, use the Products field. Add the products that should qualify for this free shipping coupon.
- You can also exclude certain products by using the Exclude Products field.
3. Set Usage Limits:
- Click on the Usage Limits tab.
- Set the limit on how many times the coupon can be used in total or per customer, if desired.
4. Publish Your Coupon:
- Once all settings are configured, click Publish to make your coupon active.
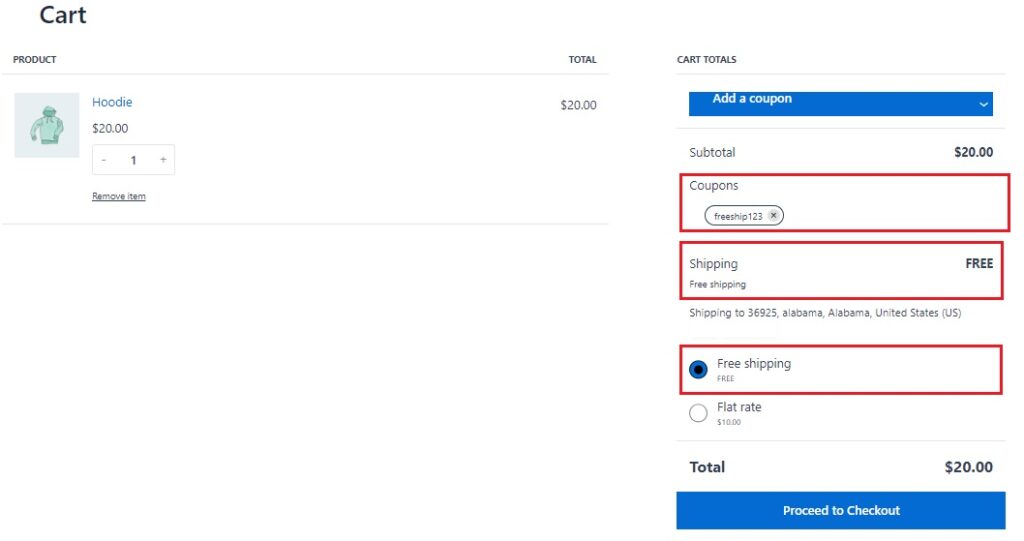
Now let’s see how it will look:
5. Promote Your Free Shipping Coupon:
Share your free shipping coupon with your customers through email marketing, social media, or on your website.
Make sure to highlight the benefits and any conditions associated with the coupon.
Before we wrap up this section, if you’re interested in coupons, take a look at this:
Transform your WooCommerce store’s coupon management.
Leveraging Plugins to Enhance Free Shipping
Let’s take your free shipping strategy up a notch with the “Amount Left Tracker for WooCommerce” Plugin.
![]()
This handy tool shows customers how much more they need to spend to qualify for free shipping, making the shopping experience more engaging and fun👌
Why Use the Amount Left Tracker?
-
Boosts Average Order Value:
When customers see they’re just a few dollars away from free shipping, they’re more likely to add an extra item or two to their cart.
-
Enhances Customer Experience:
The plugin provides clear, real-time updates on how close customers are to free shipping, reducing confusion and making the shopping process smoother.
-
Encourages Impulse Buys:
Displaying the amount left can prompt customers to make quick decisions to reach the free shipping threshold, increasing your sales.
How to Set Up the Amount Left Tracker:
It’s very simple!👇
1. Install the Plugin:
- Go to your WooCommerce dashboard and navigate to Plugins > Add New.
- Search for “Amount Left for Free Shipping,” install, and activate the plugin.
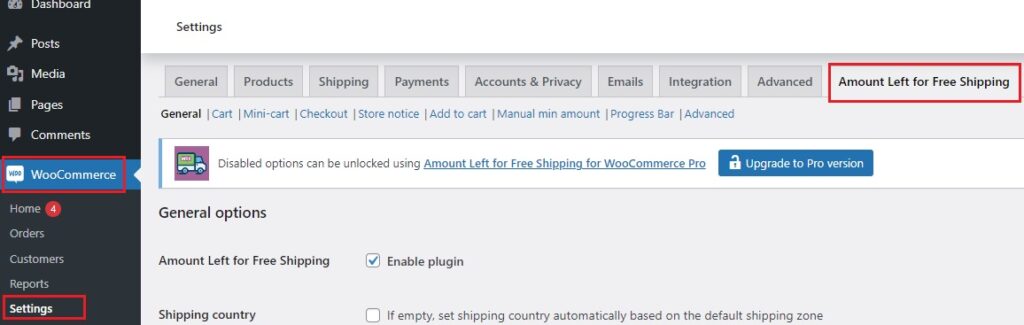
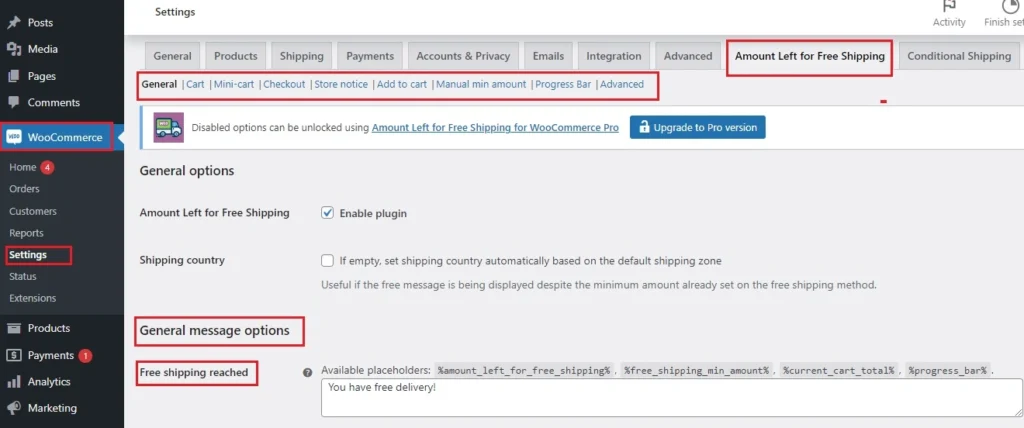
2. Configure the Plugin Settings:
- Once activated, go to WooCommerce > Settings > Shipping > Amount Left Tracker.
- Customize the message that appears to customers. For example, “Spend $20 more to get free shipping!”
- Choose where to display the message, such as on the cart page, mini cart, or checkout page.
3. Set Up Free Shipping Conditions:
- Ensure you have a free shipping method set up in your WooCommerce shipping zones.
- Define the minimum order amount needed to qualify for free shipping, the plugin will use this amount to calculate how much more customers need to spend.
4. Test the Plugin:
- Place a few test orders to make sure the tracker updates correctly as items are added or removed from the cart.
Here’s how it looks👇 it’s too encouraging!

Also:
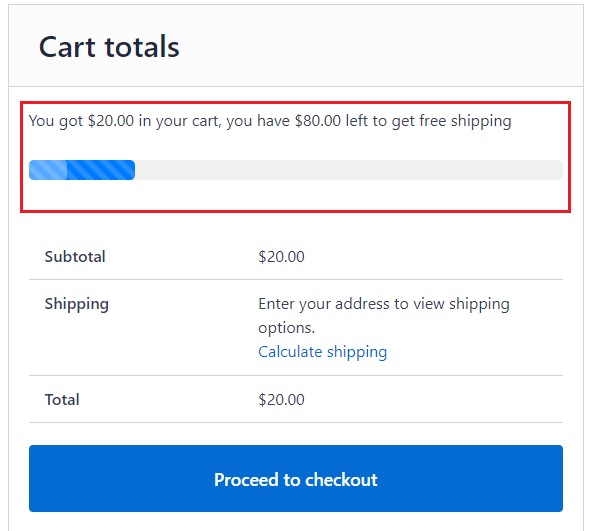
Using the Amount Left Tracker for WooCommerce Plugin is a smart way to motivate your customers to spend more while making their shopping experience more enjoyable, It’s a win-win for both your store and your customers.
Explore the possibilities with this plugin and see how it can transform your free shipping strategy!
Conclusion
Let’s quickly recap the key steps for adding free shipping to specific products in WooCommerce and some tips for ongoing optimization.
-
Key Steps Recap:
- Set up your shipping zones and add free shipping as a method.
- Define conditions for free shipping, like a minimum order amount or specific coupons.
- Assign free shipping to specific products using shipping classes.
- Create and promote free shipping coupons for targeted products.
- Use the “Amount Left Tracker for WooCommerce” to motivate customers to spend more.
-
Continuous Optimization Tips:
- Adjust your shipping policies based on customer feedback.
- Review sales data regularly to spot trends and areas for improvement.
- Keep your WooCommerce plugins and settings up to date.
- Experiment with different free shipping rules and promotions.
Finally, implementing these steps and continually refining your shipping strategy will enhance customer satisfaction and boost sales. Happy shipping!