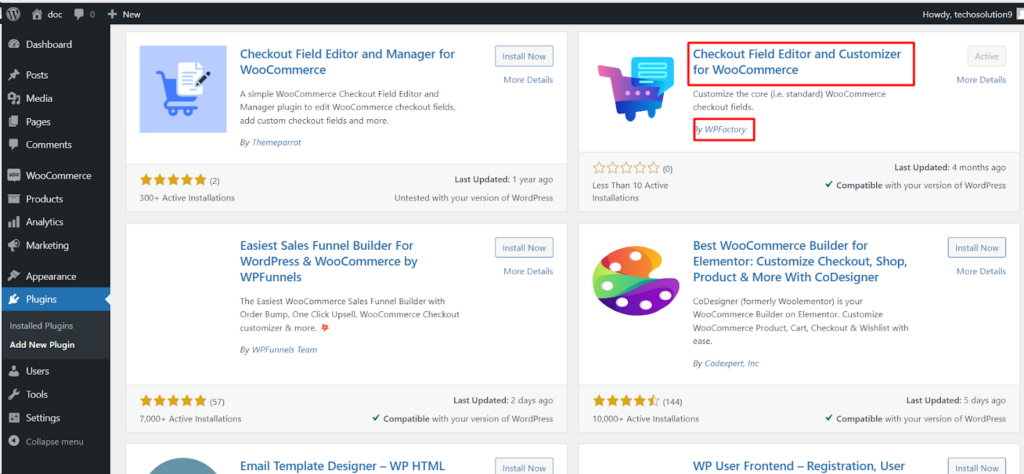
The Checkout Field Editor and Customizer for WooCommerce plugin simplifies managing your checkout page by allowing you to add, edit, delete, and reorder checkout fields. This guide will walk you through the installation process to get you started.
Installation Steps
There are two methods to install the Checkout Field Editor and Customizer for WooCommerce plugin;
Method 1: Installing from the WordPress Dashboard
- Navigate to your WordPress dashboard.
- Go to Plugins > Add New.
- In the search bar, type “Checkout Field Editor and Customizer for WooCommerce”.
- Locate the plugin by “WP Factory “ and click Install Now.
- Once installed, click Activate to start using the plugin.
Method 2: Installing Manually Pro Version(Optional)
- Download the plugin from the WordPress plugin directory https://wpfactory.com/item/core-checkout-fields-for-woocommerce
- Upload the downloaded ZIP file to your WordPress site’s plugin directory. You can do this by logging in to your website’s file manager through your hosting provider’s control panel or using an FTP client.
- Once uploaded, navigate to Plugins > Installed Plugins in your WordPress dashboard.
- Locate “Checkout Field Editor and Customizer for WooCommerce” and click Activate to start using the plugin.
Verifying Installation
After activating the plugin, you should see a new menu item called “Core Checkout Fields” under the WooCommerce> Settings > Core Checkout Fields menu in your WordPress dashboard. This indicates successful installation.
By following these simple steps, you’ll have the Checkout Field Editor and Customizer for WooCommerce plugin installed and ready to customize your checkout page for a smoother customer experience.
