
The WooCommerce Email Verification plugin’s “General” sub-tab offers various configuration options that influence core functionalities and user experience. This article explores these settings to guide you in tailoring the plugin’s behavior to your specific needs.
Block Account Verification by Email
Restrict email verification for specific users
- Prevent account verification via email for certain email addresses or domains.
- This can be useful to.
- Limit registrations from disposable email services.
- Prevent duplicate accounts.
- Control access for specific user groups.
Email denylist
- Enter email addresses or domains to block (separated by commas, new lines, or both).
- Use wildcards (*) to block entire domains (e.g., *@example.com).
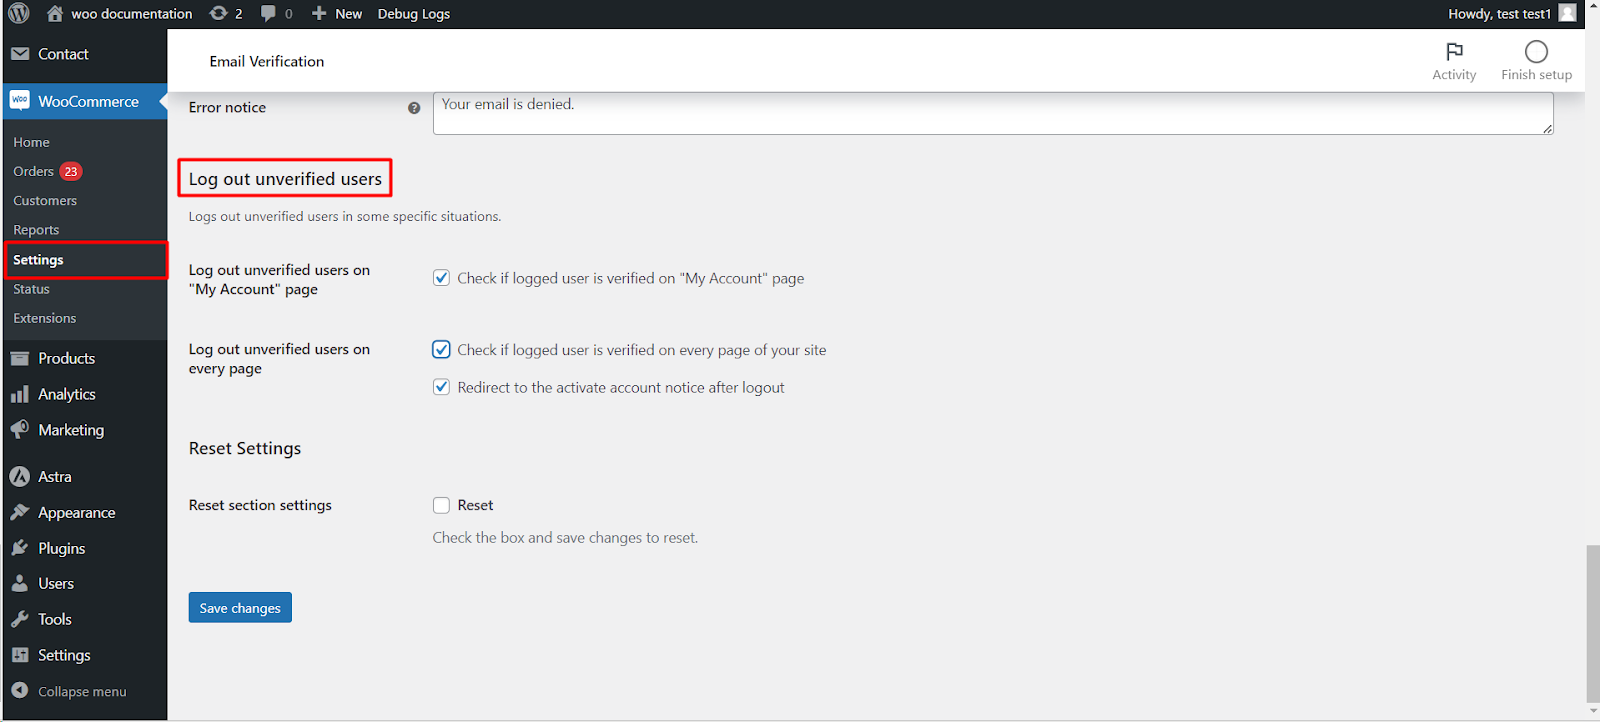
Error notice
- Craft a message informing users about blocked verification attempts.
Verification Email Delay (Optional)
Introduce a delay before sending verification emails
- Potentially reduce the likelihood of emails landing in spam folders.
Delay unit
- Choose hours or days for the delay.
Delay value
- Specify the desired delay duration.
Prevent Login After Registration (Optional)
Enforce mandatory verification before account login
- Enhance security by requiring verification for new user logins.
GDPR
Enable compatibility features for GDPR compliance
- Address data privacy regulations within the European Union.
- Options include:
- Anonymize user data after verification.
- Allow data deletion requests from users.
Role Checking (Optional)
Exclude specific user roles from verification requirements
- Grant automatic account access to certain user roles (e.g., administrators).
Accessing and Configuring Settings
- Navigate to WooCommerce > Settings > Email Verification.
- Click on the “General” sub-tab.
- Configure the desired options as per your requirements.
- Click “Save changes” to apply your configuration.