
This article delves into the various email settings offered by the WooCommerce Email Verification plugin, empowering you to customize the communication flow throughout the account verification process.
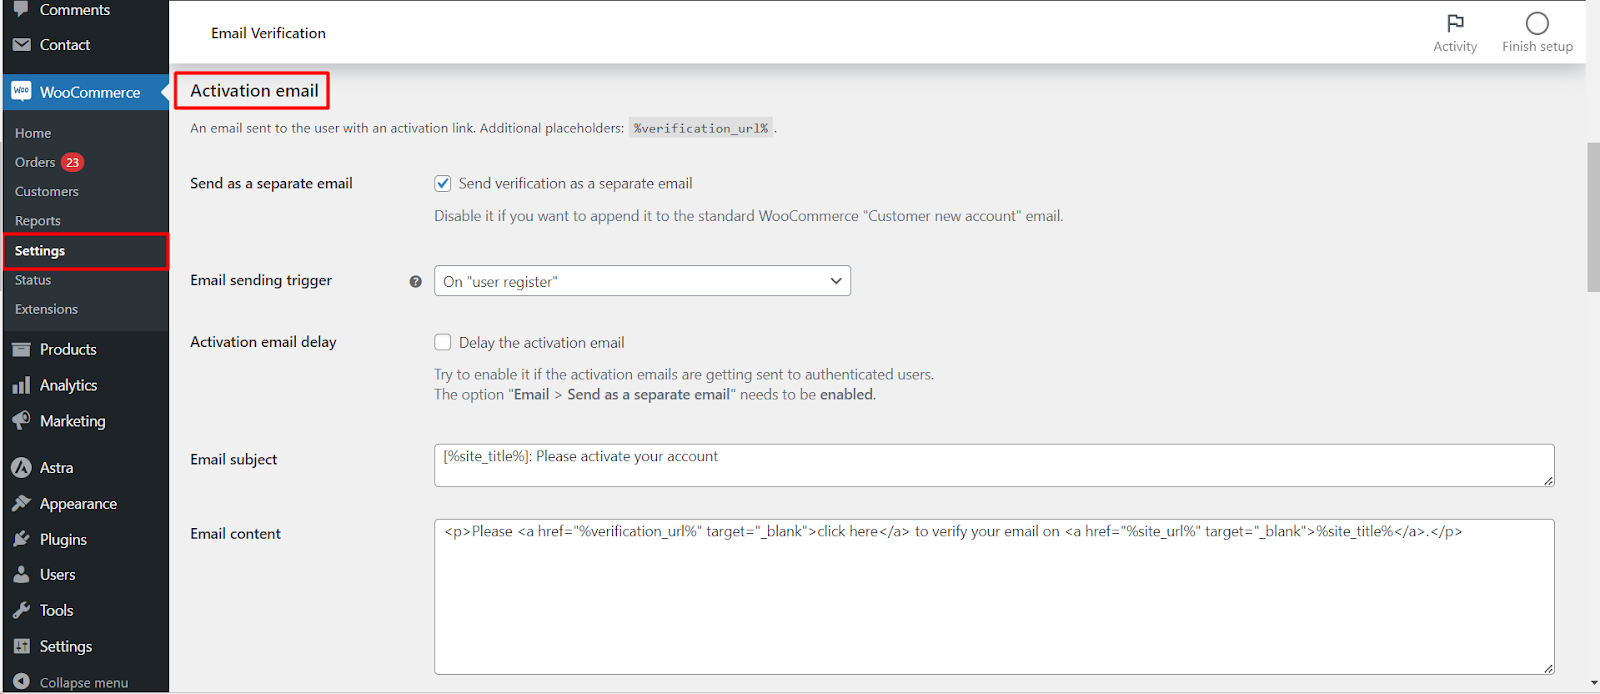
Activation Email:
- Sent to users: Contains an activation link for account verification.
- Additional placeholders: %verification_url%: Replaced with the unique verification link for each user.
- Send as a separate email:
- Enabled: Sends the activation email independently.
- Disabled: Appends the activation content to the standard WooCommerce “Customer new account” email.
- Email sending trigger: Choose when the activation email is sent:
- On “user register”: Upon user registration.
- On “WooCommerce created customer”: When a customer is created through WooCommerce.
- Activation email delay: Optionally delay sending the activation email, potentially helpful if emails are reaching authenticated users. Requires “Send as a separate email” to be enabled.
-
Email customization:
- Email subject: Define the subject line of the activation email.
- Email content: Craft the message body of the activation email.
- Email heading: Set the heading displayed within the email content.
- Fine-tune placement (applicable only if disabled): Specify the exact location within the “Customer new account” email where the activation content should be inserted. Requires adding specific code to the “Customer new account” email template.
Confirmation Email:
- Sent to users: Informs them of successful account verification.
- Trigger options:
- Send confirmation email to users who have just verified their accounts.
- Send confirmation email to the user manually verified by admin: Requires enabling “Verified column” and “Actions” options.
-
Email customization:
- Email subject: Define the subject line of the confirmation email.
- Email heading: Set the heading displayed within the email content.
- Email content: Craft the message body of the confirmation email.
- Delay: Optionally delay sending the confirmation email for a specified duration (hours or days).
Admin Email:
- Sent to admin: Notifies them upon user account verification.
-
Trigger options:
- Send email to the admin when a user verifies his email.
- Send admin email when a user has been manually verified by admin: Requires enabling “Verified column” and “Actions” options.
-
Email customization:
- Recipient: Specify the email address where admin notifications should be sent.
- Subject: Define the subject line of the admin email.
- Heading: Set the heading displayed within the email content.
- Content: Craft the message body of the admin email.
Accessing and Configuring Settings:
- Navigate to WooCommerce > Settings > Email Verification.
- Click on the “Emails” sub-tab.
- Locate the desired email settings section (e.g., Activation Email).
- Configure the options as per your requirements and customize the email content using the available placeholders.
- Click “Save changes” to apply your modifications.