How Do I Add Woocommerce Currency Switcher?
Setting up a WooCommerce currency switcher might sound tricky, but it’s actually pretty simple.
Imagine running a shop where customers from different countries visit, but all they see is pricing in one currency, some might get confused, some might leave without buying.
A currency switcher helps everyone feel right at home by showing prices in the money they use every day.
➡ In this article:
We’re going to walk you through how to easily add a WooCommerce currency switcher.
➡ You’ll learn:
How to let customers pick their currency, how to make sure prices update automatically, and how to give shoppers a smooth checkout experience.
Even if you’re not super techy, don’t worry, we’ll break everything down into simple steps you can follow.
➡ By the end:
You’ll have a store that feels a lot more welcoming to shoppers from all over the world, and you might even see your sales grow because of it.
Understanding WooCommerce Currency Switching Basics
Let’s say you run an online store using WooCommerce, and your prices are set in US dollars, that works fine if all your customers are in the US.
But what if someone from Germany visits your site? Or Canada? Or Japan? They’ll still see prices in dollars, which might confuse them or make them leave without buying.
That’s where currency switching comes in.
A WooCommerce currency switcher lets your store show prices in different currencies, based on who’s shopping or what payment method they’re using.
So if someone in France visits your site, they can see prices in euros, if a shopper from the UK checks out, they’ll see British pounds instead.
It helps your store feel local, even if it’s global.
➡ Now, here’s the thing:
WooCommerce by default only supports one currency at a time, that means if you want to show multiple currencies or change the currency based on certain conditions (like the payment gateway or country), you’ll need help from a plugin.
Otherwise, your customers are stuck with one currency, no matter where they are or how they’re paying.
That’s why currency switching is so important, and why the right plugin can make it work the way your store (and your customers) need it to.
Why Choose the WooCommerce Payment Gateway Currency Plugin?
Now that you know WooCommerce doesn’t handle multiple currencies on its own, you’re probably wondering: what’s the easiest way to fix that?
The answer: WooCommerce Payment Gateway Currency plugin!

This plugin gives you a smart and flexible way to show the right currency based on how your customer wants to pay.
➡ For example:
Maybe you want PayPal to only show USD, but let Stripe use euros or pounds.
With this plugin, you can assign different currencies to different payment gateways, and it handles the switching automatically.
No need to mess with code or complicated settings.
You just choose which currency should show up for each payment method, and the plugin takes care of the rest.
It even supports real-time exchange rates, so prices are always accurate.
It’s a simple tool, but it solves a big problem, especially if you’re selling worldwide and want your store to feel local to every shopper.
Step-by-Step: How to Add a WooCommerce Currency Switcher
Setting up a currency switcher might sound like something only developers can do, but with this plugin, it’s actually just a few clicks.
Let’s walk through it together.
-
Step 1: Install the Plugin
Firstly, buy the Plugin from WPFactory, it’s affordable and worth every penny, it’s a small cost, but totally worth it.
You’re getting full control over how currencies show up in your store, and that can seriously improve your customers’ shopping experience (and your sales).

-
- Once purchased, you’ll receive a ZIP file with the plugin.
- In your WordPress dashboard, go to Plugins > Add New > Upload Plugin.
- Click Upload Plugin, select the ZIP file, and hit Install Now.
- Once installed, click Activate to turn the plugin on.

-
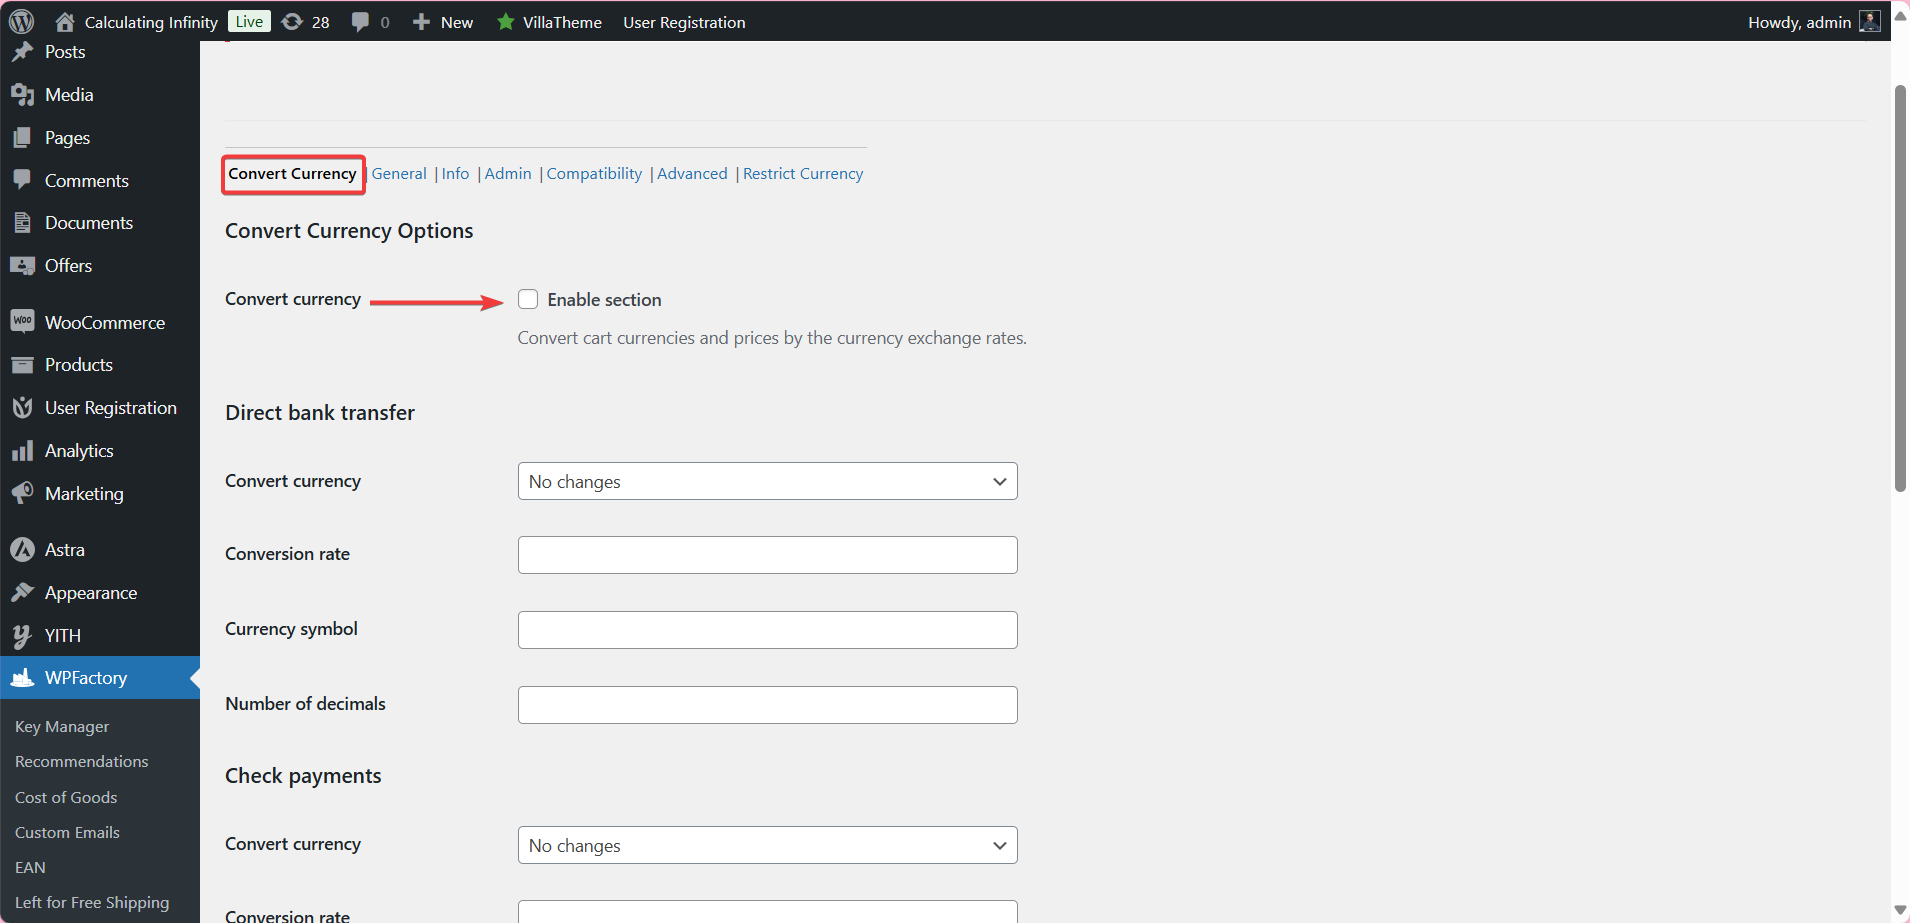
Step 2: Enable Convert Currency Option
Go to: WordPress Dashboard > WPFactory > Payment Gateway Currency
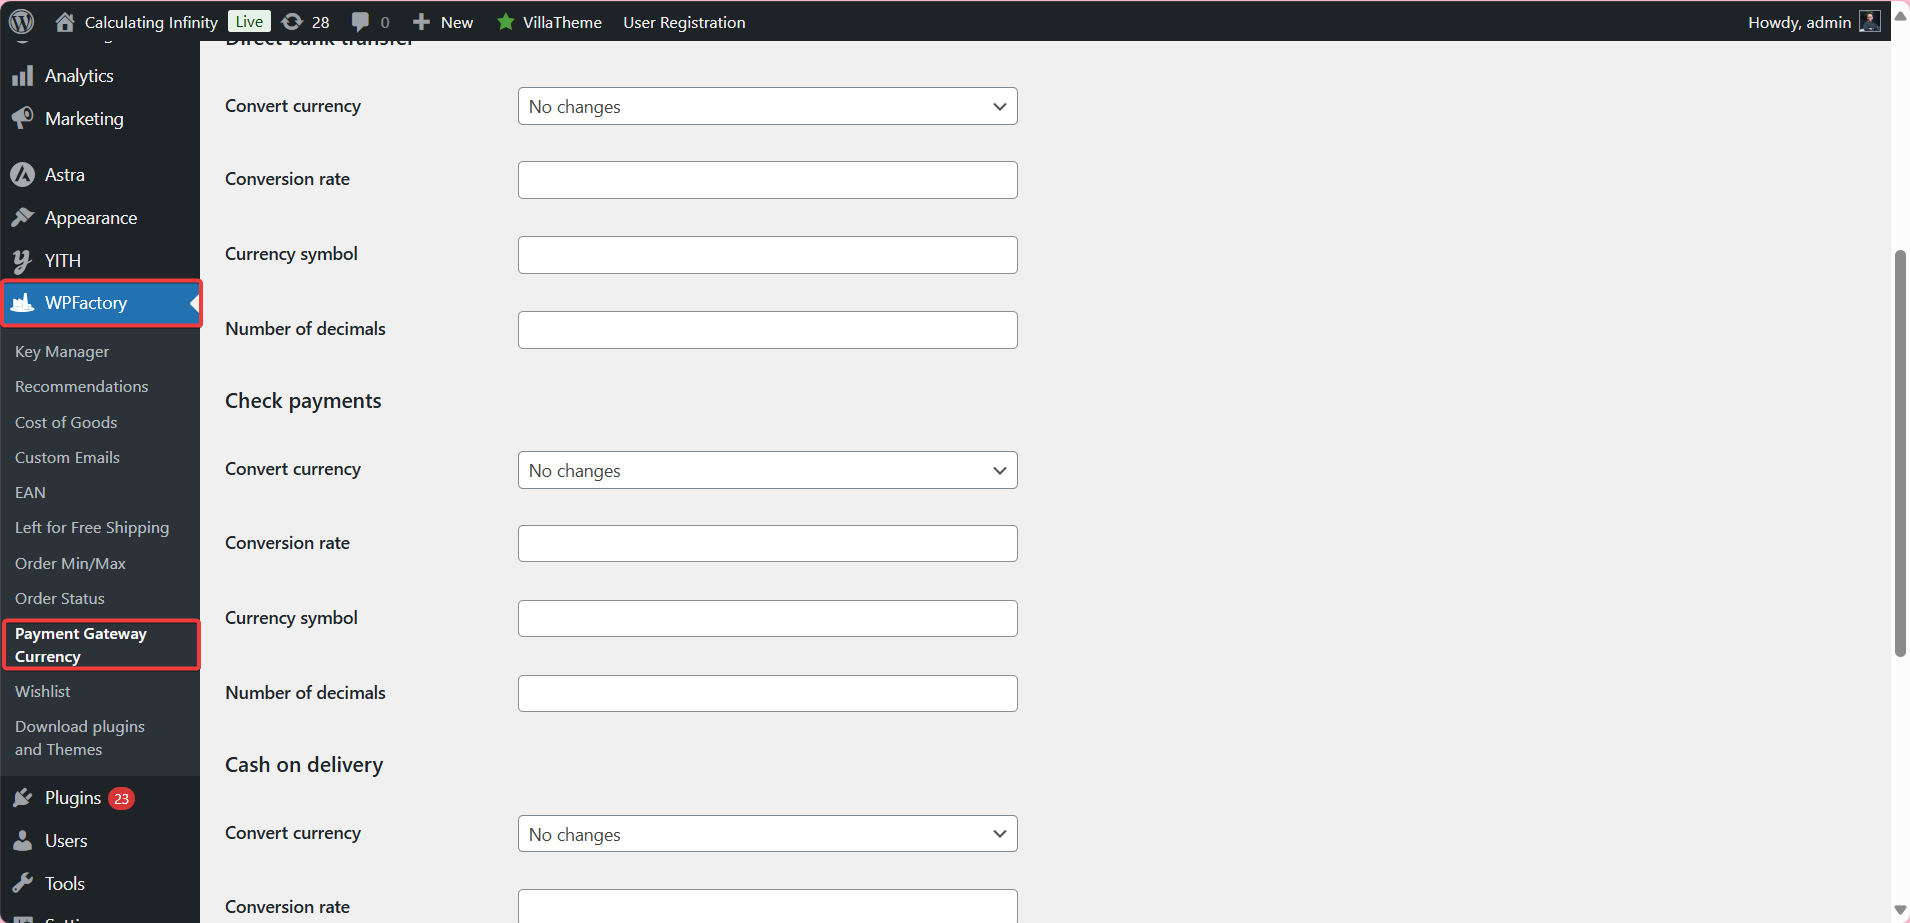
And turn on the “Convert Currency” feature.
This lets your store automatically change prices based on the currency you choose for each payment method.
➡ For example, you can set:
-
- Bank transfers to use Euros
- PayPal to use US Dollars
- Cash on delivery to use Saudi Riyals
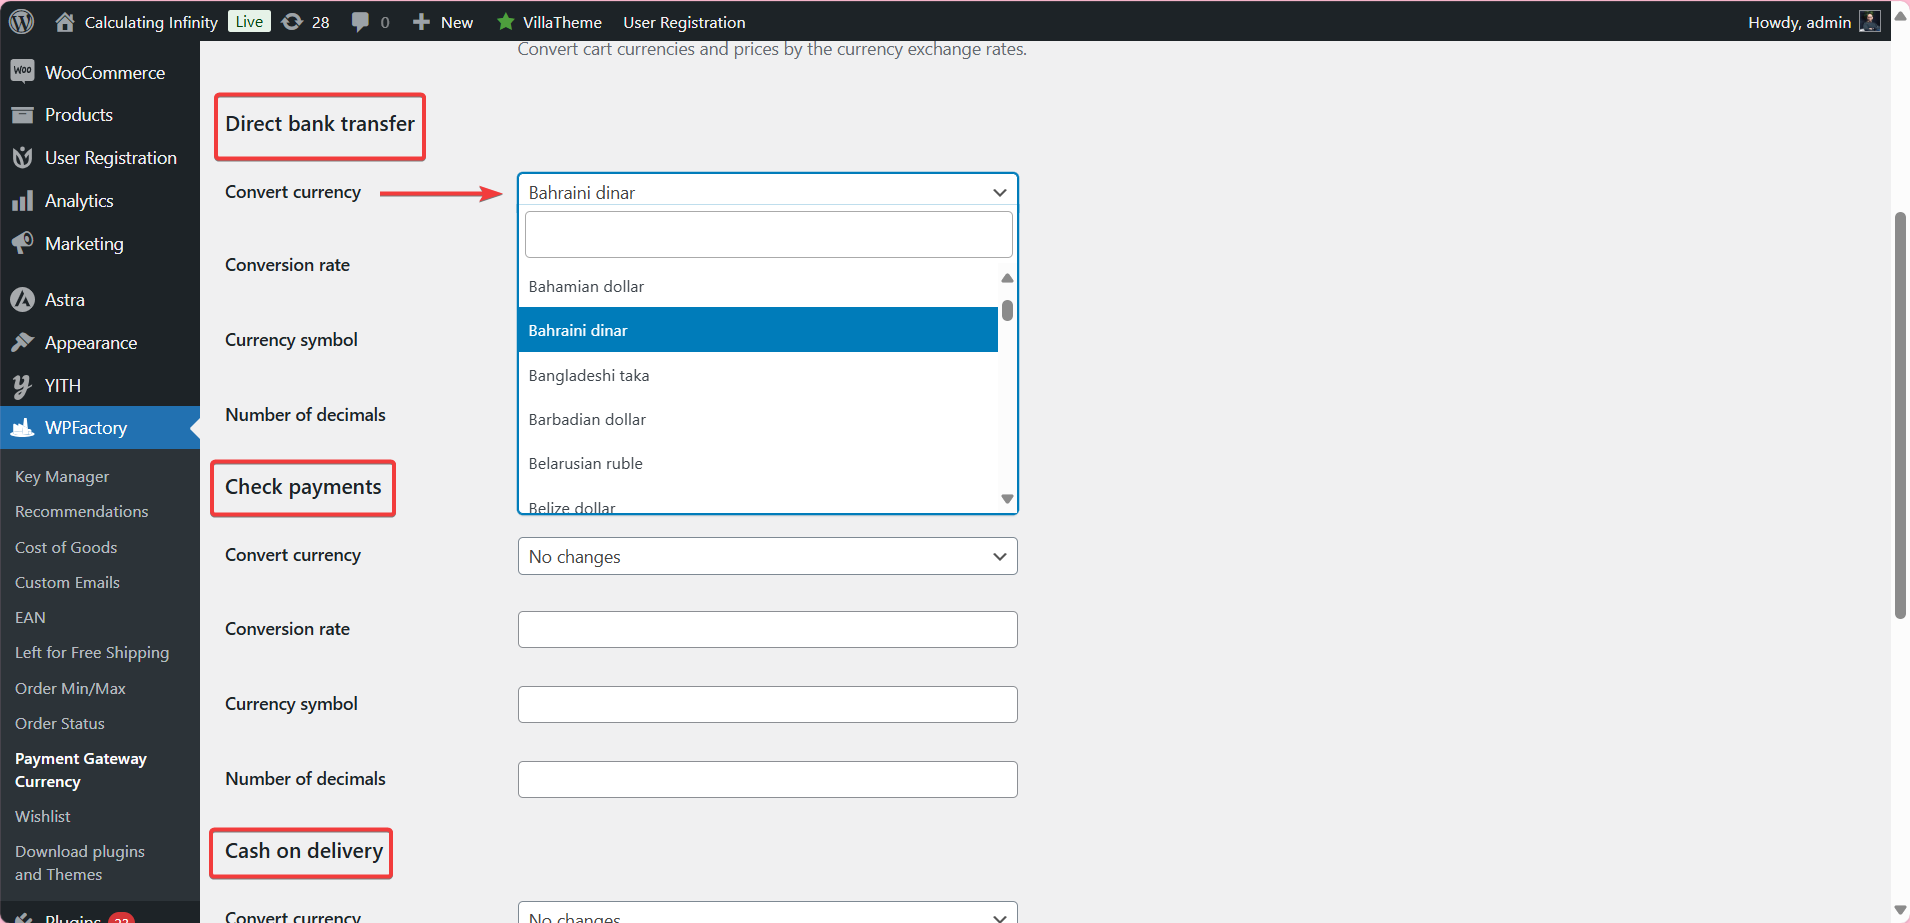
Prices will automatically update based on daily exchange rates.
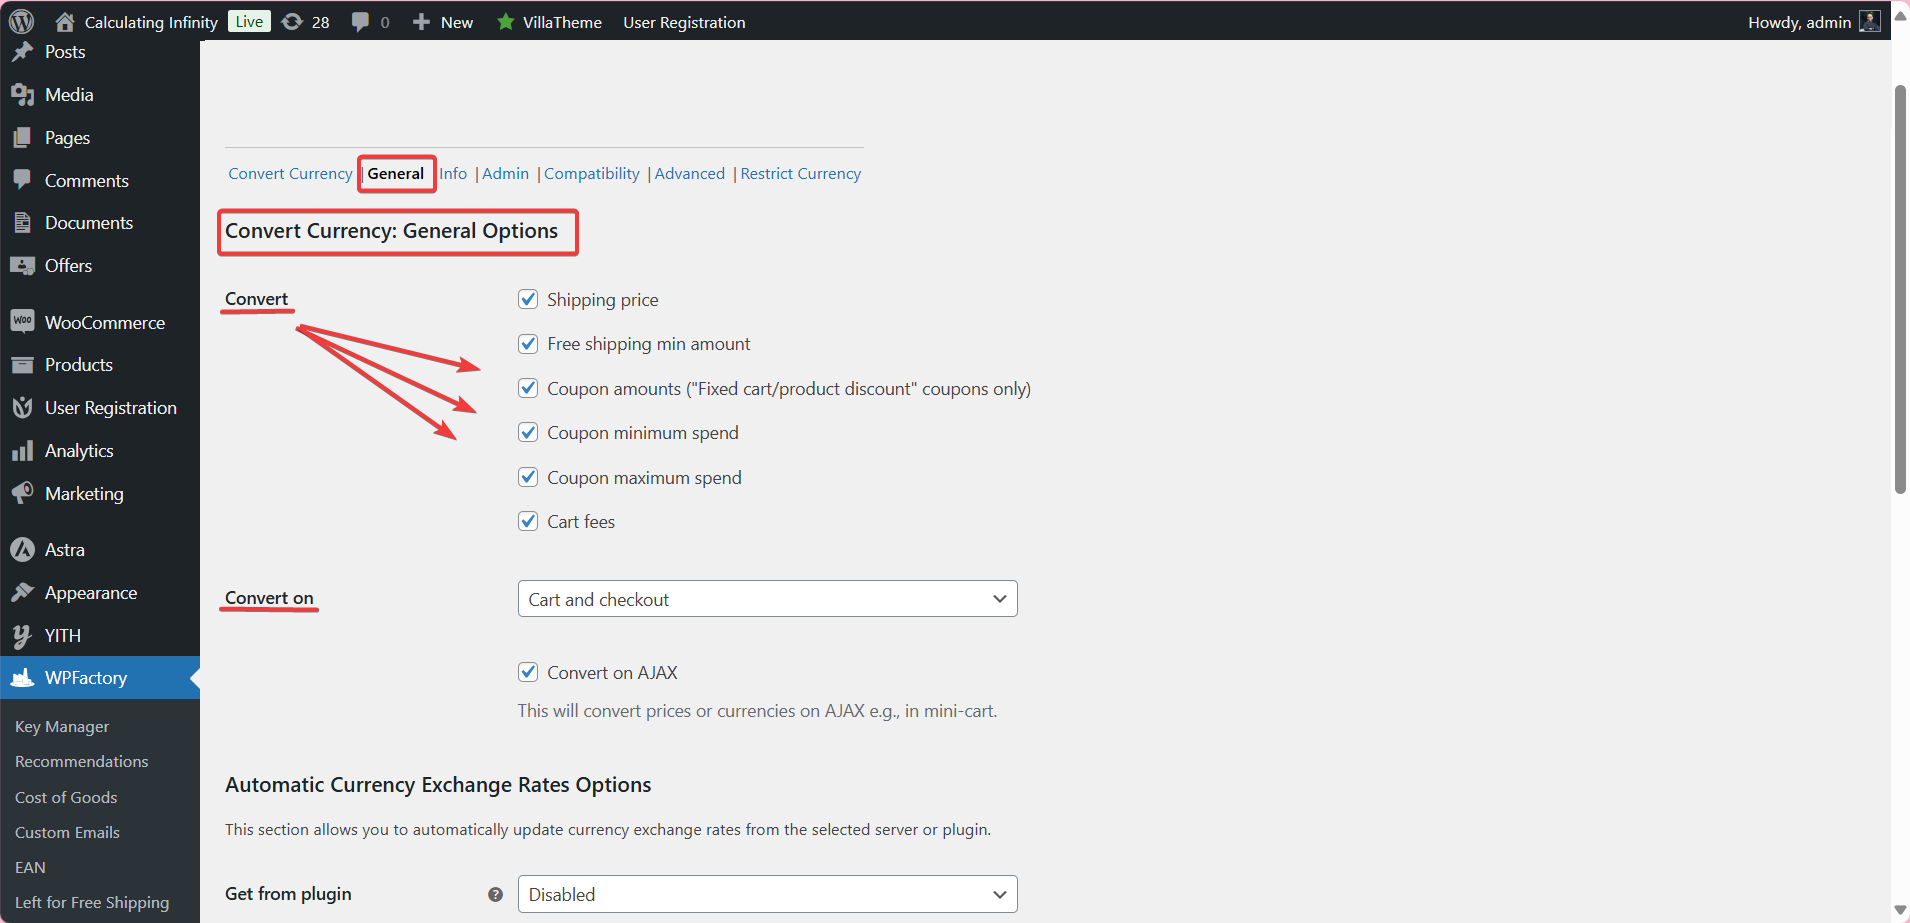
Step 3: Choose Where to Convert Prices
In the General settings, you decide where the currency conversion applies.
Just the checkout? The whole cart? Even the final thank-you page? You can control it all.
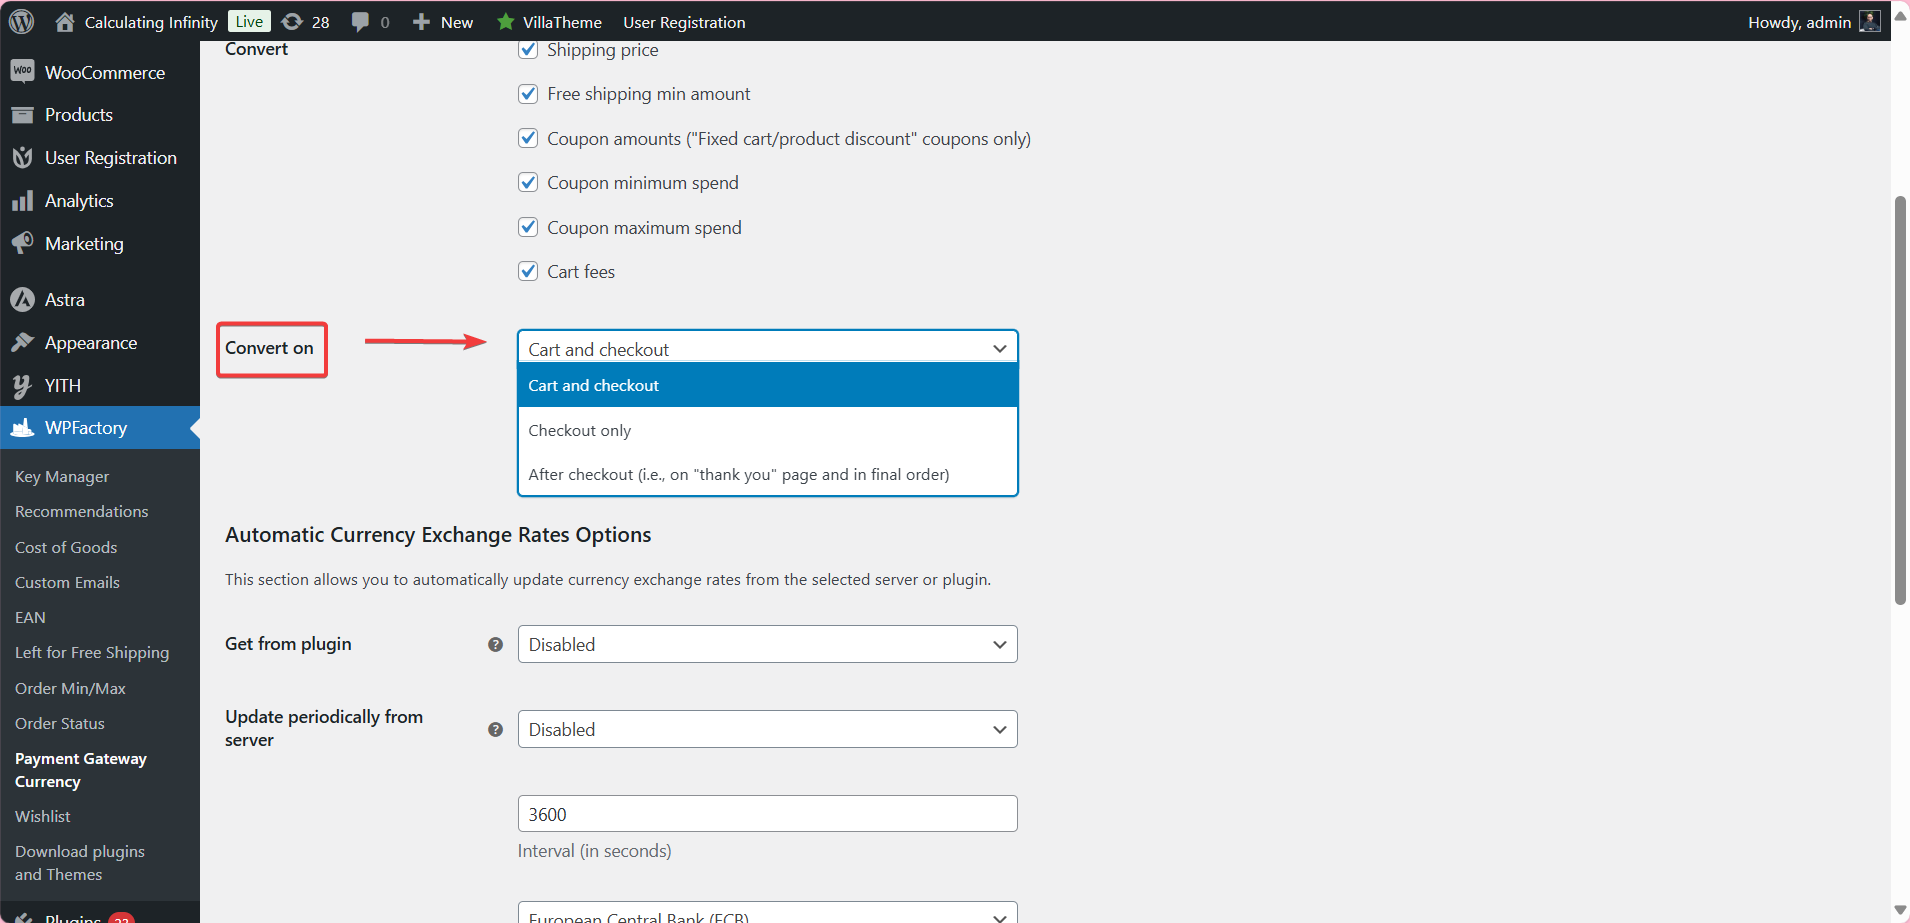
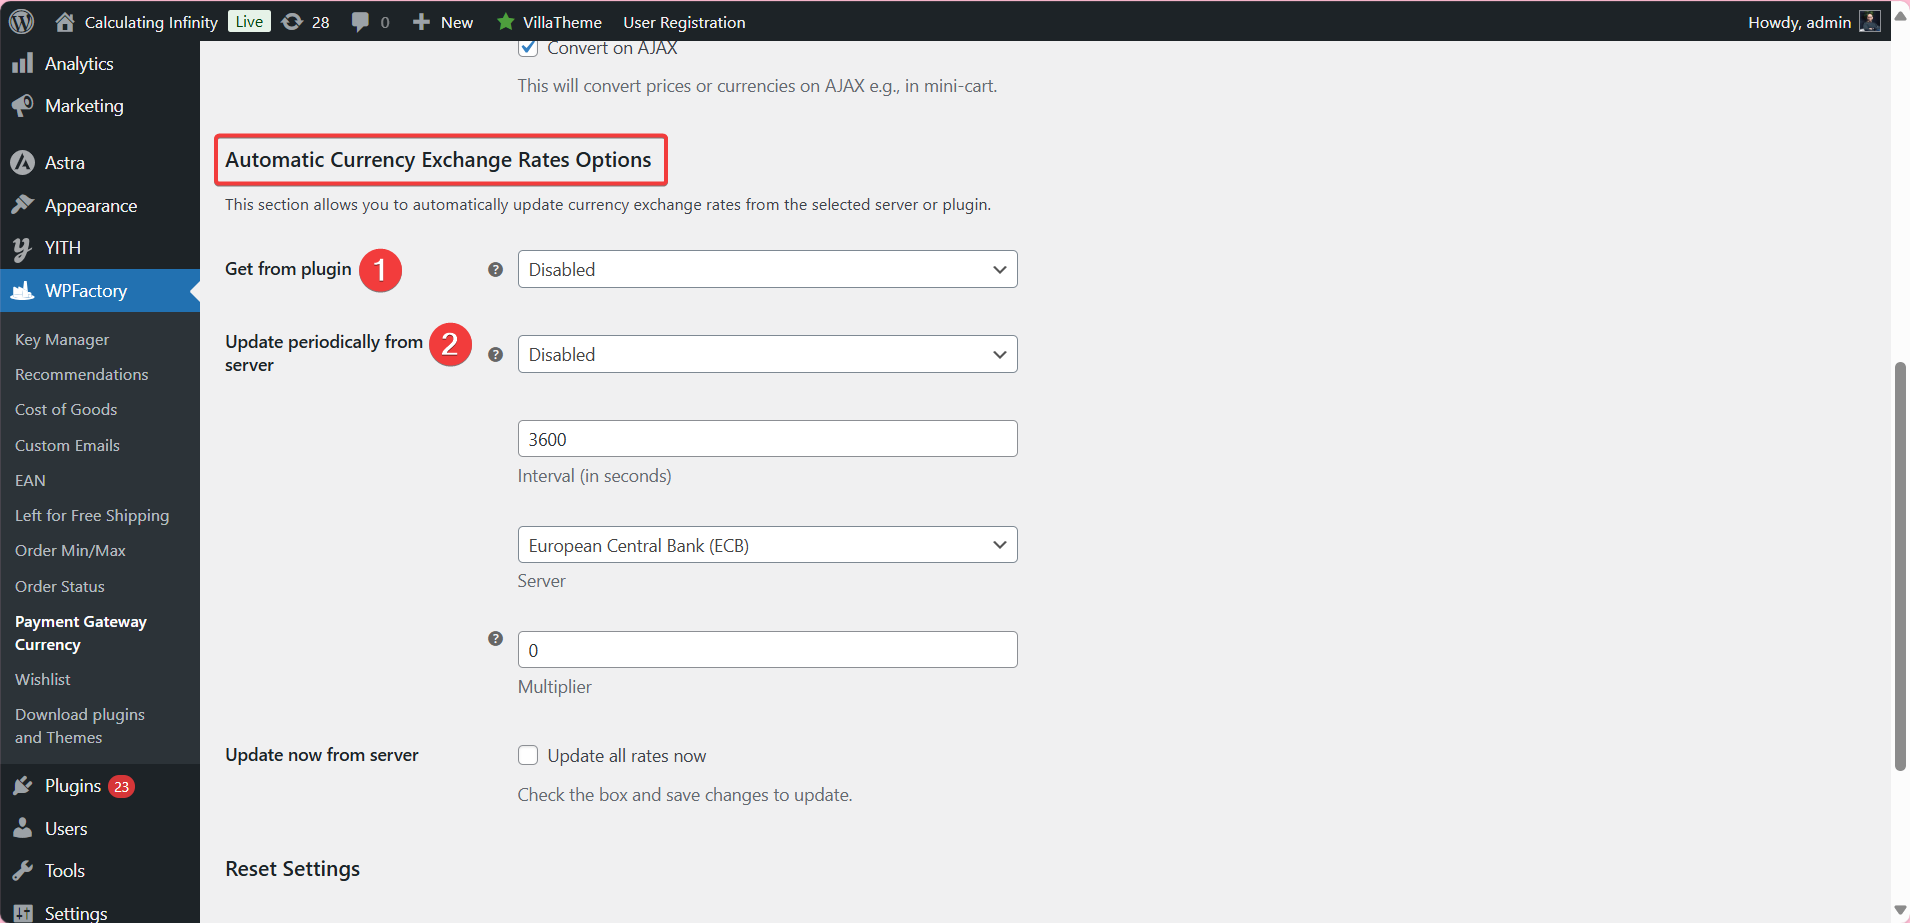
There’s also an option to update exchange rates automatically, either from the plugin itself or from a live server, that way, your prices are always current and accurate.
Step 4: Adjust How Info Shows on the Frontend
Want to show conversion details on the cart page or in confirmation emails? You get to choose where things like exchange rates and final totals appear.
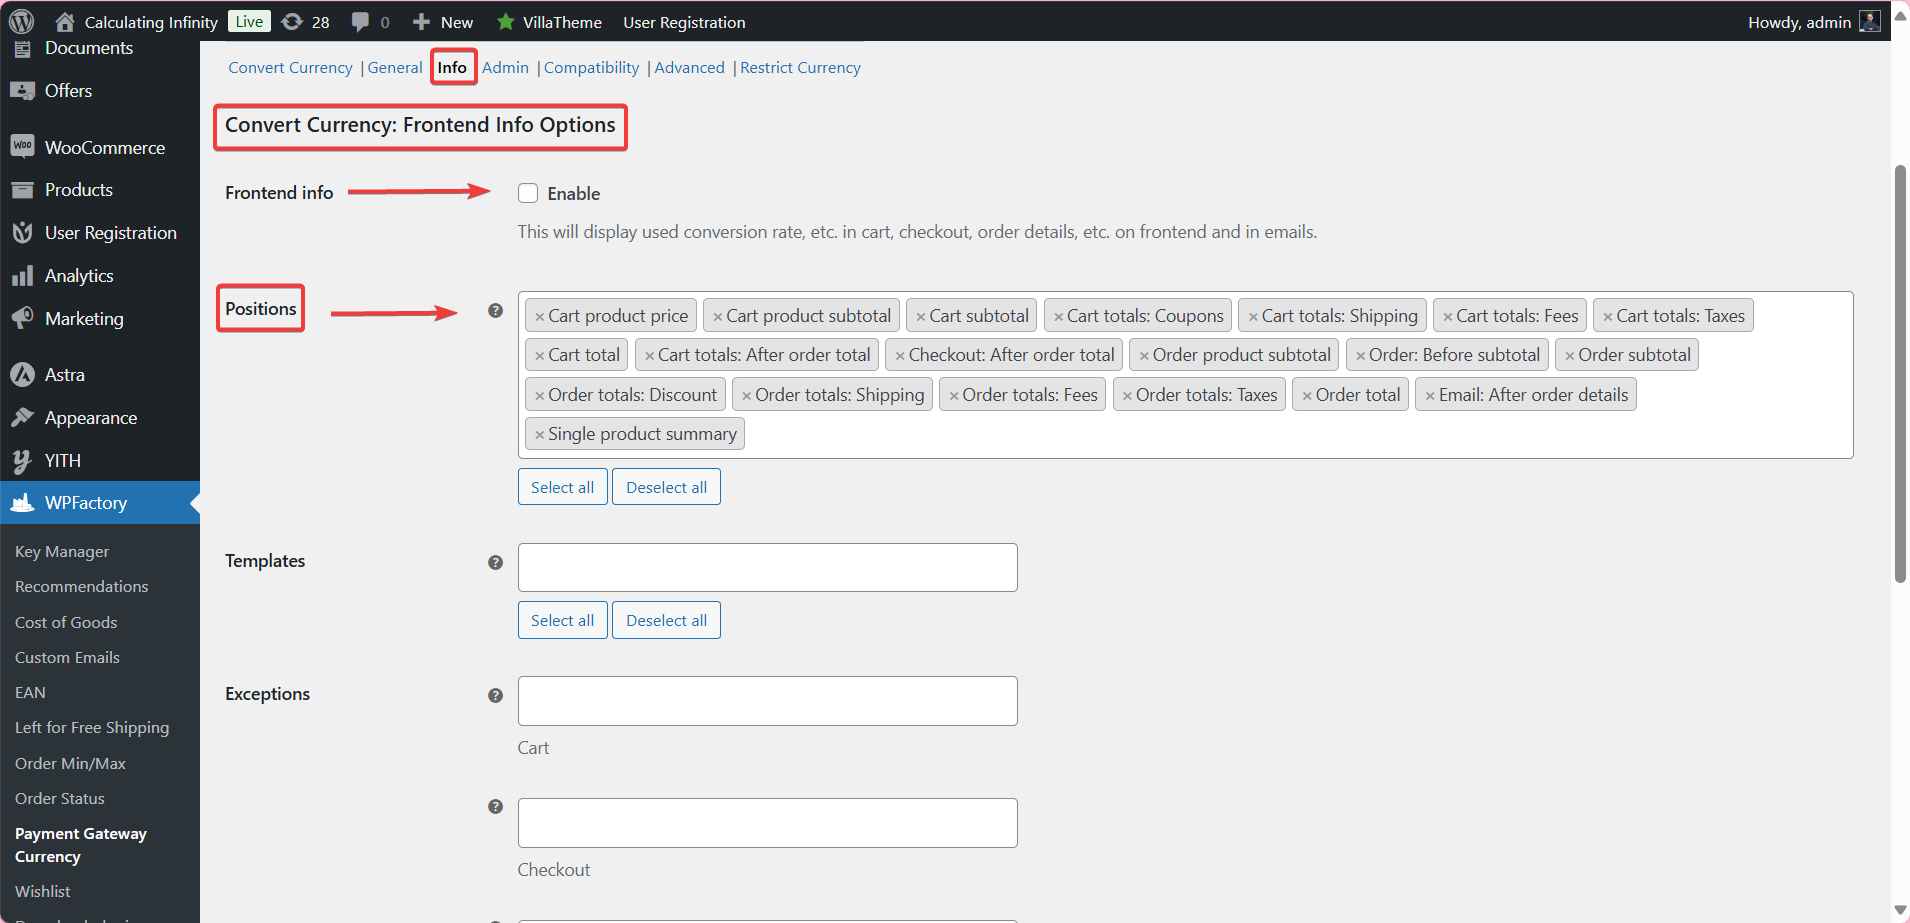
You can also hide certain info if you prefer a cleaner layout.
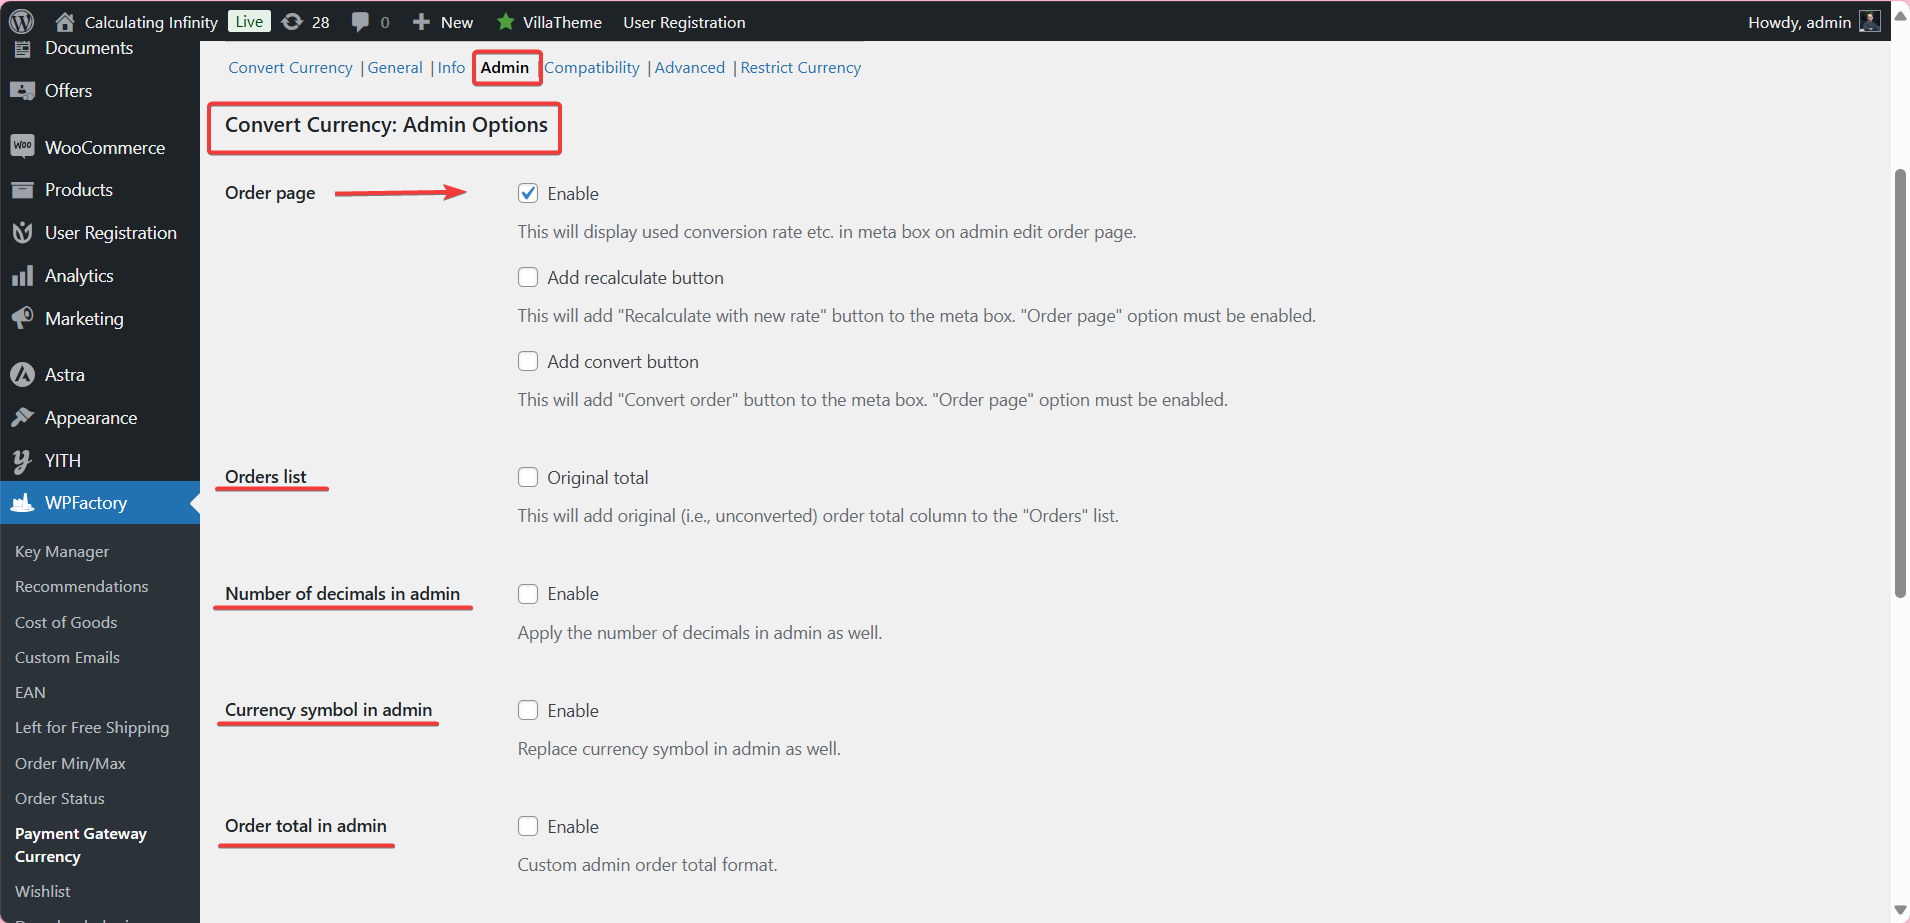
Step 5: Customize Admin View (Optional but Handy)
If you want, you can see all the conversion details right on your order pages in the dashboard, including what the rate was and even buttons to recalculate or convert manually if needed.
It’s great for staying organized.
Step 6: Fine-Tune Compatibility
The plugin works with most popular payment gateways, and this section helps make sure everything runs smoothly when switching currencies at checkout.

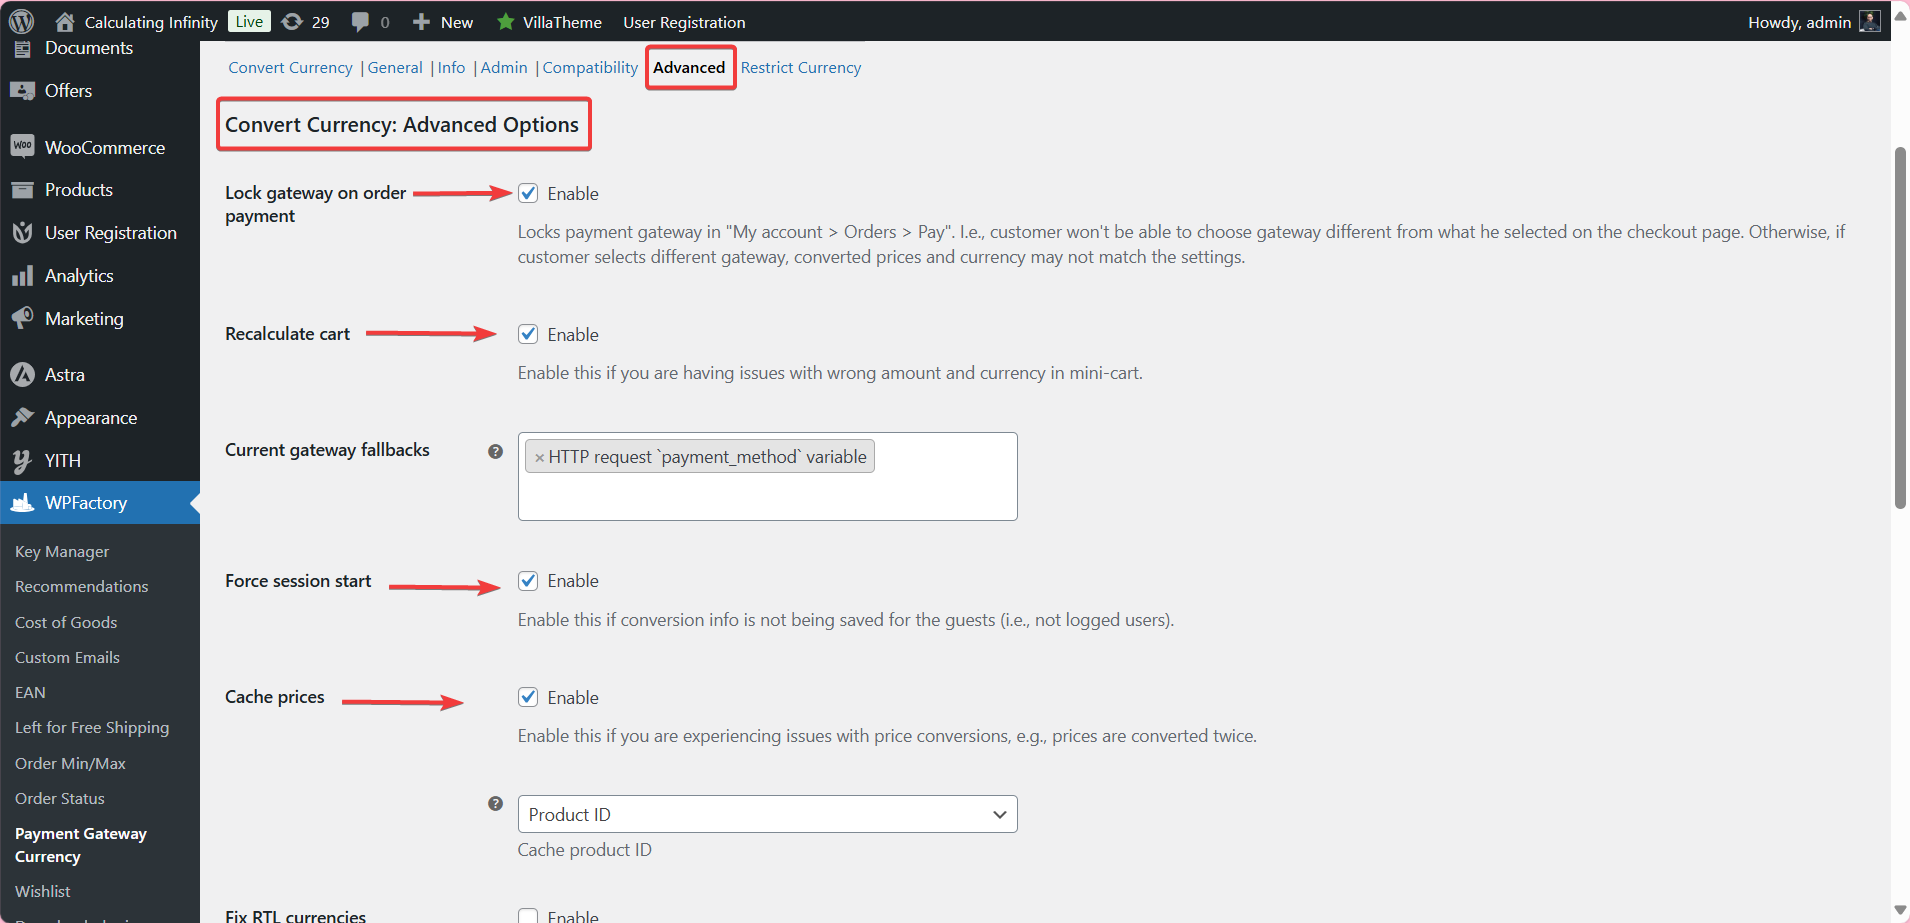
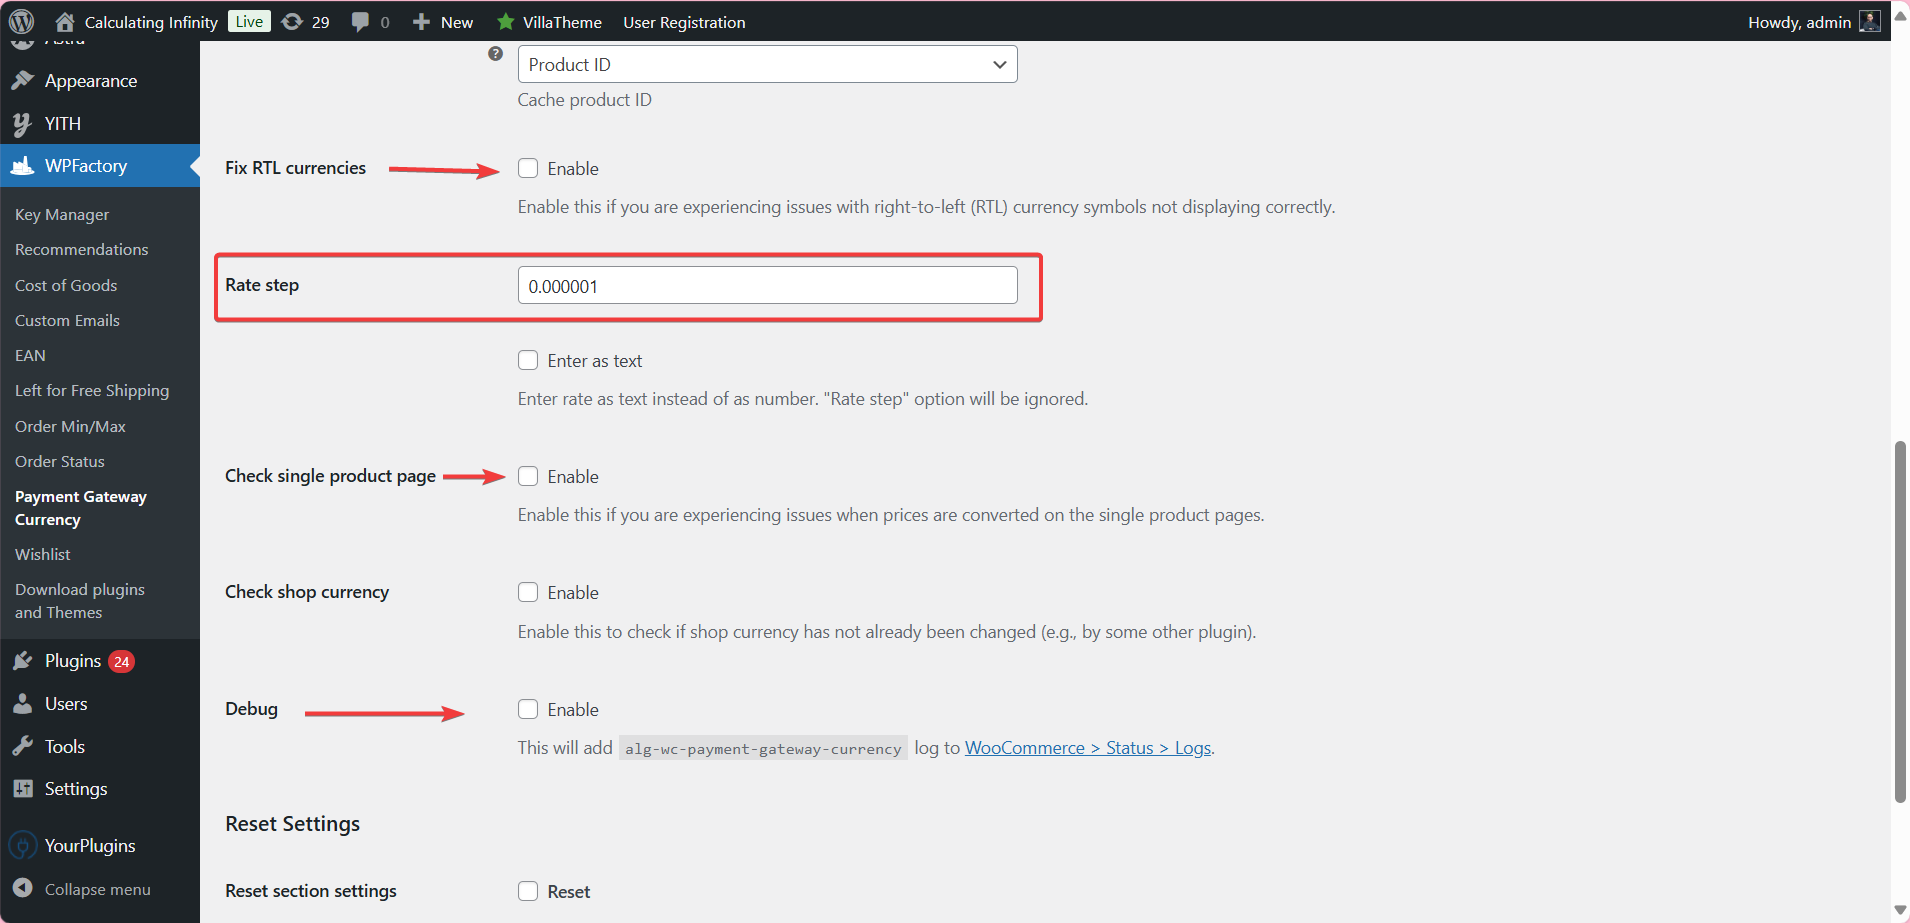
Step 7: Explore Advanced Settings
Here’s where things get a little more advanced (but still manageable). You can:
-
- Lock the gateway during payment to avoid currency mismatches
- Cache prices to make things faster
- Fix display issues for RTL currencies
- And more smart tweaks if you ever need them
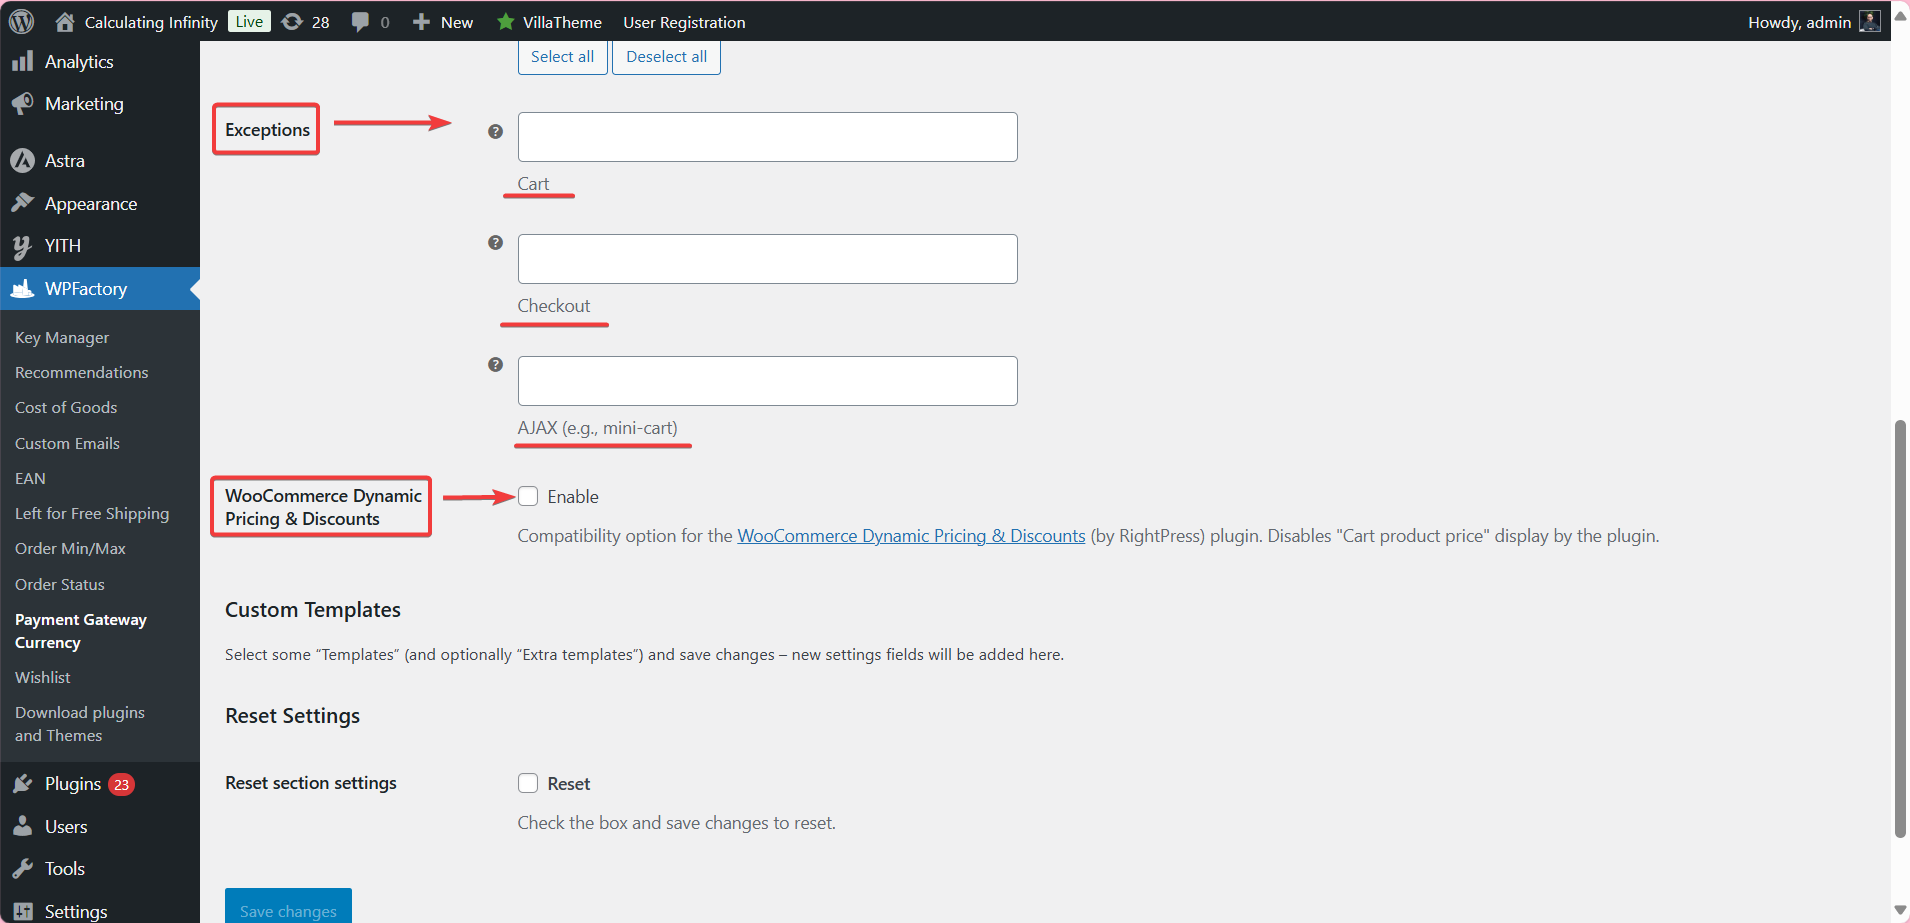
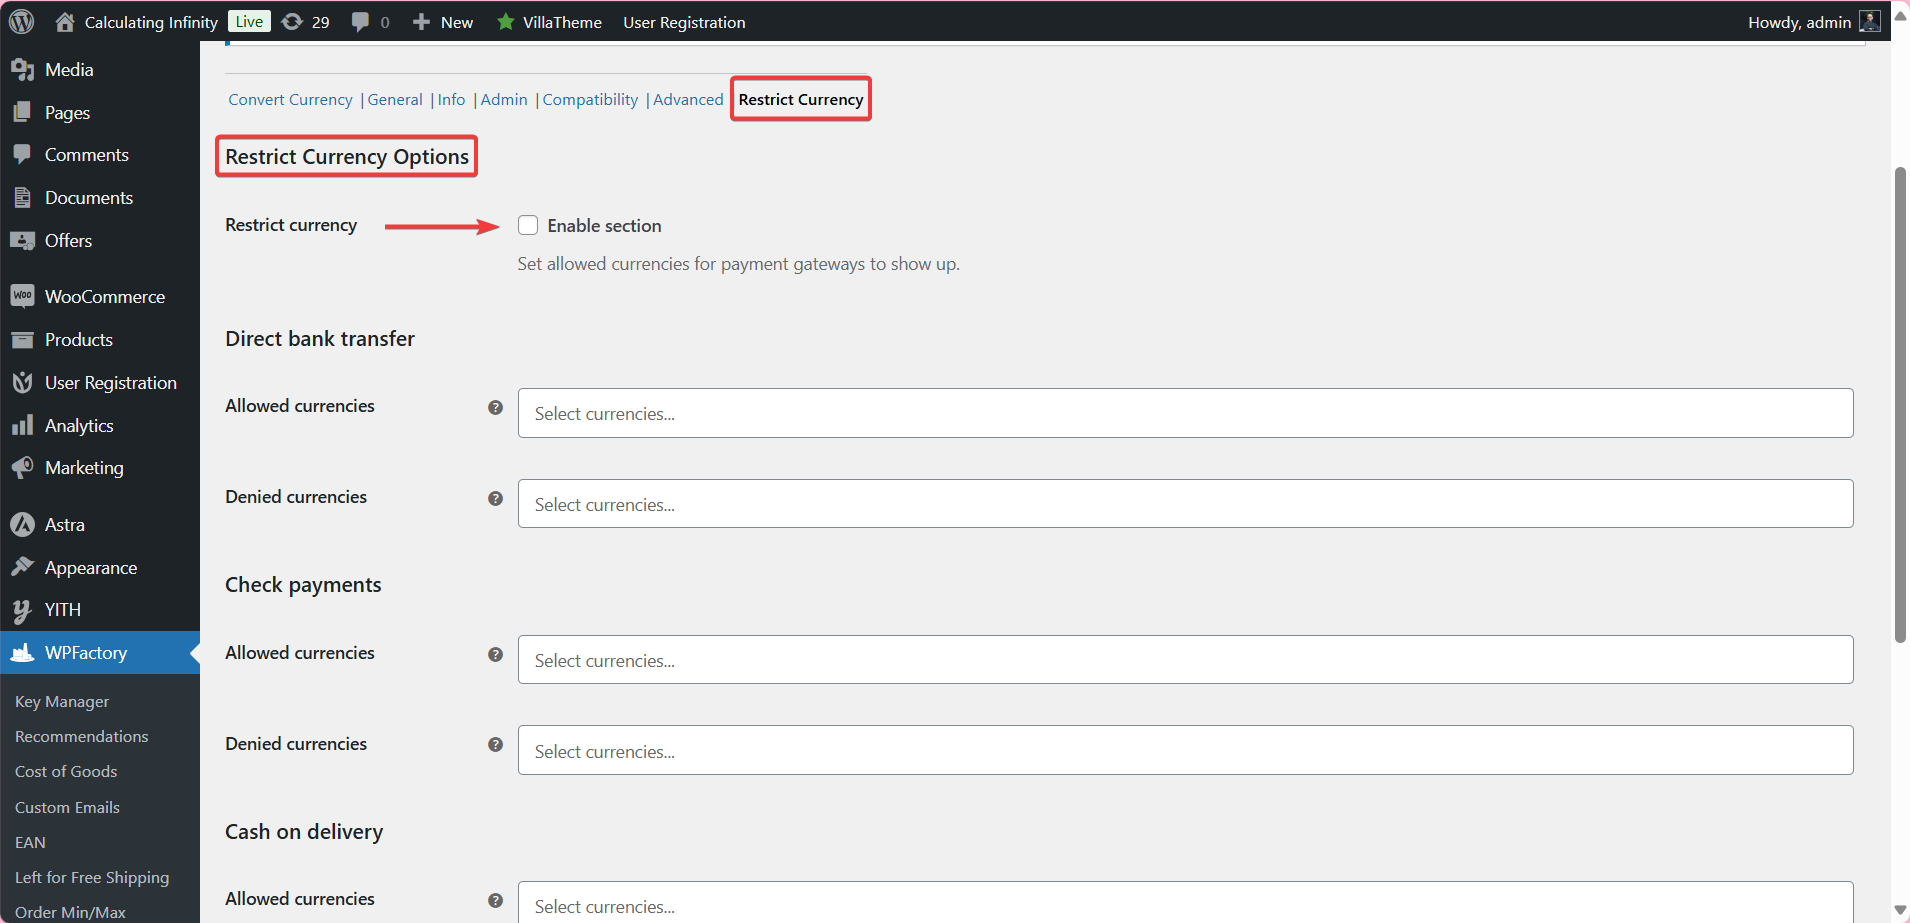
Step 8: Restrict Currency by Product or Location
You can even control which currencies show up based on the product, category, or where the customer is shopping from.
This helps keep your checkout process simple and relevant for every user.
That’s it! No coding. No confusing setup.
Just a smooth way to switch currencies based on how your customers pay, and it all runs in the background while your store keeps selling.
Pro Tips for Setting Up a Smooth Currency Switching Experience
Once you’ve set up the currency switcher, it’s worth taking a few extra steps to make sure everything runs smoothly, both for your store and your customers.
Here are some practical tips to help you avoid surprises and keep your checkout process feeling effortless.
1. Stick to the Currencies Your Audience Actually Uses
Don’t add 20 different currencies just because you can, focus on the ones that make sense for your shoppers.
If most of your traffic comes from the US, UK, and Europe, start with dollars, pounds, and euros.
2. Match the Right Currency to the Right Payment Gateway
Be clear about which payment method supports which currency.
➡ For example:
Maybe Stripe handles euros and PayPal uses dollars, mixing them up can confuse customers or even break the checkout process.
3. Keep Exchange Rates Up to Date Automatically
Make sure you turn on the plugin’s auto-update feature for exchange rates, that way, your prices stay accurate without you having to check the rates manually every day.
4. Always Test the Checkout
After setting everything up, go through the checkout process like a customer, try different gateways, different currencies, and different shipping options.
Catching a small issue early can save you a lot of frustration later.
5. Don’t Overload the Cart Page
Yes, you can show exchange rates and conversion info, but don’t clutter your cart with too much detail.
Keep things simple and clean so your customers stay focused on buying.
6. Use Caching Carefully
If your store uses caching (like many fast sites do), make sure the prices are updating correctly per session.
You might need to turn on the plugin’s built-in cache options to prevent odd behavior.
7. Add a Note About Currency Conversion (Optional)
A short note near the payment section — like “Prices shown are based on real-time exchange rates” — can help build trust and avoid confusion if totals look slightly different from what customers expect.
Final Thoughts
Selling to customers in different countries doesn’t have to be complicated.
The WooCommerce Payment Gateway Currency plugin makes it easy to show the right currency at the right time, no confusion, no guessing.
Instead of forcing everyone to pay in one currency, you can let shoppers use the one they’re most comfortable with.
That simple change can make your store feel more local, more trustworthy, and more convenient, even if you’re selling worldwide.
➡ And the best part?
You don’t need to be a developer!
With just a few settings, you can control how currencies appear based on the payment method, keep your prices accurate with automatic exchange rates, and give every customer a smoother experience.
If you’re serious about reaching more people and growing your store globally, this plugin is one of the easiest ways to make that happen.