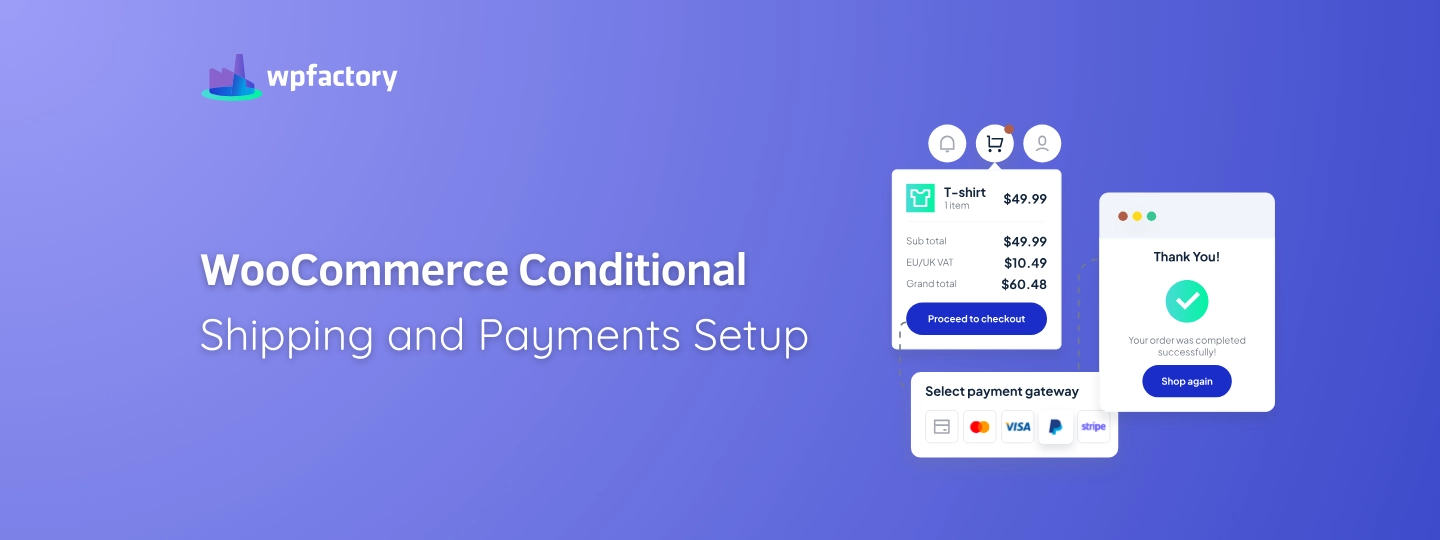
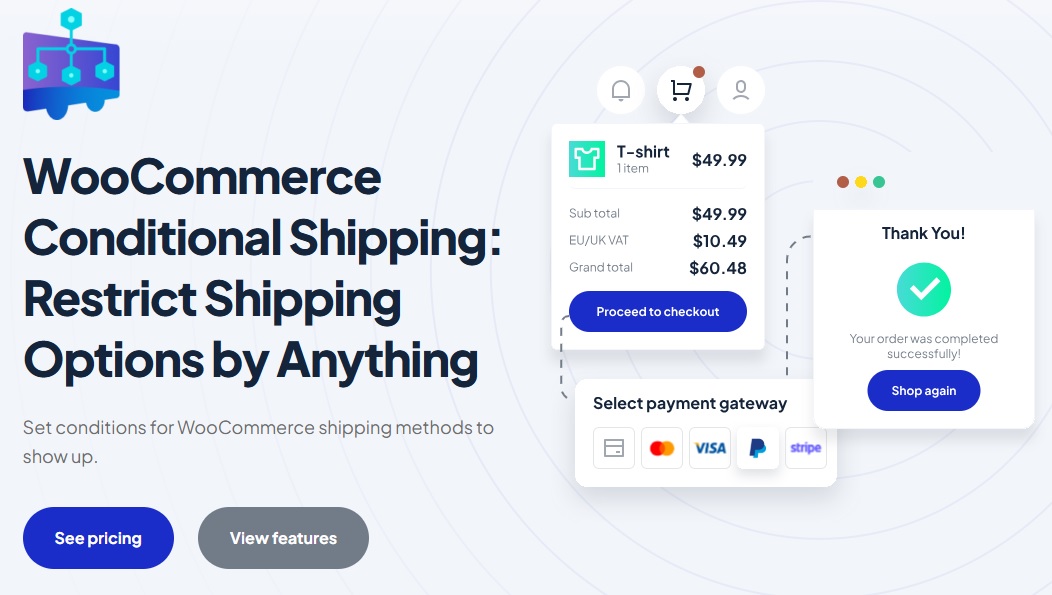
WooCommerce Conditional Shipping and Payments Setup
WooCommerce Conditional Shipping and Payments make it easy to control how customers can check out in your store.
Instead of offering the same shipping and payment options to everyone, you can set rules based on what’s in the cart, where the customer is located, or how much they’re spending.
➡ In this guide:
We’ll show you how to set up WooCommerce Conditional Shipping and Payments step by step.
➡ You’ll learn:
How to create rules that make sense for your store, helping you manage costs, avoid shipping mistakes, and give customers a smoother checkout experience.
Why Customize Shipping and Payment Methods?
When you shop online, have you ever noticed that some stores offer free shipping while others charge extra based on where you live?
Or that some stores let you pay with a credit card, but not with cash on delivery? That’s because store owners set rules for shipping and payments to make things work better for both the business and the customer.
If you run an online store, offering the same shipping and payment options to everyone might not always be the best choice.
➡ Here’s why:
-
Different Costs for Different Locations
Let’s say you’re selling phone accessories.
Shipping a small package within the same city is cheap, but sending it overseas costs much more.
So, by customizing shipping options, you can offer local delivery at a lower cost while setting specific rules for international orders.
-
Managing Payment Risks
Some payment methods, like cash on delivery, might work well for local buyers but not for international ones.
If you accept cash for long-distance orders, you might end up shipping a product without ever getting paid.
Custom payment rules let you allow or block certain options based on location, order amount, or shipping method.
-
Encouraging Bigger Orders
Imagine you want to increase your average order value.
You can set up free shipping only for customers who spend a certain amount, like $50 or more.
This encourages shoppers to add more items to their cart to qualify, which helps boost your sales.
For a closer look at this topic, Check this out:👇
Free Shipping Over Amount: Amount Left Tracker for WooCommerce
-
Avoiding Shipping Issues
Some products can’t be shipped to certain places due to size, weight, or regulations.
➡ For example:
If you sell fragile glassware, you might want to limit shipping to areas where you can ensure safe delivery.
How do Conditional Rules Work?
Think of conditional shipping and payment rules like a store’s house rules.
Just like a coffee shop might offer free refills only if you order a large drink, an online store can set conditions for shipping and payments.
These conditions help make sure orders are processed smoothly and fairly.
➡ For example:
Imagine you own an online store selling handmade candles.
👉 You can set rules like:
- Free shipping only for orders above $50 → Encourages customers to buy more.
- Cash on delivery is available only for local orders → Reduces the risk of unpaid deliveries.
- Overnight shipping is available only for in-stock items → Ensures customers don’t select fast shipping for something that’s not ready to ship.
You may be interested in:
Boost Loyalty with WooCommerce Free Shipping Strategies
Common Use Cases
Conditional shipping and payments can be useful in many ways.
Here are some real-world examples:
-
Shipping Based on Location
If you sell fresh flowers, you might only offer same-day delivery in your city but restrict shipping to other regions where flowers wouldn’t stay fresh.
-
Payment Restrictions by Order Total
Some stores allow cash on delivery only if the order total is below $100 to avoid large unpaid deliveries.
-
Product-Based Shipping Rules
If you sell electronics, you might allow standard shipping for regular gadgets but require insured shipping for expensive items like laptops.
-
Cart-Based Rules
If a customer’s cart contains oversized items, you might disable express shipping and allow only freight shipping.
You may be interested in:
How to Add a Free Shipping Bar to WooCommerce
Setting Up WooCommerce Conditional Shipping & Payments
Setting up WooCommerce Conditional Shipping and Payments is simple, just follow these steps, and you’ll have full control over how shipping and payment options appear in your store.
1. Install the Plugin
First, you need to add the plugin to your WooCommerce store:
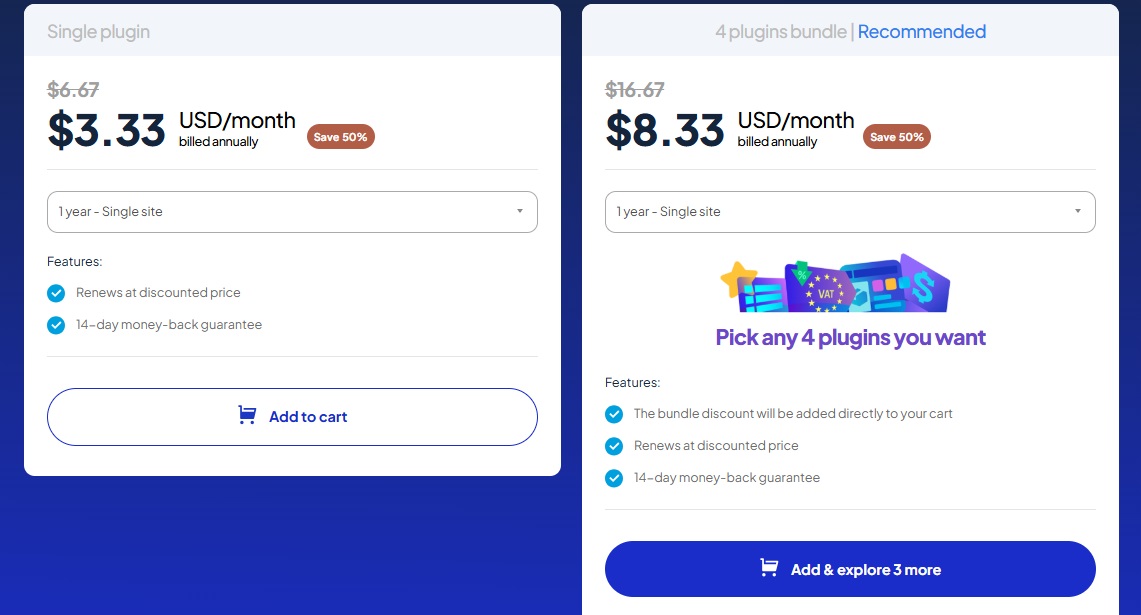
- Purchase the Conditional Shipping for WooCommerce plugin, it’s an affordable tool that helps you manage shipping and payment rules effortlessly.
- After purchase, you’ll get a ZIP file containing the plugin.
- In your WordPress dashboard, go to Plugins > Add New > Upload Plugin.
- Upload the ZIP file, click Install Now, and then hit Activate.
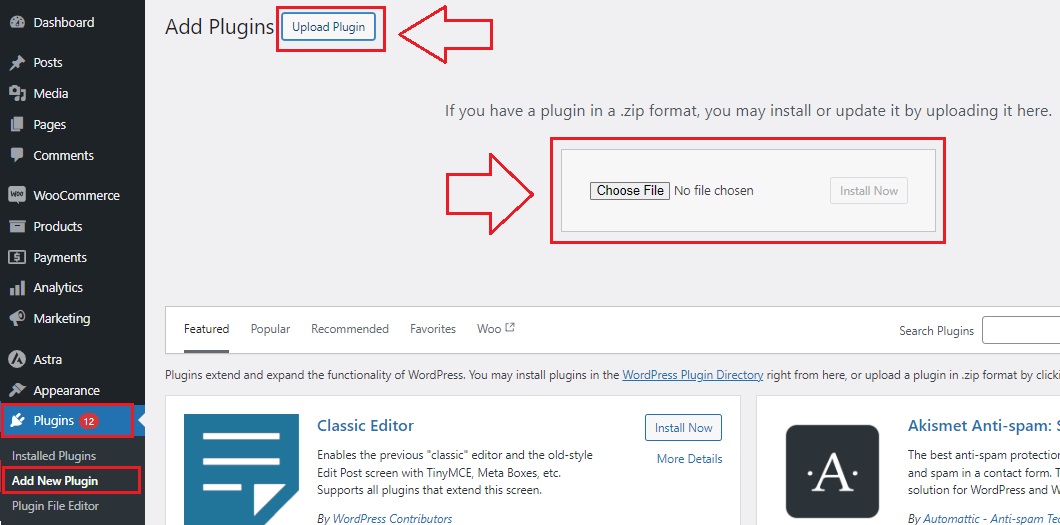
Once activated, the plugin will be ready for setup.
2. Enable the Plugin
After activation, the plugin needs to be switched on:
- In your WordPress dashboard, go to WPFactory > Conditional Shipping.
- Click on the General tab.
- Find the option Enable Plugin and check the box.
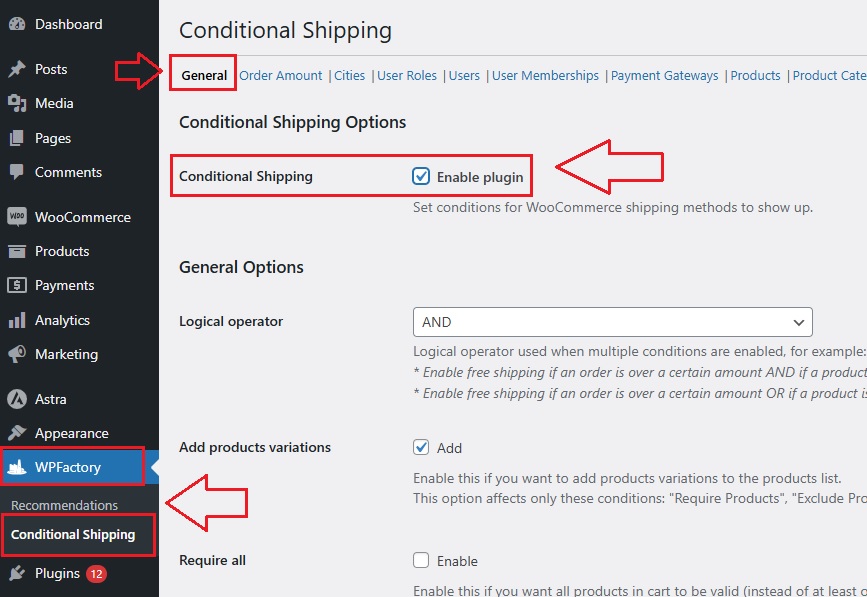
That’s it! The plugin is now running, and you can start customizing your shipping and payment rules.
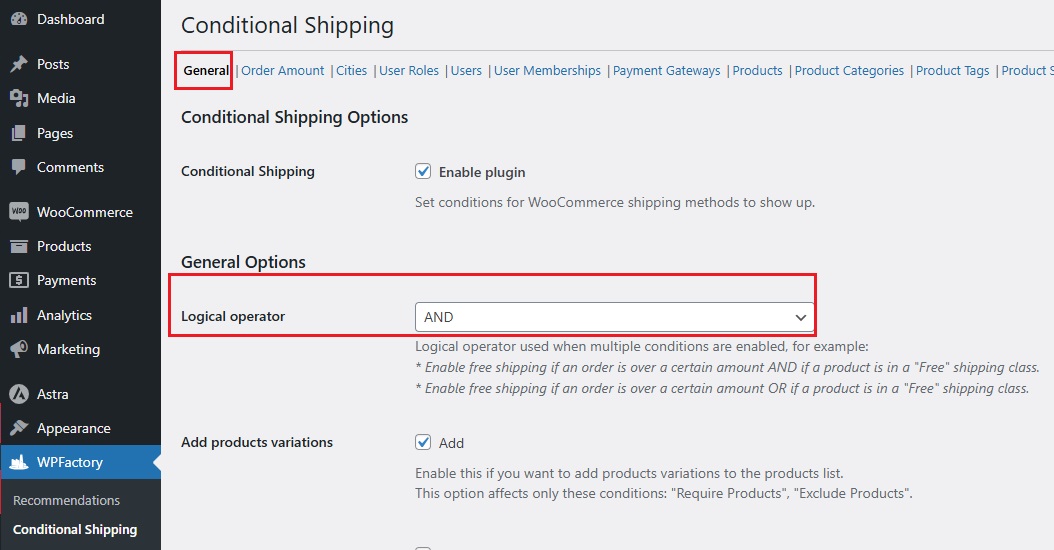
3. Adjust the Settings
Now, let’s fine-tune the plugin to work exactly how you need it.
- Stay on the General tab, where you’ll find several customization options.
- One important setting is the Logical Operator, which controls how multiple conditions work together.
➡ For example:
✔ AND Condition → Free shipping applies only if the order is over $50 and includes a product from the “Free Shipping” category.
✔ OR Condition → Free shipping applies if either the order is over $50 or a product from the “Free Shipping” category is in the cart.
- At the bottom of the page, you’ll see a section called Available Conditions. Here, you can choose what rules to set up, For example, but not limited to:
- Minimum Order Amount → Require customers to spend a certain amount before free shipping is available.
- Maximum Order Amount → Block expensive orders from using certain shipping methods.
- Require or Exclude Cities → Offer local delivery only in certain areas.
- Require or Exclude User Roles → Allow special shipping options for wholesalers but not for regular customers.
Now that the plugin is set up, let’s move on to how to create specific shipping and payment rules step by step.
Setting Up Conditional Shipping Rules
When running an online store, you don’t always want to offer the same shipping options to everyone.
Maybe you want to offer free shipping only if an order reaches a certain amount, or limit local pickup to certain cities.
That’s exactly what conditional shipping rules help you do.
With WooCommerce Conditional Shipping and Payments, you can set up smart shipping rules based on cart total, customer location, and specific products or categories.
Here’s how to configure them:
-
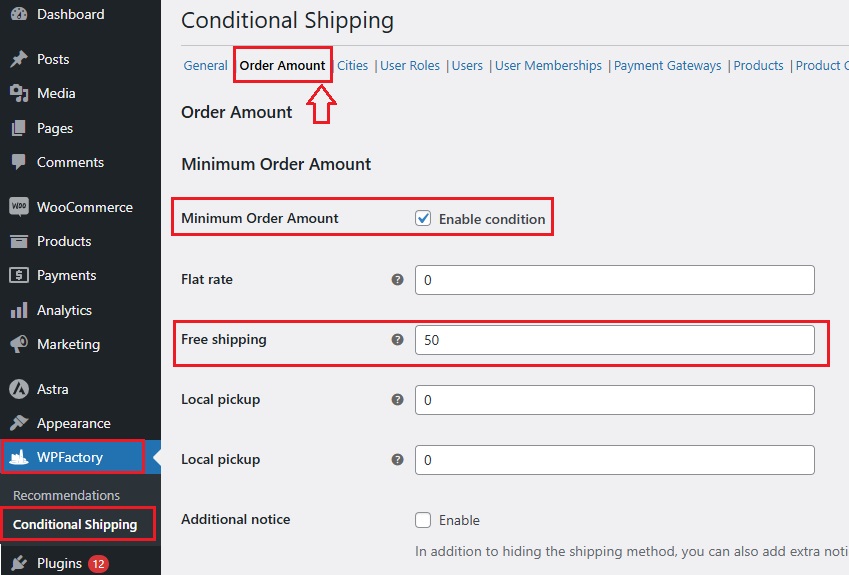
Restricting Shipping by Cart Total
Let’s say you want to offer free shipping for orders over $50 – this encourages customers to buy more while saving on shipping costs.
How to Set It Up:
- Go to WPFactory > Conditional Shipping > Order Amount tab.
- Check the box “Enable Condition” in front of “Minimum Order Amount“.
- You’ll see different shipping methods: Flat rate, Free shipping, and Local pickup.
- In front of Free Shipping, enter 50 (which means free shipping will apply only when the cart total reaches $50).
- If you want, you can do the same for Local pickup or Flat rate, setting different rules for each.
➡ Example:
Imagine you own a clothing store.
If a customer buys a single $20 T-shirt, they’ll need to pay for shipping, but if they add a hoodie and their total reaches $50, they get free shipping.
Bonus:
You can also set a Maximum Order Amount rule.
➡ For example:
The maximum order amount regarding flat-rate shipping is $100, If an order exceeds $100, you might disable flat-rate shipping and require a specialized courier service.

-
Limiting Shipping Based on Location
What if you only want to offer free shipping in certain cities or restrict local pickup to specific areas? You can do that too!
How to Set It Up:
- Go to WPFactory > Conditional Shipping > Cities tab.
- Check the box “Enable Condition” in front of “Require Cities“.
- Choose a shipping method (Flat rate, Free shipping, Local pickup).
- In front of Free Shipping, type the city name (e.g., New York), if you want to add more cities, list each one on a new line.
- If you want to block certain cities instead, use the “Exclude Cities” option.
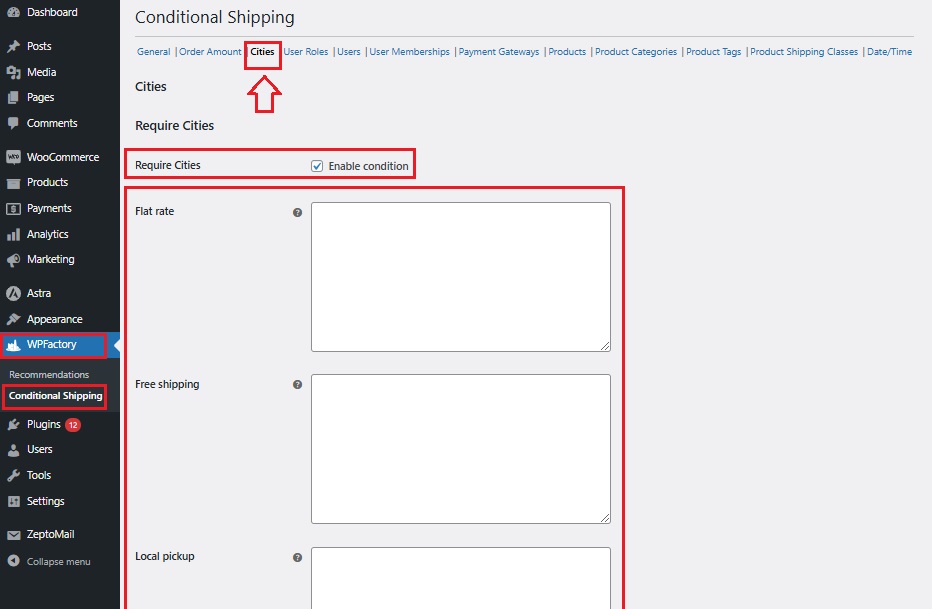
➡ Example:
You run a bakery that delivers fresh cakes.
You want to offer free delivery in New York City but not in other states.
By setting this condition, customers in NYC get free shipping, while others see regular shipping options.
-
Shipping Rules for Specific Products or Categories
Sometimes, shipping rules depend on what’s in the cart.
Maybe you want to offer free shipping for lightweight items but charge extra for bulky products.
Or, you may want local pickup only for fragile items.
How to Set It Up:
- Go to WPFactory > Conditional Shipping > Product tab.
- Check the box “Enable Condition” in front of “Require Products“.
- Choose a shipping method (Flat rate, Free shipping, Local pickup).
- In front of Free Shipping, type the product name (e.g., Hoodie). If you want to add more products, list them.
- To restrict certain products from special shipping, use the “Exclude Products” option.
- If you want to apply this rule to entire product categories, go to the Category tab and follow the same steps.
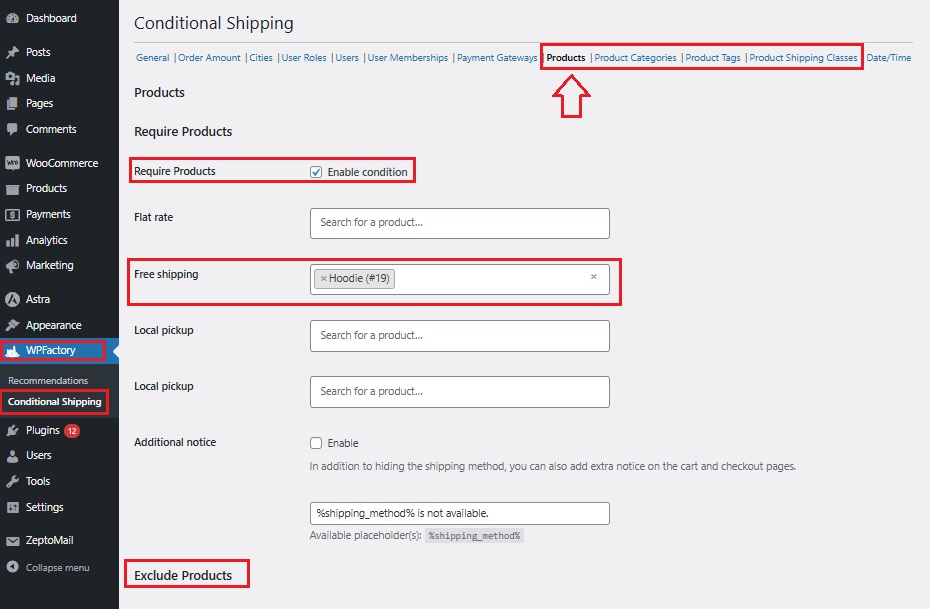
➡ Example:
You sell electronics.
You want to offer free shipping on phone accessories but charge a fee for laptops since they require special handling.
With these settings, customers buying accessories get free shipping, while laptop buyers see a different option.
Configuring Conditional Payment Gateways
Setting up conditional payment methods allows you to control which payment options appear for customers based on their shipping method.
This can be helpful for businesses that want to encourage secure payments, prevent fraud, or offer more convenient options based on how an order is being shipped.
➡ For example:
You might want to allow cash on delivery (COD) only for local pickup or restrict free shipping to customers who pay with a specific gateway like Klarna.
Here’s how to configure payment rules using WooCommerce Conditional Shipping and Payments:
-
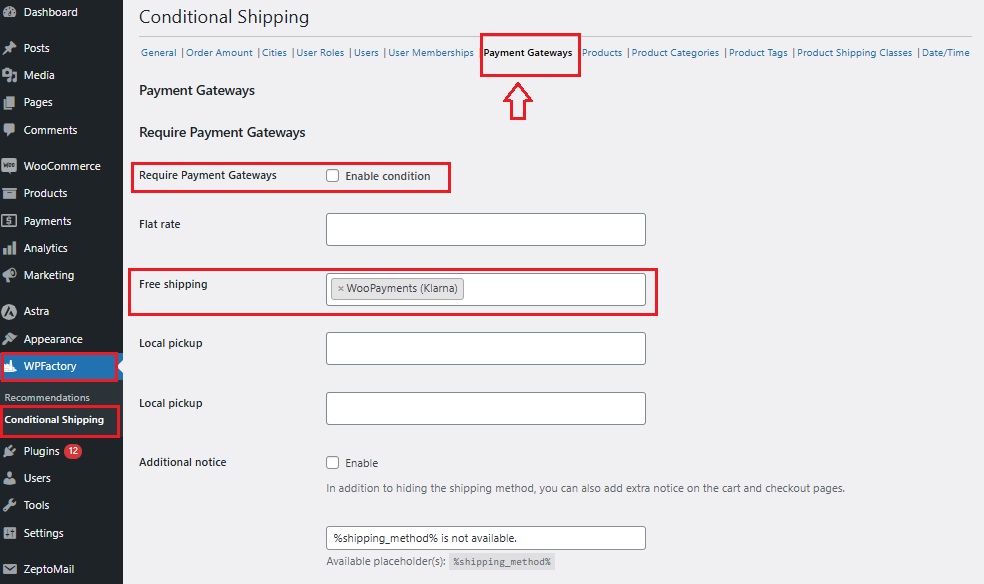
Payment Gateway Restrictions Based on Shipping Methods
With this setting, you can link payment options to specific shipping methods.
How to Set It Up:
- Go to WPFactory > Conditional Shipping > Payment Gateway tab.
- Check the box “Enable Condition” in front of “Require Payment Gateways“.
- You’ll see different shipping methods: Flat rate, Free shipping, Local pickup.
- In front of Free shipping, type the name of the payment gateway you want to allow (e.g., Woopayment (Klarna)).
- If you want to apply the same restriction to Flat rate or Local pickup, enter a payment gateway for those as well.
➡ Example:
Let’s say you want to offer free shipping only to customers who pay with Klarna.
You simply enter “Woopayment (Klarna)” in the Free Shipping field.
This means customers who choose Klarna will see the free shipping option, while others won’t.
Bonus:
You can also use this setting to cash on delivery available only for local pickup.
-
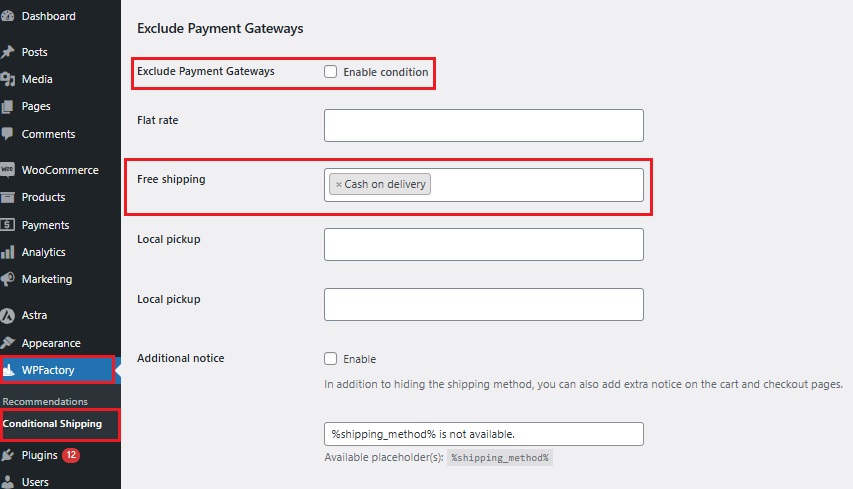
Excluding Certain Payment Gateways
Sometimes, you may want to prevent customers from using specific payment methods based on their shipping choice.
How to Set It Up:
- Check the box “Enable Condition” in front of “Exclude Payment Gateways“.
- Choose a shipping method (Flat rate, Free shipping, Local pickup).
- In front of the selected method, type the payment gateway you want to block.
➡ Example:
You might want to disable cash on delivery for free shipping orders to avoid unpaid deliveries.
Simply enter “Cash on Delivery” in front of Free Shipping.
➡ Another Example:
If you don’t want customers using PayPal for Local Pickup, you can enter “PayPal” under Exclude Payment Gateways for that method.
You may be interested in:
The Psychology Behind FREE Shipping: Should I Implement That?
Advanced Customization Options
Beyond setting conditions for shipping and payment based on order totals, locations, and products, Conditional WooCommerce Shipping and Payments plugin gives you even more control.
You can customize shipping rules based on:
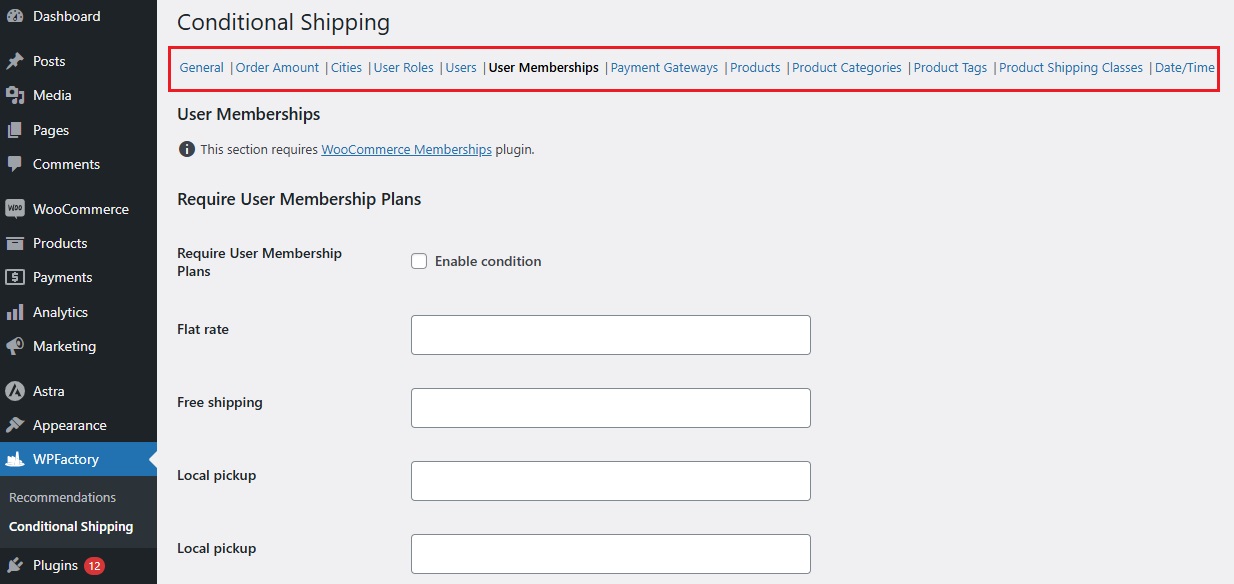
User Roles | Users | User Memberships | Date/Time
Final Thoughts About WooCommerce Conditional Shipping and Payments
Running an online store isn’t just about selling products—it’s about making the shopping experience simple and hassle-free for customers.
That’s exactly what WooCommerce Conditional Shipping and Payments helps you do.
Instead of showing the same shipping and payment options to everyone, you can customize them based on order value, location, product type, user role, or even time of day.
This keeps your store organized, reduces checkout confusion, and ensures that customers get the right shipping and payment choices every time.
➡ Why does this matter?
- Smoother checkout → Customers see only the options that apply to them.
- Fewer abandoned carts → No surprises at checkout that make customers leave.
- Better control → You decide how shipping and payments work, not WooCommerce’s default settings.
When you set up smart rules, you can offer better deals to loyal customers, manage shipping costs more efficiently, and even encourage larger purchases. So, woocommerce conditional shipping and payments plugin gives you the flexibility you need to grow.
Now, that you’ve seen how to set it up, it’s time to put these strategies into action and optimize your WooCommerce store for a seamless checkout experience!