
Managing orders efficiently is vital for any WooCommerce store. The built-in order statuses might not always perfectly reflect your specific business processes. This is where custom order statuses come in. They allow you to create tailored stages that accurately represent your workflow, enhancing clarity and streamlining order management.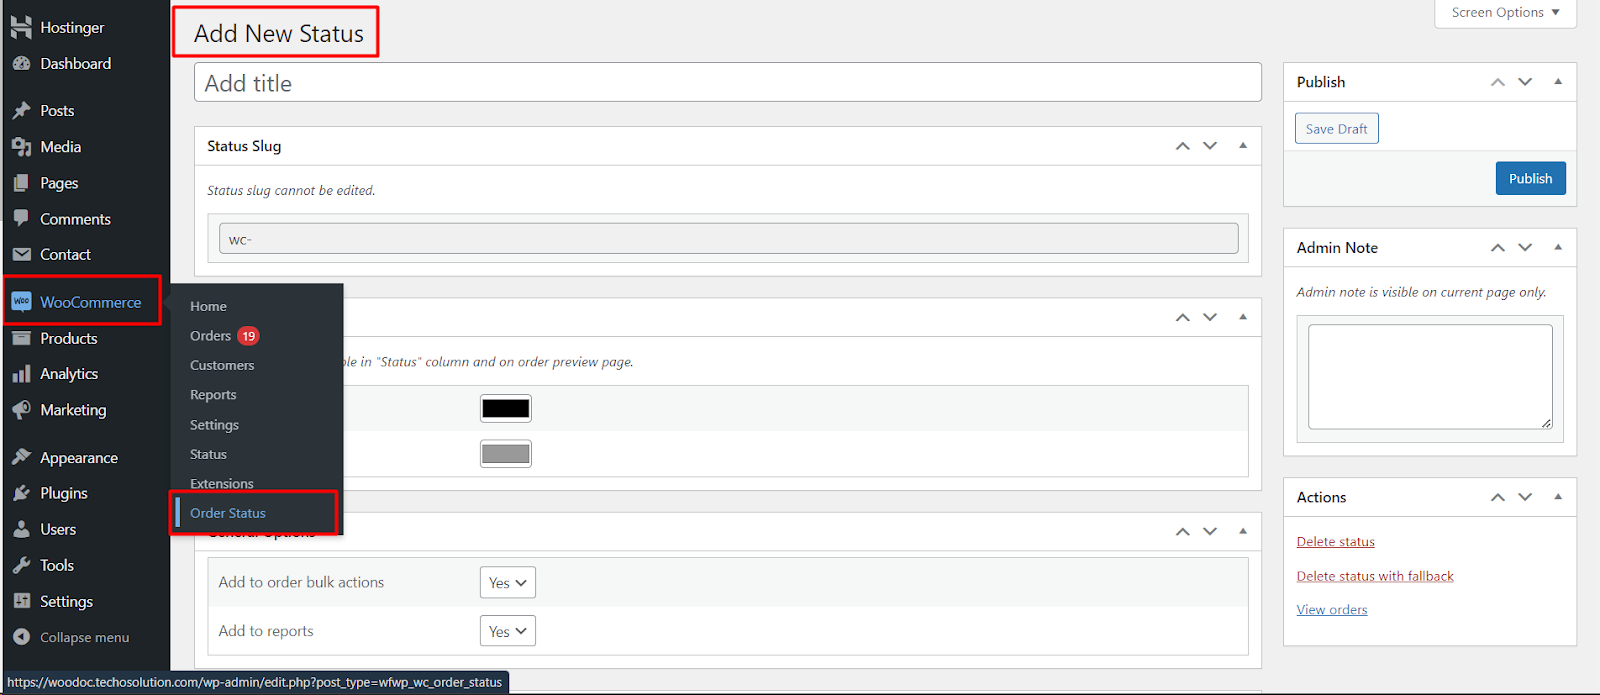
Accessing the Order Status Settings
To create custom order statuses in WooCommerce, follow these simple steps.
- Navigate to WooCommerce: Within your WordPress dashboard, locate the WooCommerce menu and click on it.
- Access Order Statuses: Click on Settings and then look for a tab labeled Order Status (or similar wording depending on your WooCommerce version). This section manages all your order statuses, both default and custom.
Adding a New Custom Status
The Order Status settings typically offer a button to Add New Status. Clicking this button will open a new interface for creating a custom order status.
Here’s what you’ll need to define
- Status Name: Enter a clear and concise name for your new status. This name should accurately reflect the stage it represents in your workflow (e.g., “Awaiting Payment”, “Ready for Dispatch”, “Customer Review”).
- Slug : This is a unique identifier used internally by WooCommerce. It’s generally recommended to leave this field blank, and WooCommerce will automatically generate an appropriate slug based on your status name.
- Show in Admin Status List: Check this box to ensure your new status appears in the order status dropdown menu on the edit order page within your dashboard.
- Public: Select this option if you want the new status to be visible to customers on their order tracking pages or emails.
Saving Your New Status
Once you’ve defined the details for your custom order status, click on the Publish button located at the page. This will create your new status and make it available for use within your WooCommerce store.
Managing Your Custom Statuses
The Order Status settings allow you to manage all your order statuses, including custom ones.
You can
- Edit Existing Statuses: Modify the name, slug, visibility settings, and (if applicable) color of your custom statuses.
- Reorder Statuses: Change the order in which your statuses appear in the dropdown menu on the edit order page. This helps reflect the typical flow of your orders.
- Delete Statuses: If a custom status is no longer needed, you can delete it. However, it’s important to note that deleting a status might affect existing orders associated with it (depending on your plugin’s functionality).
Benefits of Custom Order Statuses
By creating custom order statuses, you can achieve several advantages.
- Enhanced Workflow Clarity: Tailored statuses provide a clear picture of your order process, improving internal communication and order management.
- Improved Customer Communication (if Public): Public custom statuses keep customers informed about the progress of their orders.
- Increased Efficiency: Streamlined workflows with clear order stages can lead to faster fulfillment and improved customer satisfaction.
Conclusion
Custom order statuses empower you to personalize your WooCommerce store’s workflow, promoting efficiency and clarity. The ease of creating and managing these statuses within the Order Status settings allows you to tailor your store’s operations to your specific business needs.