WooCommerce Pay What You Want: Let Customers Name Their Price
Pay What You Want WooCommerce Plugin is a tool that lets your customers choose how much they want to pay for products in your store.
In this article:
You’ll find out how to easily set up this plugin to offer flexible pricing options.
We’ll walk you through each step, from installing the plugin to customizing it for your store, you’ll also learn why this pricing model can be great for attracting more customers and increasing sales.
By the end:
You’ll know how to make the most of this feature to improve your store’s shopping experience.
What is the Pay What You Want (PWYW) Model?
The Pay What You Want model is like a special sale where you get to decide how much you want to pay for something.
Imagine:
You’re at a hot dog sandwich stand, and instead of paying a set price, you can choose how much you think the hot dog sandwich is worth! Maybe you think it’s worth $3, or maybe you want to pay $5 because it’s really tasty.
In the same way, with some tool or plugin, you allow your online shoppers to choose their own price for items.
This can make shopping more exciting and personalized, as people feel they’re making a choice that suits their budget and value for the product.
It’s a flexible pricing approach that can help attract more customers and create a unique shopping experience.
Pay What You Want Examples
Here are some cool examples of how the “Pay What You Want” PWYW model works in real life:
-
Concerts and Events
Some music concerts or theater shows let you pay what you can.
Imagine you’re going to see a local band, and instead of buying a fixed-price ticket, you decide how much you want to spend.
If you really enjoy the show, you might pay more, but if money is tight, you can pay a bit less.
-
Restaurants
A few restaurants or cafes have “pay what you want” days where you can choose how much to pay for your meal.
It’s like a special treat where you decide what your meal is worth, based on how much you enjoyed it and what you can afford, but also remember, it has marketing implications.
-
Digital Products
Some online stores sell digital items, like e-books or software, where you can choose your own price.
For example:
If you download a new e-book, you might pay $5 or $10, depending on how much you like the book or what you feel it’s worth.
Why Choose Pay What You Want Pricing Strategy?
Choosing the Pay What You Want pricing model for your store can have some really great benefits, here’s why it might be a good idea:
-
Attract More Customers
When people know they can choose their own price, they might be more interested in shopping at your store, it’s like offering a special deal that feels exciting and fair.
For example:
If someone sees they can make an offer on a cool gadget, they might be more likely to check it out and buy it, even if they weren’t sure before.
-
Increase Sales
If you have products that aren’t selling as quickly as you’d like, letting customers decide their price can help move them out of your store, while keeping your profit margin in mind so you don’t lose out.
-
Build Customer Loyalty
When customers feel like they’re getting a fair deal, they’re more likely to come back, offering them the chance to choose their price makes them feel valued and can create a positive experience.
If someone gets a good deal on a book they love, a software they’re interested in, or something they need, they’ll remember your store and might come back for more.
-
Encourage Larger Purchases
Sometimes, when customers know they can name their price, they might decide to buy more items! Yep, if they feel like they’re getting a great deal on one product, they might be tempted to add extra items to their cart, therefore this can increase the total amount they spend.
You may be interested in:
How to Create Buy One Get One (BOGO) in WooCommerce Easily
How to Implement Pay What You Want in WooCommerce
To allow your customers to choose their own price in your WooCommerce store, you’ll need a plugin.
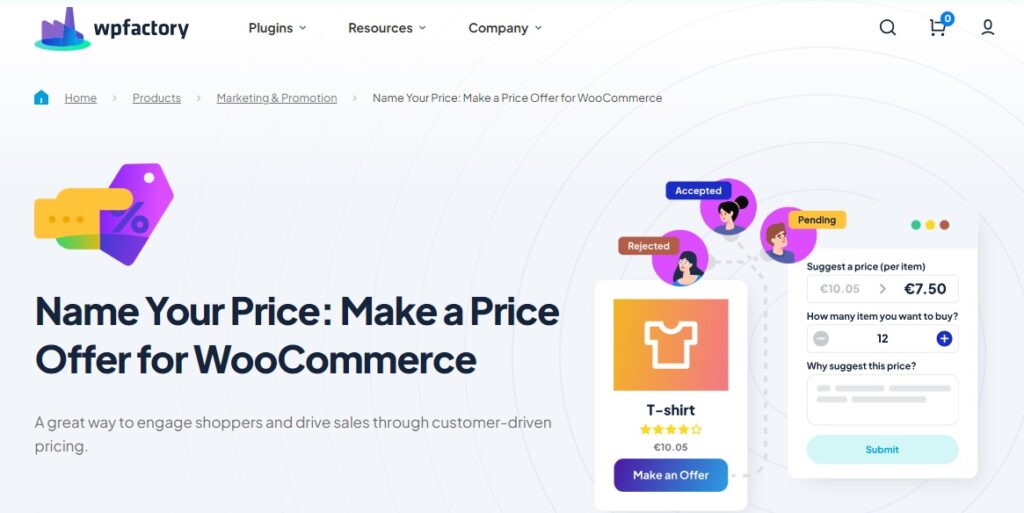
For this “Pay What You Want” feature, we recommend using the “Name Your Price Plugin“
Why this plugin specifically?
We’ll review its features in the next section, but in brief:
- It allows you to easily set up the option for customers to make their own price offers.
- You can manage those offers and decide what works best for your store.
- It’s a simple way to add this useful feature without requiring any technical expertise.
With just a few easy steps, you’ll be ready to let your customers name their own price.
Why You’ll Love “Name Your Price Plugin” Features?
Here’s what makes it so useful:
-
Custom Price Forms
The plugin lets you create a form where customers can type in how much they want to pay for a product.
Imagine you’re selling a toy, and instead of a set price, the customer can fill in how much they’re willing to pay. It’s like giving them a say in the cost!
-
Accept or Reject Offers
You don’t have to accept every offer, if a customer offers too little, you can choose to reject it or make a counteroffer.
This way, you keep control while still giving customers the chance to suggest their price.
-
Email Notifications
The plugin sends you and your customers emails when an offer is made, accepted, or rejected, so it keeps everyone informed and helps manage the process easily.
-
Flexible Display Options
You can choose where and how the price offer option appears on your site.
For example:
You can show it on specific products or categories, or to only logged-in users.
-
Auto-Accept feature
This lets you set the lowest possible price that will be automatically accepted without you having to review it.
For example:
If you’re running a special campaign for a charitable organization, you can set a minimum price that automatically approves offers above that amount.
This makes it easier to handle support cases or donation-based sales without needing to manually check each offer.
With these features, the Name Your Price plugin makes it easy to set up a Pay What You Want model, it allows customers to choose their price for products while you maintain control over the final amount👌
The plugin handles the behind-the-scenes work, so you can focus 🧐 on running your store and engaging with your customers.
You may be interested in:
WooCommerce Quantity Based Pricing: A Retailer’s Secret Weapon
Step-by-Step Installation and Setup
It is straightforward 🚀
Follow these step-by-step guide to install the Pay What You Want WooCommerce Plugin called “Name the Price”
-
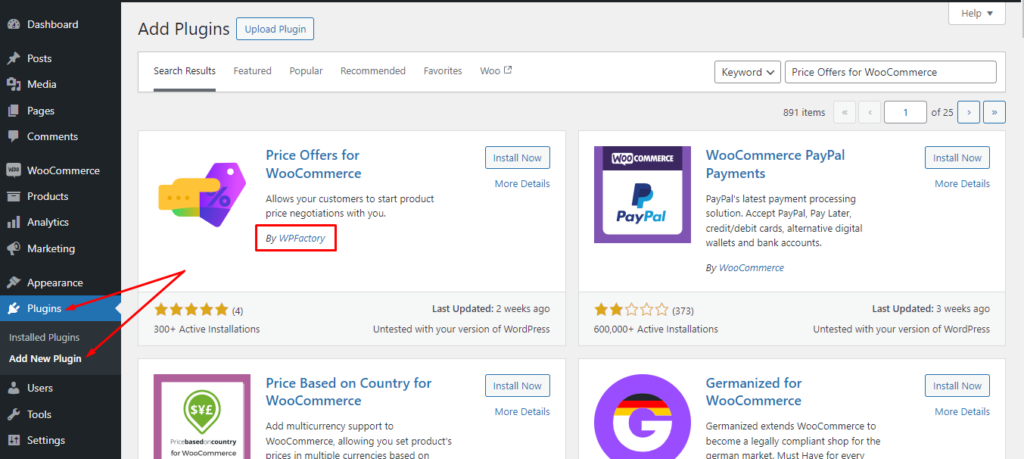
Step 1: Download the Plugin
> First, go to your WordPress dashboard and find the “Plugins section”. Click on “Add New” and search for “Name Your Price“
Once you find it, click “Install Now” and then “Activate” to get the plugin working on your site.
-
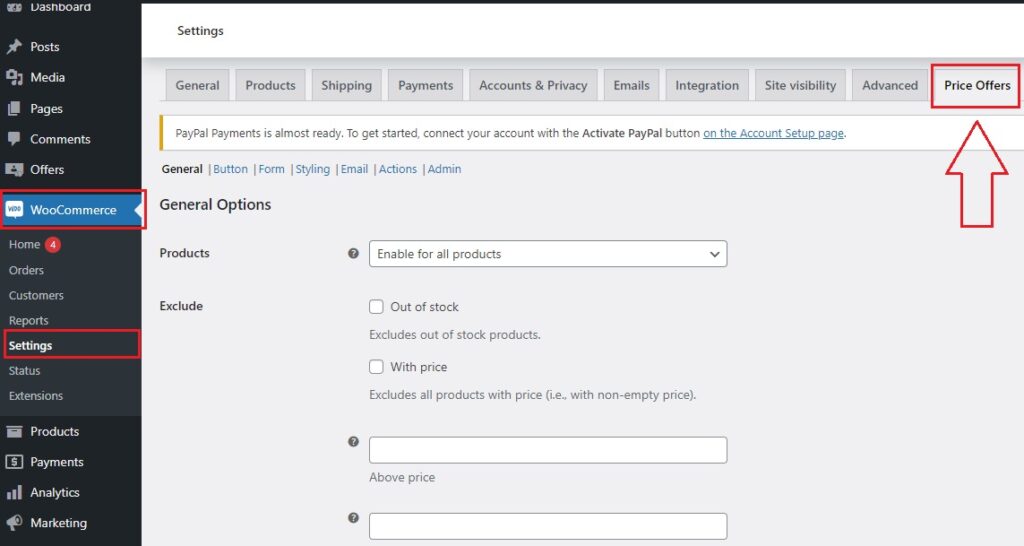
Step 2: Access the Plugin Settings
> After activating the plugin, go to WooCommerce > Settings.
> Look for the “Price Offers” tab, this is where you can adjust how the plugin works.
-
Step 3: Configure General Settings
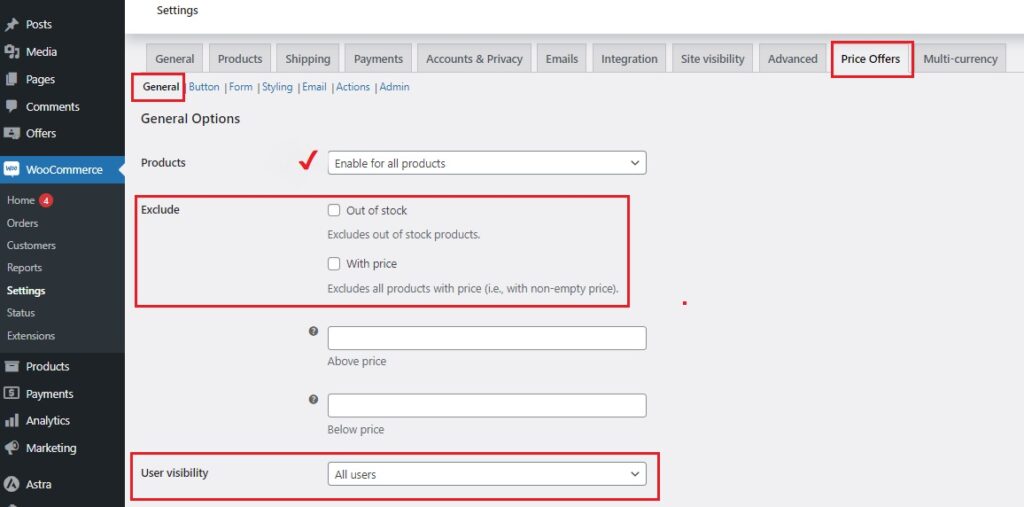
> In the “General” settings, you’ll see options to set up the plugin.
> You can choose to apply the feature to all products or just select ones.
> You can also set rules about excluding out-of-stock items and who can make offers (like logged-in users only).
-
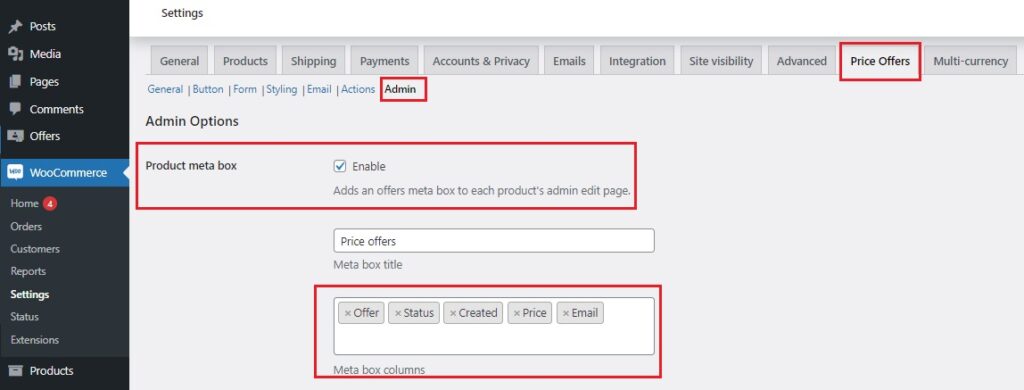
Step 4: Set the Admin Options
> In the “Admin” tab, enable the “Product Meta Box“
This adds a section to each product page where you can see the price offers coming in and manage them.
> You can customize this box to show details like the offer amount, customer info, and the status of the offer.
> Don’t forget to save changes.
-
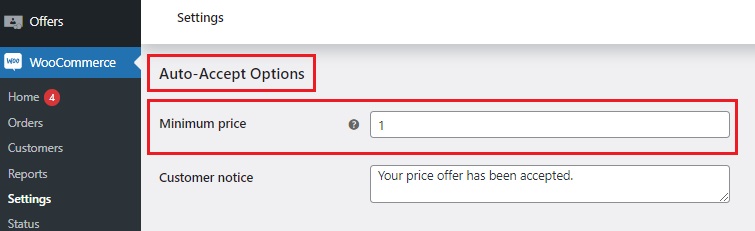
Step 5: Set Up Auto-Accept Options
> If you want to automatically accept certain offers, back to “General” tab.
> Scroll down to the “Auto-Accept” settings.
> Here, you can set a minimum price that will be accepted without needing to check each offer manually. This is handy for cases like charitable donations where you want to streamline the process.
> As an example, we’ll set the minimum price to $1
> Then, save changes.
-
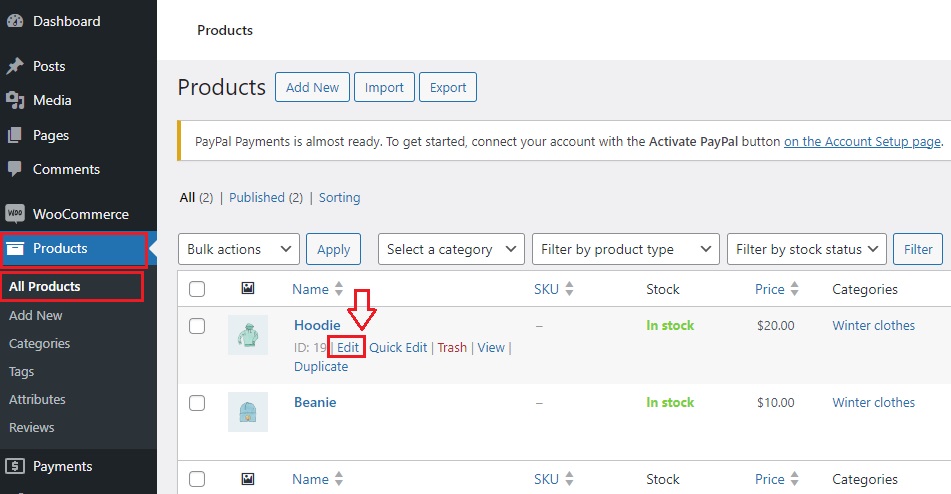
Step 6: Apply the Feature to Specific Products
> From your WordPress dashboard, go to Products > All Products.
> Choose the product you want to apply the “Pay What You Want” feature to by clicking “Edit.”
> In the “Product Data” box, find the “Price Offers” section and select “Yes” to enable the feature.
> You’ll also see a “Minimum Price” option. If you want to let customers pay whatever they want without negotiating, make sure this does not conflict with the minimum price you set in the “Auto-Accept” settings.
For example, set this option to 0 if you want to accept any offer.
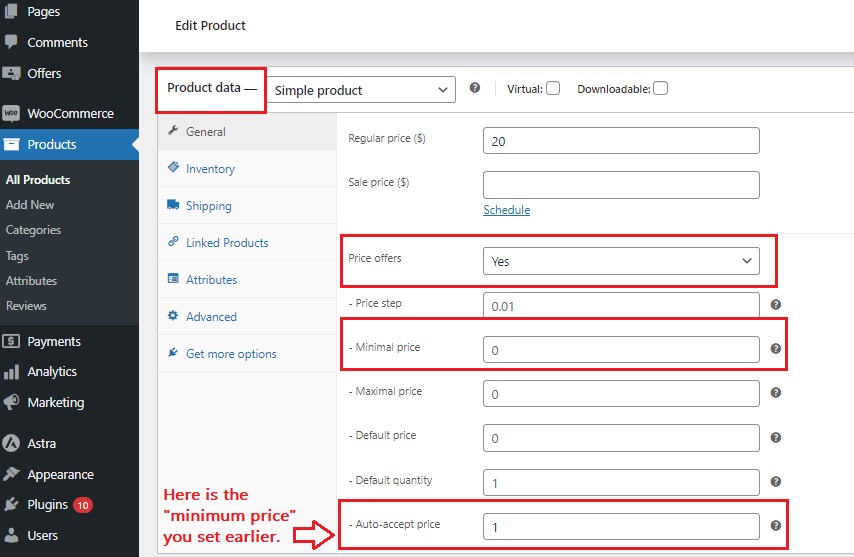
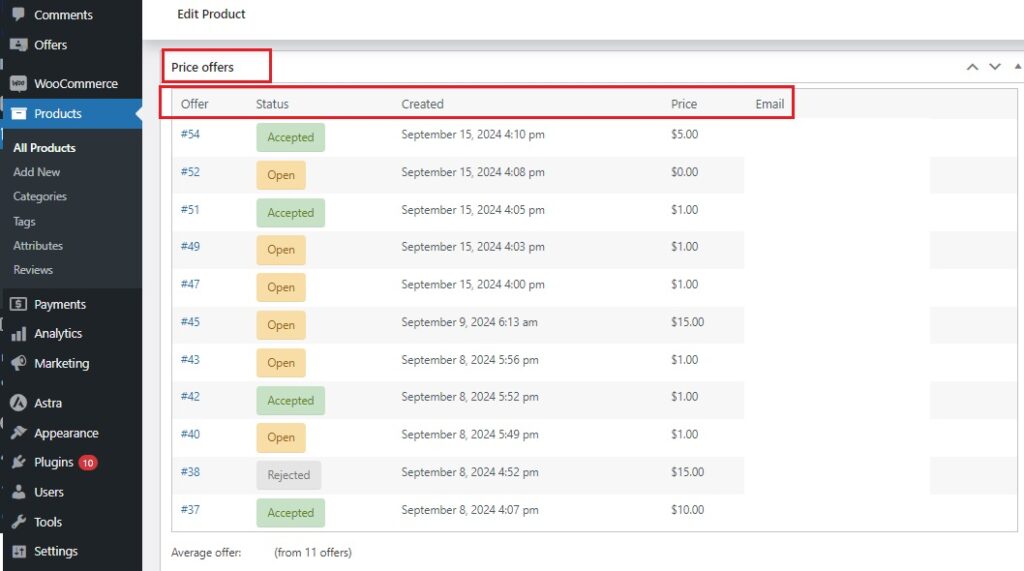
On this page, you’ll also find a “Price Offers” box where you can see and manage offers sent by customers.
> Click “Update” to save your changes.
-
Step 7: Customize the Button Label
To name the button for the “Pay What You Want feature”, follow these steps:
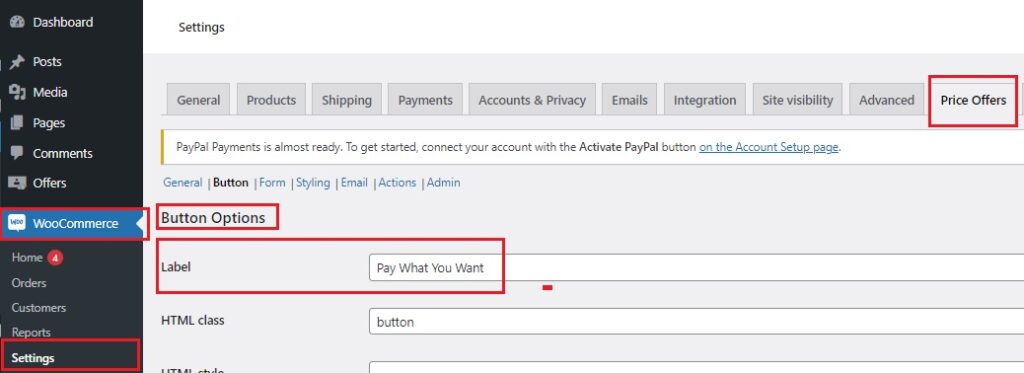
> Back to WooCommerce > Settings and click on the “Price Offers” tab.
> Select the “Button” tab within the Price Offers settings.
> In the “Button Options” section, find the “Label” field. Here, you can rename the button to “Pay What You Want” or any other text you prefer.
> Click “Save Changes”.
This will change the button label on your product pages, making it clear to customers that they can choose their own price.
Now, see the Pay What You Want Feature in Action! 🤩💫
Head over to your store and you’ll see the button labeled “Pay What You Want” on your product pages.
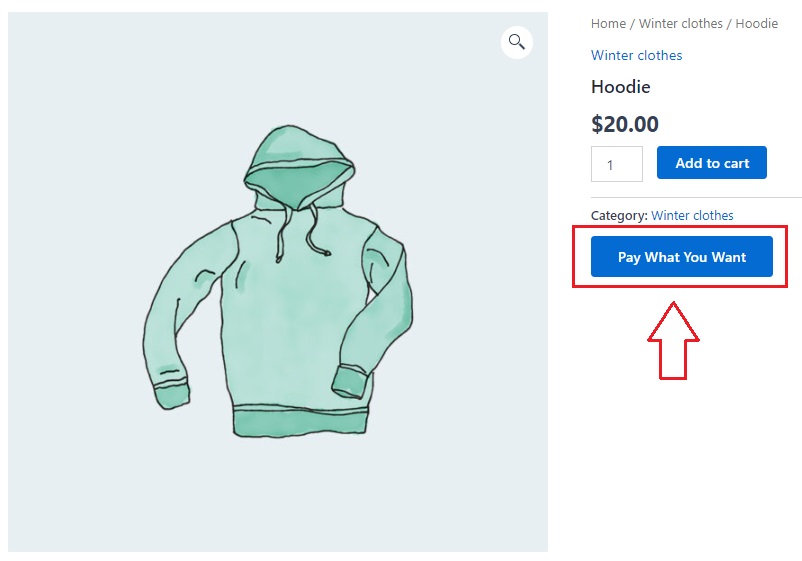
When a customer clicks this button, a form will pop up where they can enter their desired price.
For example, if they choose to offer $1, they simply type that amount into the form.
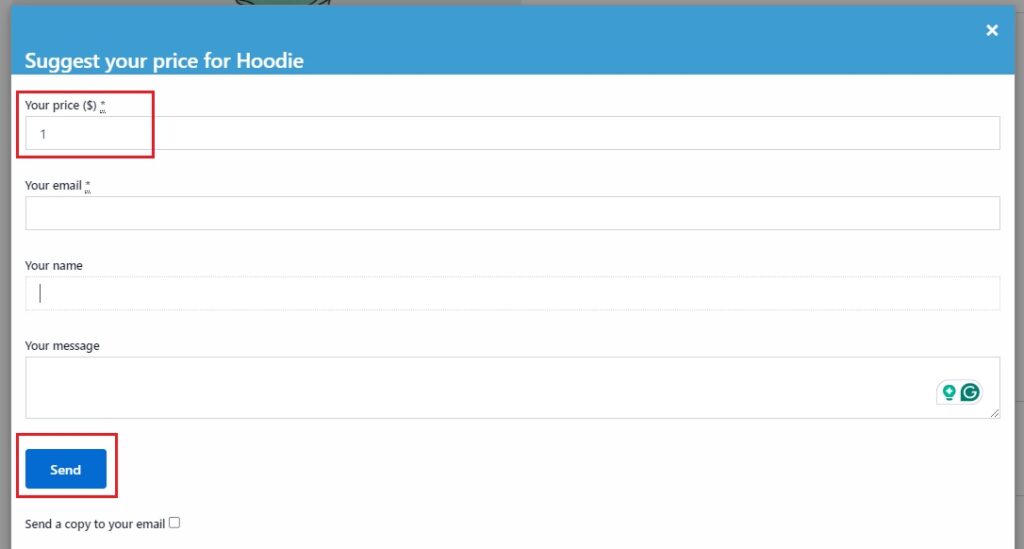
Once they submit their offer, the price is automatically accepted (based on your settings), and they’ll be redirected to the shopping cart page.
The product will appear at the price they specified, and they can proceed to complete the payment.
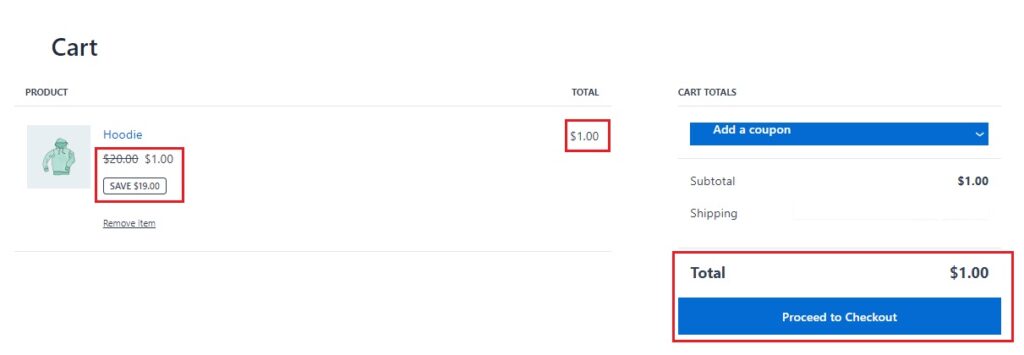
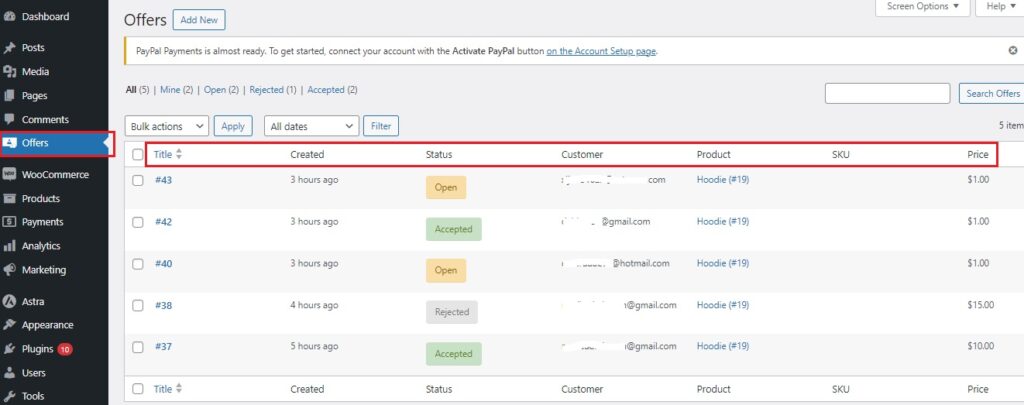
You’ll also see this offer and its details in the “Offers” section of the WordPress dashboard, so you can keep track of all the price offers customers make.
And that’s it! 🥳
Note on Plugin Pricing:
The Name Your Price WooCommerce Plugin is available in a freemium model. This means it’s free to use if you want to apply the “Name Your Price” feature to all products in your store. However, if you’d like to limit the feature to specific products only, there is a small fee.
The plugin’s original price was $6.67 per month, but right now, you can get it for just $3.33 per month/billed annually.
This low price is a great deal for the flexibility and value you’ll receive, making it a worthwhile investment for enhancing your store’s pricing options.
Practical Tips for Using Pay What You Want Pricing
When you let customers enter Price and pay whatever amount they choose without negotiating, here are some best practices to make it work smoothly and make the most out of the Pay What You Want WooCommerce Plugin:
1. Set a Clear Minimum Price
Make sure you set a minimum price that covers your costs.
For instance:
If your product costs $20 to make, set a minimum price that ensures you don’t lose money.
This way, you can let customers choose any amount above this threshold without worrying about losing out.
2. Be Transparent About the Pricing Model
Clearly explain the Pay What You Want option on your product pages, let customers know they can choose their price, but also inform them of any minimum amount they need to meet.
For example:
You might include a note like, “You can pay any amount over $10 for this product.”
3. Promote the Feature
Let your customers know they can choose their own price.
Add a clear message or banner on your product pages that says something like, “Name your own price!” This helps draw attention and gets people excited about the option.
4. Monitor Customer Reactions
Keep an eye on how customers are using this feature.
Are they generally offering amounts close to your minimum price, or are there many offers significantly below it? This can help you adjust your pricing strategy or minimum price if needed.
You may be interested in:
WooCommerce Minimum Order Amount for Better Profit Margins
5. Offer Guidance for Pricing
Sometimes customers might not know how much to offer!
So, provide suggestions or examples of typical prices.
For instance:
“Most customers pay around $15 for this item, but you can choose any amount over $10.”
6. Use for Special Events or Products
Consider using Pay What You Want pricing for specific events, products, or promotions.
For example:
Run a special campaign where customers pay what they want for a limited time, this can generate excitement and attract more shoppers.
Or you could run a charity drive where customers set their price, with proceeds going to a good cause, it’s a great way to engage customers and support important causes.
7. Ensure a Smooth Checkout Experience
Make sure the checkout process is easy and clear.
Since customers are choosing their price, ensure there are no confusing steps or extra charges that might surprise them.
8. Review and Adjust Regularly
Regularly review how this pricing model is impacting your sales and customer satisfaction.
Adjust the minimum price or terms if you find that it’s not working as well as you hoped, or if you’re receiving offers that are too low.
Conclusion: Is the Pay What You Want WooCommerce Plugin Right for Your Store?
Deciding if the “Pay What You Want – PWYW” WooCommerce model is right for your store comes down to what you’re hoping to achieve, and how it integrates with your existing WooCommerce dynamic pricing strategy to meet your sales goals.
If you have products that aren’t selling quickly or if you want to offer a special deal that feels flexible, this model could be a great fit.
It’s especially useful for running promotions, clearing out old stock, or even supporting charitable causes by letting people decide how much they want to pay.
On the other hand, if your products have fixed costs that you need to cover or if you prefer a more traditional pricing approach, you might want to stick with set prices.
In the end, if it sounds like something that fits with what you’re aiming for, give it a try and see how it works for your store!