WooCommerce Export Orders: How Do I Download Easily?
WooCommerce Export Orders is an essential feature for store owners who want to keep track of sales, manage reports, or share order details with their team.
Instead of manually checking each order one by one, exporting allows you to download all your WooCommerce orders in an organized file, making it easy to analyze and manage your store’s data.
➡ In this guide:
We’ll show you how to export WooCommerce orders easily.
➡ You’ll learn:
How to download orders in different formats, customize export fields, and filter orders to get exactly the data you need, all without any technical skills required.
Common Use Cases for Exporting Orders
Exporting orders isn’t just about downloading data—it helps store owners manage their business more efficiently.
Whether you need to track sales, share reports, or organize customer details, WooCommerce export order makes things easier.
Let’s go over some real-world situations where exporting orders can be useful.
1. Keeping Track of Sales and Revenue
Imagine you run an online clothing store and want to see how many hoodies you sold last month.
Instead of checking each order manually, you can export WooCommerce orders and get a clear report in Excel or CSV format.
This makes it easy to track total sales, popular products, and revenue trends.
✅ How it helps:
You can see what’s selling the most and plan your stock better.
2. Sharing Order Data with Your Team
If you work with a warehouse or shipping team, they might need access to order details.
Instead of giving them full access to your store, you can export orders and send them a list of what needs to be shipped.
✅ How it helps:
The shipping team gets a neat, organized file with all the order details they need, without accessing your WooCommerce dashboard.
3. Organizing Data for Accounting and Taxes
At the end of the month (or year), your accountant may ask for a list of all the orders, including payments and taxes.
Instead of copying and pasting data, you can export WooCommerce orders with just a few clicks.
✅ How it helps:
You get a well-structured report, making it easy to calculate taxes, track payments, and ensure everything adds up.
4. Filtering Orders for Customer Support
Let’s say a customer contacts you asking about an order they placed two months ago.
Instead of scrolling through hundreds of orders, you can export orders filtered by customer name or order date and find their details quickly.
✅ How it helps:
You can respond to customer requests faster and more efficiently.
5. Creating Custom Reports for Business Growth
Want to know which payment method your customers use the most? Or which country most of your orders come from?
By exporting WooCommerce orders, you can filter and analyze the data to make better business decisions.
✅ How it helps:
You can adjust your marketing, offer discounts on slow-selling products, or even introduce new shipping options based on your most common order locations.
What Order Data Can Be Exported?
When you export WooCommerce orders, you get a detailed file containing everything you need to manage your sales.
Here’s a look at the key data you can include:
-
Order Details:
Every order has a unique order number, date, and order status (e.g., Processing, Completed, Canceled).
This helps you track which orders have been shipped and which are still pending.
-
Customer Information:
You can export customer names, email addresses, phone numbers, and billing/shipping addresses.
This is useful for contacting customers, verifying orders, or marketing campaigns.
-
Product Information:
See which products were purchased, how many units were ordered, and the total cost.
This helps with inventory management and planning future stock.
-
Payment and Transaction Details:
Get details on payment methods (PayPal, Credit Card, Bank Transfer, etc.), payment status, and total order amount.
This is especially helpful for accounting and tax reports.
-
Shipping Information:
If you offer multiple shipping methods in WooCommerce, you can see which orders were shipped using which service (e.g., standard delivery vs. express shipping).
-
Custom Fields:
Some stores have additional data, such as order notes, discount codes used, or special customer requests.
These can be included in your export file if needed.
➡ Example:
Imagine you run an online store that sells coffee beans.
You want to export orders to see:
-
- Which blends are selling the most.
- The most common payment methods customers use.
- Which shipping methods are preferred by customers in different cities.
With an exported order file, you can analyze this data in a spreadsheet and make better business decisions!
You may be interested in:
How to Increase Average Order Value (AOV) | Proven Tactics
Different Export Formats (CSV, Excel, Google Sheets)
Once you export your WooCommerce orders, you can save them in different formats, depending on how you plan to use the data.
-
CSV (Comma-Separated Values):
This is the most commonly used format because it works with almost any spreadsheet program (Excel, Google Sheets, Numbers, etc.).
CSV files are simple, lightweight, and great for large order lists.
-
Excel (XLS/XLSX):
If you prefer working with Microsoft Excel, you can export orders in Excel format, which allows for more advanced formatting, filtering, and analysis.
-
Google Sheets:
If you work with a team, saving your WooCommerce Export Orders in Google Sheets makes it easy to share the data with others in real-time.
➡ Example:
- Need a quick sales report? → Use Excel for charts and analysis.
- Want to send order data to your accountant? → A simple CSV file will do.
- Managing orders with your team? → Use Google Sheets for easy access and collaboration.
Simple Setup for WooCommerce Export Orders plugin
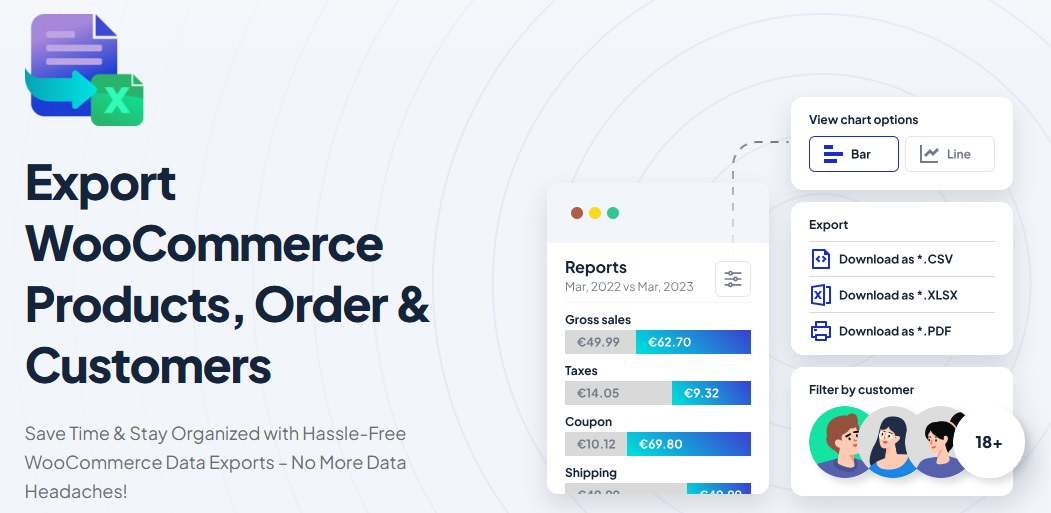
Exporting WooCommerce orders is easy when you use the Export WooCommerce Products, Order & Customers plugin.
Instead of manually sorting through data, this plugin helps you download order details in just a few clicks.
Let’s go step by step to get everything set up.
1. Install the Plugin
Before you can start exporting orders, you’ll need to install and activate the plugin.
Here’s how:
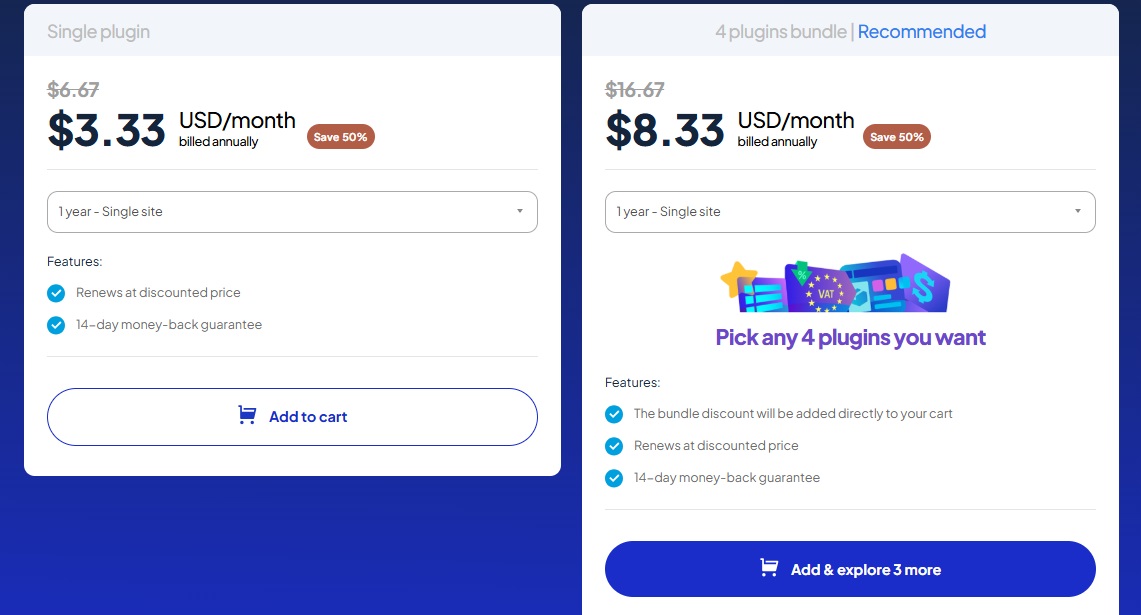
- Purchase the WooCommerce Export Orders plugin—it’s affordable and worth every penny.
- Once purchased, you’ll receive a ZIP file with the plugin.
- In your WordPress dashboard, go to Plugins > Add New > Upload Plugin.
- Click Upload Plugin, select the ZIP file, and hit Install Now.
- Once installed, click Activate to turn the plugin on.

Now that the plugin is active, you’re ready to start exporting your WooCommerce orders.
2. Select the Fields You Want to Export
Every order has lots of details, but you may only need specific ones.
With this plugin, you can choose exactly what information gets exported.
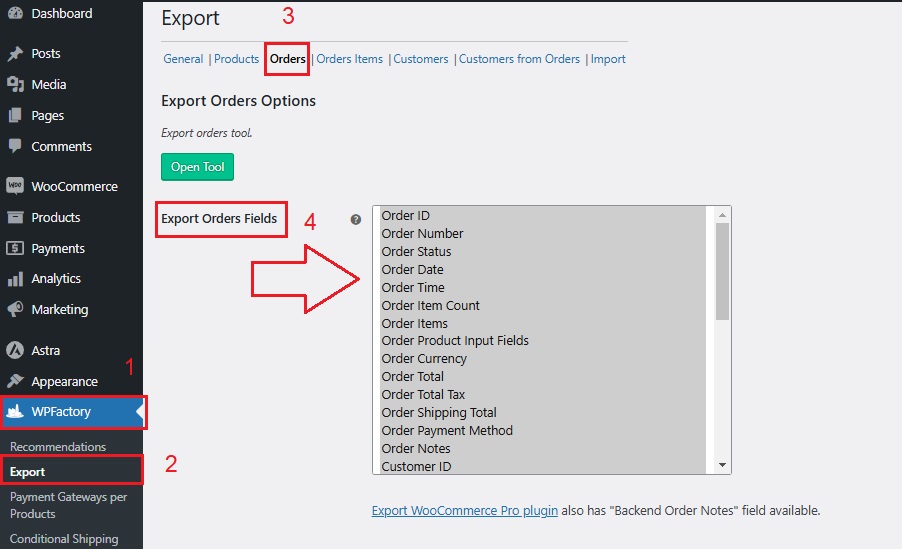
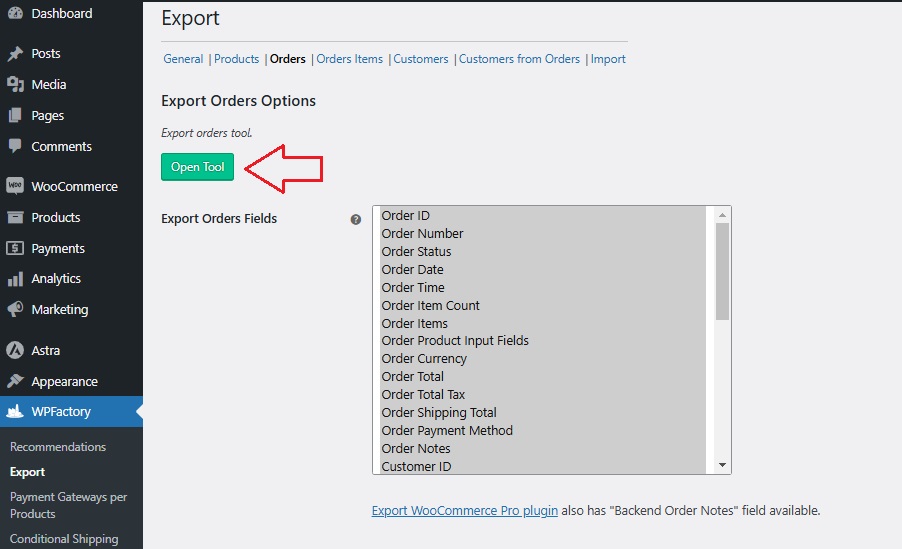
- In your WordPress dashboard, go to WPFactory > Export.
- Click on the Orders tab at the top.
- You’ll see a section called “Export Orders Fields“, this is where you decide what order details to include in your export.
- Select the fields you need, For example, but not limited to:
-
- Order number
- Customer name
- Product details
- Payment method
- Order status
- Shipping details
-
- To select multiple fields, hold the Control (CTRL) key and click the ones you want.
- To select everything, press Control + A.
- Click Save to apply your selections.
➡ Example:
If you only need a simple report for accounting, you might select Order Number, Customer Name, Payment Method, and Total Amount.
If you’re managing shipping, you might include the Order Status and Shipping Address too.
3. Choose the Date Range
Once you’ve selected the fields, it’s time to filter orders based on date.
- Click the Open Tool button on the same page.
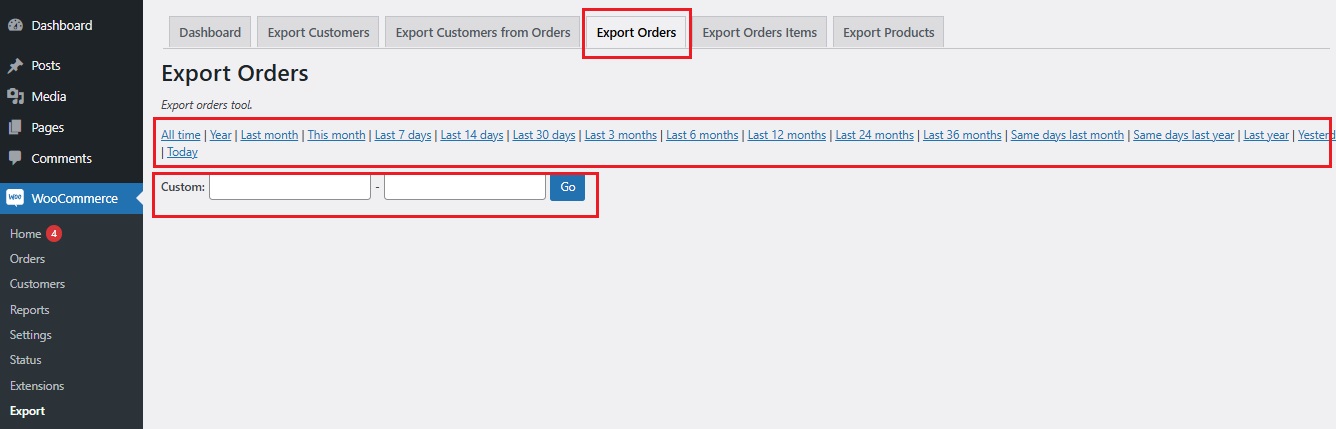
- A new window will open where you can set a date range for the export.
- You have two options:
-
- Quick selections: Choose from pre-set options like All Time, This Month, Last 7 Days, Last 14 Days, or Last Year.
- Custom range: Manually select a specific start and end date if you need data from a particular time frame.
-
➡ Example:
If you’re preparing a monthly sales report, you can select Last Month to get all orders from that period.
4. Download Your Orders
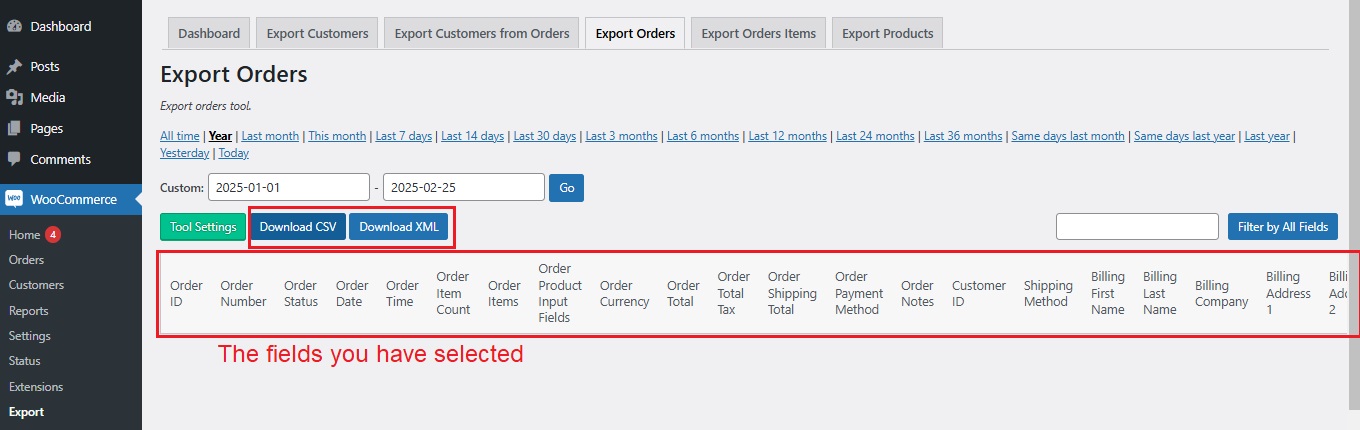
Now comes the final step, exporting and downloading the file!
- After selecting the date range, all matching orders will appear.
- Click Download CSV if you want to open the file in Excel, Google Sheets, or any spreadsheet program.
- Click Download XML if you need the data for further processing or system integrations.
➡ Example:
If you need to send order data to your accountant, downloading a CSV file will make it easy for them to review.
If you’re working with developers or another system, XML might be the better choice.
That’s it! 🎉 You’ve successfully set up the plugin and exported WooCommerce orders.
By following these steps, you can quickly access order data, organize reports, and save time managing your store.
Troubleshooting Common Issues
Exporting WooCommerce orders is usually simple, but sometimes things don’t go as planned!
Maybe your export isn’t working, the file doesn’t look right, or the data is too big to handle.
Let’s go over some common issues and how to fix them.
1. Why Is My Export Not Working?
If you click “Download” and nothing happens or the file is missing data, don’t worry, here are a few things to check:
-
Did You Select the Right Fields?
- Go to WPFactory > Export > Orders and make sure you’ve selected the correct fields for export.
- If the file is empty, try selecting all fields and exporting again.
-
Is Your Date Range Correct?
- Double-check the date range in the Open Tool section.
- If you’re looking for last month’s orders but selected “Last 7 Days,” the export may appear empty.
-
Is Another Plugin Causing a Conflict?
- Sometimes, other WooCommerce plugins might interfere with exports.
- Try disabling other plugins temporarily and running the export again.
-
Is Your Browser Causing Issues?
- If clicking “Download” does nothing, try using a different browser (like Chrome, Firefox, or Edge).
- Clear your browser cache and refresh the page.
2. Fixing Formatting Issues in CSV/Excel
If your CSV or Excel file looks messy or the data is all over the place, here’s how to fix it:
-
Problem: Data Is All in One Column
- Open the CSV file in Excel.
- Click on Column A, then go to Data > Text to Columns.
- Select Delimited, choose Comma as the separator, and click Finish, this should split the data into columns.
-
Problem: Special Characters Look Wrong
- If names, addresses, or product titles show weird symbols (like “é” instead of “é”), it’s a character encoding issue.
- Open the file in Google Sheets instead of Excel, it usually detects encoding better.
- If using Excel, go to File > Open, select your CSV file, and choose UTF-8 encoding.
-
Problem: Numbers Don’t Look Right
- If order totals show as 0.00 or weird symbols appear, check if Excel is automatically converting the format.
- Select the column, go to Format > Number, and set it to Currency or General.
3. Large Order Exports: How to Handle Them
If your store has hundreds or thousands of orders, exporting all at once might slow down your site or cause the export to fail.
Here’s what to do:
-
Break It Down into Smaller Exports
- Instead of exporting everything at once, filter orders by date range (e.g., export one month at a time).
- This reduces the load on your website and prevents timeouts.
-
Use CSV Instead of Excel
- CSV files are smaller and load faster than Excel files, especially for large exports.
- If your Excel file is too big, try opening it in Google Sheets instead.
-
Check Your Web Hosting Limits
- Some web hosts have limits on large file downloads.
- If your export is taking too long, check with your hosting provider to increase memory limits.
Final Thoughts
-
Making the Most of WooCommerce Export Orders
Once you know how to export WooCommerce orders, you can use that data in different ways:
✅ Track Sales Insights and Trends → See which products are selling the most, compare sales over time, and plan for future stock.
✅ Improve Customer Service → Quickly find past orders when customers ask about their purchases.
✅ Simplify Accounting → Send order exports to your accountant for tax calculations and financial reports.
✅ Organize Shipping and Fulfillment → Share order details with your warehouse or delivery team for better order processing.
✅ Filter Orders by Payment Method → See which payment gateways your customers prefer and adjust options if needed.
Tip:
If you export orders regularly, consider saving your favorite settings so you don’t have to reselect fields and filters every time.
-
How This Plugin Helps Streamline Order Management?
The Export WooCommerce Products, Order & Customers plugin makes order exporting fast and hassle-free.
Here’s how it helps:
- Simple and Easy to Use → No complicated settings, just a few clicks and you get your order data.
- Customizable Exports → Choose exactly which fields to include, so you only get the data you need.
- Filter by Date, Product, or Customer → No more searching manually, just set a filter and export specific orders instantly.
- Multiple Export Formats → Download in CSV or XML so you can open the file in Excel, Google Sheets, or other tools.
- Works for Any Store Size → Whether you’re exporting a few orders or thousands, the plugin handles it smoothly.
-
Final Words
Having organized order data saves time and keeps your store running efficiently.
Now that you know how to export orders from WooCommerce easily, it’s time to put these steps into action and make order management a breeze!