
The Cost of Goods plugin by WPFactory enhances WooCommerce by allowing you to track the cost of goods sold for your products. Follow these simple steps to install and configure the plugin:
Installation Steps
1. Log in to WordPress: Access your WordPress admin panel.
2. Go to Plugins: Navigate to the “Plugins” section.
3. Search and Install: Search for “Cost of Goods” and install the WPFactory plugin.
4. Activate: Click “Activate” to enable the plugin.
Configuration:
1. Access Plugin Settings: Go to “WooCommerce” > “Settings.”
2. General Settings: Click the “General” tab.
3. Cost of Goods Tab: Click the “Cost of Goods” tab.
4. Enable: Check “Enable Cost of Goods.“
5. Custom Field Name: Set a custom field name if needed.
6. Display on Product Page: Check “Display on Single Product Page.“
7. Save Changes: Click “Save Changes” at the bottom.
Adding Cost of Goods
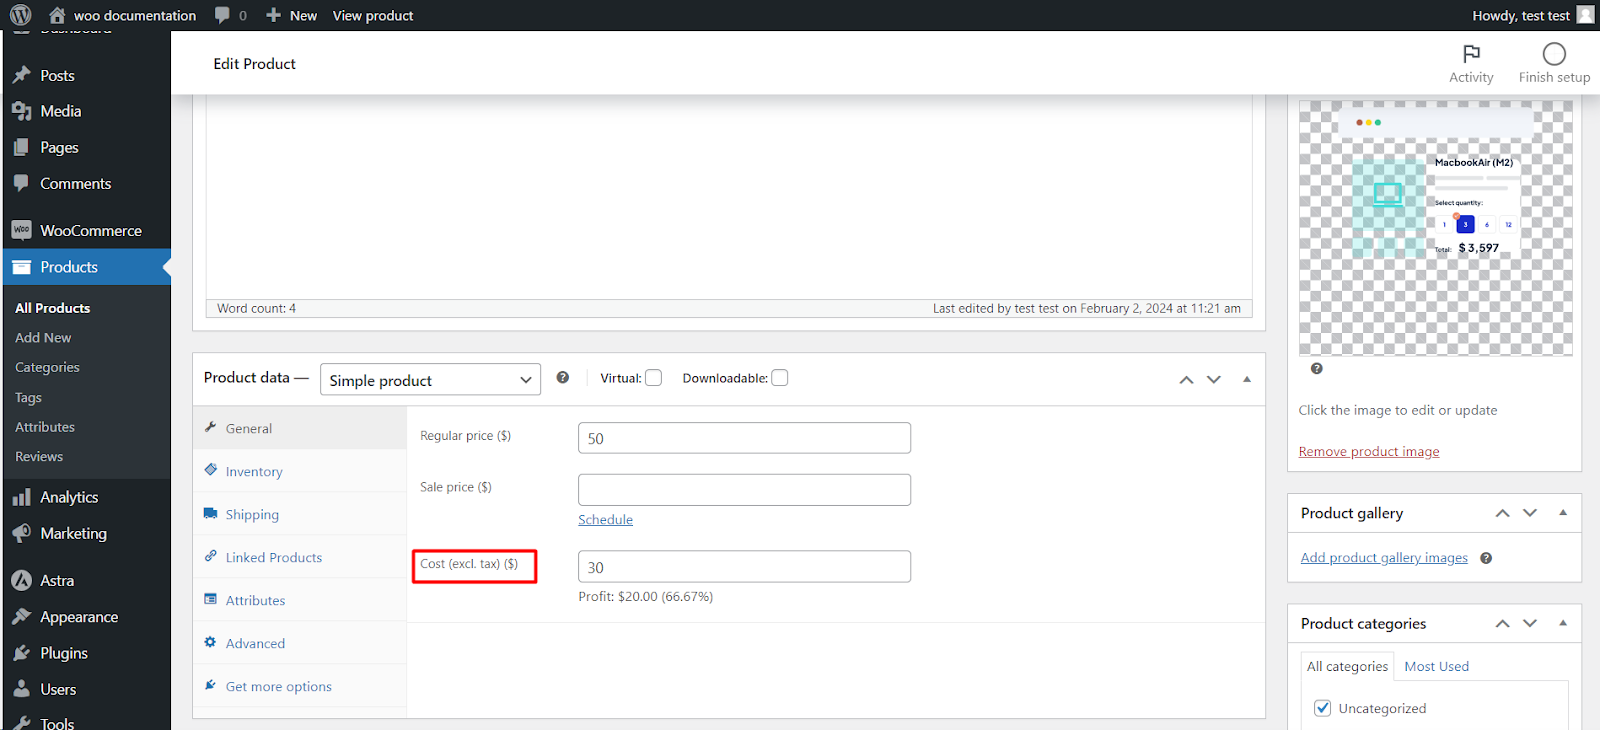
1. Edit a Product: Open the product you want to update.
2. Enter Cost: Find the custom field for cost of goods, and enter the cost.
3. Save: Click “Update” or “Publish” to save changes.
With the Cost of Goods plugin, you can effortlessly monitor product costs and make informed business decisions. Ensure you keep costs uptodate for accurate profit margin calculations.