
The Cost of Goods plugin by WPFactory is a versatile tool for WooCommerce store owners who want to manage and track their product costs effectively. In this article, we will guide you on how to customize the label field for the cost of goods, allowing you to tailor it to your specific needs.
Accessing the Cost Label Field Settings
To customize the cost label field, follow these simple steps.
1. Log in to WordPress: Access your WordPress admin panel.
2. Go to WooCommerce Settings: Navigate to “WooCommerce“ in your WordPress dashboard.
3. General Settings: Click on the “Settings“ submenu under WooCommerce.
4. Cost of Goods Tab: Once in the WooCommerce Settings, look for the “Cost of Goods” tab, and click on it.
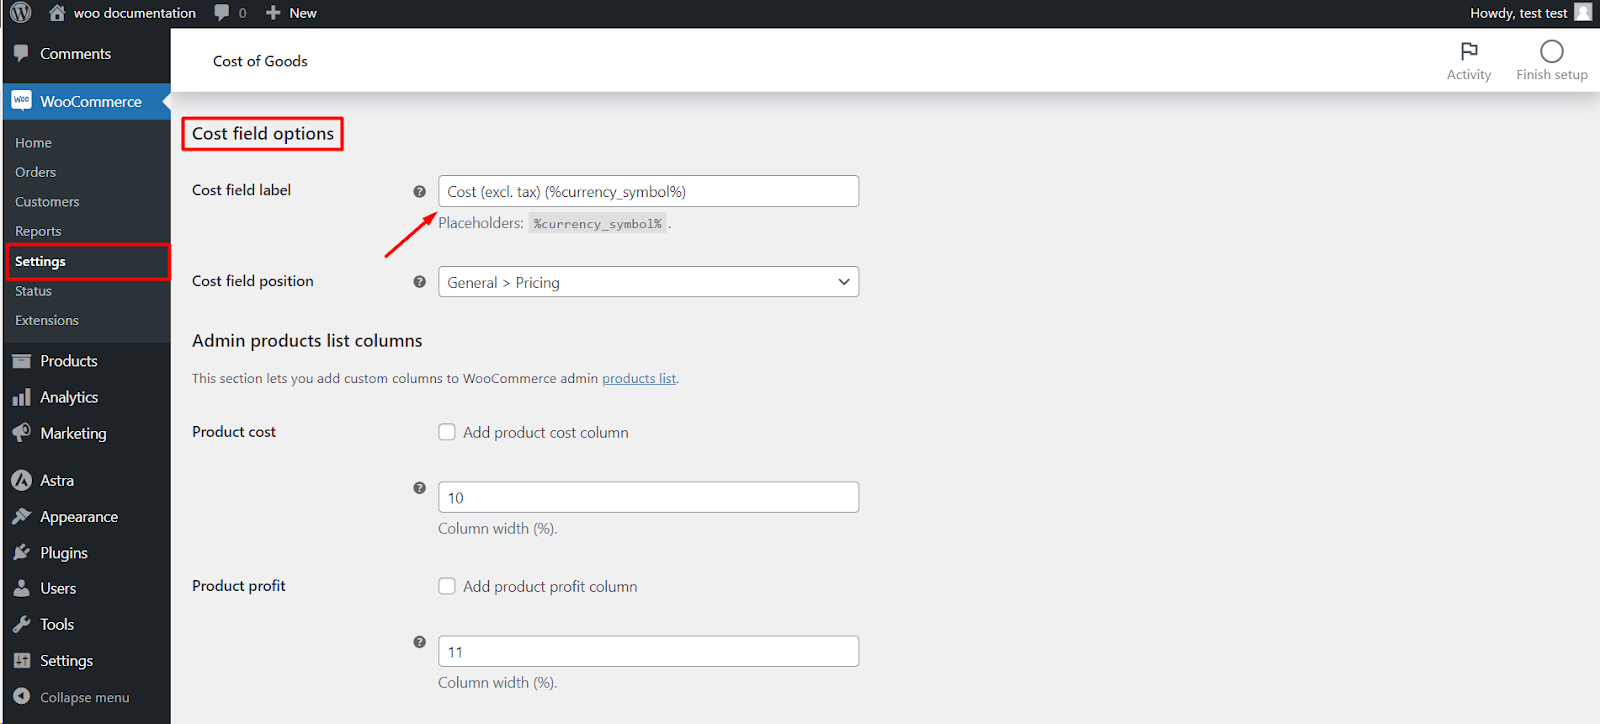
5. General Tab: Under the “Cost of Goods“ tab, you’ll find a series of options, including the “General” tab. Click on it to access the settings we need.
Modifying the Cost Label Field
In the “General” tab of the Cost of Goods settings, you will have the flexibility to customize the cost label field:
1. Cost Field Label: Locate the “Cost Field Label” option. This is where you can modify the text that appears for the cost field on the single product edit page. You can change it to something that better suits your business terminology or preferences.
2. Cost Field Position: Additionally, you can set the position of the cost field on the single product admin page. This allows you to choose where you’d like the cost field to appear for your convenience.
3. Save Changes: Don’t forget to save your changes by clicking the “Save Changes” button at the bottom of the page.
By following these simple steps, you can make the Cost of Goods plugin work seamlessly for your WooCommerce store, helping you manage your product costs efficiently and make informed business decisions.