
The Custom Checkout Fields for WooCommerce plugin goes beyond basic data collection. It offers advanced options within the General tab, empowering you to fine-tune the plugin’s behavior and address potential conflicts with your theme. This guide delves into these advanced settings, helping you leverage them for a seamless checkout experience.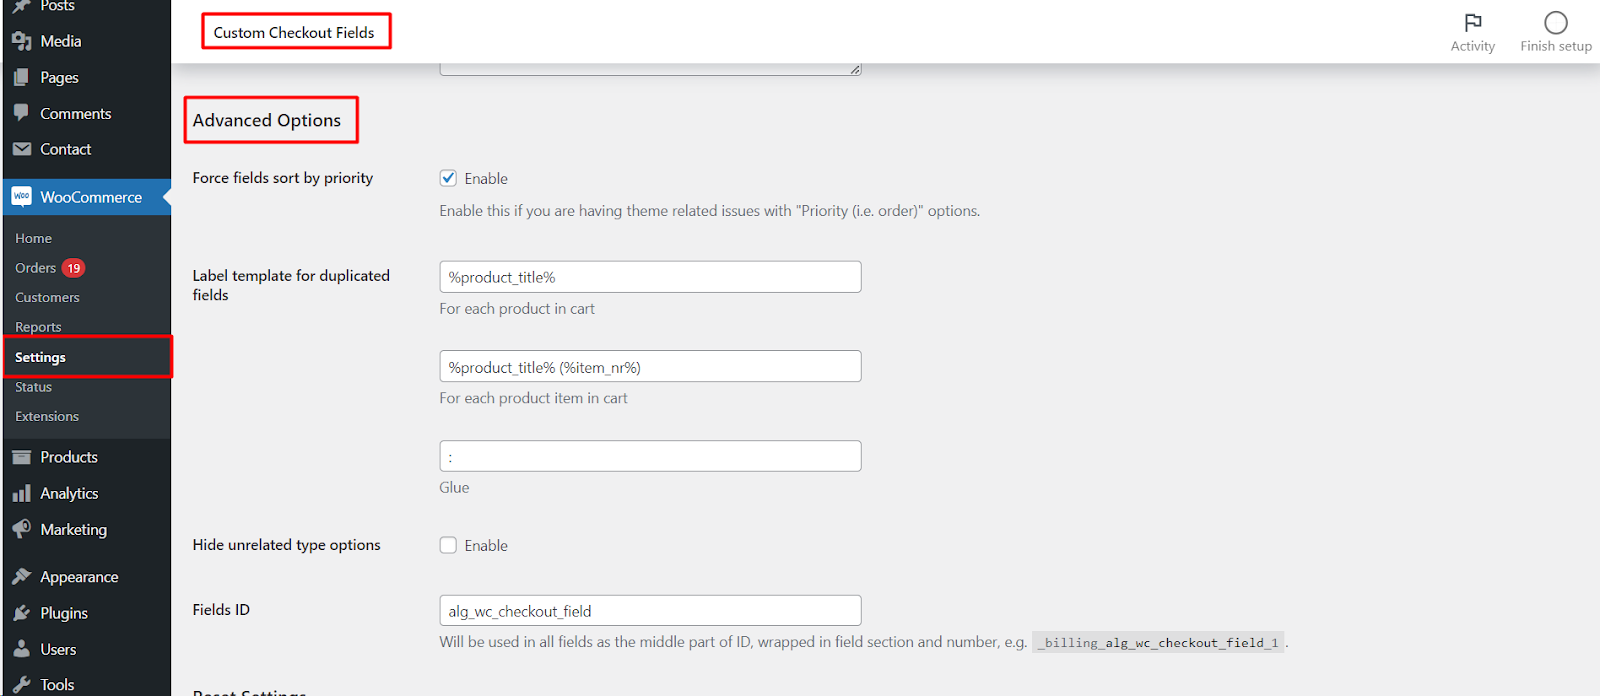
Accessing General Settings
With the plugin activated, follow these steps to access the relevant settings.
- Navigate to WooCommerce: Within your WordPress dashboard, locate the WooCommerce menu and click on it.
- Access Settings: Click on Settings within the WooCommerce menu.
- Find Custom Checkout Fields: Look for a section labeled Custom Checkout Fields (or similar wording based on your plugin version). Click on it to access the plugin’s settings.
- General Tab: Locate the General tab within the Custom Checkout Fields settings. This tab houses the advanced configuration options.
Understanding Advanced Options
Here’s a breakdown of some key advanced options you might encounter.
Force fields sort by priority (Enable/Disable)
- This setting addresses potential theme-related conflicts with the “Priority” option used to define the order in which custom fields appear on the checkout form.
- Enabling it ensures fields are displayed based on the priority you set, regardless of theme interference.
Label template for duplicated fields:
- This setting allows you to define a template for how labels appear when a custom field is duplicated for multiple products in the cart.
- You can choose from options like “For each product in cart” or “For each product item in cart,” potentially improving clarity for customers.
- Some plugins might offer a custom template option using placeholders.
Hide unrelated type options (Enable/Disable):
- Enabling this option can improve the user experience by hiding options within certain field types (e.g., dropdowns or radio buttons) that are irrelevant to the selected value.
- This prevents customers from seeing options that don’t apply to their specific choice.
Additional Considerations
The specific advanced options available might vary depending on your chosen plugin. Explore the plugin’s documentation for a comprehensive understanding of its functionalities.
Benefits of Configured Advanced Options
By configuring these advanced options strategically, you can achieve several benefits.
- Resolved Theme Conflicts: The “Force fields sort by priority” option ensures a consistent display order for custom fields, even if your theme has styling conflicts.
- Enhanced User Experience: Custom label templates for duplicated fields and hiding irrelevant options can improve clarity and streamline the checkout process for customers.