
Your Easy Guide to WooCommerce Recurring Payments Setup
Setting up WooCommerce Recurring Payments effectively can really change how you manage subscriptions and regular income for your online store.
In this guide, we’ll show you everything from installing plugins to configuring billing cycles and setting up auto-renewals.
You’ll learn to create subscription products, manage WooCommerce payment plans, and optimize payment gateways for smooth recurring billing. We’ll also cover tips for improving customer experience and handling common issues.
By the end, you’ll be ready to manage WooCommerce subscriptions effectively and boost your recurring revenue. Let’s get started!
Prerequisites for Setting Up Recurring Payments
Before diving into WooCommerce Recurring Payments, there are a few things you need to get started.
First:
You’ll need a plugin that supports recurring payments. WooCommerce Subscriptions is a popular choice, you can find it in the WooCommerce marketplace or other plugin repositories.
Ensure your payment gateway supports recurring payments, not all do, so check with your provider, payment gateways like Stripe and PayPal usually support this feature.
In any case, you can take a look at:
How to Choose The Right Payment Gateway for Your WooCommerce Business
Next:
Have your subscription products ready.
Think about what products or services you want to offer on a recurring basis, and make sure you have them set up in WooCommerce.
With these basics in place, you’re ready👌to set up and configure recurring payments in WooCommerce.
Setting Up Recurring Payments
1. Installing the Recurring Payments Plugin
First:
Let’s grab the plugin you need. Head over to the WooCommerce Subscriptions page.
Once you’re on the page, click Buy Now and follow the purchase instructions. Note: This plugin costs $23.25 monthly, billed annually at $279.

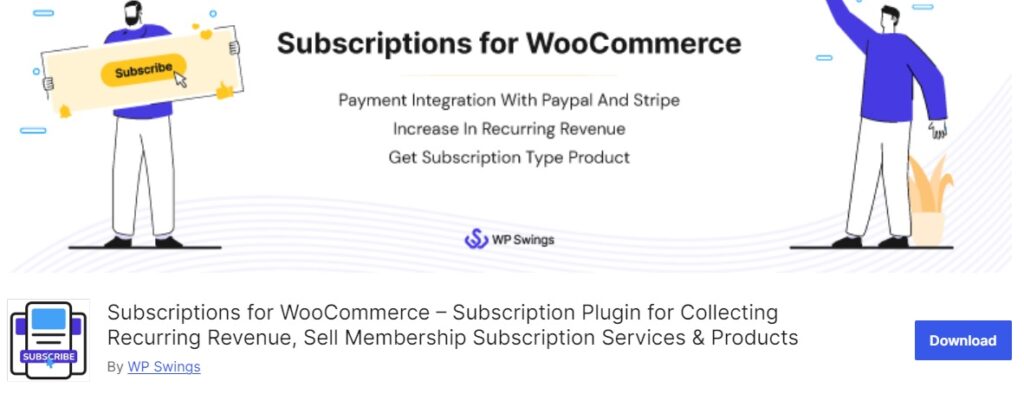
Another freemium plugin is:
Subscriptions for WooCommerce By WP Swings
We’ll continue by explaining the first plugin, the official one from WooCommerce.
After you’ve completed the purchase, download the plugin file.
Now:
Head to your WordPress dashboard, in the left-hand menu, click on Plugins and then Add New, click on Upload Plugin at the top, choose the file you downloaded, and hit Install Now, after installation, click Activate.

You’ll now see a new option for subscriptions in your WooCommerce settings, this is where you’ll configure all your recurring payment settings and start managing your subscription products.
With the plugin installed, you’re ready to move on to setting up your subscription products!
2. Configuring Basic Settings
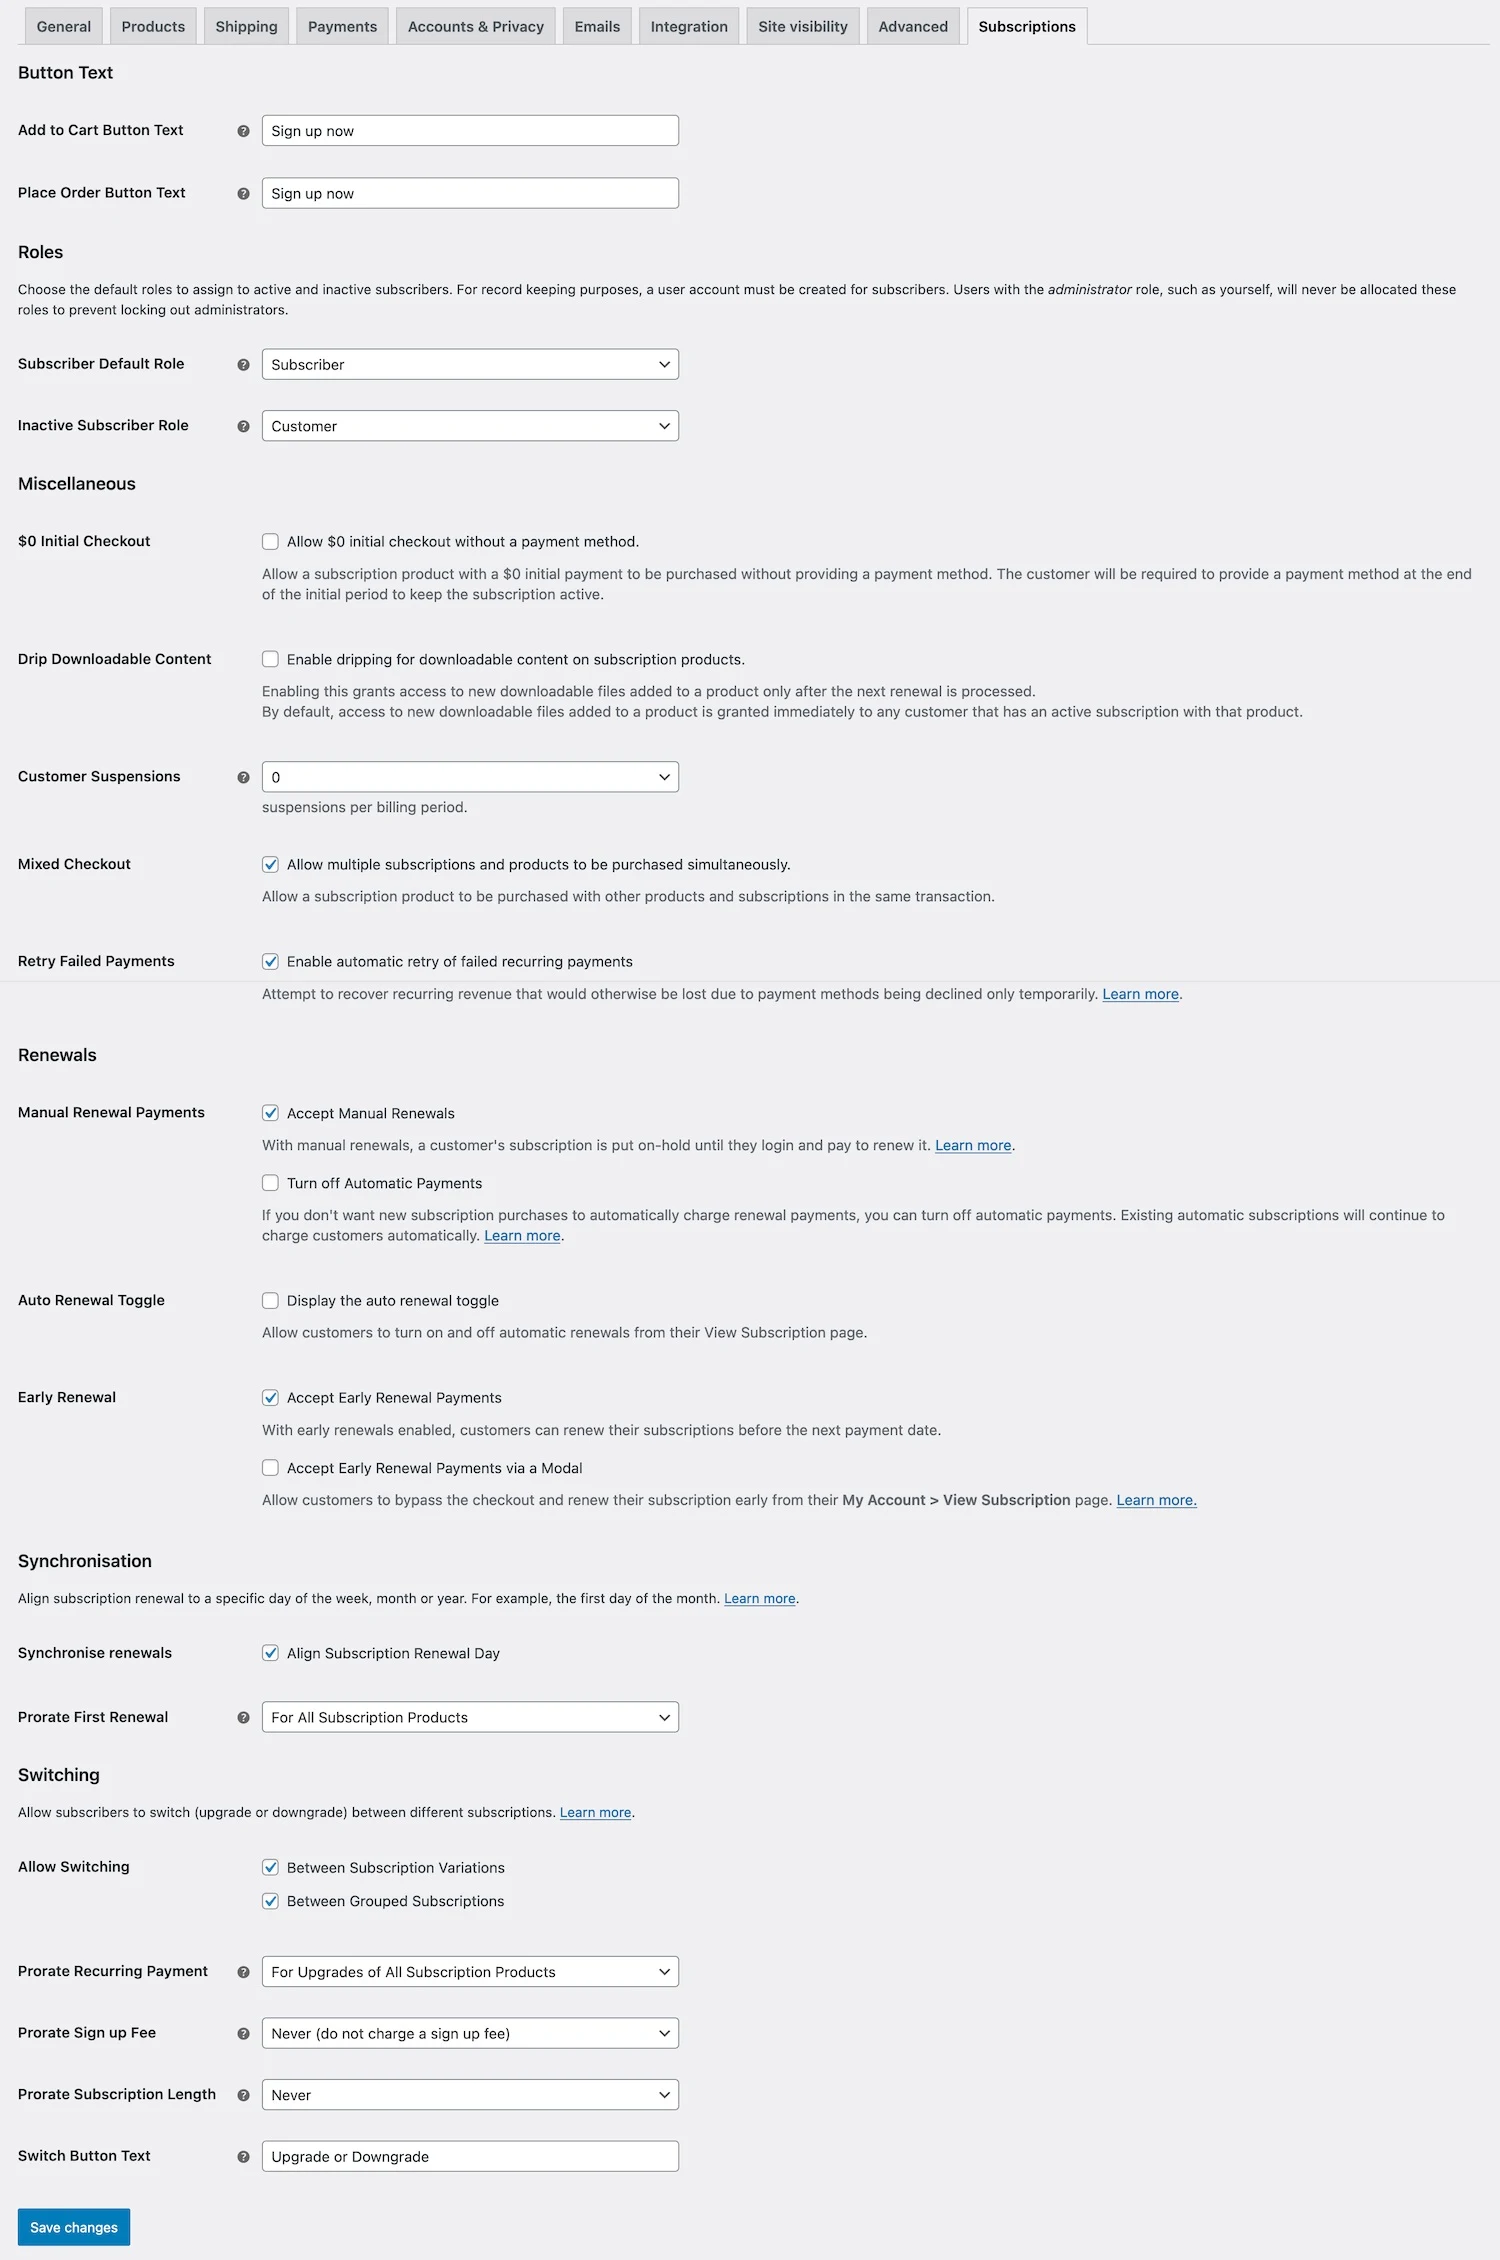
Head over to your WordPress dashboard and click on WooCommerce in the left-hand menu. Then, click on Settings and navigate to the Subscriptions tab. This is where you’ll find all the settings for managing your subscriptions.

First:
Review the general settings. Here, you can option like Role Settings, Miscellaneous Settings, Renewals Settings. Make sure to set these according to your business needs.
Next:
Move on to the Payment Gateways section, ensure that your payment gateways support recurring payments. Common choices include Stripe and PayPal, enable the gateways you want to use and configure them as needed.
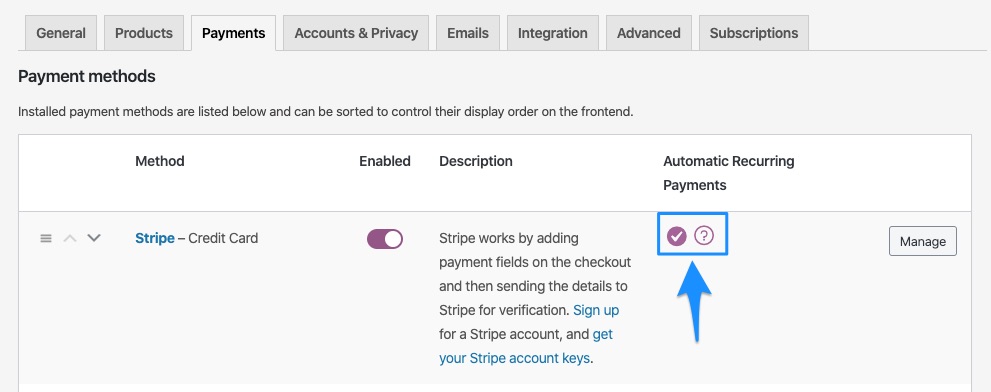
Image source: simongondeck
Don’t forget to configure email notifications. Go to the Emails tab within WooCommerce settings. Set up notifications for events like new subscriptions, renewals, and cancellations to keep both you and your customers informed.
Pro tip: This is worth a glance👇
Customer Email Verification for WooCommerce
Lastly:
Review the other settings like renewal synch, failed payment retries, and manual renewal payments. Adjust these settings to ensure smooth operation and a great customer experience.
3. Creating Subscription Products
Now that your settings are configured, let’s create some subscription products.
Head over to your WordPress dashboard and click on Products in the left-hand menu, then select Add New, give your product a name and description.
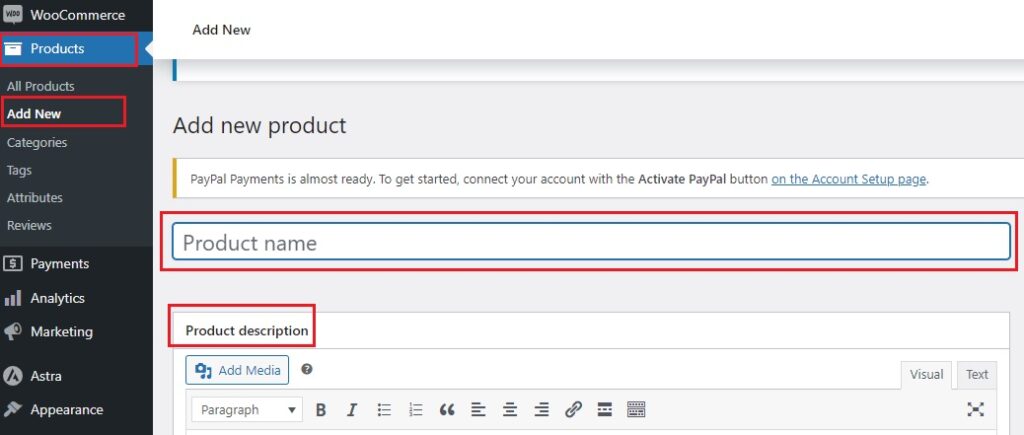
Scroll down to the Product Data section, and in the drop-down menu, select Simple Subscription if it’s a straightforward subscription or Variable Subscription if you have different options (like sizes or tiers).
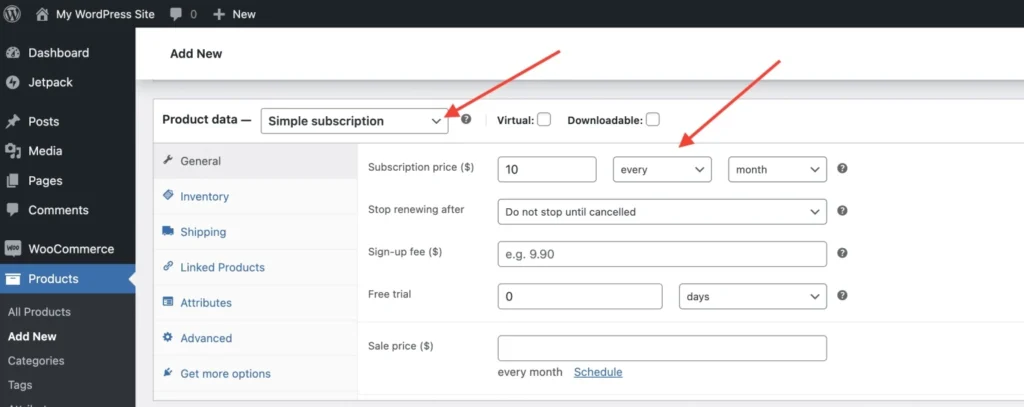
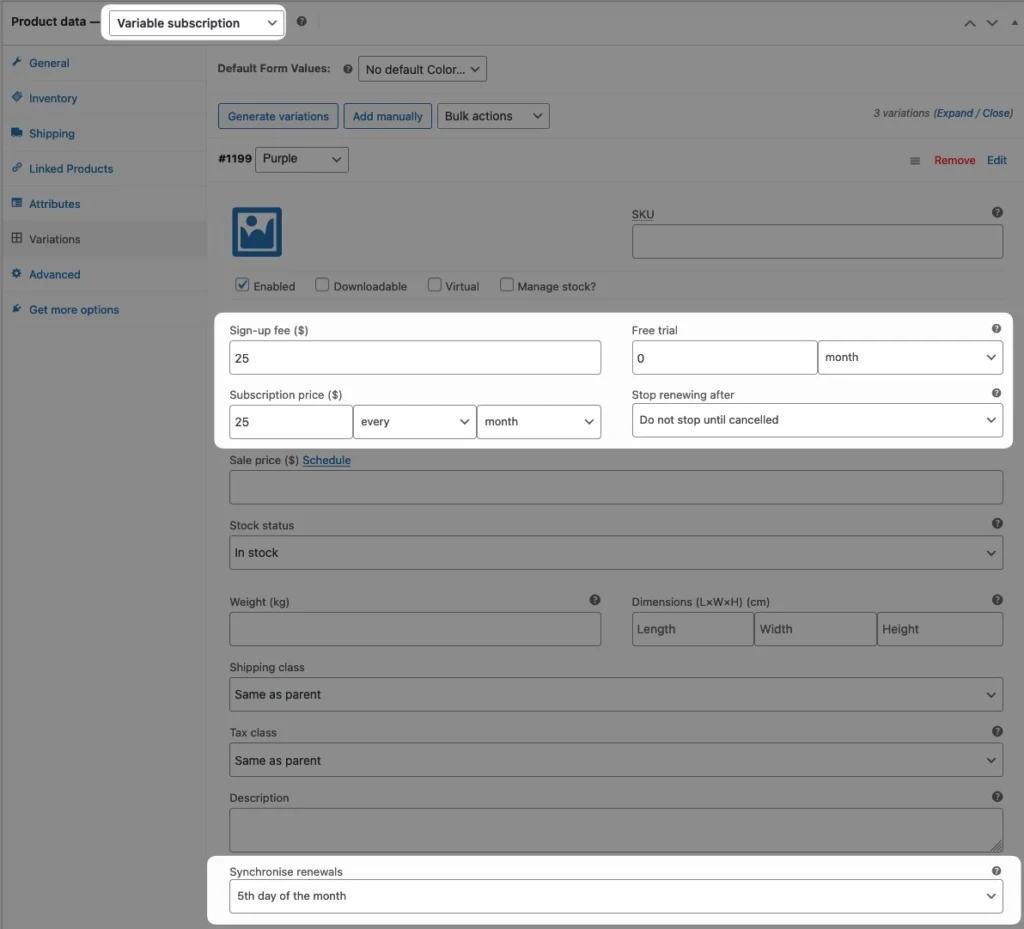
Set the subscription price, billing interval (e.g., monthly, yearly), and length (how long the subscription lasts or if it renews indefinitely).
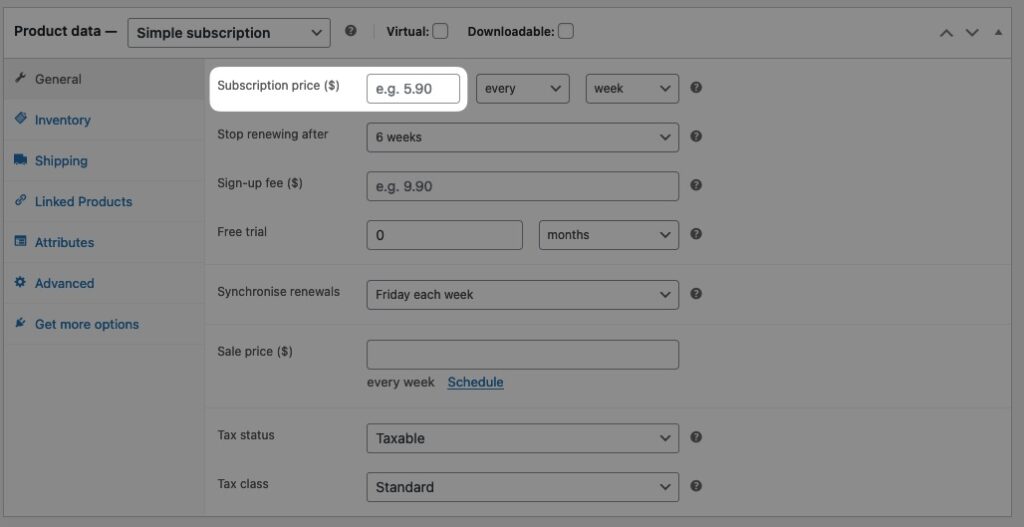
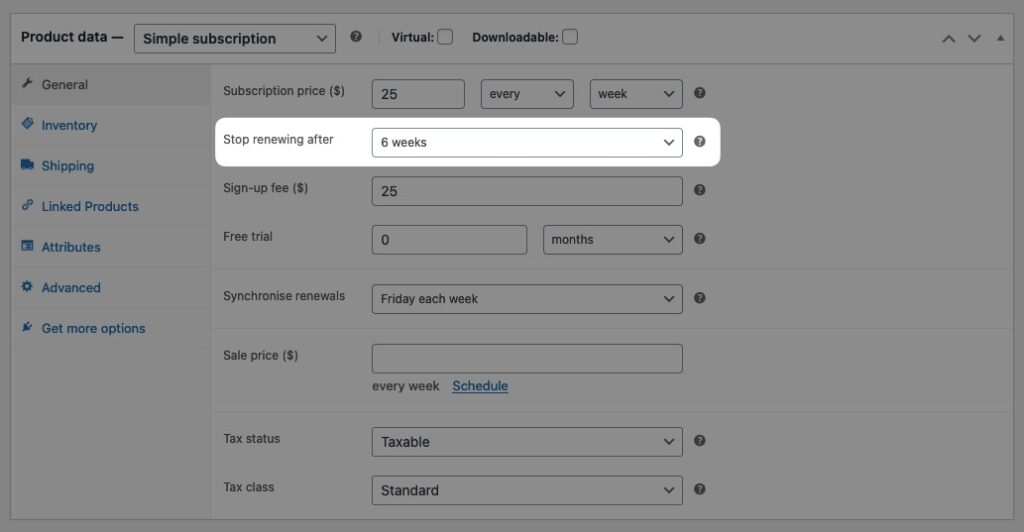
You can also add a free trial period if you want to entice new customers.
Fill out the rest of the product details as you normally would, such as images, categories, and tags. When you’re done, click Publish.
That’s it! You’ve just created a subscription product. Now repeat these steps for any other subscription products you want to offer.
4. Managing Subscription Plans
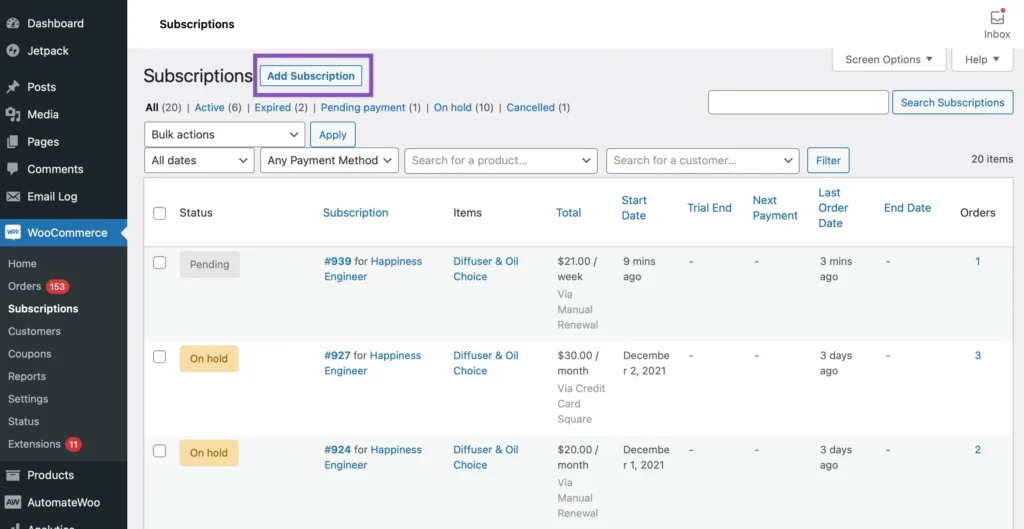
Once you’ve created your subscription products, managing them is a breeze. Head over to your WordPress dashboard and click on WooCommerce, then go to Subscriptions.
Here, you’ll see a list of all active subscriptions. You can manage each subscription individually by clicking on it. This allows you to view details like billing cycles, payment status, and customer information.
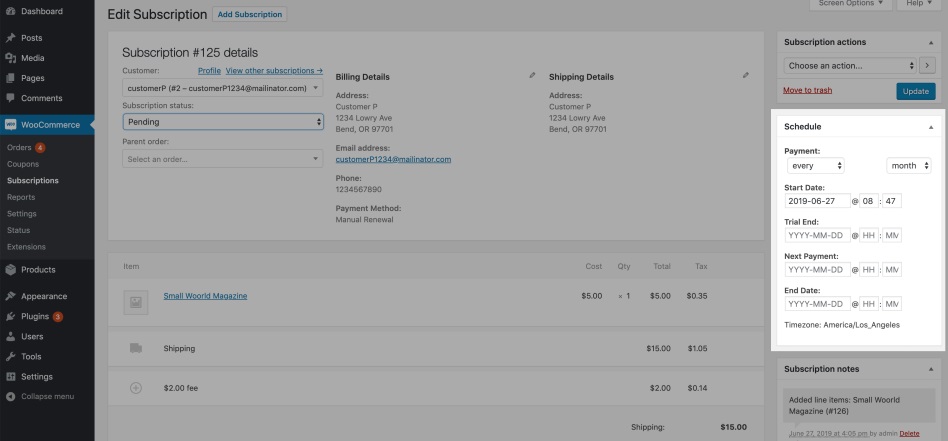
If a customer needs to change their subscription plan, you can do that right from this interface. Click the ID of the subscription you want to change to open the Edit Subscriptions screen. Then, modify the dates and schedule, as required. Finaly, Update.
You can also pause, cancel, or renew subscriptions manually if needed.
Keep an eye on the Failed Payments section too. This helps you address any issues quickly and ensure smooth operations.
Managing your subscription plans this way keeps everything organized and ensures a great experience for your customers.
You may also be interested in:
Top 5 WooCommerce Subscription Management Plugins in 2024 (Compared)
5. Running Test Transactions
Before you go live, it’s crucial to run some test transactions to ensure everything is working smoothly.
First:
Switch your payment gateway to test mode, this lets you process transactions without using real money. You can find this option in your payment gateway settings.
Next:
Go to your store and add a subscription product to your cart. Proceed to checkout and use the test credit card details provided by your payment gateway.
Complete the transaction as if you were a customer. After the checkout, head back to your WordPress dashboard, and check the order details under WooCommerce > Orders. Make sure the test transaction went through correctly.
Running test transactions helps you catch any issues before your customers do, ensuring a smooth and seamless checkout experience when you go live.
Troubleshooting Common Issues
Even with the best setup, you might run into some hiccups.
Here’s how to troubleshoot common issues with recurring payments.
-
Failed Transactions:
Check your payment gateway settings to ensure everything is configured correctly. Sometimes, it’s just a matter of updating your API keys or adjusting security settings.
-
Incorrect Billing Cycles:
Double-check your subscription settings in WooCommerce. Ensure that billing intervals and renewal dates are set correctly.
-
Customer Complaints:
If customers report issues, try running test transactions yourself to replicate the problem. This helps you pinpoint the exact issue.
-
Notification Problems:
Verify your email settings under WooCommerce > Settings > Emails. Make sure notifications for renewals and failed payments are enabled and properly configured.
We also recommend that you check out:
Don’t Rely ONLY on WooCommerce Built-In Email Marketing, Here’s Why
Bonus: Optimizing Your Payment Options
1. Offer Multiple Payment Methods
Different customers have different preferences and comfort levels with payment options, some prefer credit cards, while others might trust PayPal or local payment methods more.
By providing various payment gateways, you cater to a broader audience and enhance the overall shopping experience.
This flexibility not only helps reduce cart abandonment rates but also builds trust with your customers, making them more likely to return.
Incorporating multiple payment options also helps in reaching international customers, who may have regional preferences for certain payment methods.
This inclusivity ensures that everyone can complete their purchase smoothly, boosting your store’s sales and customer satisfaction.
2. Customize Payment Methods
Customizing payment methods can greatly benefit your WooCommerce store by enhancing the checkout experience and optimizing transaction fees.
One powerful tool for this is the “Payment Methods by Product & Country for WooCommerce” plugin.
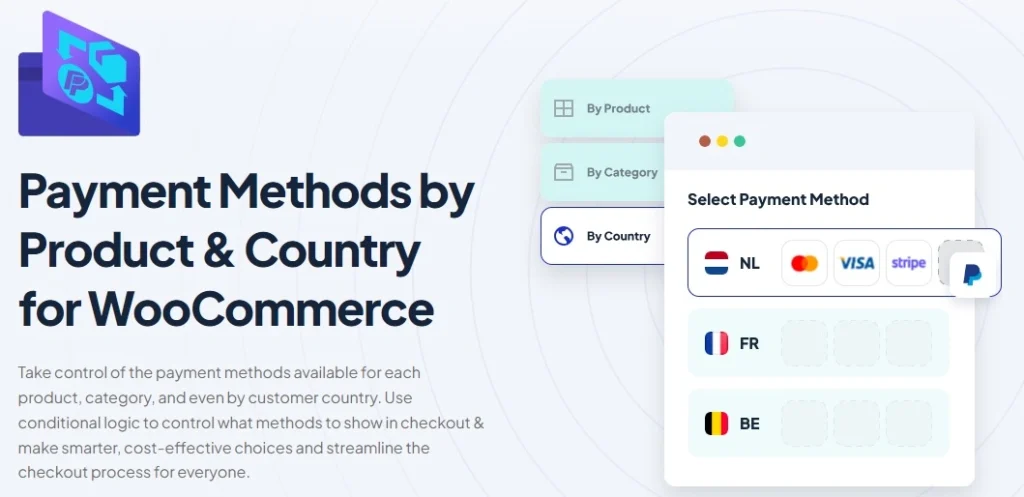
This plugin allows store owners to enable or disable specific payment methods based on product categories, tags, and even individual products or countries, this ensures that customers see the most relevant payment options at checkout.
Why is it Important?
For store owners, being able to customize payment methods can lead to higher conversion rates and more efficient payment processing, by showing the most appropriate payment options, you make the checkout process smoother and more appealing to customers.
What purpose does it serve?
- Tailor payment options to suit different products and regions.
- Avoid high transaction fees by disabling expensive payment methods for low-margin products.
- Show customers their preferred payment methods, boosting satisfaction and reducing cart abandonment.
Use Cases
- For expensive products/services, disable high-fee payment methods like PayPal and enable options like direct bank transfers.
- If selling to international customers, show local payment options like iDEAL for Dutch customers or Alipay for Chinese customers.
How to Download, Install, and Use
For more detailed instructions, check out the following article:
“How do I disable payment method for specific product in WooCommerce?”
This level of customization helps streamline the checkout process, making it more efficient and user-friendly. By tailoring payment options, you cater to the unique needs of your diverse customer base, leading to higher satisfaction and increased sales.
Want to dive deeper into creating consistent income streams? Download our free eBook Recurring Revenue Made Easy: The Ultimate WooCommerce Subscription Guide for step-by-step insights.
Conclusion
Setting up WooCommerce recurring payments might seem like a big task, but with the right steps, it’s totally doable.
We’ve walked through installing the necessary plugins, configuring your settings, creating subscription products, and managing those plans.
Testing and troubleshooting ensure everything runs smoothly.
By optimizing your payment options, you create a better experience for your customers, leading to increased sales and smoother transactions.
Now, you’re ready to implement and manage recurring payments effectively, giving your WooCommerce store a powerful boost💥


Is it possible to perform recurring payments using a local payment method?
Hi,
Sorry for not getting back to you sooner.
It depends on the exact local payment method you are using. After you install the “WooCommerce Subscriptions” plugin, you can go to “WooCommerce > Settings > Payments” and check the “Automatic Recurring Payments” column. If your method supports automatic renewal payments, there will be a tick icon.
I hope this helps. Please let me know if you have any questions.